robinhood jw
Member
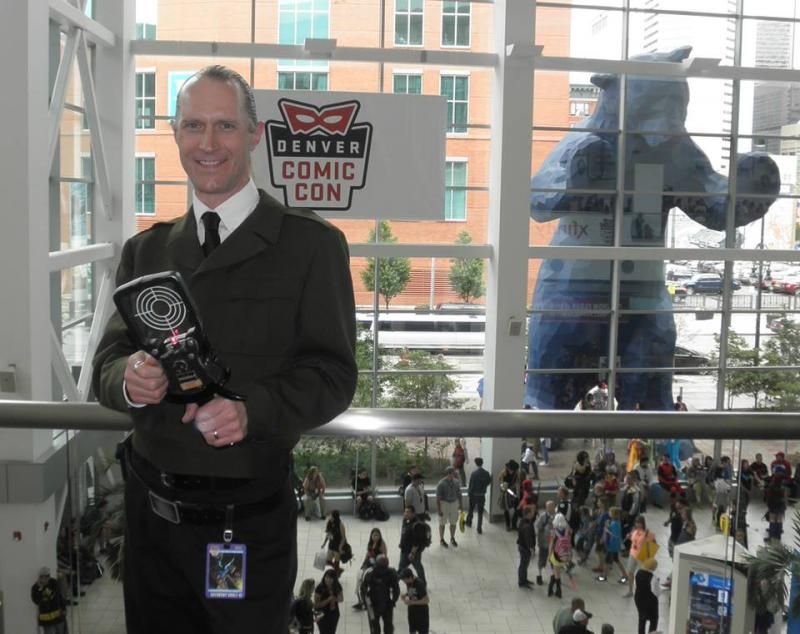
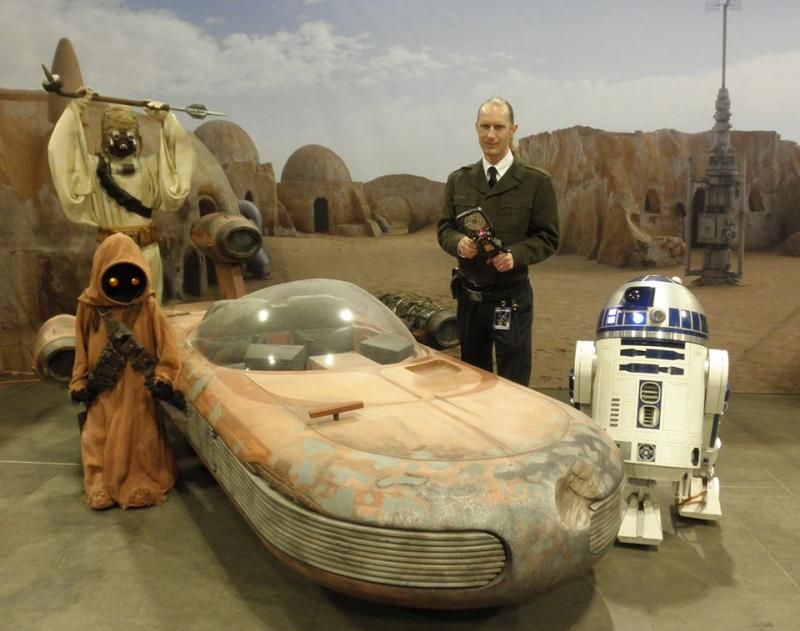
My costume for Denver Comic Con this year is The Middleman.
If you haven't seen this show, you really should. It's an action/comedy series that ran for half a season a few years ago on abc family. It was written by Javier Grillo-Marxuach based on his comic book series. It's the story of the sidekick to a superhero, and is jam-packed with fun geeky references.
The Middleman and Wendy (the sidekick protagonist) work for a mysterious organization nicknamed O2STK. (Organization Too Secret To Know) They provide them with weapons and gadgets and such.
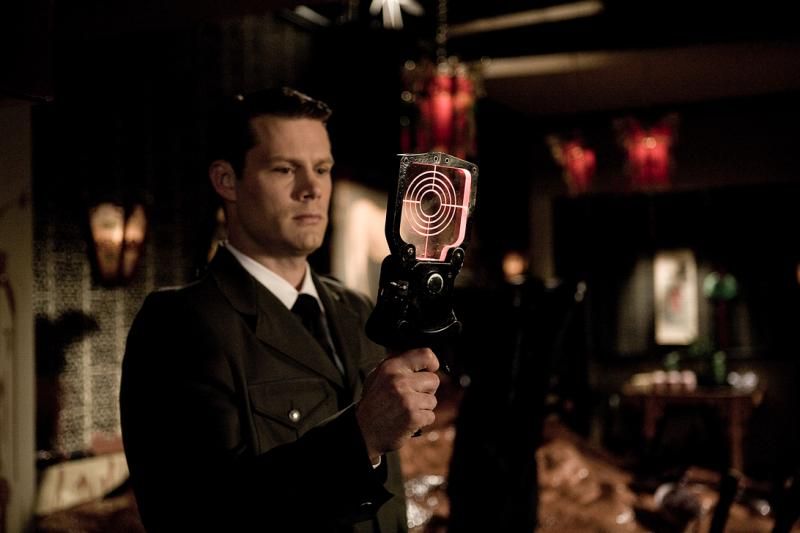
The 'look' of the show is a cool blend of mixed vintage technology and sleek space age for a great retro-scifi feel. The middleman's uniform coat is vaguely WW2 looking, but he carries a silver ray-gun and a scanner that detects things "beyond the realm of science" - the BTRS Scanner.

My original plan had been to make the "Middle Gun", but I realized I wasn't going to have time around a bunch of other projects this spring.
I decided on the BTRS scanner as a less involved, but still cool and identifiably Middleman prop instead.
I did some research on the scanner and read that it was based on some kind of ammeter. Searching on Ebay and some creative googling brought more specific information. It's a Columbia brand lineman's tong test ammeter from the mid-1900s.
I found some great closeup photos online on a web page with an interview with Javier. He held onto a bunch of the props when the show wrapped, and he had them all on a table at his house for the interviewer to see and photograph. Score!


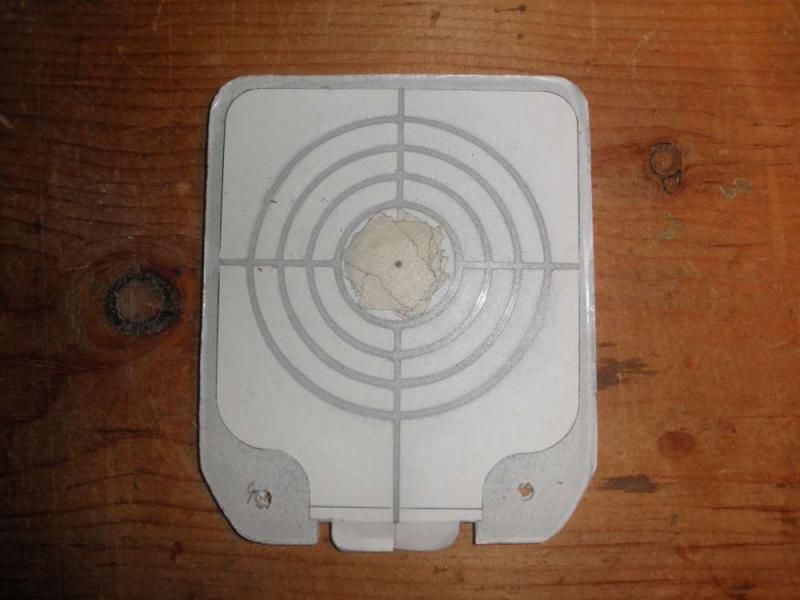
There are two different scanners used on the show; one by The Middleman, and one by Wendy. Both have only a few modifications to take it from ammeter to BTRS scanner - an illuminated screen with cross-hairs and a toggle switch. The tongs never open on the show, because of the way the screen is mounted, they're acting as more of a "frame" for the screen.
The one Wendy uses has smaller more rounded tongs and screen. The Middleman uses one with larger, more rectangular tongs, and a larger screen. They both have the exact same handle and dial.
On ebay, the base ammeter can go for up to $400 for functioning ones of the larger variety. I looked at a lot of them for sale and studied the photos. I realized that the dial part comes off, and so do the tongs. The smaller ones are more commonly available, and are less expensive. Also, some non-functioning ones appear occasionally far cheaper. I bought a "Wendy" style one for about $45, and planned to modify it into a "Middleman" one.
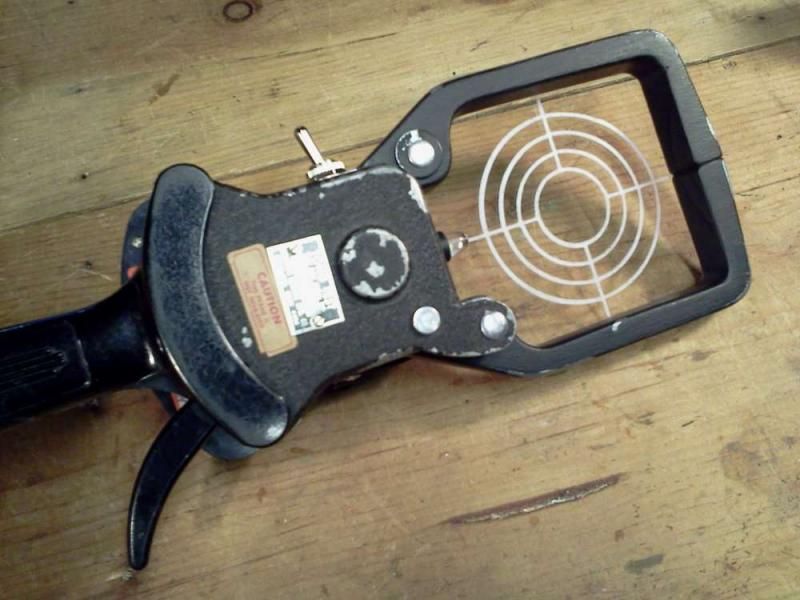
I took some measurements off the smaller one I bought, and compared it to some photos I found online of the larger one, to get an idea of the scale and proportion of the larger tongs relative to the handle and dial. I drew it up with CAD and printed it to-scale.
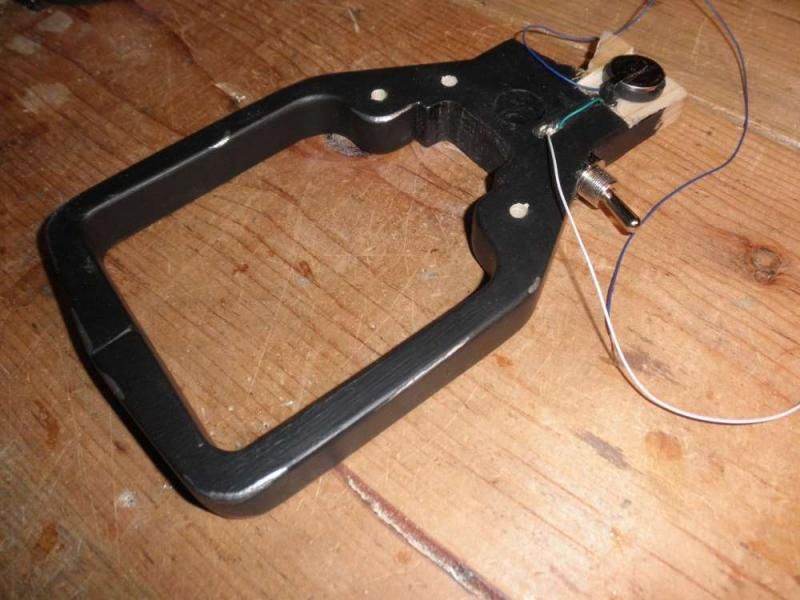
Here you can see the print, and the disassembled ammeter.

I traced the shape onto a regular pine 1x6, cut it out and sanded it smooth. I went back and tweeked the shape to fit the inside of the handle better. Drilling and coping out some more wood, and shaping it with a chisel and dremel to fit around the back of the dial.

I painted it black and sanded it smooth again. I ended up giving it 3 or 4 coats of the black paint to get it nice and smooth.

I'm actually quite a bit farther along, but haven't shot any more photos for a while. I'll post more in a few days when I get time to shoot some new photos.
If you haven't seen this show, you really should. It's an action/comedy series that ran for half a season a few years ago on abc family. It was written by Javier Grillo-Marxuach based on his comic book series. It's the story of the sidekick to a superhero, and is jam-packed with fun geeky references.
The Middleman and Wendy (the sidekick protagonist) work for a mysterious organization nicknamed O2STK. (Organization Too Secret To Know) They provide them with weapons and gadgets and such.
The 'look' of the show is a cool blend of mixed vintage technology and sleek space age for a great retro-scifi feel. The middleman's uniform coat is vaguely WW2 looking, but he carries a silver ray-gun and a scanner that detects things "beyond the realm of science" - the BTRS Scanner.
My original plan had been to make the "Middle Gun", but I realized I wasn't going to have time around a bunch of other projects this spring.
I decided on the BTRS scanner as a less involved, but still cool and identifiably Middleman prop instead.
I did some research on the scanner and read that it was based on some kind of ammeter. Searching on Ebay and some creative googling brought more specific information. It's a Columbia brand lineman's tong test ammeter from the mid-1900s.
I found some great closeup photos online on a web page with an interview with Javier. He held onto a bunch of the props when the show wrapped, and he had them all on a table at his house for the interviewer to see and photograph. Score!
There are two different scanners used on the show; one by The Middleman, and one by Wendy. Both have only a few modifications to take it from ammeter to BTRS scanner - an illuminated screen with cross-hairs and a toggle switch. The tongs never open on the show, because of the way the screen is mounted, they're acting as more of a "frame" for the screen.
The one Wendy uses has smaller more rounded tongs and screen. The Middleman uses one with larger, more rectangular tongs, and a larger screen. They both have the exact same handle and dial.
On ebay, the base ammeter can go for up to $400 for functioning ones of the larger variety. I looked at a lot of them for sale and studied the photos. I realized that the dial part comes off, and so do the tongs. The smaller ones are more commonly available, and are less expensive. Also, some non-functioning ones appear occasionally far cheaper. I bought a "Wendy" style one for about $45, and planned to modify it into a "Middleman" one.
I took some measurements off the smaller one I bought, and compared it to some photos I found online of the larger one, to get an idea of the scale and proportion of the larger tongs relative to the handle and dial. I drew it up with CAD and printed it to-scale.
Here you can see the print, and the disassembled ammeter.
I traced the shape onto a regular pine 1x6, cut it out and sanded it smooth. I went back and tweeked the shape to fit the inside of the handle better. Drilling and coping out some more wood, and shaping it with a chisel and dremel to fit around the back of the dial.
I painted it black and sanded it smooth again. I ended up giving it 3 or 4 coats of the black paint to get it nice and smooth.
I'm actually quite a bit farther along, but haven't shot any more photos for a while. I'll post more in a few days when I get time to shoot some new photos.
Last edited:


")