Suit : Teknoman Armor Suit.
Build : Cardboard and Foam.
Freehand made.
This is always been one of my dream armors. Its just of those armors I felt i had to do. And so here i am doing it.
It begins with Toy Figurines online. Though ive had some help working out parts and placements thanks to some of the other fellow Teknoman/Tekkman fans Ive met along the way

Starting things off with a Blank helment base. Not sure who the orginal maker was..but I hope that to the person who made this template possible Im very greatful.

From my own interpetation, the side fins of the helmet. mind Ive found about 2-3 variations. And im only going with what im comfortable and capable off

Comparing sketches and blanks traces, i worked out the where , what and whys of the face armor.

After a while I go what i was looking for

Because I used a really thin foam. I planned adhead. Some of the curves are hard to template. So i traced out the general lines, then stripped them off to get the templates i would need to make them

make look a bit messy but this is one of the few ways i could think off for making them accurate without worrying to much
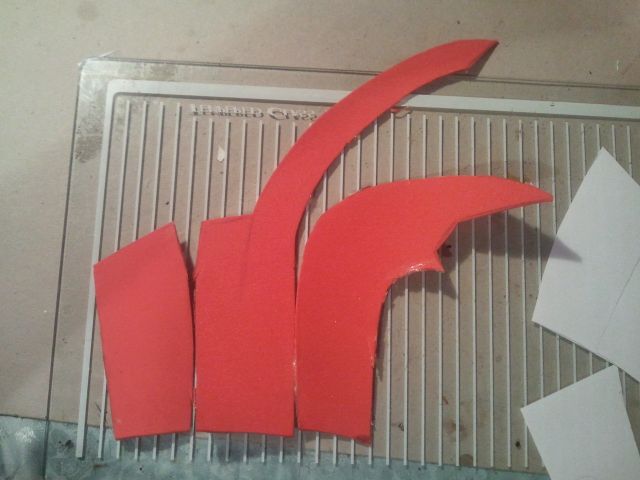
Here u can see the results.

Added the brow armor , its about layers of 2mm foam.
the chin guard.
And here it its coming together.

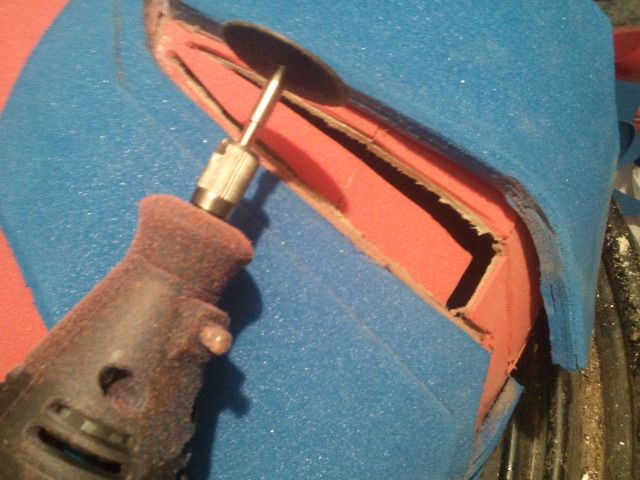
Using my dremel, i cut away the eye slot
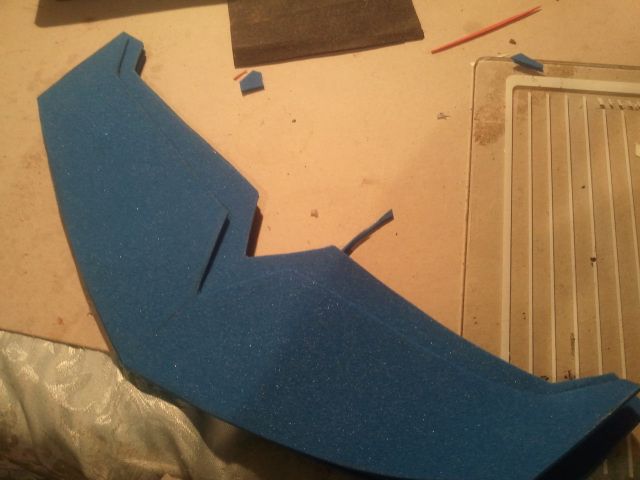
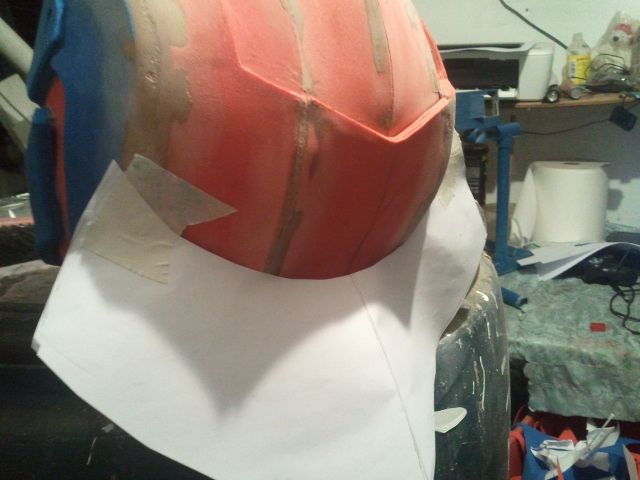
I used some paper templates for the back shield. I didnt relised it was akin to the Japanese helemt armor. Actually...there arent many shots of the back of the helmet out there. So to my friend Zac. who got me shots of it.
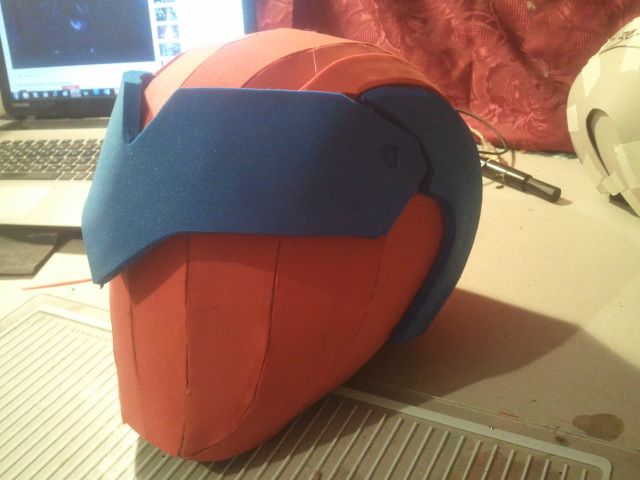
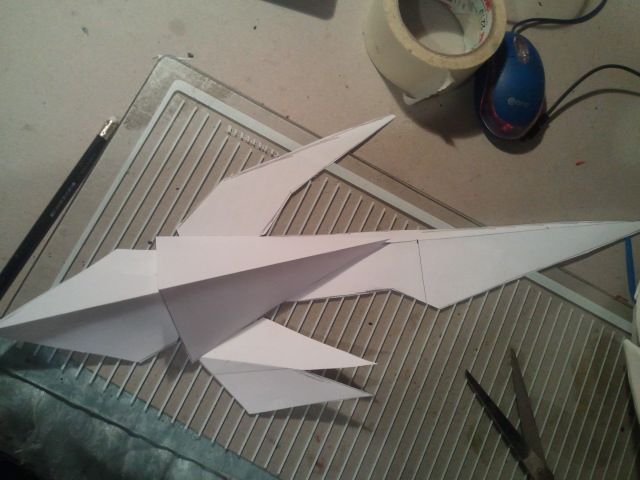
Using paper templates for the side fins. Honestly i think i made them just a bit smaller than they should be...but. ill work it this way for now.
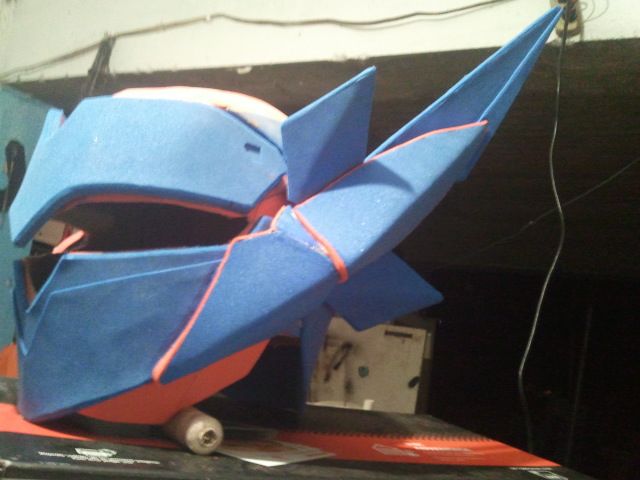
And heres the first side fin guard in place. I worked out to the best i could and not to over do on making it flashy, but as simple as possible. More updates coming soon.
Build : Cardboard and Foam.
Freehand made.
This is always been one of my dream armors. Its just of those armors I felt i had to do. And so here i am doing it.
It begins with Toy Figurines online. Though ive had some help working out parts and placements thanks to some of the other fellow Teknoman/Tekkman fans Ive met along the way

Starting things off with a Blank helment base. Not sure who the orginal maker was..but I hope that to the person who made this template possible Im very greatful.

From my own interpetation, the side fins of the helmet. mind Ive found about 2-3 variations. And im only going with what im comfortable and capable off

Comparing sketches and blanks traces, i worked out the where , what and whys of the face armor.

After a while I go what i was looking for

Because I used a really thin foam. I planned adhead. Some of the curves are hard to template. So i traced out the general lines, then stripped them off to get the templates i would need to make them

make look a bit messy but this is one of the few ways i could think off for making them accurate without worrying to much

Here u can see the results.

Added the brow armor , its about layers of 2mm foam.

the chin guard.

And here it its coming together.

Using my dremel, i cut away the eye slot

I used some paper templates for the back shield. I didnt relised it was akin to the Japanese helemt armor. Actually...there arent many shots of the back of the helmet out there. So to my friend Zac. who got me shots of it.

Using paper templates for the side fins. Honestly i think i made them just a bit smaller than they should be...but. ill work it this way for now.

And heres the first side fin guard in place. I worked out to the best i could and not to over do on making it flashy, but as simple as possible. More updates coming soon.


