Stellar Envoy (1/144 FineMolds Millennium Falcon build)

JMChladek

Sr Member
All these Millennium Falcon models coming out lately has gotten me interested in revisiting the old girl after doing my 1/72 FM build a few years back. I am collecting bits for a DeAgostini build, but I wanted to get something finished soon that didn't require another 18 months worth of work. So I pulled a FineMolds 1/144 Falcon model kit from my stash.

Instead of doing it stock as Solo's ship, I decided to build it as the ship which appeared briefly in Episode III. Lucas says it is the Millennium Falcon as it appeared 20 years before Solo got ahold of it. The "Legacy" book series (i.e. before the Disney reboot) calls the ship the Stellar Envoy and who knows if it is still known by that name now. But it still appeared in Episode III and I've wanted to build the model for some time after seeing Alex Jaeger's original pre-visualization artworks printed up in the " The Making of Revenge of the Sith" book.

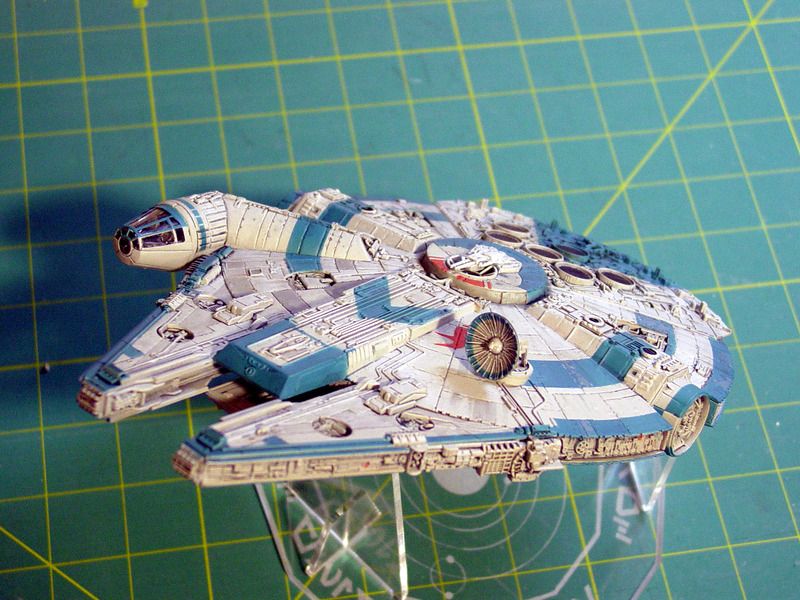
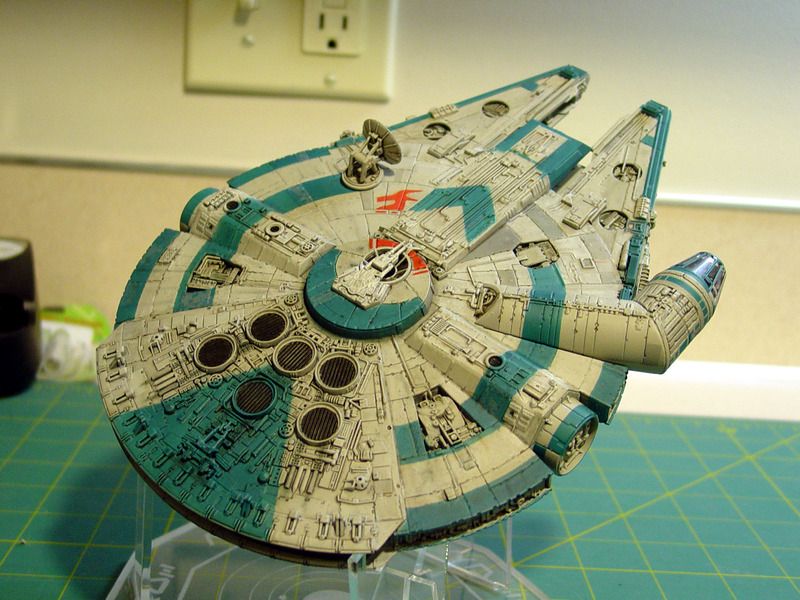
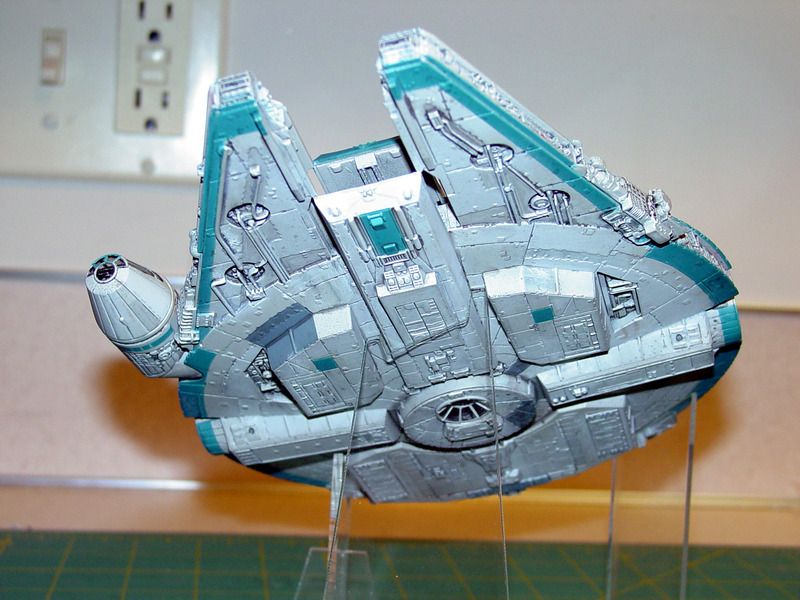
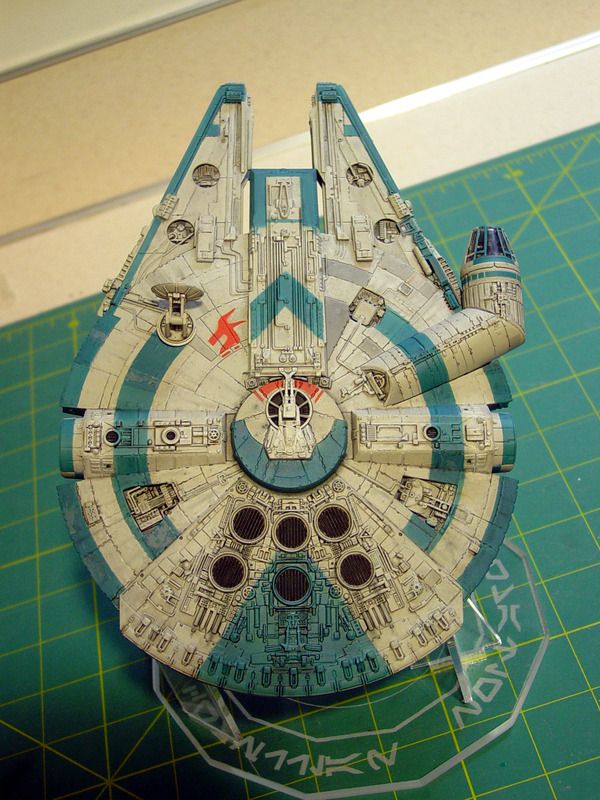
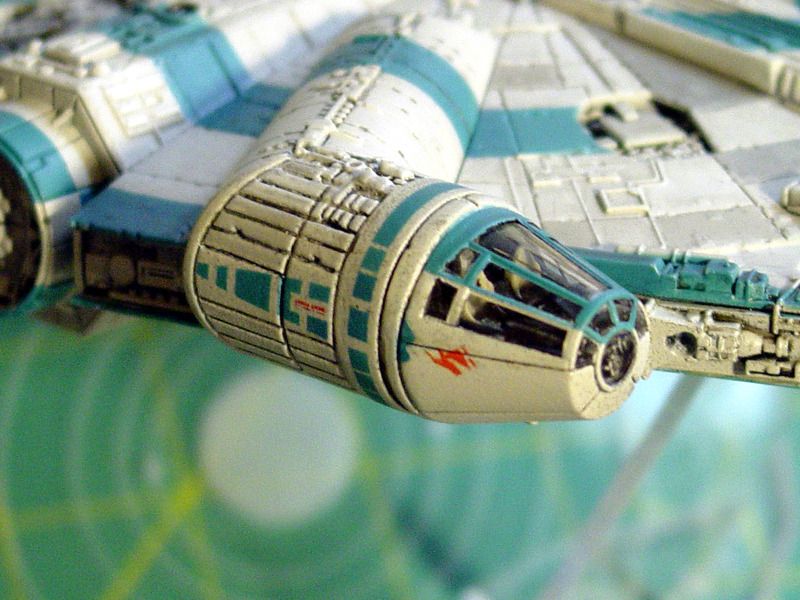
I made some minor modifications to the model as I wanted to do more than just slap a different color scheme on an unaltered Falcon model. So the bottom turret was deleted, the top turret was modified to a twin gun arrangement and slightly different details were added to the hull openings. The biggest mods were to the cockpit pod as I used thin strip styrene to represent the ornate panel detailing Jaeger had in his artwork. So here she is, the Stellar Envoy!


Beautiful work JMC

The panelling around the cockpit tubes looks like it should be there

I'm sure that masking especially across the engine deck was difficult

J
 
There was a little difficulty doing that engine deck, although using single strips of 18mm wide Tamiya tape seemed to do the job as long as I didn't get too close with the airbrush to undercut the masks. If that didn't work, I probably would have gone with poster putty and a straight edge to mask it. A blob of poster putty is what I used to mask the blue stripe on the radar/rectenna dish.


Getting straight tape to curve as needed was a bigger challenge. So for that I used thin strips of Aizu brand tape, usually the 2.5 mm width, and gently curved them as needed. I used the wider Tamiya tapes to fill in the gaps. The new Tamiya tape that can mask curves would have worked pretty well for this, but I didn't have any when I started this project.
 
Paint colors used were Tamiya AS-16 Light Gray spray painted over a flat black pre-shade (Testors Model Master Light gray was also applied over the top as the two shades are almost identical). The blue used was Delta brand Ceramcoat Select satin 0419 North Sea acrylic. I thinned it with Tamiya thinner and shot it through an airbrush. The light and dark gray panel shades were just what I had on hand. Model Master Navy Blue Gray was used for the worn chipped paint on some areas of the blue stripes. For the red trim, I used Testors Model Master RLM 23 Rot since it looks brighter than typical red shades.

As for weathering techniques, it started with an all black pre-shade on the model (with the sidewalls and front section being painted in black before assembly). The light gray spray was kept somewhat light in spots to allow the black to be visible in spots. The chipped paint areas in Navy blue gray were done with salt masking (i.e. apply wet salt crystals, spray the color over the top of the chipped panel, then pick off the salt to chip the paint). Once the main paint shades were down, I gloss coated the entire model and gave it a very light wash of Tamiya smoke tint. I then drybrushed slightly lighter coloring over the top (and used a mechanical pencil to darken panel lines in spots that the wash didn't touch). Final weathering after flat coating was to apply pastel chalk weathering with Microbrush brand applicators. I used the green and white colored ones due to their small size.
 
If the Stellar Envoy is the original name for the MF, shouldn't it only have three landing gear bays instead of five since Han Solo added those sometime between ANH and TESB? Just nitpicking. I know I wouldn't want to hack those out of the Fine Molds kit!
 
If the Stellar Envoy is the original name for the MF, shouldn't it only have three landing gear bays instead of five since Han Solo added those sometime between ANH and TESB? Just nitpicking. I know I wouldn't want to hack those out of the Fine Molds kit!

Actually, I wondered that myself until I picked up the novel "Millennium Falcon" by James Luceno. Yes, I know it is "Legends" timeline which is now different from the "official" timeline, but at least the stuff that took place in and around Episode III could still have taken place. The book mentions that the Envoy had five main gear struts since it was a YT-1300F freighter. But after it left Corescant just after Palpatine's rescue from the Seperatists, it lost power coming out of hyperspace near Nal Shada and it collided with a bulk freighter. After that, the hulk spent a few months in a salvage yard before the front half and the cockpit module got rebuilt (including new mandibles salvaged from a different YT-1300P freighter). So, my interpretation is that is when it lost the extra gear pads and it stayed that way until just after ANH when Solo did some minor rebuild work and installed another set, which seemed to include a set of beefed up roll control thrusters to allow the ship to turn and bank like crazy (real reason being the 32" Falcon had a couple additional animation rod mounting points added). That's the "in story" justification I used anyway as yes, cutting out those pods and plating over the bottom holes was something I briefly considered, but opted not to do. When I tried doing an Envoy build a few years back, it was with an MPC kit which had three gear struts. I shelved that project as it got to be a bit too much of a chore.

As for a "behind the scenes" justification, ILM's digital Millennium Falcon mesh seemed to have the extra gear ports designed into them from day one and you can see them ever so slightly in the later versions of ANH where the digital ship was used. Even though the ship's appearance in Episode III featured a different paintjob, I doubt they deleted those gear ports considering it was seen from an angle where the bottom was not visible.
 
Last edited:
Thanks!

How do you mix the smoke wash? Just water, or thinner?

When doing an acrylic wash, I use mainly just paint and water since Tamiya paints are water wash up. But, and this is very important, you need to add a drop of soap (hand soap, dish soap, doesn't really matter) to your wash water to help break the surface tension of the water/thinner. Otherwise the mixture will bead up like rain drops on a freshly waxed car.

Now if I could get smoke tint in enamel paint, it would be nice to use that since enamel washes flow into cracks and recesses a lot better than acrylic ones. But Tamiya smoke in bottle form is only done in acrylic (at least in the states). The reason I prefer to use it instead of other types of black or gray paint is it contains just pigment and no opaquing agents. So the base color is still visible through it. Using an opaque paint can also work, but the trick with model weathering IMHO is to keep things subtle. You don't want the subject to end up looking like an oversized gaming miniature.

Before applying the wash, it is best to give the surface a semi-gloss to gloss finish to keep the wash from spider-webbing into the base paint (but you might want that effect so that is entirely up to you). Sealing the base paint is a good idea, especially if you are working with enamels and are applying an enamel wash. Reason being, is the thinned paint can soften the base paint if it isn't sealed properly, even if given a good period of time to cure. Acrylics cure differently and usually even water can't take them up again after they have been given 48 hours to cure (and enamel washes typically won't harm acrylic paint or vice versa).

You can mix a full batch if you wish (in fact, it is best to do that if you are new to this). A good rule of thumb to follow is perhaps six parts thinner/water to one part paint. The way I do mine though is to take some paint on my brush and dip it into the wash water (don't shake the paint off, just dip briefly) and then do a quick test on a paper towel to see how it soaks in. Dip the brush a second time if the wash seems too strong. Then apply it to the model as desired. Using a big brush for area coverage can work, but in the Envoy's case I used a smaller brush and did more pin-point applications in spots to help minimize the staining of the base paint coloring. It worked out pretty well, although it went a bit slowly. For my 1/72 Falcon I went with a larger and broader coverage brush as it had a larger surface area that I had to cover.

A wash is only just one step as typically some sort of drybrushing will still be needed to help disguise areas where maybe the wash was a little too dark. Plus, the drybrushing will help to pick out the highlights while a wash helps to expose the shadows.

Hope this helps!

Thank you so much! Wow! Yes- this has been very helpful! And I'm a huge fan of your 1/72 Falcon. One of the best I've seen!

Keep up the good work!
 
Looks great! Some YouTube clip the other day about ten things you didn't know about the millennium falcon, said that there's actually 4 YT1300 freighters in ROTS but I only ever spotted this one.
 
In AOTC there 2 or three parked in the bottom of the frame as Anakin & Padme arrive at Naboo

Star-Wars-Prequels-Millennium-Falcon.jpg


J
 
Last edited:
This thread is more than 8 years old.

Your message may be considered spam for the following reasons:

  1. This thread hasn't been active in some time. A new post in this thread might not contribute constructively to this discussion after so long.
If you wish to reply despite these issues, check the box below before replying.
Be aware that malicious compliance may result in more severe penalties.
Back
Top