Star Wars Garage Room Build (WIP)

mmx2000

New Member
New member here...
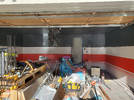
Inspired by Fuzzual I am going to build out an entire room to be Star Wars inspired, although the room happens to be my garage. Being my garage, it still needs to be functional, so it won't be wholly immersive, but wherever I can, I'm going to try to incorporate Star Wars-themed ideas.

This is going to be a slow burn over a few months most likely, so forgive me if updates roll in slowly.

First, some concept art, I modeled the garage in google sketchup (it's a great tool, its free, browser based, and I taught myself to use it via youtube tutorials. Highly recommend!):

From the outside looking in:
1654437148143.png


Standing in the doorway looking out towards the driveway:
1654437480292.png


Other side:
1654437526985.png


So, I didn't model all the Star Wars greeblies in full, this was more to get the major items laid out so I could understand how much paint, material, etc I would need. For function, the black stripes you see along the walls are actually 3/4" French Cleats, around the entire garage. This way I can easily make shelves, tool holders, ladder rack, bike racks, etc. anywhere I want. I'm going to paint them an extremely high-gloss black. This is probably a good point to start listing out the major components:

  • Black, high-gloss French Cleats around entire garage
  • The very bottom one, which starts about 24" off the ground, won't be a cleat, but will be a row of greebled control panels lit with LED's. I'm 50/50 on buying a Glowforge right now and if so, will likely buy the digital files from Fuzzual's The Smugglers Room STL shop
  • The bottom 24" of the walls I originally was going to do a Vinyl Diamond Plate, but I don't think there's diamond plate in Star Wars, so now I'm thinking about doing Death Star panel walls. Going to need to figure out how to design them so they look right with only about 24" in height.
  • I'm building at least 6 shelves, 3 for each wall, and the supports will be cutout with LED-lit acrylic to give it a Star Wars feel. They will also be painted high-gloss black.
  • Around the top corners of the walls and ceiling I'm going to do LED lighting with these panels at a 45º angle out of MDF and acrylic:
    • 1654438276322.png
  • The main door I'm going to greeble to look Star Wars-y, replace the handle & lock. Haven't decided on a pattern yet, I will probably just glue thin MDF panels to it. However, the surround of the door will also have that same small LED pattern that I showed above going around the ceiling, on the inside of the doorframe, and then on the front of the door frame this:
    • 1654438393905.png
    • I'll also probably build out the step to have lights on the front of it too in a similar pattern.
  • Major Launch Bay Arch around the Garage opening, out of MDF, Aluminum 8020 channels for strength, acrylic and LED lights.
    • 1654438524406.png
  • Greeblied hanging rack for all my cordless battery chargers (design TBD).
  • Greeblied Control panel near door that will be power distribution to the LED lights around the corners of the ceiling along with possibly the battery chargers or other things. Will have several of these through the garage near power outlets with Wire loom running the lines to each device/thing.
  • Turn my Ridgid Shop Vac into a Droid.
  • Mount a Projector underneath my Garage Door Opener and turn the two of them into some sort of floating droid. The projector will broadcast a starfield/space scene onto the Garage Door when shut, which I will paint with Projector Screen Paint
  • Variety of cabinets and other workbenches that are greebled, as this is also my workshop. Things like rolling table saw, miter saw, router table, drill press, storage cabinets.
  • There's a Window in the room that I am going to panel over, probably with Death Star White Acrylic Wall panel. Layout not yet done.
  • On the ceiling, I'm going to do a mix of lighting:
    • 1654439025680.png
    • The big grey rectangle is the open garage door placeholder in the model.
    • The red panels actually will be a frame of wood, painted black, about 2-3" deep. The bottom of it will be black tinted acrylic. Inside will be red (or more likely, coloring changing LED's), not too bright. Underneath the black tinted acrylic will be these egg-crate style black grids.
    • The white panels will be a frame of wood, painted black, about 6" deep, to create different depths on the ceiling. They will be a mix of plain white acrylic with no back lighting (the little panels), and the big panels are these 1'x4' LED panel lights.
    • Along the back wall, I'm again taking a page out of Fuzzual playbook and making some greebled drop lighting out of these drains.
  • There's some other miscellaneous hangers and things I will make to go on the cleats that I haven't figured out yet, but will create as needed for real garage stuff.
  • The floor will be Vinyl Garage tiling

May the force be with me...
 
Last edited:
I started a few weeks ago by completely gutting my garage, which was in poor shape. The garage originally was drywalled like 20 years ago, taped and mudded, but never painted. On the left side of my garage the drywall was really in bad shape, so I started by first removing every hook, screw, shelf, bracket, etc. that had ever been installed in the past twenty years (a mini project in and of itself). Then I ripped out all the drywall on the left side. The outside wall of the garage was easy, because they never painted, I could see where the screws were mudded over and it was easy to find them with my drill to pop them all out, and the sheets basically fell off the wall. The back wall, however... those m'fers nailed the drywall to the studs, so there was no way to easily remove it, and I had to destroy the sheet in like 16"x24" sections. Took FOREVER and made a HUGE mess.
Then, I was too cheap to get a Bagster to haul away the garbage, so I thought it would be smart to break up all the drywall sheets into small enough pieces to go in garbage bags that I could just put in my garbage can and take to the curb.
Turns out, Drywall is heavy as hell, messy as hell, and two entire walls of drywall fills a garbage can about 5x over. I've been slowly throwing it away every week for a month. Never again!

Then, I wanted to re-do the framing behind that wall and re-insulate it. So, a quick trip to the local big box store:
1654439611288.png


By the way, this cordless framing nailer is really stupidly expensive, but not gonna lie, it's awesome! I have another project to frame out a large section of my basement so the purchase was worth it for me.
1654439671779.png


Here's a progress pic with half of the old drywall out (just the outside wall), a giant pile of drywall garbage, new framing up, and insulation in. By the way, if you are ever trying to drill Tapcon's into concrete and are struggling, make sure your Hammer Drill is ACTUALLY SET TO HAMMER MODE, so you don't waste 2 hours of trips back and forth to the hardware store buying carbide bits wondering wtf is up with your super concrete :)idiot:).
1654439800112.png


Pic of everything in my garage piled into the middle of the floor, new Drywall up, mudded and taped. This took forever. I said it already, but I'll say it again. I'm NEVER. DOING. DRYWALL. AGAIN. It's the nastiest material, heavy, and sucks. My tape and mudding job was garbage, I don't know how people get it so smooth (actually I do, patience, which I lost, because this **** is NASTY).
1654439907341.png


I didn't realize a single 5/8" 4'x8' sheet weighs about 70 lbs, too, so I tried to do this alone, and it was a nightmare. I originally was going to re-do the right side of the garage too (the old brown drywall), but said F NO at this point. I did pay a professional electrician to come add all the outlets you see prior to drywalling; I now have 3 separate circuits to my garage, the original 15A circuit that has one outlet by the door, powers the outside lights, and the garage door opener with outlets in the ceiling; a new 20A circuit with 3 boxes, and a second 20A circuit with 2 boxes. Power for days! No more blown fuses when running table saw and shop vac at same time! Yay!

After multiple coats of mud and some half-assed cleanup on the right side of the garage, on to taping:
1654440075356.png


I decided to invest in a corded, 360º capable paint sprayer that uses these perishable bottles:
1654440119647.png


For about $225, my review of it is meh. Granted, it's my first time using it. So far I've only primed the walls, using Kilz primer. One fill-up of the paint gun only gets me about 6'x8' of coverage. Constantly having to refill it is a bit of a pain. This gun seems better suited for smaller projects like furniture or something. If I could do it over I would buy the $300 one that has a hose that can feed straight from the bucket. The overspray also makes a huge mess, but that could be me not knowing what speed to set it at and having it too high. Finally, when I painted the ceiling, the thing clogged constantly if I held it straight vertically (so much for "360º"!!!!). So I had to hold it at about 45º and spray the ceiling, which also caused tons of overspray and paint "dust" over everything. Not a big deal but really annoying and bad for your eyes/lungs.

I did do my best to wear safety equipment:
1654440322097.png


Here's what she looks like after two coats of primer. You can see the amount of "dust" the spray gun put over everything.
1654440373916.png


It's taken me a month to get to this point, which is why I started the thread. There's nothing Star Wars-y about it yet, and probably won't be for a while still, but I'm getting closer every day.

Next update, I hope to have the red and white paint stripes done and the grey paint on the top of the wall and ceiling. Then the french cleat building begins. You can see the sheets of plywood (ripped in half already) next to my rolling work bench. Going to rip them down to about 3" in diameter, then use a 45º bit on the router table to cut them. I know I could do it on the table saw but I like the ease of use of the router table.
 
Last edited:
Minor update and reminder to all:

Never put a can of bright red paint on the ground where you could kick it on accident. This is already after one hour of attempted clean-up (the can was brand new, I just opened it, 80% of it spilled).
1654464935959.png


On the plus side, my driveway looks kinda like Mustafar as its drying

Edit: Praise Costco and their $160 sale price Huskvarna 2000 PSI power washer. After another hour with that:
1654472600717.png
 
Last edited:
This is so cool! Always wanted to renovate a room to be a a full on SW room. Can’t wait to see it come together!
 
Looks like you’ve got this all planned out and I can’t wait to see your progress. I’m not sure if you’ve seen or are aware of the barrette outdoor living 3x6 garden privacy screens.

The look like this and are sold in Home Depot, lowed, tractor supplies, wayfair.
If they are any use to you.
83E1A4F6-2EFE-46DB-9EB4-FDCFDC308F9A.jpeg
 
Looks like you’ve got this all planned out and I can’t wait to see your progress. I’m not sure if you’ve seen or are aware of the barrette outdoor living 3x6 garden privacy screens.

The look like this and are sold in Home Depot, lowed, tractor supplies, wayfair.
If they are any use to you.
View attachment 1584405
Wow, nice, never seen that before. I'll keep that in my back pocket.


Project got sidetracked due to catching COVID (ugh, whooped my ass for a few days starting to feel better). Put some work in as I'm on the mend the past couple nights, progress is SLOWWWW.
I hate painting rooms. I thought buying that Spray Gun would make things a lot easier. It kind of did... except for a few issues:
  • Really easy to spill when loading the paint reservoir. Constantly made a mess.
  • Speaking of mess, the overspray is ******* HEINOUS. Imagine taking a can of spray paint and just spraying the entire thing into the air and letting it float to the ground. This is what the spray gun creates.
  • Obvious user error, but if you oversaturate one area, it looks fine at first, but 20 minutes later you can see these large sagging drips form. I'll have to deal with some of those later.
All in all, don't know that I would ever use the spray gun again to paint an interior room.

Anyways, here's the progress:

Red Stripe taped and painted. Man, taping takes forever. Something that really helped with the keeping the tape lines properly level was this tool:
That said, if I were to do it over, I would spend more money and get a more powerful one. This one only cast a line about 5-6 ft wide before it faded away which made it take a lot longer to finish.
1655513670916.png


After the red was on, I tried out this product from Scotch tape that is tape + painters plastic combined, in a handy roll-out dispenser. This stuff is great! I would absolutely use this again to tape off horizontal sections.

1655513996482.png


Fully applied and white stripe taped off:
1655514130114.png


Look how nice and bright it is!

Painted the white stripe, applied more scotch painters plastic tape, and then painted the top of the walls and ceiling. Went with Satin Black from Behr paint.
1655514362849.png


Now everything looks an absolutely filthy dungeon. I won't need to weather anything in my garage that got hit by its overspray... already done...

Tape and plastic all removed.
1655514536300.png


It's sooo dark with all the white painted over. Here's hoping it all comes together when the lighting is installed.

I'm ignoring the overspray underneath the red, as that will be covered up by the base panels.
It's far from perfect in many areas, tons of blemishes, ceiling is a little fubar'd, but now that I've spent weeks on the walls and the ceiling just getting them to this state - time to cover them up with a thousand french cleats and all the ceiling light fixtures.
If I don't build some shelves soon my wife is going to kill me, she is a very organized person and the general state of the garage is gross.
 

Attachments

  • 1655514449628.png
    1655514449628.png
    1.8 MB · Views: 87
Thanks for sharing your progress - you've done a lot of work! I'm looking forward to seeing the cleats installed!
 
Little more progress this weekend, though the covid hit to the stamina is real.

Turned three 4'x8' sheets of plywood (seen here ripped in half already):
1655670215143.png


Into forty-eight 2 & 7/8" x 96" strips, that only took forever on the table saw:
1655670404531.png


Now I know most people build cleats on the table saw with the blade at 45º, but I've been looking for an excuse to use the router table so I'd thought I'd try it on that, went with a 45º chamfer bit:
1655670497105.png


Running them through... it actually took 90 minutes, even with the production line setup, to run all 48 boards through the thing. Made a mountain of sawdust, didnt realize my shop vac got full partway through and was doing nothing.

1655670623758.png


All 48 finally done. Didn't bother to clean up the ends yet where the tear out is. Now to spray them all black and clearcoat over the top. I can't wait to be done with this part of the build. So tedious.
1655670783199.png
 
Been a month since my last update, COVID didn't help the progress, but I have been working steadily. The cleats have taken INFINITELY longer than I expected, I have much regret lol. I cut them all in one day, but the many coats of primer -> paint -> paint etc. only being able to do 12 at a time and having to wait between coats have made it take forever.

I plastic'd off a corner of the garage to be the paint area. First, I stood them all up so that I could paint the top of the cleats all at once:
1658098675531.png


Primed:
1658098703160.png


Flipped over to do the bottoms:
1658103829947.png


Primed again:
1658103862297.png


Laid down 12 at a time to prime the faces:
1658103885920.png


The main tools of this job - in the end, to do just half the garage so far worth of cleats, I think I went through literally somewhere around 50-60 cans. Each can only covers about 4'x4'.
1658103941950.png


Primed the front of them (exciting shots, I know):
1658103966721.png


Standing them up on end to paint them black:
1658103987091.png


First coat of black on the faces:
1658104132089.png


Close up of finish... looks ok, i wanted to hide the wood grain more but I got too tired to deal with it:
1658105804903.png


I've heard this gives an amazing clear coat finish like an automotive finish:
1658105842893.png


Well, its heinous to use. Smells like cancer, even through a respirator. It aerosol's a ton, the whole garage filled up with its haze. And, the finish came out cloudy and looked like ****.
1658105897153.png


I ended up using the Rustoleum clear coat I posted above. It didn't do much better. In hindsight, the actual gloss of just the black spray paint came out better. After mounting them all on the wall, I ended up coating them all twice again with wipe-on poly to try to even it out (it worked). I'm getting ahead of myself a bit.

Took literally like 3 weeks to paint all the boards.

Finally mounting the first one:
1658106023730.png


Now the moment of truth... will all my layouts actually line up, so they cover the seams of the paint stripes, and go to the ceiling correctly?

Made 3" spacers, this made it very easy to stack the next one on top:
1658108036443.png


Of course, the electrical outlets line up with a board instead of the empty space:
1658108081899.png


This one too:
1658108108550.png


After some jigsaw work:
1658108126675.png


After using a studfinder to map the studs on the first board, I used a speed square to line up my drill using a pilot+countersink combo bit to do all the screw holes. Had a second impact driver handy to do the screws themselves. This made it go fairly quick:
1658108226606.png


You can see here the real crappy uneven gloss finish that the boards have at this point.
1658108178181.png


End of day 1 of trying to mount them. This actually took probably 4-5 hours because I was being really meticulous. All the other boards will line up off these, so if these were wrong, the whole room would end up cockeyed.
1658108279816.png


After another week of working on it in my freetime. You'll notice, I didnt put boards over the red. At first I was going to chump out and not do it out of laziness, thinking that most of it would be covered:
1658108338004.png


But I didn't like the way the red looked without the stripes. Stick to the plan, man. But now I had to go down, instead of up. Couldn't just lay the spacers on top and place the next board above. What to do?:

1658108432503.png


That actually worked surprisingly well.

Forgot to mention, I mounted them all with these. To be honest, in hindsight, they are too short. After the .75" plywood, and the 5/8" drywall, they are only sticking into the studs about .25" (Granted, I countersinked them, so in reality its about .3-.35" maybe). On the otherhand, I went through 750 screws or something, so realistically, unless a 400lb gorilla tries to climb them, I think it'll be fine.
1658108527193.png


I've got all the boards up on this side of the garage now, and just finished the 2nd coat of wipe-on poly on all of them. That actually didn't take as long as I thought. Probably less than one hour to wipe on poly on all 48 boards. It's took dark to take a picture, so it will have to wait for the next update.
 

Attachments

  • 1658105987829.png
    1658105987829.png
    954.8 KB · Views: 75
  • 1658104070734.png
    1658104070734.png
    1.2 MB · Views: 70
More progress:

Got all the boards up... but I damaged one and now am 1 short on this side of the garage. Oh well, I'll fix it later.
1658526005839.png


Now to start working on the shelves. I need to actually use them to free up floor space to make more stuff faster.
This was the design:
1658526364061.png


Underneath the facade of the bracket is this:
1658526435847.png


First, going to use a scrap piece of plywood to make those rectangular backers:
1658526471129.png


Let's doublecheck...
1658526556695.png


yep good to go

After some cutting:
1658526676974.png


Used the scrap cleat board that already had the 45º on it to help make the backers for these. Test fitting:

1658526713406.png


Yay, it works.
1658526770137.png


Time to burn more cans of spray paint:
1658526805125.png


Ran out of grey primer:
1658526957986.png


2nd Coat. Why, when these will eventually be 100% covered? Because I'm stupid and wasteful I guess
1658526991778.png


Getting them mounted to a shelf. This carpenter's speed square has been the most useful thing through this entire project.
1658527020258.png


Let's see what the first one looks like!
1658527060867.png


Not bad!
All 6 built and thrown up on the wall in a bit of a random order just to test:
1658527222563.png


Next up, I have to load these shelves up with stuff to clear 1/2 the garage floor, so I can make another 48 cleats (ughhhh) for the other half of the garage.

Someday I'll post something Star Wars-y, I promise...
 
They flex a little due to the cleats, so probably not as much as you'd expect. I wouldn't want to put more than 100 lbs on them, if that. Mostly they are going to store lumber and woodworking finishes and such for me, so I'm not too worried.
 

Your message may be considered spam for the following reasons:

If you wish to reply despite these issues, check the box below before replying.
Be aware that malicious compliance may result in more severe penalties.
Back
Top