Video link:
Last year I finally got around to finishing this replica of the Photonic Lifeform's scanner from the Voyager season 5 episode "The Bride of Chaotica".
After identifying the original LCD game that was used as a base for the prop, I picked up a few on e-bay and converted the first one into this replica.
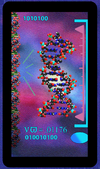
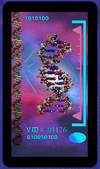
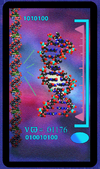
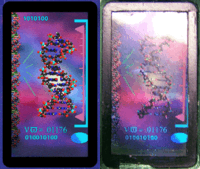
There was some great reference of the original screenused piece on Yourprops, credit to the owners there for posting their photos, particularly the close-up on the display graphic which helped me recreate a copy in Corel Draw.
Before I get into the details, I didn't document my build fully. These days I tend to work on props in dribs and drabs as and when I have time after work and frequently don't take a lot of photos.
I'll try and describe the build process as best as I can here but this will be fairly light on accompanying photos.
The Reality Fighters Game.
There are a few variants including one with red buttons, which was the one I actually used for this replica but I didn't take a picture of that model. I think the variety in the handheld game's body colour comes with the various wrestlers used for each game.

The build

I cut the game more or less in half to get the correct shape, retained the off-cut section of trim for the display screen to save trying to sculpt it again, glued it in place and then built up the cut away section with styrene and Milliput.
I used 3mm translucent acrylic for the display screen.
I retained the original buttons from the game but I re-painted them as the original colour from the LCD game was a very vibrant red, I used an off the shelf iridescent red that I added a speck of black to this helped darken it down a fraction to match the pictures posted on Yourprops of the original prop. I then gave them a coat of semi-gloss clear coat to protect them.
The end emitter was painted this same colour at the same time but I don't think I took a photo of it.
I added a 3mm wide short stryene strip to the back and also made and additional plant-on for this prop, a capsule shaped button that was also painted red and added to the raised small area below the scanner screen.

*he main body colour is **Halfords Ford Aqua Jade, with a coat of semi-gloss clear coat over the top.** (I'm in the UK so I'm not certain what the US equivalent would be but in person the green matches to about 90% accuracy of the photos of the original prop on Yourprops, give or take a change in manufacturer and the camera used and display on my laptop)
The end "scanning node" has a piece of 3D modelled and printed plastic in to mimic a sheet of oval slot brass sheet. I was having a really difficult time trying to find the correct sheet, especially in just a small sheet. I think there was the possibility of buying a large sheet but I only needed a rectangle that was about 15mm x10mm to fit in the top section. I mixed up some Revell acrylic with a couple of drops of water and airbrushed the fake metal piece as I didn't want to buy a whole can of spray for such a small piece.
I generally prefer rattle cans for uniformity of cover and colour match when painting larger props but for such a small piece it was easier to use the airbrush.
The only mid-build work in progress photo, the capsule button is missing and the screen graphic wasn't in-place at that time.


There's a 5mm white LED behind the display screen that is embedded in some hot glue to diffuse the light and the end emitter has a 5mm high brightness clear lens green LED.

@hms did post a great video of the original in his series of behind the scenes prop insight videos. If you haven't watched them already I would highly recommned checking them out, Mike gives great insight into the history and build up of some of the most iconic Star Trek props....I'm hoping he will get back to posting more again!
In addition:
*The same Reality Fighters game was used whole without cutting down to make another scanner from the sixth episode of Season 6, "Riddles". It was painted a really nice blue and has multicoloured sequencing LEDs in the screen and a pink flashing LED in the emitter.*
*I'll start another post covering the build of the Kesat representative, Deputy Investigator Naroq's scanner, that he used to track the B'Neth that attached Tuvok in that episode, until then here's a quick preview photo to whet the appetite!*

Last year I finally got around to finishing this replica of the Photonic Lifeform's scanner from the Voyager season 5 episode "The Bride of Chaotica".
After identifying the original LCD game that was used as a base for the prop, I picked up a few on e-bay and converted the first one into this replica.
There was some great reference of the original screenused piece on Yourprops, credit to the owners there for posting their photos, particularly the close-up on the display graphic which helped me recreate a copy in Corel Draw.
Before I get into the details, I didn't document my build fully. These days I tend to work on props in dribs and drabs as and when I have time after work and frequently don't take a lot of photos.
I'll try and describe the build process as best as I can here but this will be fairly light on accompanying photos.
The Reality Fighters Game.
There are a few variants including one with red buttons, which was the one I actually used for this replica but I didn't take a picture of that model. I think the variety in the handheld game's body colour comes with the various wrestlers used for each game.
The build
I cut the game more or less in half to get the correct shape, retained the off-cut section of trim for the display screen to save trying to sculpt it again, glued it in place and then built up the cut away section with styrene and Milliput.
I used 3mm translucent acrylic for the display screen.
I retained the original buttons from the game but I re-painted them as the original colour from the LCD game was a very vibrant red, I used an off the shelf iridescent red that I added a speck of black to this helped darken it down a fraction to match the pictures posted on Yourprops of the original prop. I then gave them a coat of semi-gloss clear coat to protect them.
The end emitter was painted this same colour at the same time but I don't think I took a photo of it.
I added a 3mm wide short stryene strip to the back and also made and additional plant-on for this prop, a capsule shaped button that was also painted red and added to the raised small area below the scanner screen.
*he main body colour is **Halfords Ford Aqua Jade, with a coat of semi-gloss clear coat over the top.** (I'm in the UK so I'm not certain what the US equivalent would be but in person the green matches to about 90% accuracy of the photos of the original prop on Yourprops, give or take a change in manufacturer and the camera used and display on my laptop)
The end "scanning node" has a piece of 3D modelled and printed plastic in to mimic a sheet of oval slot brass sheet. I was having a really difficult time trying to find the correct sheet, especially in just a small sheet. I think there was the possibility of buying a large sheet but I only needed a rectangle that was about 15mm x10mm to fit in the top section. I mixed up some Revell acrylic with a couple of drops of water and airbrushed the fake metal piece as I didn't want to buy a whole can of spray for such a small piece.
I generally prefer rattle cans for uniformity of cover and colour match when painting larger props but for such a small piece it was easier to use the airbrush.
The only mid-build work in progress photo, the capsule button is missing and the screen graphic wasn't in-place at that time.
There's a 5mm white LED behind the display screen that is embedded in some hot glue to diffuse the light and the end emitter has a 5mm high brightness clear lens green LED.
@hms did post a great video of the original in his series of behind the scenes prop insight videos. If you haven't watched them already I would highly recommned checking them out, Mike gives great insight into the history and build up of some of the most iconic Star Trek props....I'm hoping he will get back to posting more again!
In addition:
*The same Reality Fighters game was used whole without cutting down to make another scanner from the sixth episode of Season 6, "Riddles". It was painted a really nice blue and has multicoloured sequencing LEDs in the screen and a pink flashing LED in the emitter.*
*I'll start another post covering the build of the Kesat representative, Deputy Investigator Naroq's scanner, that he used to track the B'Neth that attached Tuvok in that episode, until then here's a quick preview photo to whet the appetite!*


