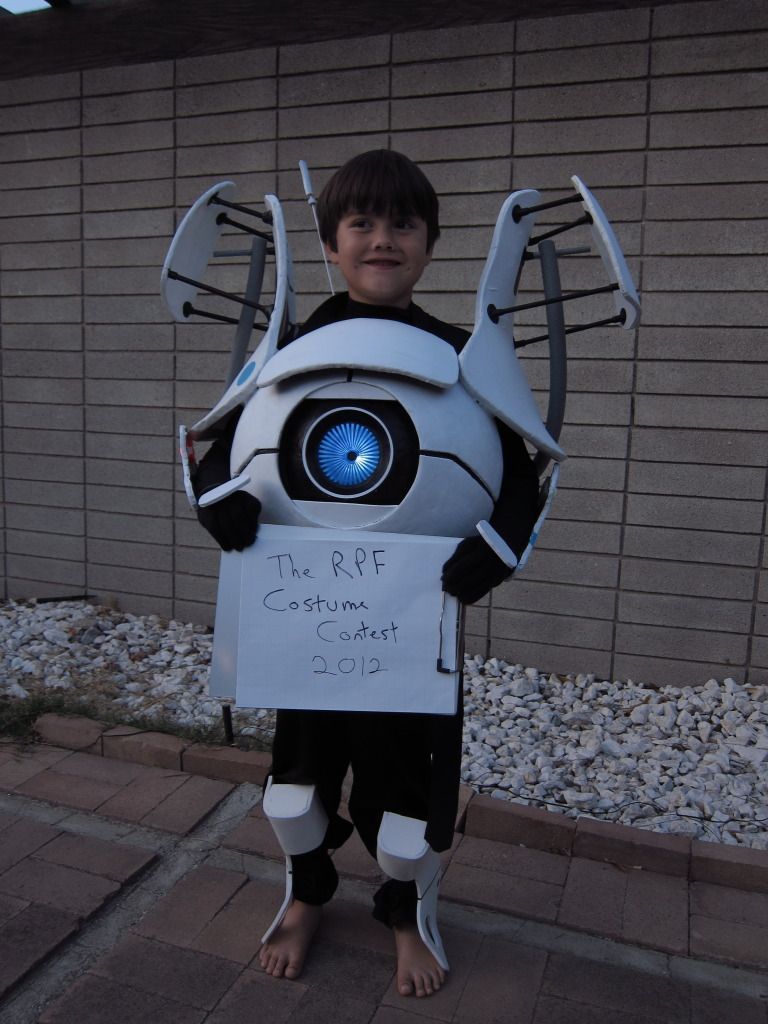
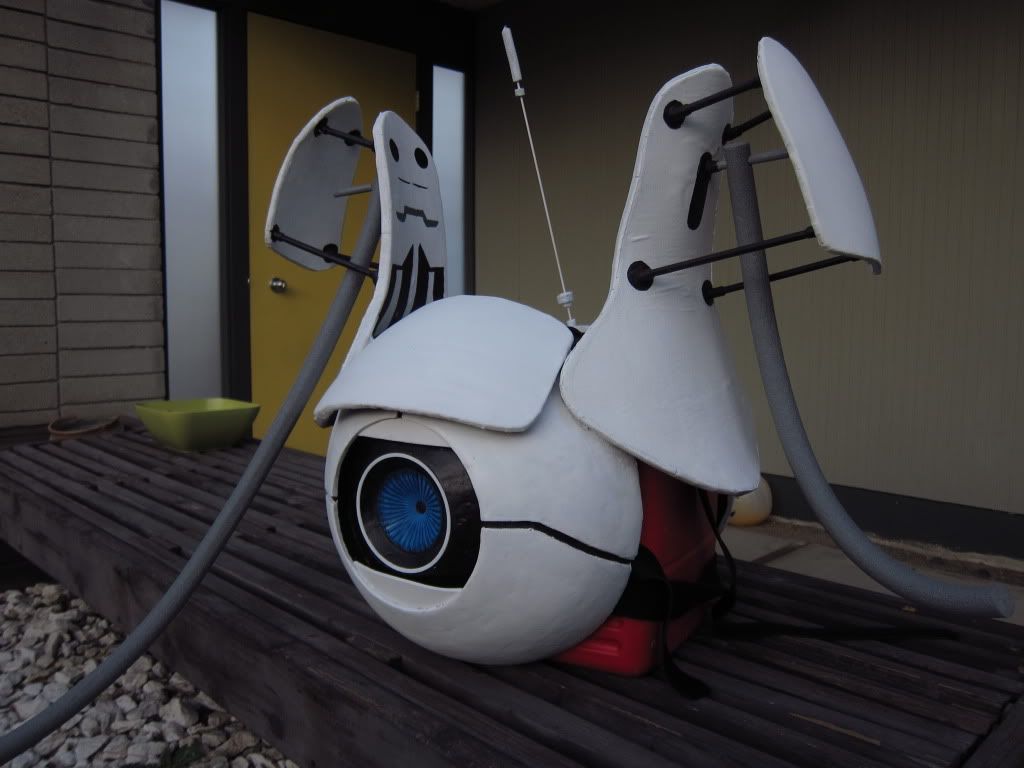
Meet Atlas:
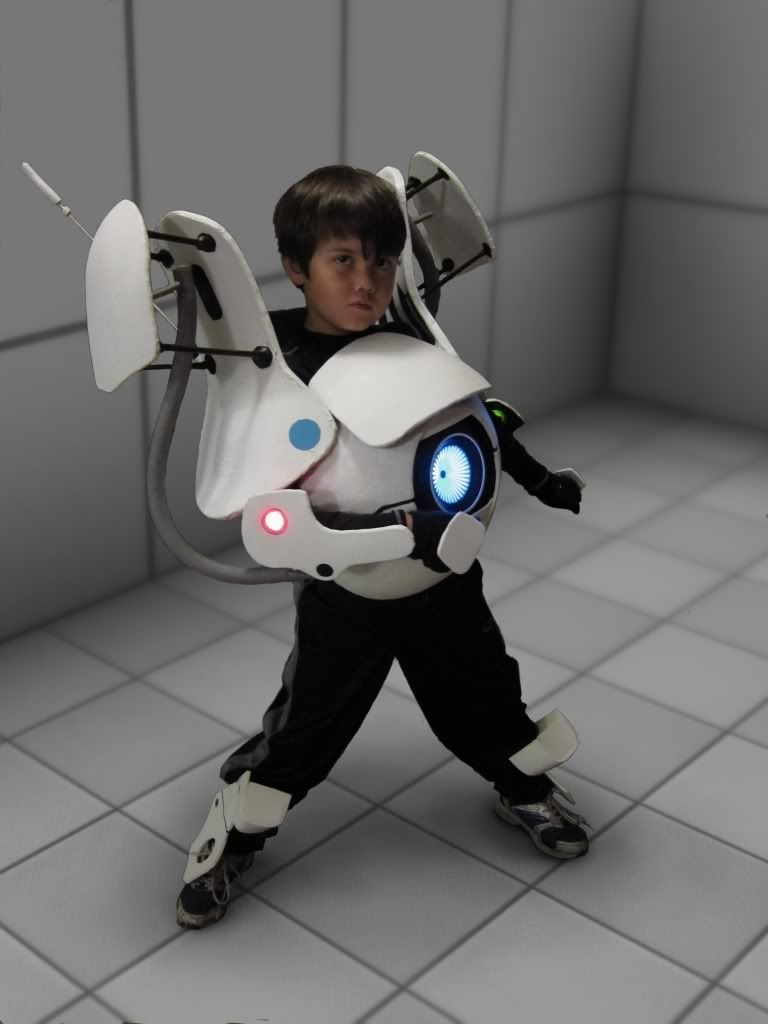
Background was added in post. I created a simple set in Maya using Portal 2 textures, matched the perspective, and rendered with occlusion and depth of field.
My 8 year old son loves playing Portal and Portal 2, and everything about Aperture. (His life-goal right now is to be the one to build Aperture Science for real) He wanted to be Atlas for Halloween, so I figured I would try and build a costume for him. I didn't want to go for something super simple, I wanted him to *look* like Atlas, and it ended up being a bit bigger of a project than I though it would be at first. I started the costume about 3 weeks ago, and worked on it nights from about 9pm until about 2 in the morning. It held up well during trick-or-treating as well as the elementary school parade, where it took quite a few knocks from all the kids bumping into each other.
I don't really have a background in making costumes, but do work as an artist. The only other real costume I have made is a Freddy Kruger glove and face makup that I did over 20 years ago. Building Atlas was really fun, and I learned tons doing this.
The main part of the sphere body is made from pink rigid insulation foam, while the other parts are made of volara foam with wonderflex adhered to it to maintain it's form. The hardest piece to construct were the shoulder plates that attach to the main body. It was tricky getting the right shape, without having the wonderflex peel itself off the volara.
I'm also new here. I hadn't heard of theRPF until a couple of weeks ago. I found it through Volpin props, and also found Tech Magic's thread on the 1/2 scale Atlas sculpture. There are so many talented folks here!
Here are my stages of construction:
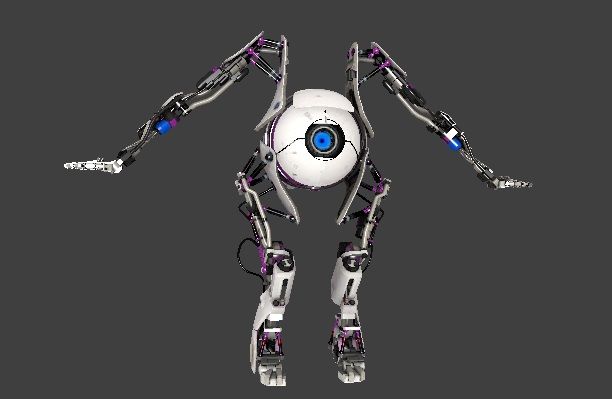
This is Atlas, one of the two co-op player characters in Portal 2:
The first thing I did was to start figuring out scale. Atlas is basically a sphere, so I started with figuring out the dimensions of what that should be. I took some photos of my son and did some drawings over the top of them to get the general idea of what I should do.
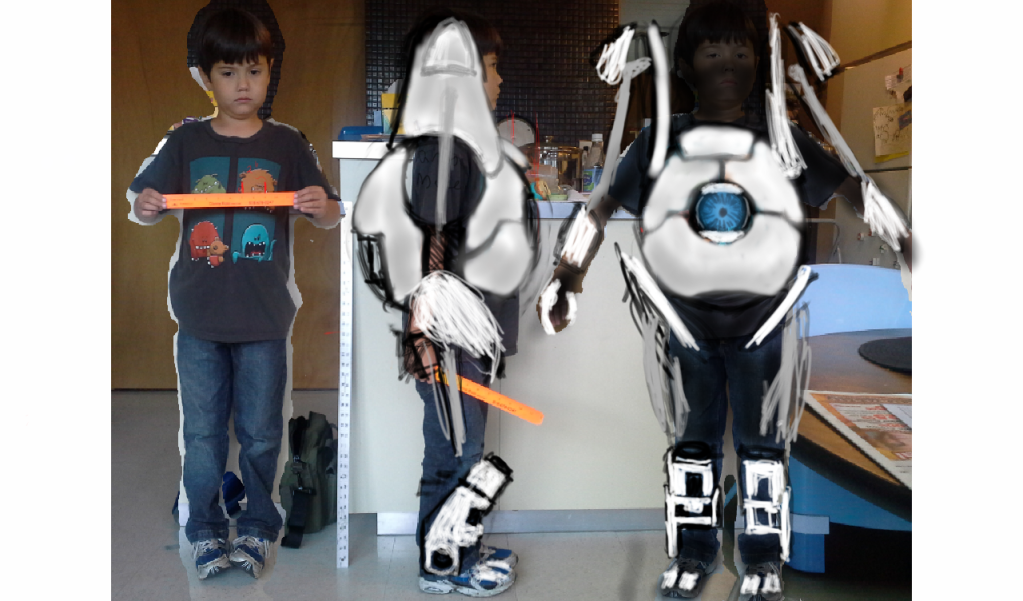
I also did some looking around to see how tall Atlas was next to Chell. I figured the head ball would be between 16 and 18 inches. I wanted to make sure I wasn't going to make the sphere too big so I cut out a circle from foamcore board, and mad sure that my son could reach his arms around it without too much trouble. A 16 inch diameter seemed like the best fit, so I used a 3d model of Atlas extracted from the game and loaded into Maya to start pulling dimensions. I would measure parts in 3d and then compare them to my son's dimensions, and adjust where needed. I also wasn't too exacting with the dimensions, and shapes. I just wanted something that felt about right, since I didn't have tons of time to make everything perfect.
Materials:
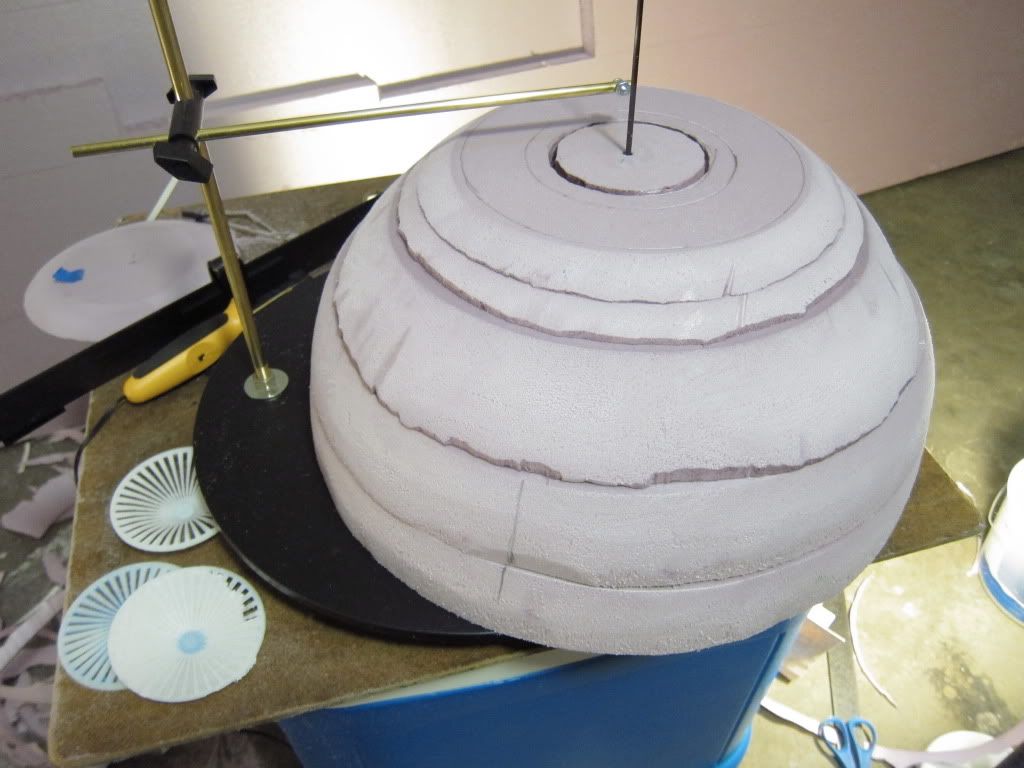
I decided to make the main spherical part of the body out of pink rigid foam insulation boards. I figured out the diameters of the foam disks I would need, cut them out and stack them, and then rough out the sphere using a combination of hot wire knife and sandpaper. I worked with two hemispheres, with a 4 inch gap between that would later be filled with boy.(he ended up being 6 inches thick, but it still worked ok.)
front half:
and back half with penciled in details:
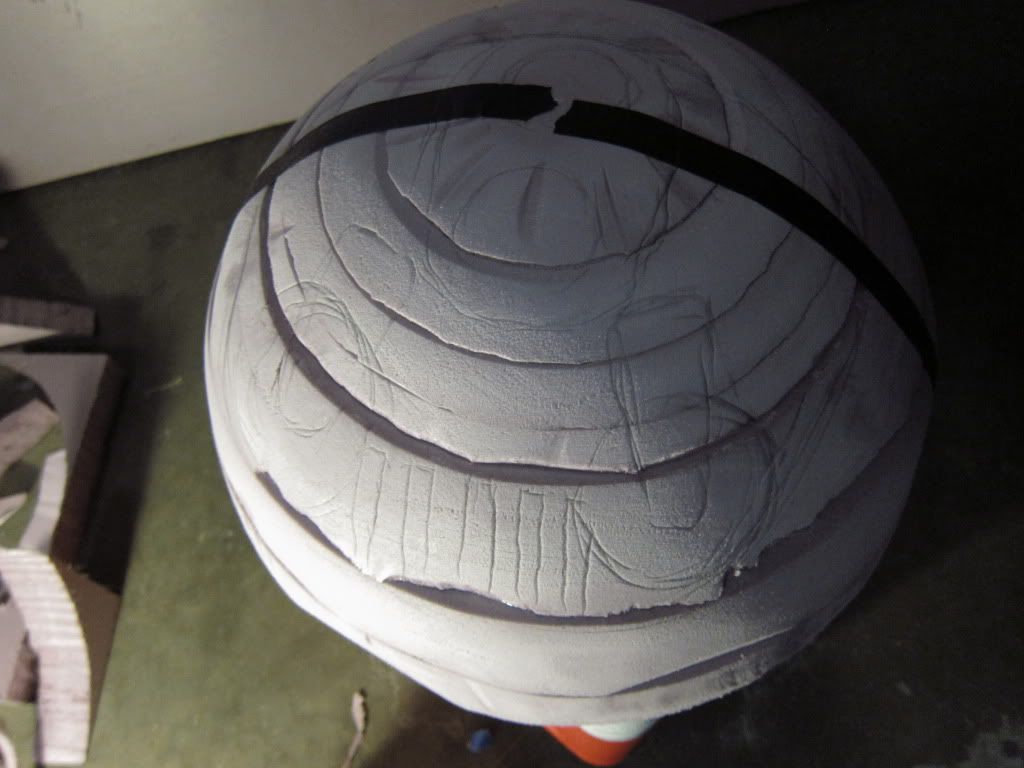
Once the hemispheres were roughed in I then sculpted the details for the front eye, the body panel lines and the mechanical details on the butt.
Once the rough details were sculpted, I filled all the gaps and voids using Free Form Air lightweight epoxy putty. It allowed me to do most of my fill without adding much weight to the costume. I tried doing a thin skim coat of it over the whole thing, but it was difficult to smooth well, so I ended up using apoxie sculpt for that duty. I didn't have time to do a great smoothing job, so the whole thing ended up a little more "homemade" than I would have liked, but at least it was consistent.
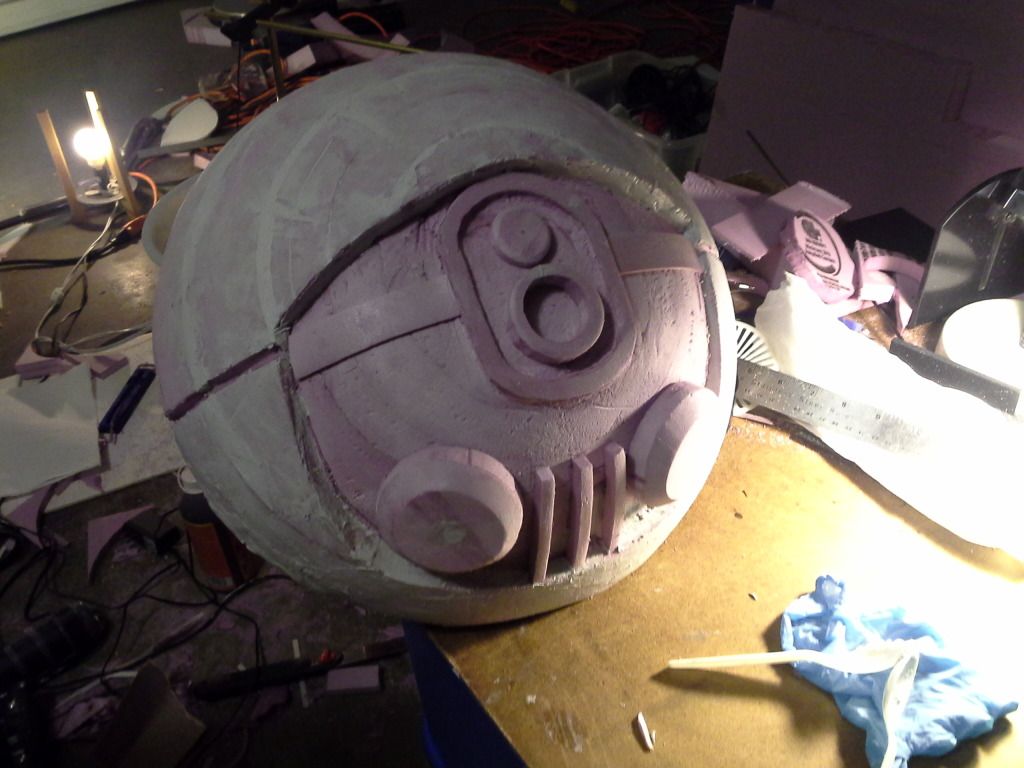
Some of the parts on the sphere didn't get the epoxy protection, like the mechanical bits on the butt, and the inside. I just ended up painting those and calling it good.
The rest of the body panels were made from a combination of volara foam and wonderflex. I used these to create a layered composite that would hold it's shape and be durable.
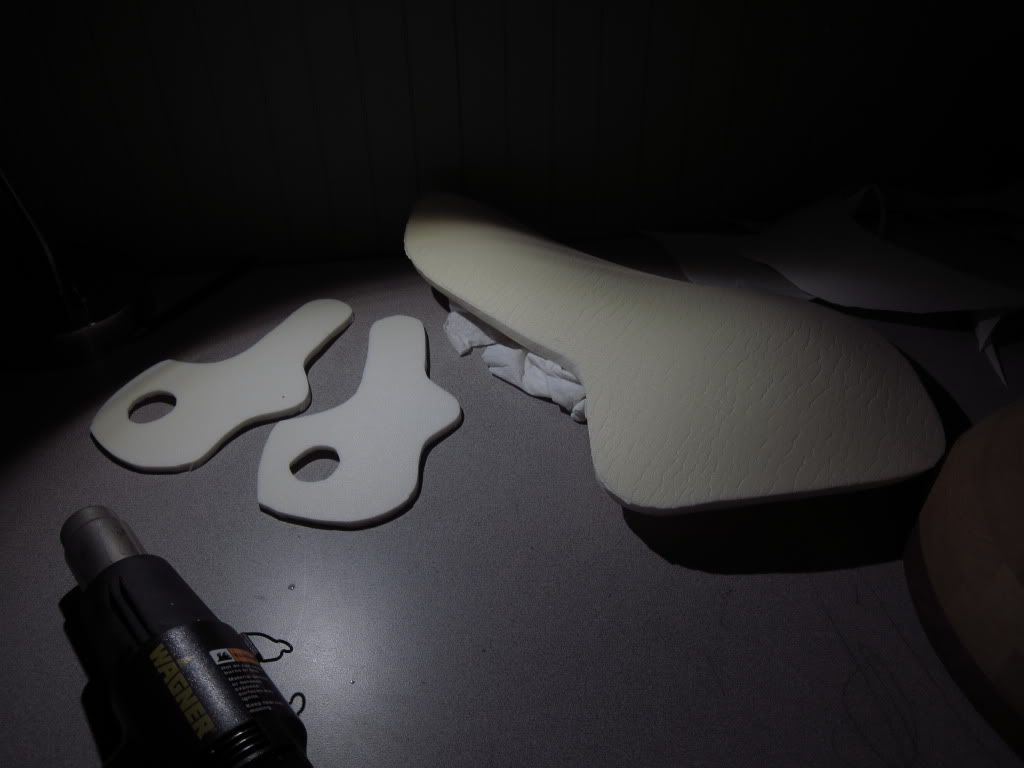
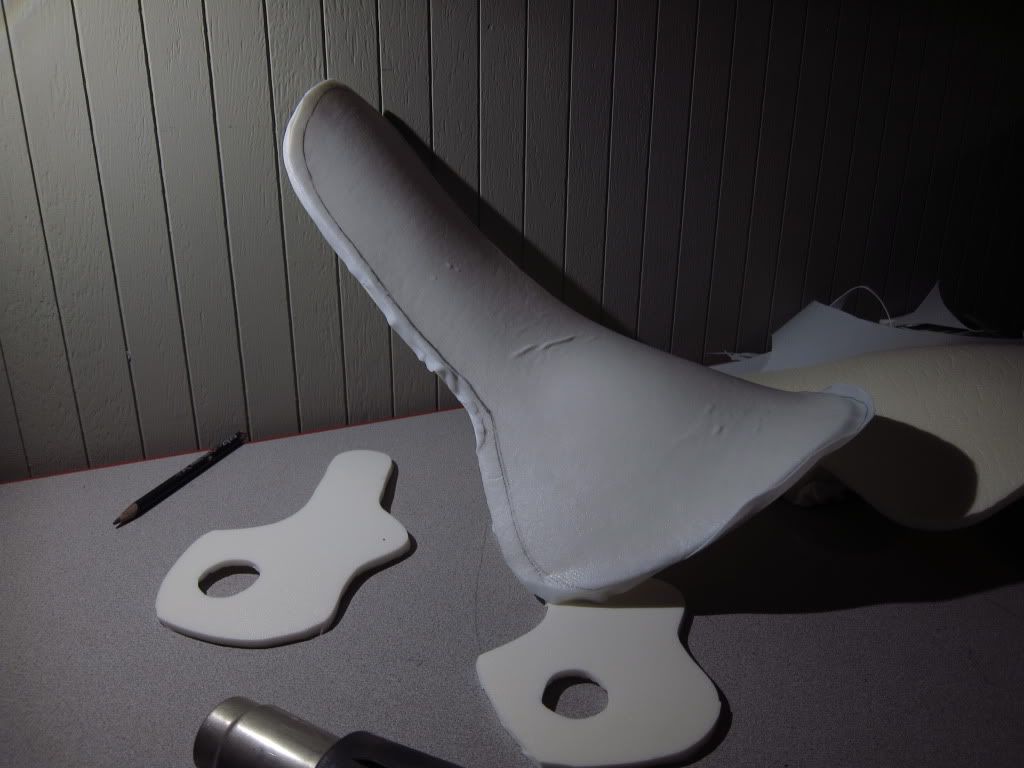
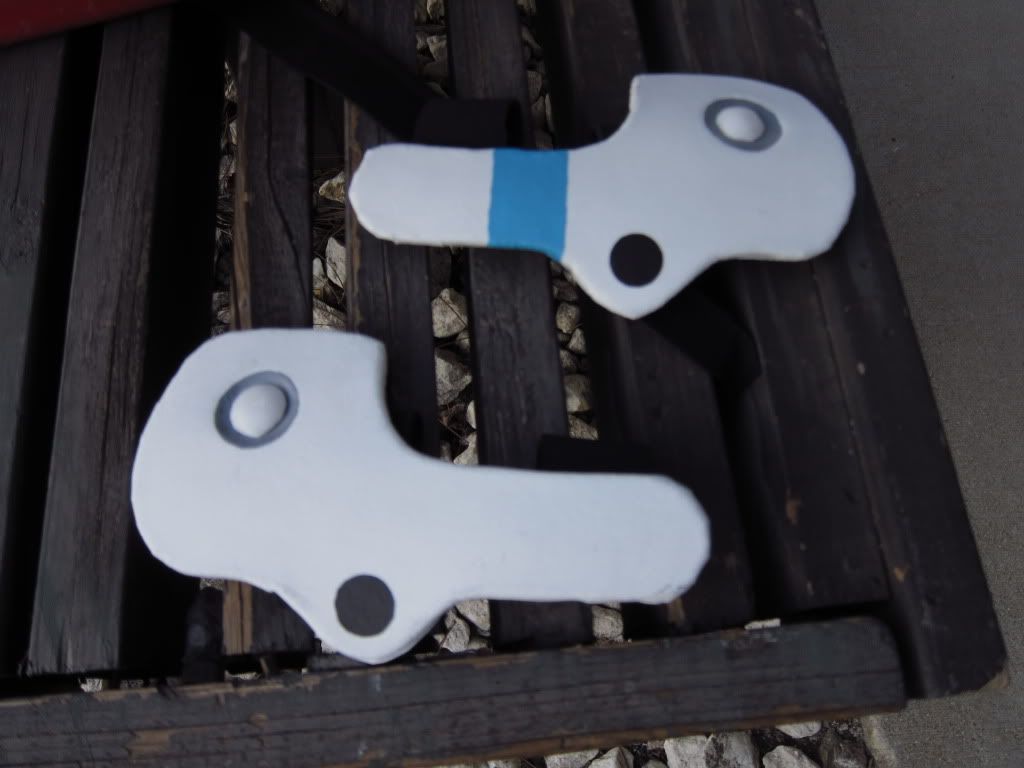
The trickiest part to get right were the shoulder plates that attach to the main body. I did some rough shaping of the volara using my heat gun, and then did wonderflex to one side and hand formed it close to the desired shape while warm. Once it cooled I went back into specific areas to get a better shape. I had a really hard time with this part. I would heat up a section, and it would start detaching itself from the volara. These parts would also have to be fairly strong, as they attach to the sphere body from just one of the lower corners, so would have to deal with the stresses of being worn and having the other shoulder rods and plates attached at the top. I covered both sides of the foam with wonderflex, and then added a couple of additional layers where it would be attached to the sphere. Once it was done I was surprised how stiff the panels were!
To attach the shoulder plates to the main body, I created wedges of rigid foam to act as spacers, and then used 5 min epoxy to tack them together. After that cured I used the lightweight epoxy to support the area. Once that cured it was very rigid and could be bumped around without worrying about it breaking off.
The upper shoulder plates are also volara/ wonderflex composites, with the connecting rods made of wooden dowels glued in place with wonderflex.
The forearm plates are volara/ wonderflex, with neoprene straps for wearing, and the leg pieces are just volara, so that they could flop around a bit more for comfort.
The straps for wearing are cut from cloth backed neoprene, connected to brackets that I made from Shapelock thermoplastic:
Lighting:
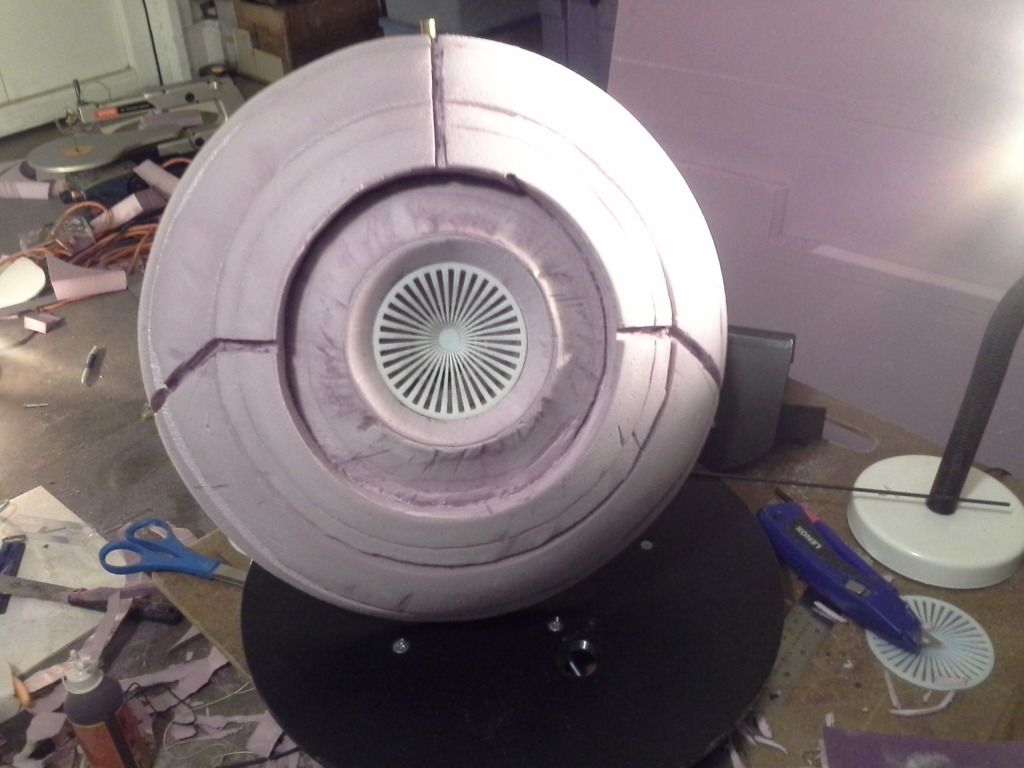
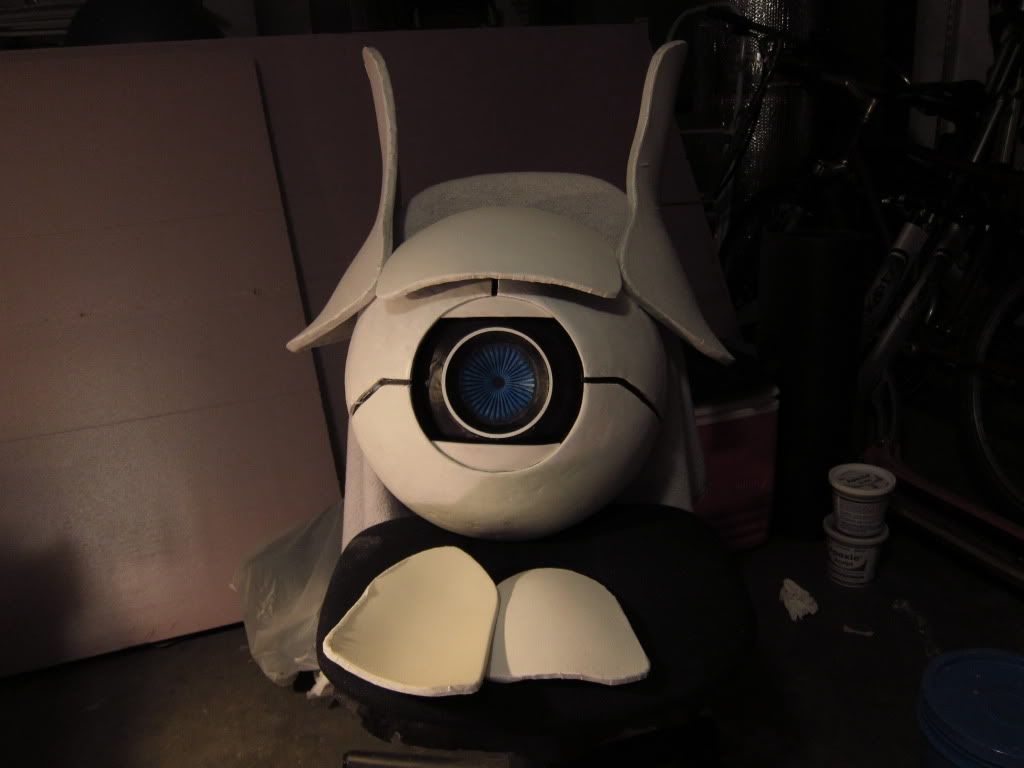
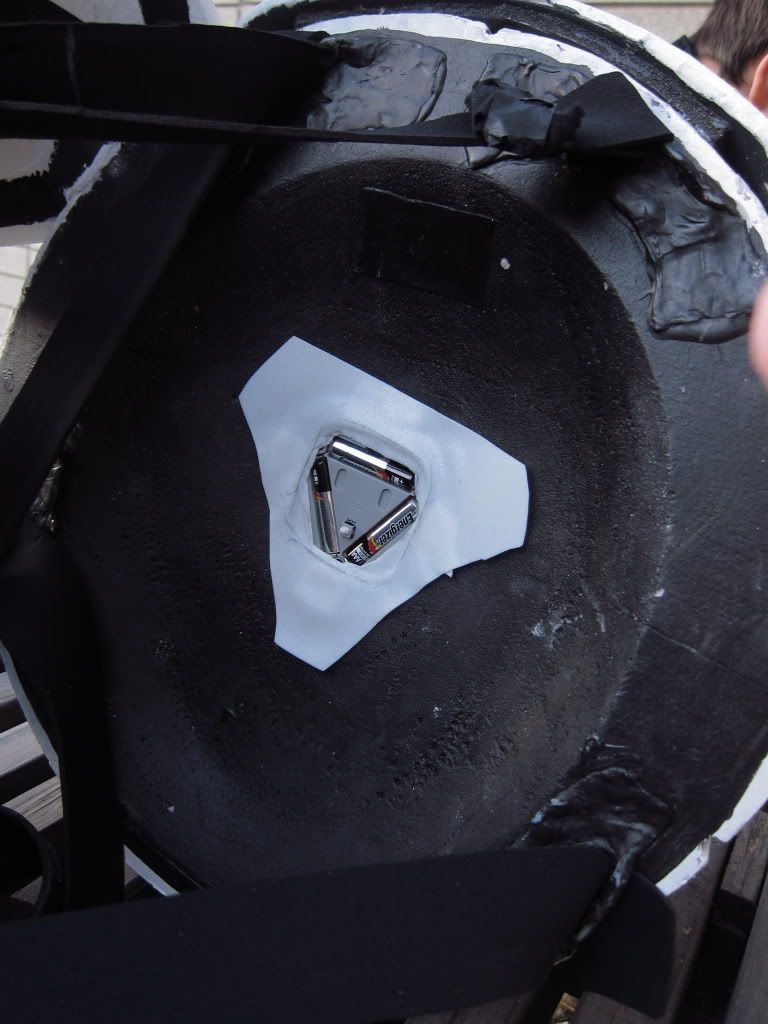
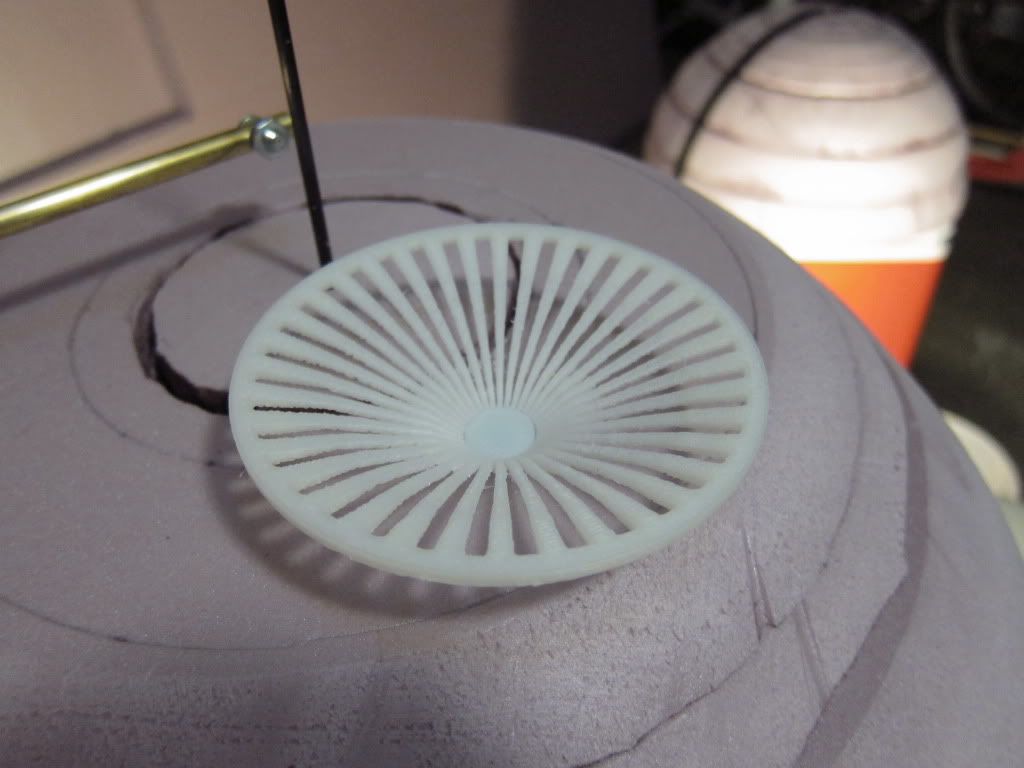
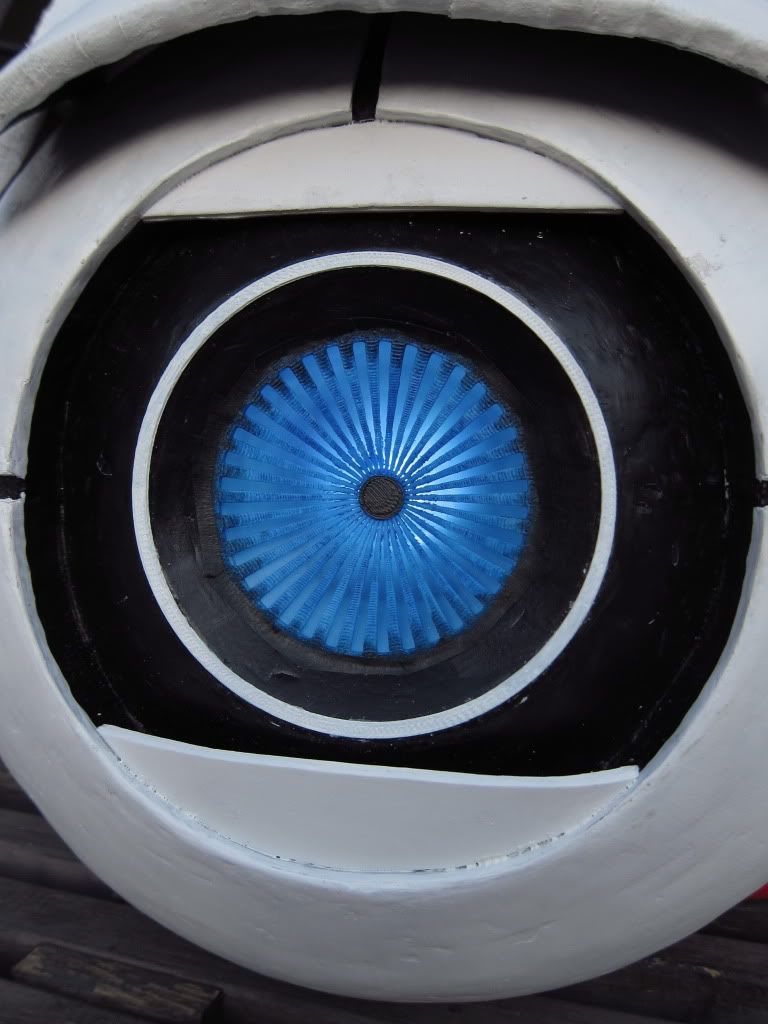
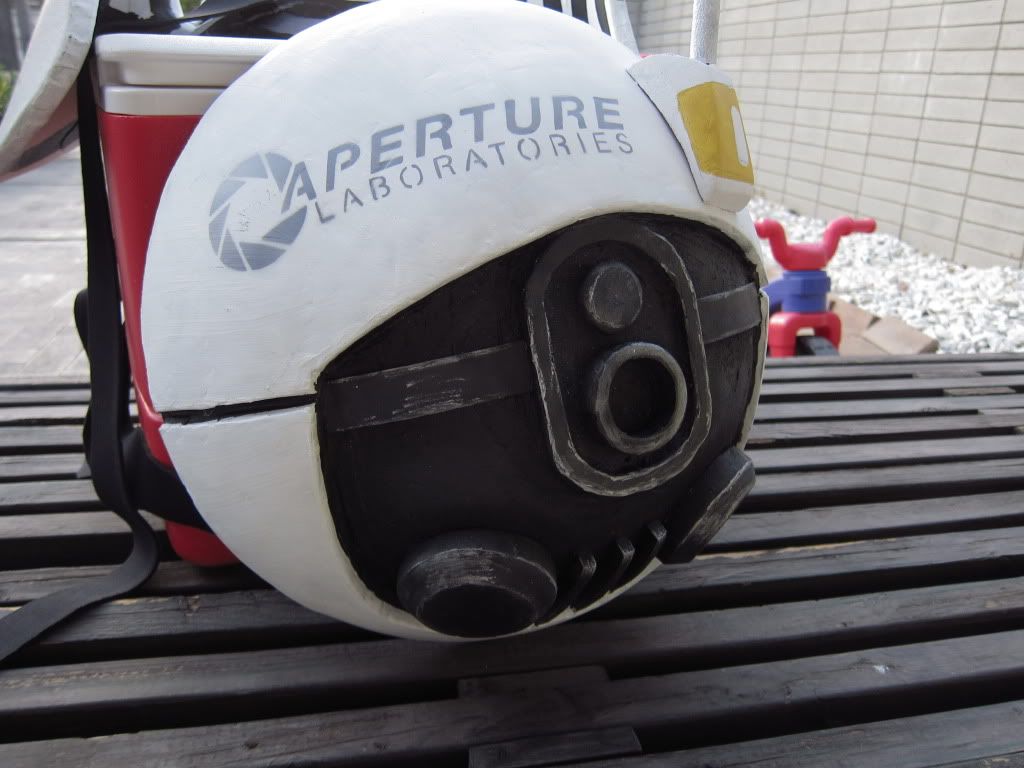
The main light is a led tap night light from target. The on/off switch is on the top of the thing, so I ended up desoldering the switch, cutting a hole in the bottom of the light housing and mounting the switch there. (see above picture) It's held in place by a fixture made of wonderflex, so the whole thing can come out if need be. The front of the eye is an iris piece that I modeled in 3d and printed out on my 3d printer. behind that is a cone that I made from a semi-transparent blue folder divider that acts as the light diffuser. The white ring around the eve is also a 3d printed part.
I was really happy with how the eye light worked out!

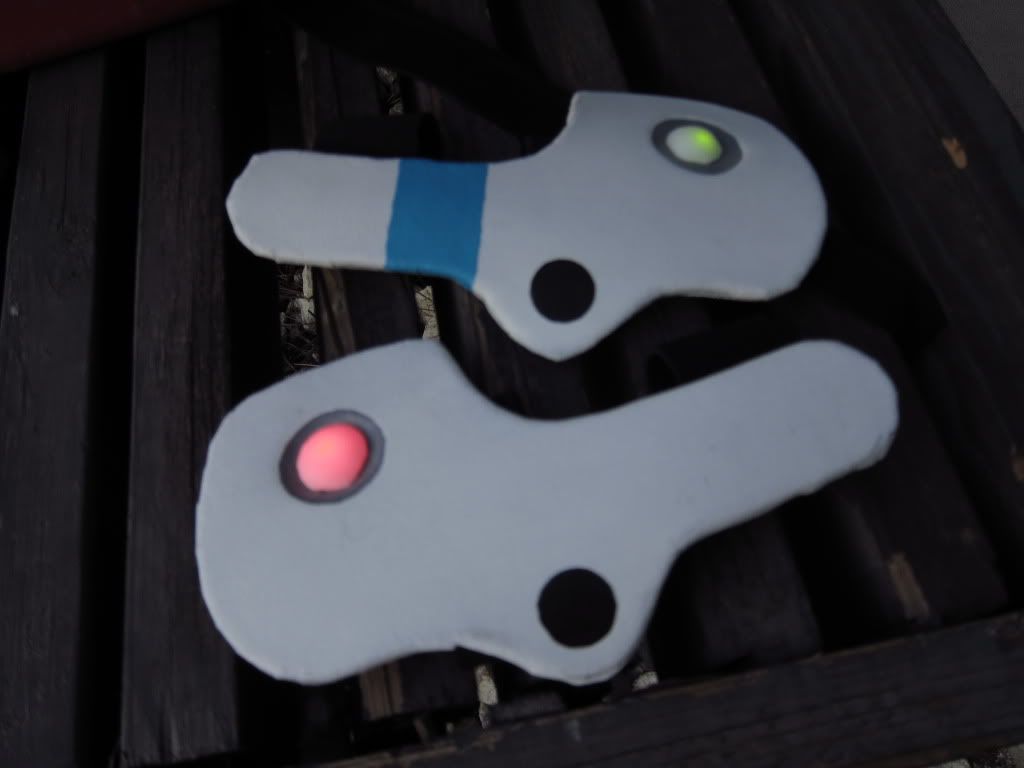
The arm plate lighting is hacked from little led tea lights that I got from Ikea years ago. I had red and white ones. I removed the white led from one and used a green led that I had in my parts bin. The diffuser dome was removed from the lights and I glued the lights to the underside of the plate. I then used some shapelock plastic to create the little diffuser balls in the final costume. The translucent shapelock diffuses led light very well.
Paint:
Most everything was just painted with a brush and acrylic, except the aperture logo. For that I created a stencil cut out of card stock and then used an airbrush to paint. The silver highlights on the butt were painted with a silver paint sharpie. and then knocked back a bit with a light wash of black paint.
Well, I guess that's about it! I wish I would have had more time to get to a few more things. The costume is missing the thigh plates and tubing, the lower legs needed to be built out a bit more. Other things I wanted to do was to get the frame rings on the back and make the correct mount for the antenna, also wanted to add more detail to the upper arm cables, and do more painting on it for weathering and details that I didn't get time to add.
Thanks for looking!
Background was added in post. I created a simple set in Maya using Portal 2 textures, matched the perspective, and rendered with occlusion and depth of field.
My 8 year old son loves playing Portal and Portal 2, and everything about Aperture. (His life-goal right now is to be the one to build Aperture Science for real) He wanted to be Atlas for Halloween, so I figured I would try and build a costume for him. I didn't want to go for something super simple, I wanted him to *look* like Atlas, and it ended up being a bit bigger of a project than I though it would be at first. I started the costume about 3 weeks ago, and worked on it nights from about 9pm until about 2 in the morning. It held up well during trick-or-treating as well as the elementary school parade, where it took quite a few knocks from all the kids bumping into each other.
I don't really have a background in making costumes, but do work as an artist. The only other real costume I have made is a Freddy Kruger glove and face makup that I did over 20 years ago. Building Atlas was really fun, and I learned tons doing this.
The main part of the sphere body is made from pink rigid insulation foam, while the other parts are made of volara foam with wonderflex adhered to it to maintain it's form. The hardest piece to construct were the shoulder plates that attach to the main body. It was tricky getting the right shape, without having the wonderflex peel itself off the volara.
I'm also new here. I hadn't heard of theRPF until a couple of weeks ago. I found it through Volpin props, and also found Tech Magic's thread on the 1/2 scale Atlas sculpture. There are so many talented folks here!
Here are my stages of construction:
This is Atlas, one of the two co-op player characters in Portal 2:
The first thing I did was to start figuring out scale. Atlas is basically a sphere, so I started with figuring out the dimensions of what that should be. I took some photos of my son and did some drawings over the top of them to get the general idea of what I should do.
I also did some looking around to see how tall Atlas was next to Chell. I figured the head ball would be between 16 and 18 inches. I wanted to make sure I wasn't going to make the sphere too big so I cut out a circle from foamcore board, and mad sure that my son could reach his arms around it without too much trouble. A 16 inch diameter seemed like the best fit, so I used a 3d model of Atlas extracted from the game and loaded into Maya to start pulling dimensions. I would measure parts in 3d and then compare them to my son's dimensions, and adjust where needed. I also wasn't too exacting with the dimensions, and shapes. I just wanted something that felt about right, since I didn't have tons of time to make everything perfect.
Materials:
I decided to make the main spherical part of the body out of pink rigid foam insulation boards. I figured out the diameters of the foam disks I would need, cut them out and stack them, and then rough out the sphere using a combination of hot wire knife and sandpaper. I worked with two hemispheres, with a 4 inch gap between that would later be filled with boy.(he ended up being 6 inches thick, but it still worked ok.)
front half:
and back half with penciled in details:
Once the hemispheres were roughed in I then sculpted the details for the front eye, the body panel lines and the mechanical details on the butt.
Once the rough details were sculpted, I filled all the gaps and voids using Free Form Air lightweight epoxy putty. It allowed me to do most of my fill without adding much weight to the costume. I tried doing a thin skim coat of it over the whole thing, but it was difficult to smooth well, so I ended up using apoxie sculpt for that duty. I didn't have time to do a great smoothing job, so the whole thing ended up a little more "homemade" than I would have liked, but at least it was consistent.
Some of the parts on the sphere didn't get the epoxy protection, like the mechanical bits on the butt, and the inside. I just ended up painting those and calling it good.
The rest of the body panels were made from a combination of volara foam and wonderflex. I used these to create a layered composite that would hold it's shape and be durable.
The trickiest part to get right were the shoulder plates that attach to the main body. I did some rough shaping of the volara using my heat gun, and then did wonderflex to one side and hand formed it close to the desired shape while warm. Once it cooled I went back into specific areas to get a better shape. I had a really hard time with this part. I would heat up a section, and it would start detaching itself from the volara. These parts would also have to be fairly strong, as they attach to the sphere body from just one of the lower corners, so would have to deal with the stresses of being worn and having the other shoulder rods and plates attached at the top. I covered both sides of the foam with wonderflex, and then added a couple of additional layers where it would be attached to the sphere. Once it was done I was surprised how stiff the panels were!
To attach the shoulder plates to the main body, I created wedges of rigid foam to act as spacers, and then used 5 min epoxy to tack them together. After that cured I used the lightweight epoxy to support the area. Once that cured it was very rigid and could be bumped around without worrying about it breaking off.
The upper shoulder plates are also volara/ wonderflex composites, with the connecting rods made of wooden dowels glued in place with wonderflex.
The forearm plates are volara/ wonderflex, with neoprene straps for wearing, and the leg pieces are just volara, so that they could flop around a bit more for comfort.
The straps for wearing are cut from cloth backed neoprene, connected to brackets that I made from Shapelock thermoplastic:
Lighting:
The main light is a led tap night light from target. The on/off switch is on the top of the thing, so I ended up desoldering the switch, cutting a hole in the bottom of the light housing and mounting the switch there. (see above picture) It's held in place by a fixture made of wonderflex, so the whole thing can come out if need be. The front of the eye is an iris piece that I modeled in 3d and printed out on my 3d printer. behind that is a cone that I made from a semi-transparent blue folder divider that acts as the light diffuser. The white ring around the eve is also a 3d printed part.
I was really happy with how the eye light worked out!
The arm plate lighting is hacked from little led tea lights that I got from Ikea years ago. I had red and white ones. I removed the white led from one and used a green led that I had in my parts bin. The diffuser dome was removed from the lights and I glued the lights to the underside of the plate. I then used some shapelock plastic to create the little diffuser balls in the final costume. The translucent shapelock diffuses led light very well.
Paint:
Most everything was just painted with a brush and acrylic, except the aperture logo. For that I created a stencil cut out of card stock and then used an airbrush to paint. The silver highlights on the butt were painted with a silver paint sharpie. and then knocked back a bit with a light wash of black paint.
Well, I guess that's about it! I wish I would have had more time to get to a few more things. The costume is missing the thigh plates and tubing, the lower legs needed to be built out a bit more. Other things I wanted to do was to get the frame rings on the back and make the correct mount for the antenna, also wanted to add more detail to the upper arm cables, and do more painting on it for weathering and details that I didn't get time to add.
Thanks for looking!
Last edited: