Severance Candle Conversion

Astyanax

Master Member
RPF PREMIUM MEMBER
Hi all:

I haven't shared this info publicly before, but with a friend about to make one, I thought I'd post the steps here.

First, a reference pic of Gemma's Candle from Severance:

severance.s01e04.1080p.web.h264-glhf.mkv_snapshot_42.51_[2024.04.29_21.50.46].jpg

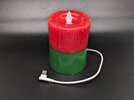
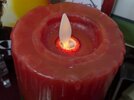
Here's a pic of the final project (cost about $30):

PXL_20240809_044353429.jpg

And here's a video of the candle in action:


The next couple posts will show my steps to converting it from a real candle to USB-powered, flameless "always-on."
 
Parts

This project consisted of only three parts:
  1. Red and Green Candle
    Purchased from A. Dodson's:

    Don't fall for the Wayfair version...it's too big!

  2. Flameless Taper Candles with flickering and moving flame (and remote):
    From Amazon:

    I do NOT recommend you necessarily order the red pair, because they are more expensive, take forever to arrive, and really only the outer wax appears to be red.

  3. A spare USB cable
    From anywhere.
 
Last edited:
Prepping the Candle

(Sorry for the lack of pics here...didn't document this part, but it's easy!)
  1. Flip It: First, the candle had to be turned upside-down, as it's supposed to be red on top. Then, I pulled the wick through the red side a half-inch or so with needle-nose pliers, so that it could be lit from that end.

  2. Light It: I lit the candle for about 20 minutes or so, so that it would melt an "indentation" around the wick and make it look more authentic.

  3. Drip It: While I was waiting for the melted indentation to form, I used a pipette to pick up some of the melted wax and drip it around the edges (don't over do it!).

  4. Clean it: Once done, I found that there was a bit of a mess around the outside, so I did the following:
    - Popped off or scratched off some of the extra wax trails where I overdid it a little.
    - Ran a lighter very quickly around the outside to smooth any scratches or indentations.
    - Rubbed it with my fingers to bring back the natural waxy shine where it needed it.
 
Prepping the Flameless Tapers

Adapting them could not be easier! I might order a couple more just to have in reserve for other projects!

Quick analysis:

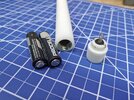
The bottom is a spring-loaded pushbutton to turn the candle on.
My phone over-corrected, but they are medium bright. And they wiggle back and forth irregularly.
The bottom unscrews and it accepts 2 AA batteries (not included)

PXL_20240430_222421074.jpg PXL_20240430_222450352.MP.jpg PXL_20240430_222528799.jpg

At the top, you can see bits of the mechanism, and the yellow LED that illuminates the flame from behind (or the front). So the candle definitely has a front and back that are important to keep in mind.

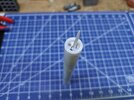
PXL_20240430_222551040.jpg PXL_20240430_222918495.jpg

Disassembly:

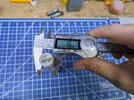
The candle's outer 1/8" is wax, which shaved off very easily with a sharp box cutter. This left a metal and plastic inner core that is under 17mm in diameter.
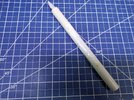
PXL_20240430_222926025.jpg PXL_20240430_223012018.jpg

The metal and plastic segments simply unscrewed from each other!
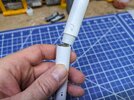
PXL_20240430_223030710.jpg

This left a small circuit board sticking out from the bottom. It is well secured, and no need to do any more surgery at this point!
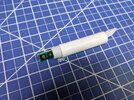
PXL_20240430_223105320.jpg

On this side of the board you can see the two connection points. The spring serves as your negative, and the squarish bracket on the end is the positive.
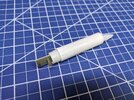

PXL_20240430_223121875.jpg

Conversion:

I simply took a spare USB power cable, cut it and stripped the end inch or two, connected the black wire to the spring and the red wire to the bracket, and it works great! I will add a bit of solder after I've threaded it all through the candle.
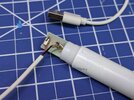
PXL_20240430_225041319.jpg

Once connected, I bathed it in hot glue so that I wouldn't have to do any soldering.


NOTE: this candle does indeed only expect 3V of power, and raw USB gives it 5V. That's fine (in fact, the light is a little brighter), but that might shorten the life of the candle over the long term. 3 volts' worth of batteries are going to be more gentle on the components.

And that's it! The spring serves also as a tensioner, when the candle will be slid into its hole in the pillar candle.

Also, these candles come with a remote, which still works! I love that you can have the flame move or give it a stationary flickering instead!
 
Last edited:
Assembly:

(Again, apologies for lack of photos, but it's easy!)
  1. I pulled out the wick with needle-nose pliers. It did need some encouragement, but you want it out before drilling the core. This leaves a nice guide hole for drilling.

  2. I drilled all the way through the candle with an 11/16" Forstner bit. Do this in a paper bag to catch the shavings!

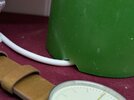
  3. I used a hot soldering iron to melt a horizontal half-hole in the bottom, making room for the power cord (not necessary if using batteries).
    PXL_20240923_144718912.jpg

  4. With a red Sharpie, I VERY CAREFULLY colored some of the white plastic on the top of the taper. Not sure this was necessary, as the "flame" is bright!
    PXL_20240923_144505298.jpg

  5. I inserted the flameless taper (with USB cord attached) from the top down. Friction held it in place; no glue was necessary!
And done!

Happy to answer questions. Thanks for reading!
Bill
 
Back
Top