Tyr
Member
Possibly the most useful tool there is for EVA foam builds is the trusty scroll saw.
Today I will explain some of aspects of using the saw such as:
-Safety
-Templates and Spacing
-How to cut your parts
-How to get the desired angles
-How to choose your saw and what settings to use it at
First and foremost, I would like to discuss safety.
As with any power tool you must take great care to avoid injuring yourself or damaging your equipment.
Before changing the angle of your table or adjusting the blade and holding foot always ensure that there is no power running to the machine, It only takes one faulty switch to lose a finger.
This can be done by unplugging it but I find it much easier to use either a power cord with a built in switch or a power strip like those used for computers.
I personally use a power block extension cord which has its own switch:

Another thing to keep in mind is the holding foot of your saw:
It is adjustable to the angle of your table as well as up and down to hold the piece you are cutting in place.
Always be sure to check that this is flush against the part you are cutting.
Doing so will prevent the part from wiggling with the blade thus reducing the chance of the cut missing your line and greatly increases the safety of your fingers.
This may seem like an extra step for each cut but EVA foam is rarely of uniform thickness, even pieces cut from the same sheet.
Always remember that a scroll saw is a reciprocating saw, meaning that it only cuts on the down stroke. This is important to know so that you do not try to force your piece through rather than feeding it through the saw.
Never place your fingers within the boundaries of the foot.
Follow all other tips as suggested by the instructions that come with your saw.
In high school I almost lost a finger and thumb in a table saw accident caused by carelessness, so I cannot stress safety enough.
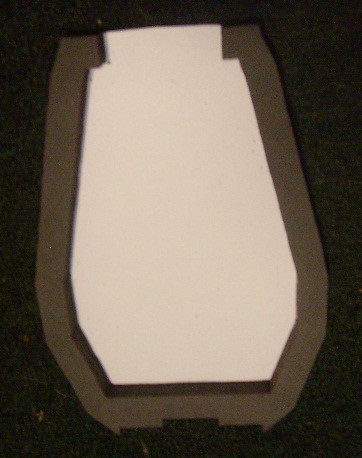
When planning your template layouts be sure to give proper spacing to parts, allowing for 1/2-1 inch spacing for each piece:

This may seem wasteful but it will save you a lot of improperly cut parts thus saving you foam in the long run.
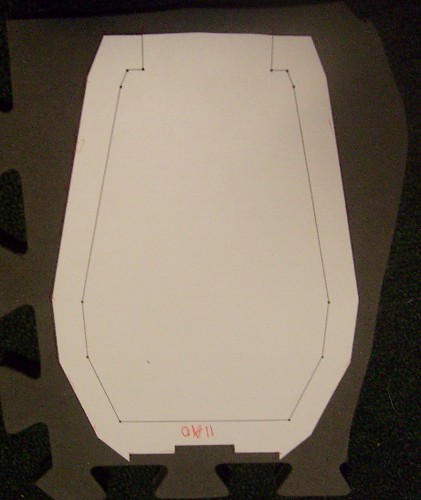
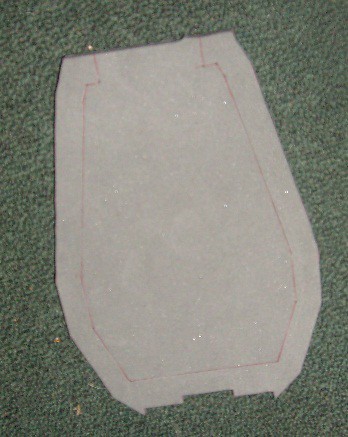
It is also a good idea to keep your templates for reference on your angles, seen here in red pen:
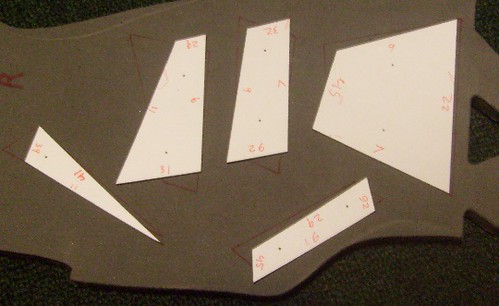
In this case, the traced shapes are reversed from the templates thus making this an even more important time to have your templates nearby.
Before cutting your parts you should know that the style of blade(I haven't tried a spiral cut but I will soon) and amount of teeth per inch(TPI) does not affect the smoothness of the cut very much. However, the speed of your saw can greatly alter the edges. The best speed to use for the foam is the lowest available, this also helps to reduce unnecessary vibration.
If you do not have a table that is sturdy enough to handle the vibrations produced by the saw it is perfectly acceptable to use your saw while it is on the floor(A cushion to sit on is highly suggested). A vinyl, concrete or other hard surface is best but short carpet or rugs also work.
When it is time to cut your parts first cut them all at a 0 degree angle with proper spacing, this step is known as the precut:

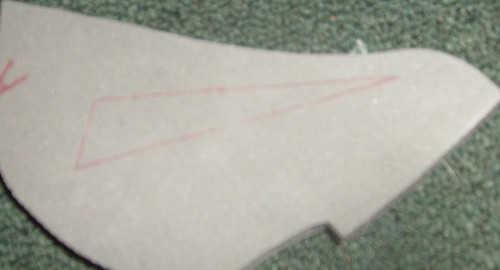
For triangular pieces it is important to leave roughly 1 inch of extra foam:
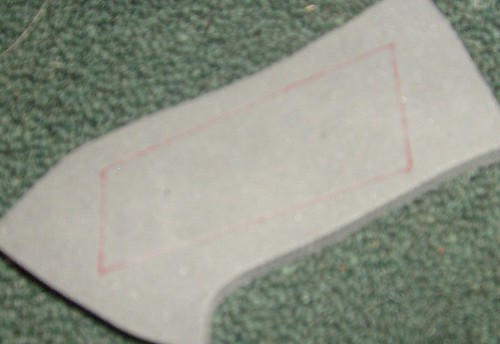
Pieces that are less than an inch wide should be given extra foam to their thinner ends:
These precuts are essential if you want to have a smooth cut on your traced lines and also aid in keeping your fingers away from the blade.
The triangular and thin piece precuts are there to give you extra grip on both sides of the cut.
The foam isn't a rigid material so the blade will try to fold it over on itself if the edges are not held taut between two points, the cut lines that are of 2 inches or more on parts with at least 4 sides do not need this as the piece should stay firmly in place with only one side being held.
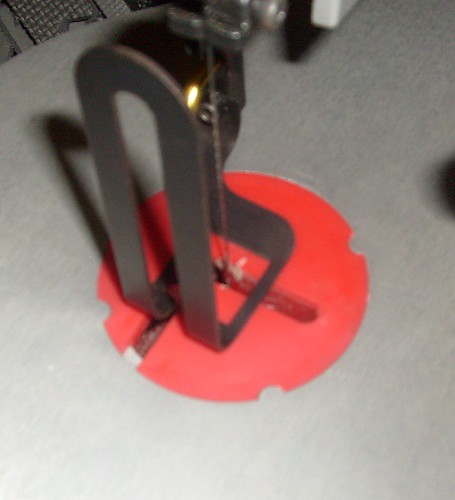
If you need to cut a piece that resembles a U:
You should first begin by cutting the outer edges, especially important if they are angled:
Follow this by cutting the inner edges:
I use my own 3D renders to calculate my cutting angles but for those of you who do not have access to that method there are a few standard angles that I would suggest.
From smallest to largest: 0, 11, 23, 34, and 45. These correspond to: flush cut, 1/8 inch cut, 1/4 inch cut, 3/8 inch cut, and 1/2 inch cut.
For the angles that would be "mountains" folds in Pepakura, make your cut on the side of the table lowest to the ground.
For those that would be "valley" folds, make your cuts on the side of the table away from the ground.
*I will update with images when I have them*
As incredibly useful as a scroll saw is, some of your angles may need clean up afterward, this is the perfect time to use a sharp X-Acto knife.
When choosing your saw there are a few factors to keep in mind.
Keep your eyes open for a saw with a cast iron table, this is normally only available on the pricier saws and the few I've seen at low cost aren't of adequate quality.
Die cast tables are acceptable and will work for projects other than EVA foam without any problems.
Machine pressed tables should be avoided if you intend to use your saw for anything other than foam.
Some saws come with articulated work lights, these are incredibly useful to have but an adjustable desk lamp can be used instead.
It isn't suggested to buy a saw for less than $100, though accepted if money is an issue.
My saw was purchased for just under $130 and it is of a well known maker and a quality machine.
Don't rely on online reviews too much, the one I have has quite a few bad reviews but I haven't had a single problem with it.
Most stores that sell power tools have them on display so check them out and compare them to other options before deciding.
This is the saw I use but I would still suggest looking at all of your choices:
Shop Skil 16" Variable Speed Scroll Saw at Lowes.com
I will update and elaborate as I continue my builds and learn new things.
Feel free to add any helpful info you may have on the subject.
Today I will explain some of aspects of using the saw such as:
-Safety
-Templates and Spacing
-How to cut your parts
-How to get the desired angles
-How to choose your saw and what settings to use it at
First and foremost, I would like to discuss safety.
As with any power tool you must take great care to avoid injuring yourself or damaging your equipment.
Before changing the angle of your table or adjusting the blade and holding foot always ensure that there is no power running to the machine, It only takes one faulty switch to lose a finger.
This can be done by unplugging it but I find it much easier to use either a power cord with a built in switch or a power strip like those used for computers.
I personally use a power block extension cord which has its own switch:
Another thing to keep in mind is the holding foot of your saw:
It is adjustable to the angle of your table as well as up and down to hold the piece you are cutting in place.
Always be sure to check that this is flush against the part you are cutting.
Doing so will prevent the part from wiggling with the blade thus reducing the chance of the cut missing your line and greatly increases the safety of your fingers.
This may seem like an extra step for each cut but EVA foam is rarely of uniform thickness, even pieces cut from the same sheet.
Always remember that a scroll saw is a reciprocating saw, meaning that it only cuts on the down stroke. This is important to know so that you do not try to force your piece through rather than feeding it through the saw.
Never place your fingers within the boundaries of the foot.
Follow all other tips as suggested by the instructions that come with your saw.
In high school I almost lost a finger and thumb in a table saw accident caused by carelessness, so I cannot stress safety enough.
When planning your template layouts be sure to give proper spacing to parts, allowing for 1/2-1 inch spacing for each piece:
This may seem wasteful but it will save you a lot of improperly cut parts thus saving you foam in the long run.
It is also a good idea to keep your templates for reference on your angles, seen here in red pen:
In this case, the traced shapes are reversed from the templates thus making this an even more important time to have your templates nearby.
Before cutting your parts you should know that the style of blade(I haven't tried a spiral cut but I will soon) and amount of teeth per inch(TPI) does not affect the smoothness of the cut very much. However, the speed of your saw can greatly alter the edges. The best speed to use for the foam is the lowest available, this also helps to reduce unnecessary vibration.
If you do not have a table that is sturdy enough to handle the vibrations produced by the saw it is perfectly acceptable to use your saw while it is on the floor(A cushion to sit on is highly suggested). A vinyl, concrete or other hard surface is best but short carpet or rugs also work.
When it is time to cut your parts first cut them all at a 0 degree angle with proper spacing, this step is known as the precut:
For triangular pieces it is important to leave roughly 1 inch of extra foam:
Pieces that are less than an inch wide should be given extra foam to their thinner ends:
These precuts are essential if you want to have a smooth cut on your traced lines and also aid in keeping your fingers away from the blade.
The triangular and thin piece precuts are there to give you extra grip on both sides of the cut.
The foam isn't a rigid material so the blade will try to fold it over on itself if the edges are not held taut between two points, the cut lines that are of 2 inches or more on parts with at least 4 sides do not need this as the piece should stay firmly in place with only one side being held.
If you need to cut a piece that resembles a U:
You should first begin by cutting the outer edges, especially important if they are angled:
Follow this by cutting the inner edges:
I use my own 3D renders to calculate my cutting angles but for those of you who do not have access to that method there are a few standard angles that I would suggest.
From smallest to largest: 0, 11, 23, 34, and 45. These correspond to: flush cut, 1/8 inch cut, 1/4 inch cut, 3/8 inch cut, and 1/2 inch cut.
For the angles that would be "mountains" folds in Pepakura, make your cut on the side of the table lowest to the ground.
For those that would be "valley" folds, make your cuts on the side of the table away from the ground.
*I will update with images when I have them*
As incredibly useful as a scroll saw is, some of your angles may need clean up afterward, this is the perfect time to use a sharp X-Acto knife.
When choosing your saw there are a few factors to keep in mind.
Keep your eyes open for a saw with a cast iron table, this is normally only available on the pricier saws and the few I've seen at low cost aren't of adequate quality.
Die cast tables are acceptable and will work for projects other than EVA foam without any problems.
Machine pressed tables should be avoided if you intend to use your saw for anything other than foam.
Some saws come with articulated work lights, these are incredibly useful to have but an adjustable desk lamp can be used instead.
It isn't suggested to buy a saw for less than $100, though accepted if money is an issue.
My saw was purchased for just under $130 and it is of a well known maker and a quality machine.
Don't rely on online reviews too much, the one I have has quite a few bad reviews but I haven't had a single problem with it.
Most stores that sell power tools have them on display so check them out and compare them to other options before deciding.
This is the saw I use but I would still suggest looking at all of your choices:
Shop Skil 16" Variable Speed Scroll Saw at Lowes.com
I will update and elaborate as I continue my builds and learn new things.
Feel free to add any helpful info you may have on the subject.
Last edited: