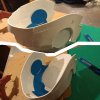
Our "Iron Man" helmet...

lharles

Sr Member
Been working on this off & on for a few weekends now. Mostly cause' I can't make much progress on paint testing on the other main thing on my bench, ("http://www.therpf.com/f9/our-jurassic-park-cryocan-progress-195928/").

Started with this thread: "http://www.therpf.com/f24/jfcustoms-foam-files-148889/" -- but wound up with another unfold that I can't seem to find the origin of, (I think it's an unfold of a file from 'Zabana'...but I'm not sure. I'd never take credit for somethin' I didn't do, so I'll just say I think it's a modification of his file for craft foam.). :) It's supposed to wind up being a Mark III helmet...

Progress to this point:

1265660_291810844299711_693215200_o.jpg 1796738_291810860966376_803176916_o.jpg 1500872_291810884299707_1180417208_o.jpg
1519398_292194324261363_1016809225_o.jpg 1669690_292194370928025_776349932_o.jpg 1511941_292458527568276_959287159_o.jpg

1781349_292908110856651_48034991_o.jpg 1534991_294621500685312_383174157_o.jpg 1518474_294621590685303_48483665_o.jpg
1557140_294621690685293_595853882_o.jpg 1801349_294940820653380_2122096676_o.jpg 1618233_294940857320043_357449034_o.jpg


Next - figure out a non-toxic, low odor/fumes way of hardening the interior o' the helmet, (I'm thinking of a similar material to what I used on my parts o' my HIC - Elmer's 'Glue All' with flour mixed in to thicken it...took forever to dry, but worked very well).

Then, of course, the exterior & fine detailing. I expect this thing will look so nice when I've finished that folks will suspect it was made by a kindergartener. :D

As always, I hope someone gets some use outta' what I'm stumbling through here...


Take care, all!
 
Thanks. :) It's my first go round' with makin' a helmet, let alone making something sturdy with craft foam. We'll see how it turns out...

[...& I really do hope it turns out better than it would if I were a kindergartener. :D ]
 
Looking at your pics and reading your description, I think you're using the same file I'm trying to build mine from. Do you have any close up pics of the forehead/widow's peak area? I've been having difficulties getting that area to work on my test builds, so I'm interested in what you did there.
 
Looking at your pics and reading your description, I think you're using the same file I'm trying to build mine from. Do you have any close up pics of the forehead/widow's peak area? I've been having difficulties getting that area to work on my test builds, so I'm interested in what you did there.

What I found in my unfold is that several REALLY small bits weren't actually over on the print area, (there's a bunch of bits off to the far left in the printing pane), & I printed those out & sorta' doped out how to place them properly. They do show linked to the 3D model, you just need to hover over the area that seems to be 'missing', click there, & it'll select the piece in the printing pane. I have both Pepakura viewer & designer so I was able to bounce back & forth between them & get that figured out...

...if we're talking about the same model, of course.

I'll see if I can get a better picture of that area for you. I'm not fully satisfied with the initial way it turned out on mine, but I planned on cleaning it up as I went along in the process... :)
 
"Iron Man" mark III helmet - in progress - as of Apr. 12, 2014. As mentioned previously, I'm trying to use minimal toxic material, (resin, bondo, etc). I've done so - up to this point. Paint will definitely throw that out the window though...& I think glazing putty is on the near horizon for this build too... :)

MkIII-apr-12-14.png
 
So, I shared my concoction for hardening the craft foam helmet in another thread a while back - here - & am planning on digging in on this again in the next couple of weeks. Gotta' dig in on stuff that I have partially finished for a while. I foresee a great deal of sanding in my future... :)

If anyone makes use o' my, er, glop, (first name that comes to mind), for hardening, I'd be curious as to what their thoughts are.

Anyway...

Interested in this technique... a few questions...

How smooth does it apply on? Does it require sanding for a smooth finish?

How much weight does it add?

What's the working time for this? As in how long do you have to apply it before it starts to harden and you can't play with it anymore? This was always my biggest issue with rondo/fiberglass.

So is it rock hard or does it have some flex? How hard would it be to cut or drill into it?

How does it take to painting?

Well, it applies reasonably smooth, but it sort of depends on how it's applied & the thickness, (the amount of water used to thin it, basically). I wound up using...plastic knives. :) It definitely takes on a smooth finish with sanding. You can get a reasonably smooth finish without sanding, but it would definitely require some sanding for a finished look.

Working time for a REALLY thick coat, (which I used on the interior of the helmet), is 3 days, at least. I sort of had to check in on it & sculpt it as I went along. Thinner coats dry in a few hours. The REALLY thick coats have some appreciable shrinkage. Multiple thin coats seem to overcome this. Lesson learned as I went along.

It's pretty hard. There is a little flex but not a ton. Enough for it to be handled pretty roughly, but it will crack if flexed with too much force or dropped from a good height. That being said, I've dropped the helmet at least twice & repaired it with the same material & it mends to itself wonderfully.

Cutting or drilling is no problem. I've used a utility knife on it to shape it & it carves off pretty easily. If you use too much force it will crack & flake though.

At this point I have not done ANY paint testing. That is the one thing I can't provide any information on. Sorry. I have painted other stuff that I've used water putty on & that worked fine. Considering the rest of the additives that I've used in other things take paint well, (water doesn't, of course), I suspect it wouldn't be a problem.

Again, I really was/am in the testing phases with the stuff. I was trying to find a reasonably non-toxic way to harden the helmet & this is the concoction I came up with. You should give it a go if you think it might work for you. I'd love to get someone else's input on it.

My take on it is that it has potential. Not sure if it would work for every variant of stuff in the universe, but it would certainly work for something you were making a one-off of, for display - I think. :)
 
Back
Top