Unrelated introduction:
So a little bit of explanation... I'm currently a woodworker (for the most part) however, I used to be very "into" art. In general, I've always liked to manufacture things rather than purchase, or innovate and create something myself which I couldn't find .
Anyways, several months ago, a friend of mine asked me to build him something, knowing that I like to build stuff. It was for a cosplay, so that was my first venture into costuming. During this time, I'd been in a bit of a rut in regards to inspiration and motivation to actually produce. I began to look up media for costuming, building, etc... and discovered Adam Savage's portions on the channel "Tested", which in turn introduced me to this site.
Long story short, it got me back into the mood, since then I've produced a few more pieces, and I'd like to showcase some of my work and get advice from those more experienced.
Content regarding the piece I've made:
So I watched Frozen the other day... Loved it, as many do. Pulled out some sculpey the other night wanting to make something, decided to go with a Frozen character, narrowed that down to Olaf

Thats the image I used as reference.
So I started from the ground up this time. Wasn't too concerned about scale in regards to his actual size (how big he'd be if he actually existed) just scaled it off of the image I had displayed on my monitor. Its approximately 65% of the size of the image, overall size (excluding the base) is about 53/4"
to the end of his hair twiggy things.
Not super great at sculpting yet. I've worked with hard materials more than soft. Carving stone and wood comes a little more naturally for me then coaxing a blob into a shape. I have shaky hands as well, so being able to anchor a tool before removing/moving material helps, which I can't really do with soft stuff.
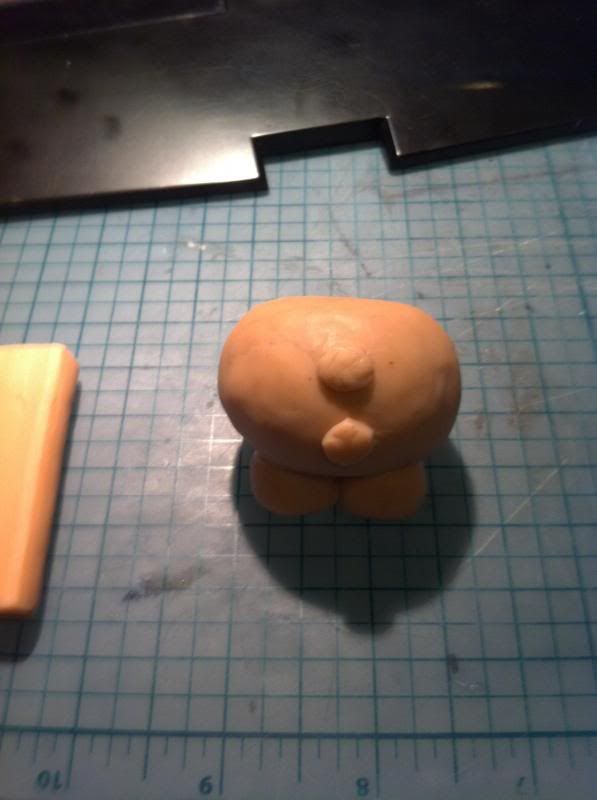
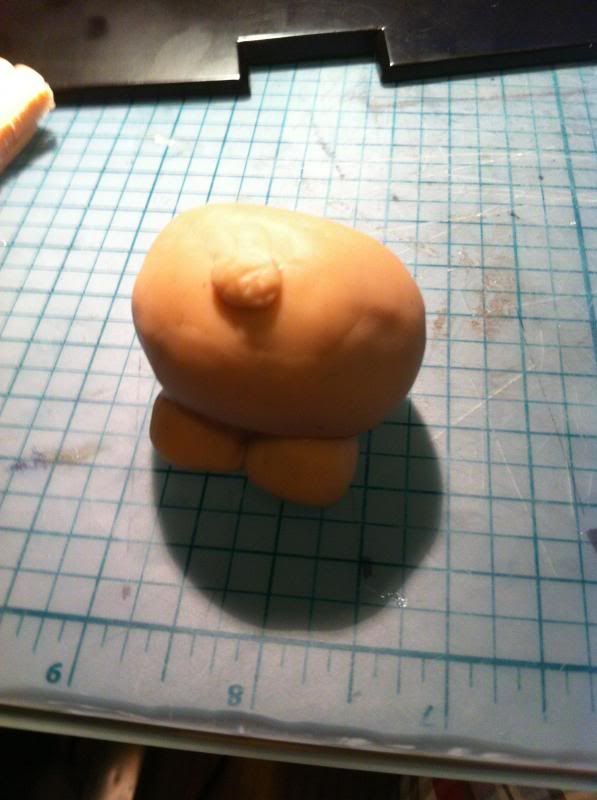
Wasn't super jazzed at this point, yet. He didn't quite feel like he was a character, just a shape. Makes sense considering he's a snow man. Had to change scale at this point when I realized how large it could potentially get.

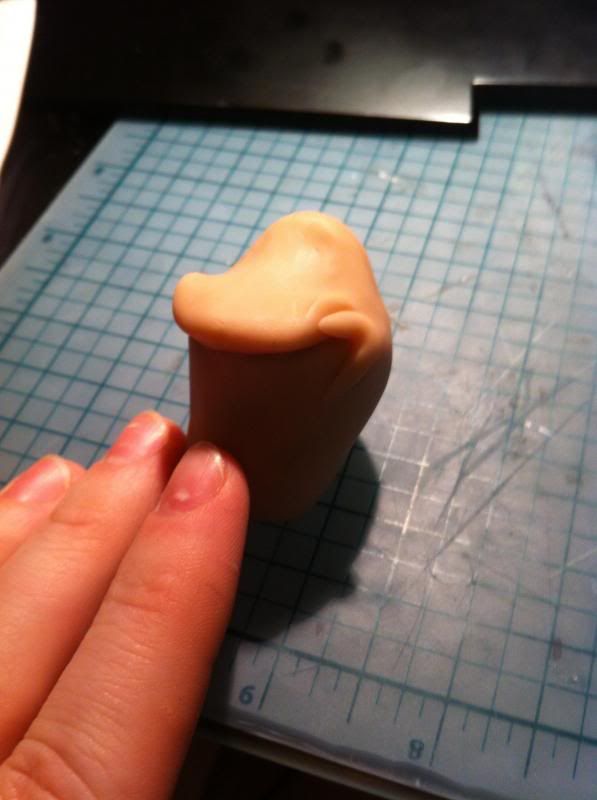
Beginning of the head. Cut his face off and glued it back on once I had the head shaped the way I liked it. To be honest, his head is slightly smaller in scale than the body. In hindsight, I suppose sculpting the more difficult parts first and adjusting to those would be a better solution.
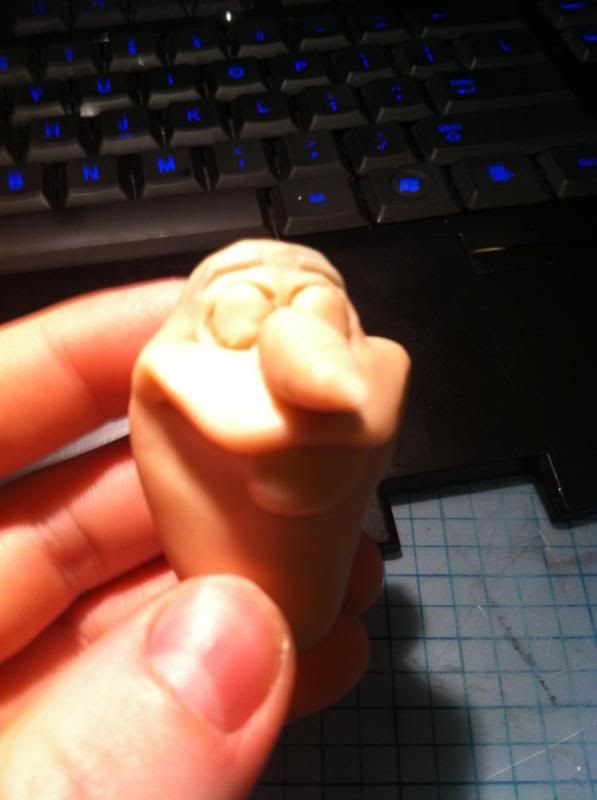
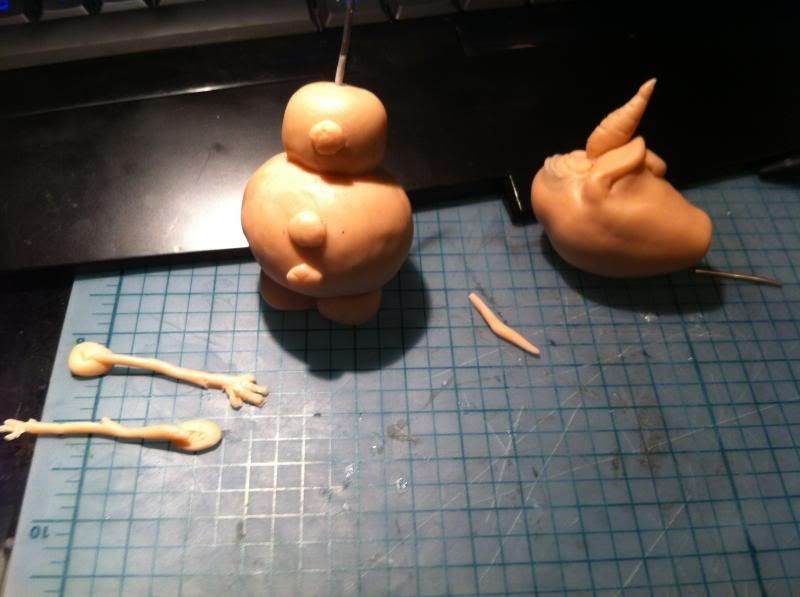
Couldn't quite get the cheeks the way I wanted them, but they're fairly close.

I was really excited about sculpting the nose, for some reason. It sort of made it from a blob into the face of the character. As I said, shaky hands, pictures aren't super smooth. Also just a phone camera.
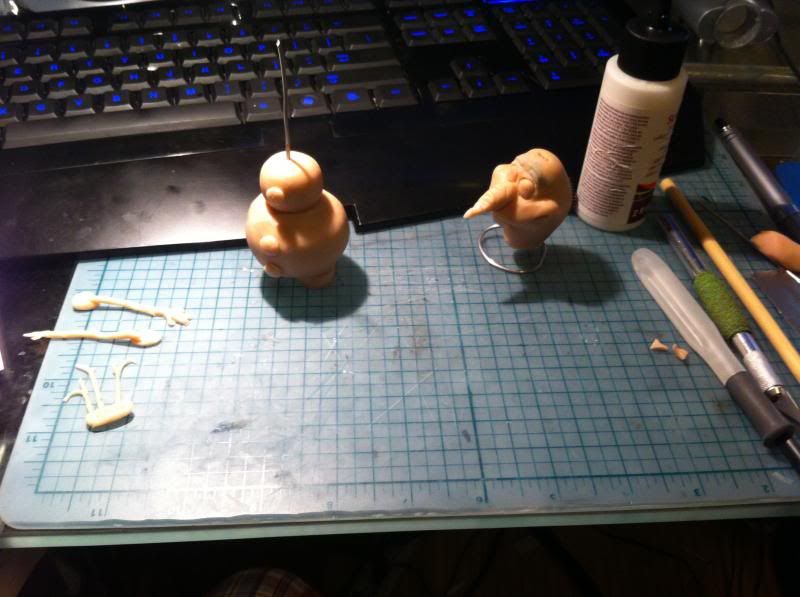
Most of him was ready at this point. It was also getting late
Ready for the oven. twigs labeled with little tabs.
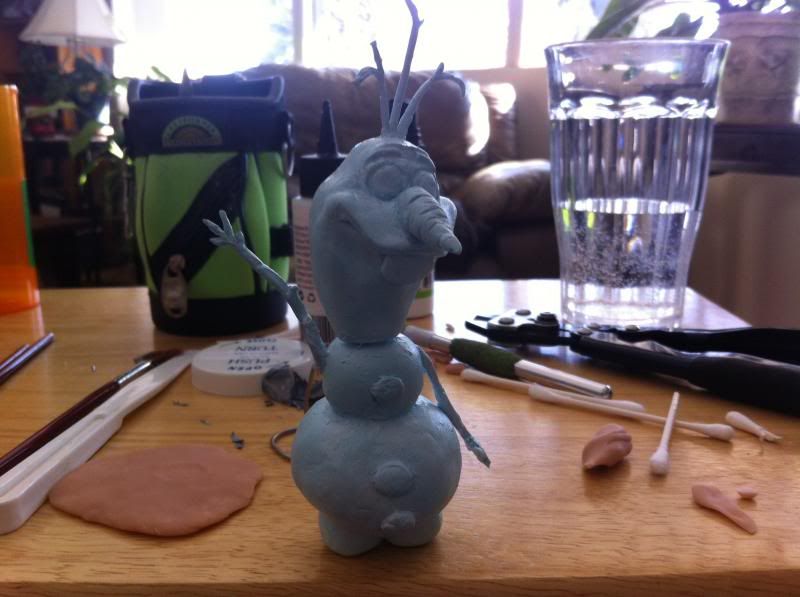
The next morning I baked and assembled him. Had a few close calls here. Broke a twig on his head, as well as an arm. Forgot to mention, he has a bit of skeleton made with aluminum fencing wire. Used a bit of super glue to fix the pieces which I broke.

So I admit I need to improve on my model painting. The paint I'm using for now, though, is acrylic. I started by putting on a baby blue base coat, mostly as a primer.
Couple coats of white, followed by the orange, black, and brown finished him off. Base is just a little more sculpey flattened with my palm to make it irregular, squished the hardened feet into the base, baked it, then super glued him down to it.

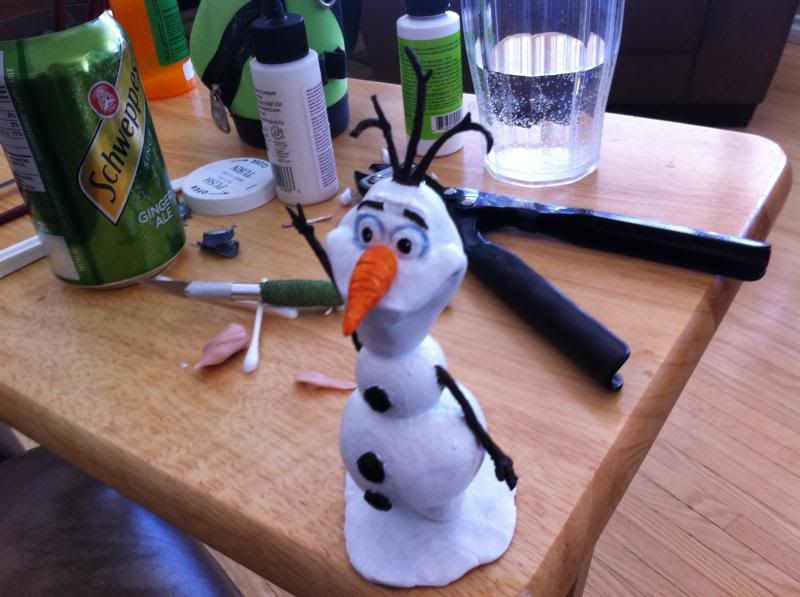
I found it very humorous when I painted his little face on. I literally lol'd when I dabbed on his pupils. Goofy lookin' little dude.
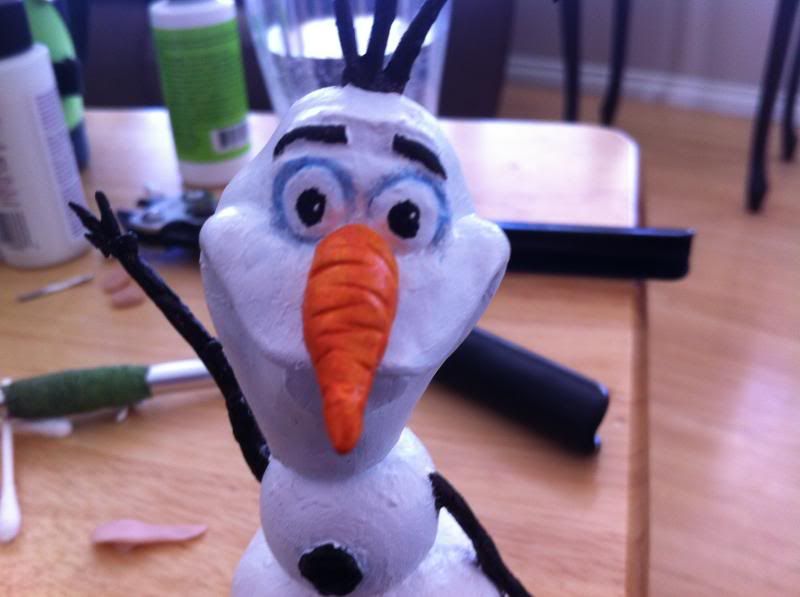

I'm gonna blame my shaky hands again for some of the paint job mess-ups. A few minor things, but overall I'm satisfied with the result.
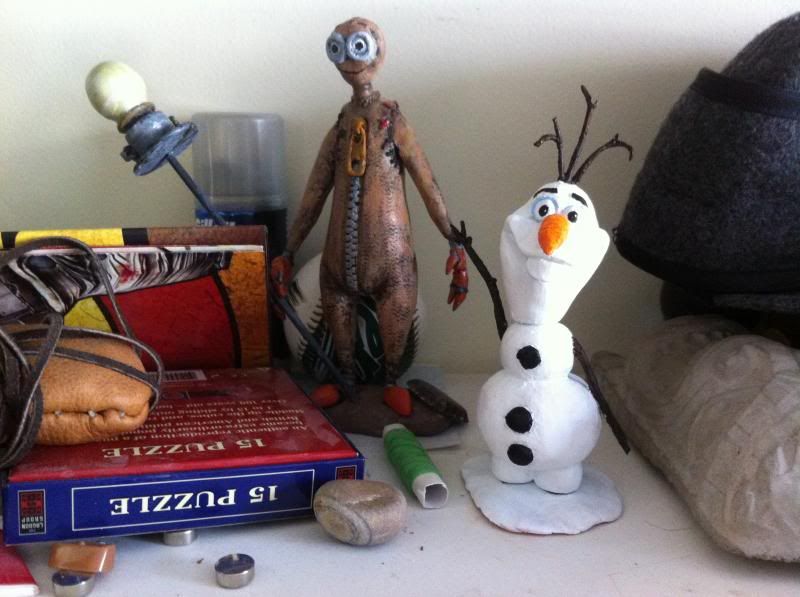
My two sculpey statuettes, so far, at least. Got a couple lenses for my phone's camera. I'll take some higher quality/close up/detail shots later on.
I'd greatly appreciate feedback and help in all of the steps.
Cheers
So a little bit of explanation... I'm currently a woodworker (for the most part) however, I used to be very "into" art. In general, I've always liked to manufacture things rather than purchase, or innovate and create something myself which I couldn't find .
Anyways, several months ago, a friend of mine asked me to build him something, knowing that I like to build stuff. It was for a cosplay, so that was my first venture into costuming. During this time, I'd been in a bit of a rut in regards to inspiration and motivation to actually produce. I began to look up media for costuming, building, etc... and discovered Adam Savage's portions on the channel "Tested", which in turn introduced me to this site.
Long story short, it got me back into the mood, since then I've produced a few more pieces, and I'd like to showcase some of my work and get advice from those more experienced.
Content regarding the piece I've made:
So I watched Frozen the other day... Loved it, as many do. Pulled out some sculpey the other night wanting to make something, decided to go with a Frozen character, narrowed that down to Olaf

Thats the image I used as reference.
So I started from the ground up this time. Wasn't too concerned about scale in regards to his actual size (how big he'd be if he actually existed) just scaled it off of the image I had displayed on my monitor. Its approximately 65% of the size of the image, overall size (excluding the base) is about 53/4"
to the end of his hair twiggy things.

Not super great at sculpting yet. I've worked with hard materials more than soft. Carving stone and wood comes a little more naturally for me then coaxing a blob into a shape. I have shaky hands as well, so being able to anchor a tool before removing/moving material helps, which I can't really do with soft stuff.

Wasn't super jazzed at this point, yet. He didn't quite feel like he was a character, just a shape. Makes sense considering he's a snow man. Had to change scale at this point when I realized how large it could potentially get.

Beginning of the head. Cut his face off and glued it back on once I had the head shaped the way I liked it. To be honest, his head is slightly smaller in scale than the body. In hindsight, I suppose sculpting the more difficult parts first and adjusting to those would be a better solution.

Couldn't quite get the cheeks the way I wanted them, but they're fairly close.

I was really excited about sculpting the nose, for some reason. It sort of made it from a blob into the face of the character. As I said, shaky hands, pictures aren't super smooth. Also just a phone camera.

Most of him was ready at this point. It was also getting late

Ready for the oven. twigs labeled with little tabs.

The next morning I baked and assembled him. Had a few close calls here. Broke a twig on his head, as well as an arm. Forgot to mention, he has a bit of skeleton made with aluminum fencing wire. Used a bit of super glue to fix the pieces which I broke.

So I admit I need to improve on my model painting. The paint I'm using for now, though, is acrylic. I started by putting on a baby blue base coat, mostly as a primer.

Couple coats of white, followed by the orange, black, and brown finished him off. Base is just a little more sculpey flattened with my palm to make it irregular, squished the hardened feet into the base, baked it, then super glued him down to it.


I found it very humorous when I painted his little face on. I literally lol'd when I dabbed on his pupils. Goofy lookin' little dude.


I'm gonna blame my shaky hands again for some of the paint job mess-ups. A few minor things, but overall I'm satisfied with the result.

My two sculpey statuettes, so far, at least. Got a couple lenses for my phone's camera. I'll take some higher quality/close up/detail shots later on.
I'd greatly appreciate feedback and help in all of the steps.
Cheers