Coz
Sr Member
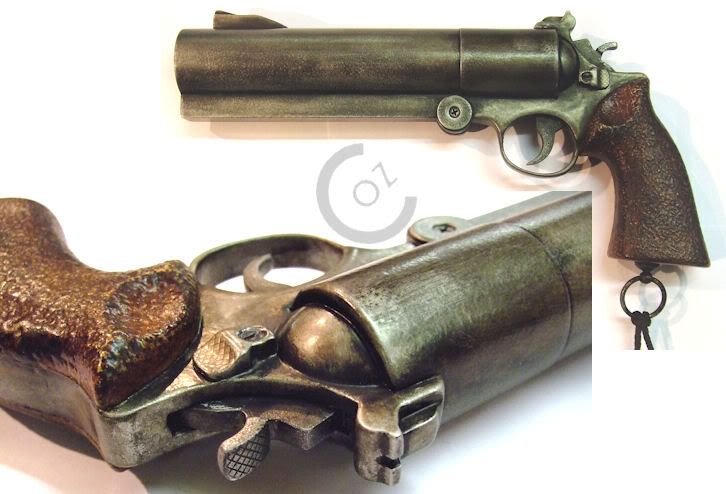
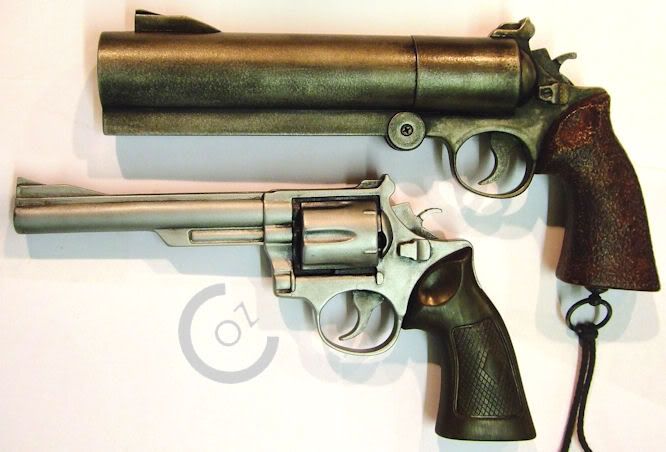
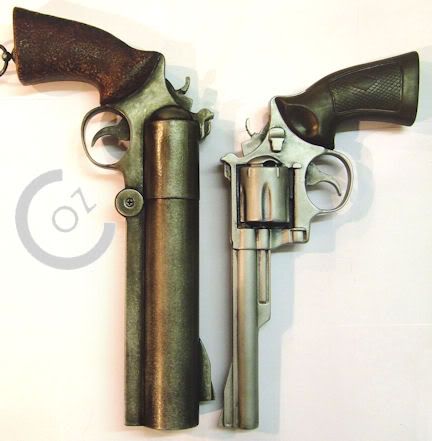
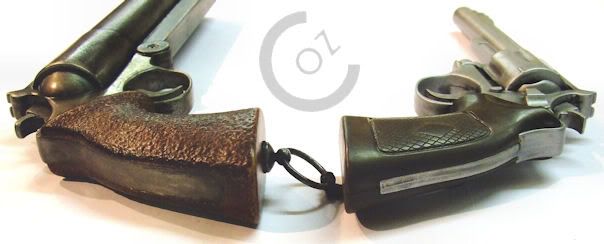
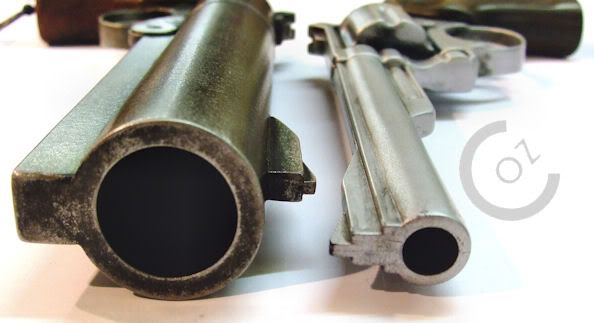
Hiya guys! Been a while, but I have a new project - Mike Mignola style Hellboy pistol!
This is very similar to the base gun I started out with (mine didn't have the extra screws in the barrel, frame and grips).
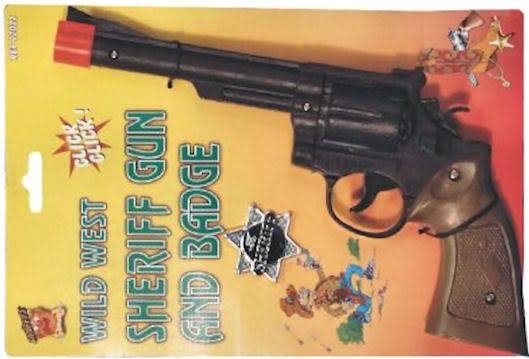
Coupla quid off eBay (unless you have a Pound Shop near you, where you can get 2 for a quid!).
Disassembled (excuse the ugly hack job on the internals!):
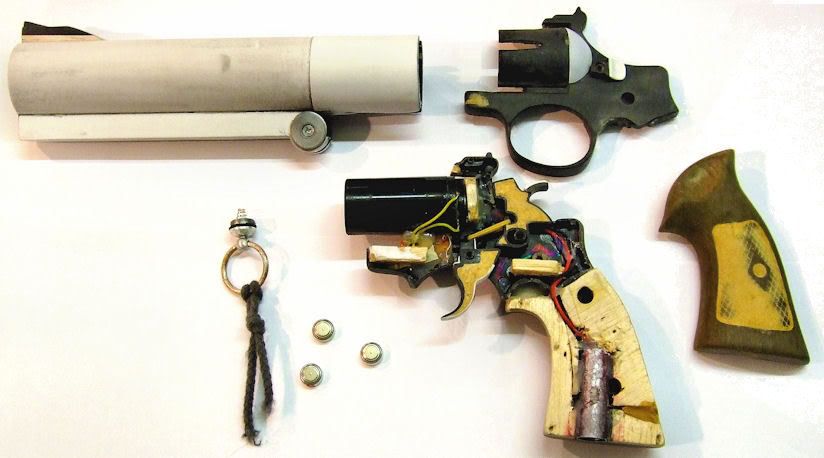
Measures about 12", so not really huge. Used a toy 'clicker' Magnum .44 (often seen on eBay as a cowboy gun).
Chopped off the barrel and slotted it into a length of 40mm plastic tubing.
Added another tube for the internal barrel, and glued it in. Also wrapped the 'cylinder' with a layer of thin plasticard.
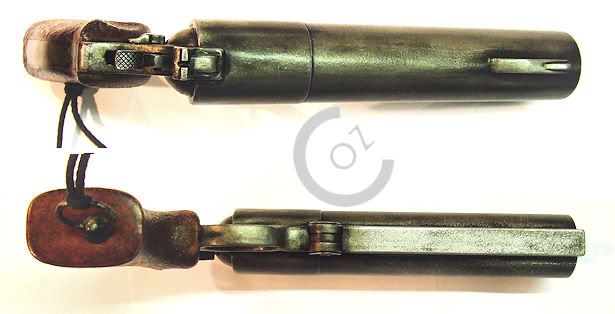
A length of square section balsa was laminated with superglue & plasticard for the 'barrel weight', and epoxied into place, as was the foresight.
After splitting the frame, I saw how much space was free inside the gun, I added the 'Blam!' circuit from to Pound Shop gun. Replaced all the wires as they're so thin and badly soldered.
Glued the speaker to a short piece of tubing, and added a plastic washer on the opposite end to create a resonating chamber. The chamber fits into the back of the internal barrel tube perfectly.
Assembled:
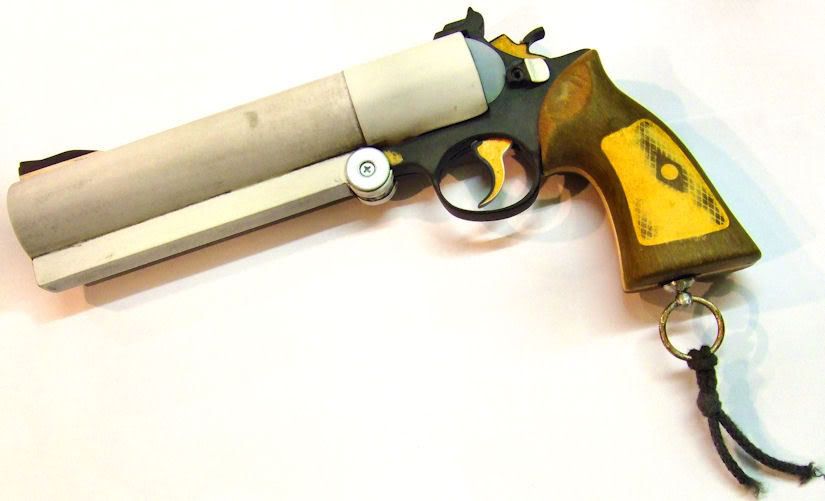
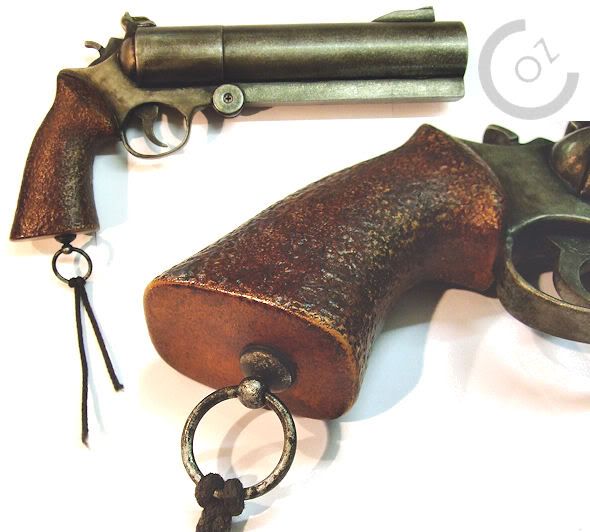
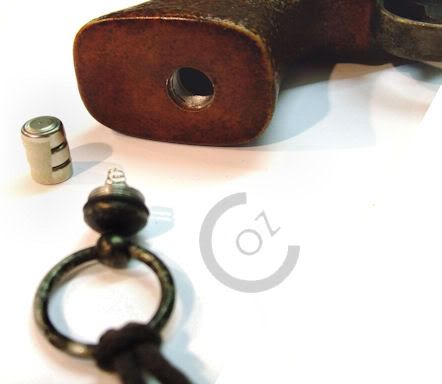
For the batteries, I used a 3-button cell LED flashlight - I removed the LED and fitted wires instead, checked it was switched on then removed the button, soldered the wires into the circuit board, and as a bonus the cap works perfectly for the lanyard ring once slightly reamed out for the curtain ring!
I added a rubber o-ring so that the cap needn't be wound in too tightly.
Similar type of light:
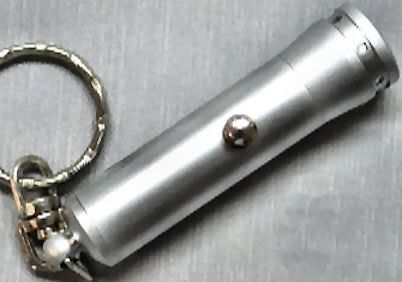
Filled the grip with hotglue & balsa wood scraps to hold the light in place. I should've added a couple of lead fishing weights too, but once I'd used the hotglue, it proved to be a total pain to drill and cut into.
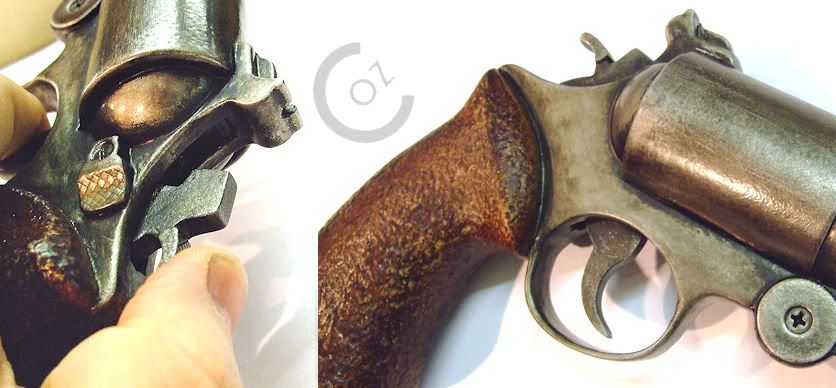
I filled the detail in the grip, as well as the hammer & trigger. I'm on the lookout for a spring to replace the high-tech rubber band! I cut open a ping pong ball for the cylinder detail (why do the insides smell of menthol???). Also used grid patterned plasticard on the hammer spur and cylinder release catch.
The hinge was made from a half section of balsa rod, again laminated with plasticard, then added a couple of thin strips of plasticard to simulate the exposed hinge. Added a washer on either side and glued screws in the centers.
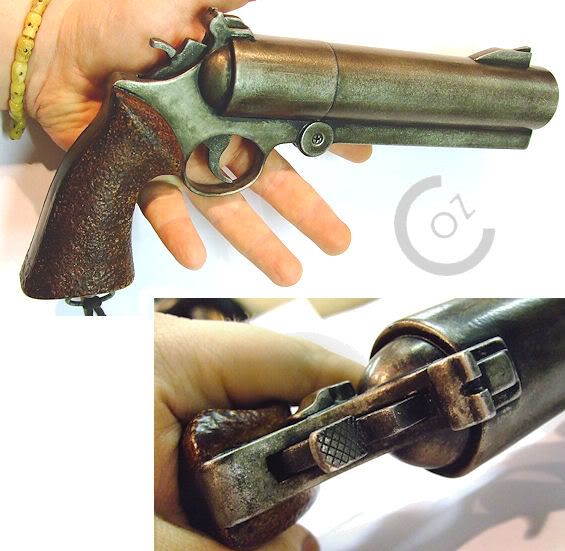
In hand:
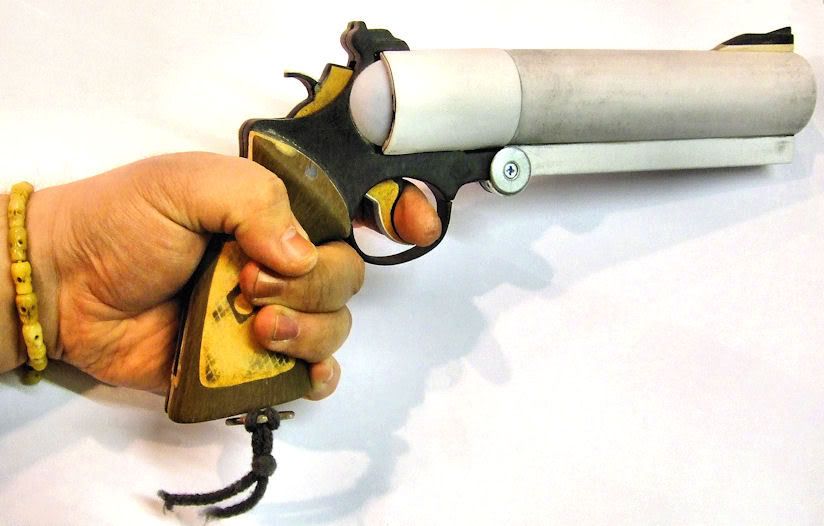
I widened the grips with more balsawood to give it a better fit for larger hands! You may wonder why I use this - well, it's cheap and easy to work with, but could certainly use styrene.
I used thick cord for the remnants of the lanyard, and for the lanyard ring itself I used a chrome ring from a sewing shop. I filed & dremeled it for a more 'rough-hewn' look.
Painted the hammer & trigger with Plastikote Pewter, prior to gluing it all together for filling & paint.
After looking at the Art of Hellboy book again, I realised I missed an idiosyncratic Mignola design quirk - the front sight is always set back from the end of the barrel! So I shifted it back where it should be.
Primered after some filling, plus some filling to do - parts still all seperate:
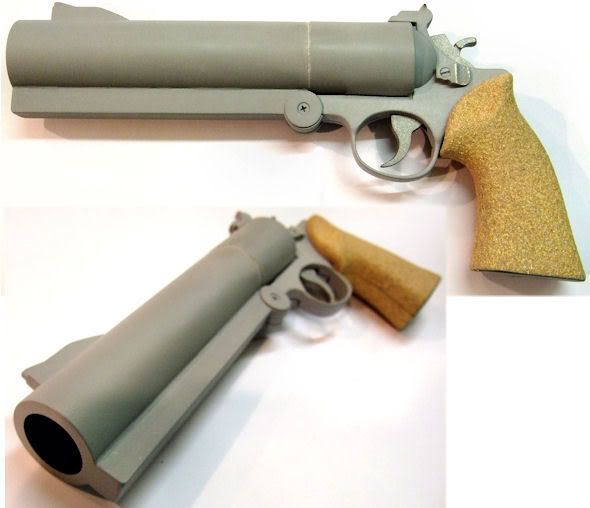
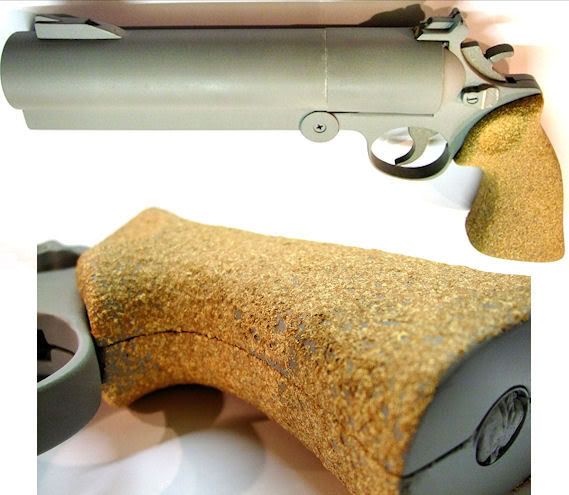
Also sprayed the grips with Stone Fleck paint - wanted texture to hide the terrible filling job I did! It's kind of a stippled look - like griptape. Used to have a air-pistol with a similar texture on the target grips.
It's a little thin in paces - you can see the grey primer in spots - but it should be ok once painted (I like the colour, so the grip will probably be a similar shade. Masked off the bottom of the grip as that isn't normally textured.
Keeping with the textured theme, I plan on using Hammerite silver grey spray on the 'metal' parts. A little lighter than the pewter, but a good contrast, and is somewhat forgiving of bad filling & shaping, too.
Any comments, from you fine folks?
Coz.
This is very similar to the base gun I started out with (mine didn't have the extra screws in the barrel, frame and grips).

Coupla quid off eBay (unless you have a Pound Shop near you, where you can get 2 for a quid!).
Disassembled (excuse the ugly hack job on the internals!):

Measures about 12", so not really huge. Used a toy 'clicker' Magnum .44 (often seen on eBay as a cowboy gun).
Chopped off the barrel and slotted it into a length of 40mm plastic tubing.
Added another tube for the internal barrel, and glued it in. Also wrapped the 'cylinder' with a layer of thin plasticard.
A length of square section balsa was laminated with superglue & plasticard for the 'barrel weight', and epoxied into place, as was the foresight.
After splitting the frame, I saw how much space was free inside the gun, I added the 'Blam!' circuit from to Pound Shop gun. Replaced all the wires as they're so thin and badly soldered.
Glued the speaker to a short piece of tubing, and added a plastic washer on the opposite end to create a resonating chamber. The chamber fits into the back of the internal barrel tube perfectly.
Assembled:

For the batteries, I used a 3-button cell LED flashlight - I removed the LED and fitted wires instead, checked it was switched on then removed the button, soldered the wires into the circuit board, and as a bonus the cap works perfectly for the lanyard ring once slightly reamed out for the curtain ring!
I added a rubber o-ring so that the cap needn't be wound in too tightly.
Similar type of light:

Filled the grip with hotglue & balsa wood scraps to hold the light in place. I should've added a couple of lead fishing weights too, but once I'd used the hotglue, it proved to be a total pain to drill and cut into.
I filled the detail in the grip, as well as the hammer & trigger. I'm on the lookout for a spring to replace the high-tech rubber band! I cut open a ping pong ball for the cylinder detail (why do the insides smell of menthol???). Also used grid patterned plasticard on the hammer spur and cylinder release catch.
The hinge was made from a half section of balsa rod, again laminated with plasticard, then added a couple of thin strips of plasticard to simulate the exposed hinge. Added a washer on either side and glued screws in the centers.
In hand:

I widened the grips with more balsawood to give it a better fit for larger hands! You may wonder why I use this - well, it's cheap and easy to work with, but could certainly use styrene.
I used thick cord for the remnants of the lanyard, and for the lanyard ring itself I used a chrome ring from a sewing shop. I filed & dremeled it for a more 'rough-hewn' look.
Painted the hammer & trigger with Plastikote Pewter, prior to gluing it all together for filling & paint.
After looking at the Art of Hellboy book again, I realised I missed an idiosyncratic Mignola design quirk - the front sight is always set back from the end of the barrel! So I shifted it back where it should be.
Primered after some filling, plus some filling to do - parts still all seperate:


Also sprayed the grips with Stone Fleck paint - wanted texture to hide the terrible filling job I did! It's kind of a stippled look - like griptape. Used to have a air-pistol with a similar texture on the target grips.
It's a little thin in paces - you can see the grey primer in spots - but it should be ok once painted (I like the colour, so the grip will probably be a similar shade. Masked off the bottom of the grip as that isn't normally textured.
Keeping with the textured theme, I plan on using Hammerite silver grey spray on the 'metal' parts. A little lighter than the pewter, but a good contrast, and is somewhat forgiving of bad filling & shaping, too.
Any comments, from you fine folks?
Coz.
Last edited:

