wayouteast
Sr Member
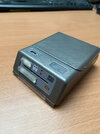
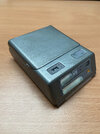
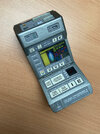
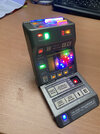
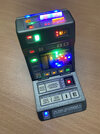
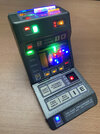
Finished a build of a Mk X-style medical tricorder today.

The shell is 3D-printed in Elegoo ABS-like resin on my Elegoo Mars printer, from a combination of STL files from Fleetprinter on Thingiverse and UnimatrixRed on Printables, with some modifications and scratchbuilding with plasticard and putty along the way.
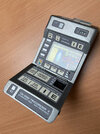
The body is painted with Vauxhall Smoke Grey Metallic, and then very lightly dusted with Audi Dakota Grey just to warm the colour up slightly. The decals and markings are printed on self-adhesive white vinyl sheet. The openings are cut out and the vinyl applied to clear plastic sheet before attaching to the shell with canopy glue. This unifies the various lighting panels. The decals are mostly based on those from the UnimatrixRed files (which are for a TR-590).
Having been disappointingly let down and ripped off by one of the most commonly recommended vendors of the electronics for TNG-era tricorders, I have attempted the electronics myself. The big issue with this (other than my ancient and rapidly fading eyesight and my total incompetence at anything other than the most basic electronics) was space - without having custom PCB boards I had to use relatively larger components and actual wiring for all the connections, and it was a real struggle to fit everything in - the back literally bulges under the pressure of everything that's crammed in there!
Which is - 75 LEDs and SMDs in total, the equivalent number of resistors, a DFPlayer Mini for the sound (only the standard scanning sound), a 3.7v LiPo battery bumped up to 5v with a converter board, an 18mm speaker, and a magnetic reed switch for the open/close functionality. The whole thing is run by an Arduino Nano with home-built code.
It's been a bit of a struggle at times - not the most enjoyable of props to attempt with my limited skillset, and sometimes more frustrating than relaxing! It would have been a lot more fun and a lot easier with tried and tested electronics... but there we are. Some people just suck. There's a couple of (to me) egregious mistakes in the final build where I lost concentration and f*cked up, but I honestly can't be arsed to tear it down and fix them at this stage... maybe in the future! But it's done and it's fine for what it is. It'll do.
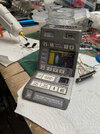
Work-in-progress:
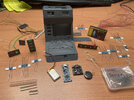
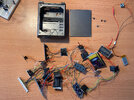
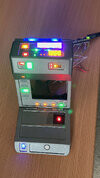
Early test of the electronics
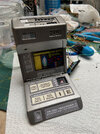
The final result:
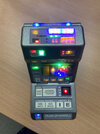
In action:
The shell is 3D-printed in Elegoo ABS-like resin on my Elegoo Mars printer, from a combination of STL files from Fleetprinter on Thingiverse and UnimatrixRed on Printables, with some modifications and scratchbuilding with plasticard and putty along the way.
The body is painted with Vauxhall Smoke Grey Metallic, and then very lightly dusted with Audi Dakota Grey just to warm the colour up slightly. The decals and markings are printed on self-adhesive white vinyl sheet. The openings are cut out and the vinyl applied to clear plastic sheet before attaching to the shell with canopy glue. This unifies the various lighting panels. The decals are mostly based on those from the UnimatrixRed files (which are for a TR-590).
Having been disappointingly let down and ripped off by one of the most commonly recommended vendors of the electronics for TNG-era tricorders, I have attempted the electronics myself. The big issue with this (other than my ancient and rapidly fading eyesight and my total incompetence at anything other than the most basic electronics) was space - without having custom PCB boards I had to use relatively larger components and actual wiring for all the connections, and it was a real struggle to fit everything in - the back literally bulges under the pressure of everything that's crammed in there!
Which is - 75 LEDs and SMDs in total, the equivalent number of resistors, a DFPlayer Mini for the sound (only the standard scanning sound), a 3.7v LiPo battery bumped up to 5v with a converter board, an 18mm speaker, and a magnetic reed switch for the open/close functionality. The whole thing is run by an Arduino Nano with home-built code.
It's been a bit of a struggle at times - not the most enjoyable of props to attempt with my limited skillset, and sometimes more frustrating than relaxing! It would have been a lot more fun and a lot easier with tried and tested electronics... but there we are. Some people just suck. There's a couple of (to me) egregious mistakes in the final build where I lost concentration and f*cked up, but I honestly can't be arsed to tear it down and fix them at this stage... maybe in the future! But it's done and it's fine for what it is. It'll do.
Work-in-progress:


Early test of the electronics


The final result:


In action:
