Iron Giant Bolt Build

McKeePhoto

Active Member
About two years ago, or maybe three, I purchased an Iron Giant Bolt kit from member Justice91423 in the JY. It was one of my first purchases here and my first foray into model building in 30 plus years.

As the fates allowed, I received it and opened it up to get started but, after a few brief sanding passes, I had to package it up and shelve it. But, not before losing the darned lenses.

I have been browsing and lurking here for the past few years as time allows and I have to say just how inspiring all of these projects have been to me. It finally motivated me to pull it down and dust it off.

b108ac2355724f82b70ffb10c91e6f79.jpg


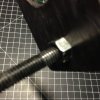
I wish I had done a better job keeping notes and photos along the way, but here is what I got.

Hope you all like it! And, thank you to Justice91423 for such a wonderful kit!

fa9f32549a85c5ae02169aa1d48ff609.jpg
9cd5e3748359c6e39e197ee8ef027ad3.jpg
e5df84211c0009343131fef1324c0df5.jpg
77b832862fd32877eb12076a4787a39d.jpg
454dfc1312f2f399b098a22523df96f6.jpg
fe1ba04e2527692b1d3979fbcb0cabb4.jpg
4abdd3f131b6ffed51123d43f7501b5a.jpg
8c7f0d806e5214ab400fd3cb3b4ff52f.jpg
2d734be249dd05884f1ebb2866c2e82b.jpg
d9c6269abd8c0747004f51a516104d4e.jpg
c4d8fb4eb87af0edac04913330cc0f28.jpg
 
Thanks, guys! I need to work on a name plate for it. My original idea was a card catalog brass slot, but it was just a bit too wide. The base was made from scraps in the workshop, so the name plate should follow suit. I just need to dig a bit deeper.
 
Wow very cool! This is a prop I could really add to my collection. I seem to have issues taking progress pictures also! :)
 
That would be hillarious! Have it bump around in the display case until someone lets it out. Then, it rolls across the floor to the door, orders up an Ubber and heads on out. Sigh. I lose more bolts that way...
 
I made a label in illustrator and mounted it on some black mat board. Right now, it is just fun tacked on the stand because I am still thinking about a metal label with etched graphics and chipped paint.
IMG_2924.jpg

Right now, I dont have the time to design or source it, so here it is in the studio, waiting to go up on the shelf.

IMG_2919.jpgIMG_2918.jpg
 
Nice... Love the colors. I actually have two sitting on my shelf... they've been there forever... I NEED to get on this after seeing yours.

Do you mind my asking what colors you used?

And I assume you made the stand? Parts? I would flat out do the same thing... looks great!
 
very very cool, one of my favorite movies! that bolt came out great!! i see your little north from me, praying we dont get snow tonight, best of luck buddy!
 
Thanks Halliwax! They say just flurries and snow showers, nothing like last year. Then again, last year they under estimated more than a couple of times...

NeoRutty, I hereby swear that, for future builds, I will actually take notes and keep track of things as I go along. It was at least 6 months ago that I painted it up. I used the paints I had picked up for doing a bladerunner build... that I never took any pictures of or notes on or ...! As my kid quotes Adam Savage: "It isn't science if it isn't written down." Sigh.

I believe I started with a coat or two of grey auto primer. Followed by ModelMaster's 1455 Gunmetal over the whole thing. Then I masked off the raised part of the top and hit it with Model Master's 1454 Titanium Buffing Metalizer. However, I wasn't too clear on the directions and never really got how to do the whole rub and buff thing, so I never got it to that aged metal look I was hoping for.

But, I am very happy with the way it turned out. The other thing I learned was that I really need to clip my leads shorter when I am doing the final wiring. Mine are way too long and it made it difficult to cram it all in at the end.
IMG_2931.jpg
 
Almost forgot that you asked about the base.

I started with a hunk of oak 2x4 from a pallet tear down, cut to a random length and sanded relatively smooth on my belt sander. It was finished with some left over spray poly. A coat, followed by steel wool, repeat as needed.
IMG_2942.jpg

I had a 3/8th" x 5" carriage bolt left over from something and a hanger plate for threaded rod that fit it from some other project (where the heck does all this clutter come from any way??). I sprayed them with a satin black and ended up having to wipe most of it off because the nozzle was clogged and spraying every where but at the hardware. That ended up looking cool and aged.

That was mounted using some EZ-Lock Threaded inserts and hex bolts that came out of a salvage project. They have some surface rust from the salvage which adds a little texture to the project.

IMG_2936.jpgIMG_2943.jpg

IMG_2941.jpgIMG_2939.jpg

The top was made of some 1/4 hobby plywood (again, from deep in the pile. Someone should really clean up... or at least organize this crap!) that I drilled with a 2 and a quarter hole saw, cut in half and sanded. I did the corner rounds with the belt sander. Top it off with some wood glue and felt and lock it in place with a nut. Oh, almost forgot: get lazy and forget to paint the plywood so you have to go back with a sharpie after the felt is glued on. ;-)

IMG_2938.jpgIMG_2937.jpgIMG_2935.jpgIMG_2945.jpg
The only really difficult part here was remembering that, because of the shape of the screw portion of the IG bolt, the actual gape in the top should be offset to one side. I didn't quite offset mine enough and there is a little overhang on the left side that annoys me.

As usual, there are a ton of things I would like to do slightly different, from planing the wood to redoing the label in metal. But, for now... ;-)

IMG_2947.jpg
 

Attachments

  • IMG_2940.jpg
    IMG_2940.jpg
    1.1 MB · Views: 173
OMG! How is it I never saw this thread! So cool.

I can not tell you how excited I get to see pictures of my kit put together.

Great paint and that stand is amazing. Thank you so much for sharing this
 
Back
Top