ajamodels
Well-Known Member
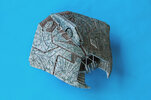
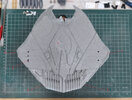
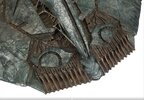
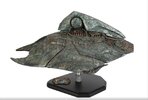
Just found this kit lurking in the back of my closet! 30 years old (almost).
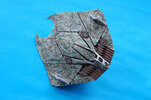
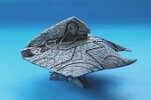
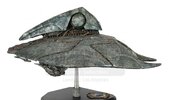
After seeing photos on the 'prop store' auction (attached photos), it motivated me to pull out and correct this kit.
The kit is good, but certianly needs lots of improvements. I did what i could without going crazy.
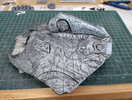
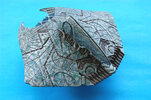
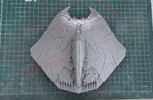
Based on photos of the 2 foot filming miniature, i did the following improvements:
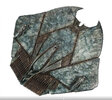
1. Sanded and filled gap through the entire perimeter. The textured surface was reapplied using white glue. The glue was painted on then ‘lifted’ with the pad of my finger. Looks very similar to what is on the kit! Texture is clear, so not visible in photo.
-Rescribed panel lines and continued to the edge.
2. Drilled new holes for a secondary laser cannon that was molded and cast from the one in the kit.
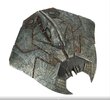
3. Reshaped rear of body edges.
4. Reshaped front window, and made new window frames in correct locations.
5. Cannon added from ‘spares’ box.
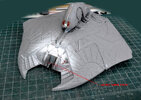
6. Added ‘tentacle’ like shapes around perimeter of ‘head’ where it attaches to body. Done using Aves epoxy sculpt.
7. Widened ‘head’ with .060” shim.
8. added small bumps around cannon with filler.
9. Added ‘sabre toothed cat teeth’ to the front. Sculpted from Aves epoxy sculp.
10. Narrowed the ‘trench’ by 4mm on each side with Aves epoxy sculp.
I think it is now ready for painting........
After seeing photos on the 'prop store' auction (attached photos), it motivated me to pull out and correct this kit.
The kit is good, but certianly needs lots of improvements. I did what i could without going crazy.
Based on photos of the 2 foot filming miniature, i did the following improvements:
1. Sanded and filled gap through the entire perimeter. The textured surface was reapplied using white glue. The glue was painted on then ‘lifted’ with the pad of my finger. Looks very similar to what is on the kit! Texture is clear, so not visible in photo.
-Rescribed panel lines and continued to the edge.
2. Drilled new holes for a secondary laser cannon that was molded and cast from the one in the kit.
3. Reshaped rear of body edges.
4. Reshaped front window, and made new window frames in correct locations.
5. Cannon added from ‘spares’ box.
6. Added ‘tentacle’ like shapes around perimeter of ‘head’ where it attaches to body. Done using Aves epoxy sculpt.
7. Widened ‘head’ with .060” shim.
8. added small bumps around cannon with filler.
9. Added ‘sabre toothed cat teeth’ to the front. Sculpted from Aves epoxy sculp.
10. Narrowed the ‘trench’ by 4mm on each side with Aves epoxy sculp.
I think it is now ready for painting........
Attachments
-
 IMG_20230907_104640622.jpg1.3 MB · Views: 152
 -
 ID4_Alienship7.JPG221.6 KB · Views: 157
 -
 ID4_Alienship6.JPG115.5 KB · Views: 138
 -
 ID4_Alienship3.JPG101.1 KB · Views: 143
 -
 ID4_Alienship2.JPG2 MB · Views: 151
 -
 ID4_Alienship1.JPG134 KB · Views: 156
 -
 IMG_20230907_112321974.jpg1.5 MB · Views: 157
 -
 IMG_20230907_104552333_HDR.jpg1.7 MB · Views: 161