AlloyAlchemist
New Member
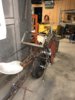
I'm a first time poster,though I have been lurking around for awhile after hearing about this community on Adam Savage's Tested. I'm going to build a rideable Rey's speeder from a motorcycle project that I already have and would love to have help and input from this great community. What help you may or may not be asking yourself ? Well the first help I could use is some measurements of the speeder itself. I could always buy one of the toys and scale up the measurements from there....but I'd rather not do it that way. So any help in this matter would be greatly appreciated.
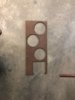
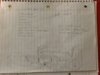
First stage of this project is almost done ,which for me is the planning ,sketching , reference pictures gathering and initial parts list and a hopeful budget total. The easiest stage in any project if you ask me.
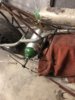
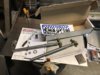
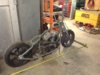
Second stage of this project is what I'm calling the R&D stage . It will consist of ordering of the parts . Making the bike start , stop , steer , shift and go all from almost 5 feet rearward of the traditional seating position . Most of these will not be Problematic for me because of my background in custom motorcycle and car fabrication.
The steering I know is going to be the biggest issue in this stage of the project and I'm pretty sure it will have to go through several changes to get it to work smoothly and something that I'm comfortable controlling while going down the road with its non traditional arrangement . I already have a plan for the initial steering set up which will basically be a traditional set of handlebars linked to the front ones via hemi joints and tubing.
Another part of the second stage will be something that will be in a constantly evolving as the project gets closer to completion of the third stage as well . This will be the counter balancing/adding weight to the front of the bike to offset the weight hanging behind the rear axle.
The third stage is the building of the front pod frame and "skinning" of the front pod and basically making EVERYTHING that is visible on the outside and the structure that supports it ,also any of the weight and steering changes . This 3rd stage will of course be the most time consuming but the most rewarding as well.
The forth stage will be the paint job and weathering some may say this is the most rewarding and fun stage but not for me personally.
Thanks for reading my long post and any info you may give will be greatly appreciated.
First stage of this project is almost done ,which for me is the planning ,sketching , reference pictures gathering and initial parts list and a hopeful budget total. The easiest stage in any project if you ask me.
Second stage of this project is what I'm calling the R&D stage . It will consist of ordering of the parts . Making the bike start , stop , steer , shift and go all from almost 5 feet rearward of the traditional seating position . Most of these will not be Problematic for me because of my background in custom motorcycle and car fabrication.
The steering I know is going to be the biggest issue in this stage of the project and I'm pretty sure it will have to go through several changes to get it to work smoothly and something that I'm comfortable controlling while going down the road with its non traditional arrangement . I already have a plan for the initial steering set up which will basically be a traditional set of handlebars linked to the front ones via hemi joints and tubing.
Another part of the second stage will be something that will be in a constantly evolving as the project gets closer to completion of the third stage as well . This will be the counter balancing/adding weight to the front of the bike to offset the weight hanging behind the rear axle.
The third stage is the building of the front pod frame and "skinning" of the front pod and basically making EVERYTHING that is visible on the outside and the structure that supports it ,also any of the weight and steering changes . This 3rd stage will of course be the most time consuming but the most rewarding as well.
The forth stage will be the paint job and weathering some may say this is the most rewarding and fun stage but not for me personally.
Thanks for reading my long post and any info you may give will be greatly appreciated.
Attachments
Last edited: