Scarecrow Joe
Sr Member
As some may know I am working on my Zvezda Star Destroyer and taking it slow to not get crazy,since Ive decided to add FO details, something Ive never tried before. In the meantime I started to work in a 3D printed Solo Blaster. Now, I know this may come as a lame prop for the hardcore blaster specialists here but I wanted to try my hand at it. Who knows?, maybe this will serve me to get my hands on something more realistic in the future. Ive never worked with a 3D printed before so this is a first for me also.
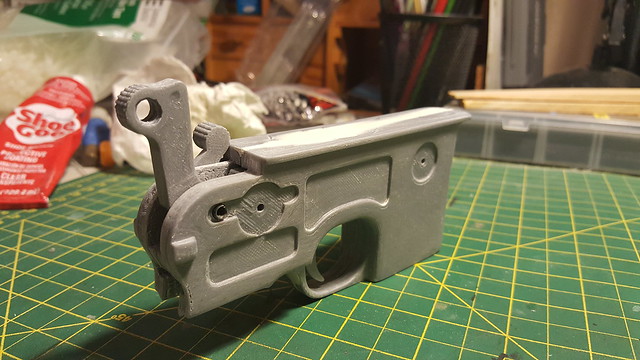
Thought it will be easier to tell you the truth. The kit at first looks bad but once you start the tedious process of prepping the details and overall look of the piece is quite impressive. I added some weights to it to improve the feel of it when you handle it and it really makes a difference. I used some white putty to fill some seams and defects. The trigger cocks and "fires"' the receiver can be retracted with a realistic spring action too. At first it looked like this:
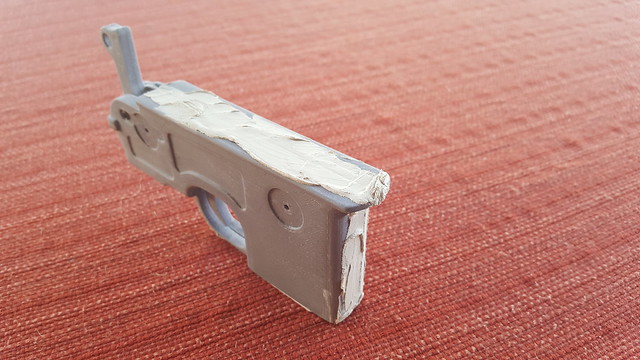 20170215_173924 by Oscar Baez Soria, on Flickr
 20170215_173909 by Oscar Baez Soria, on Flickr
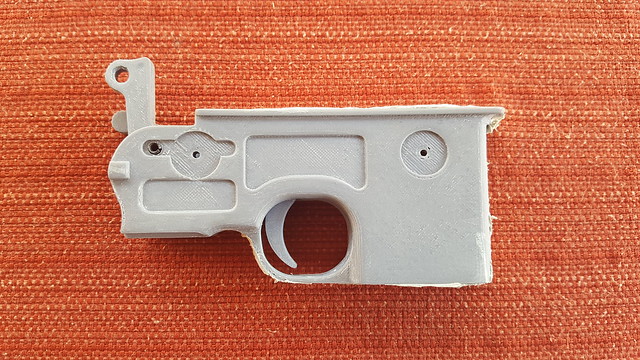
Sanded, finish starts to visibly improve:
 20170215_193355 by Oscar Baez Soria, on Flickr
 20170215_193412 by Oscar Baez Soria, on Flickr
 20170216_203154 by Oscar Baez Soria, on Flickr
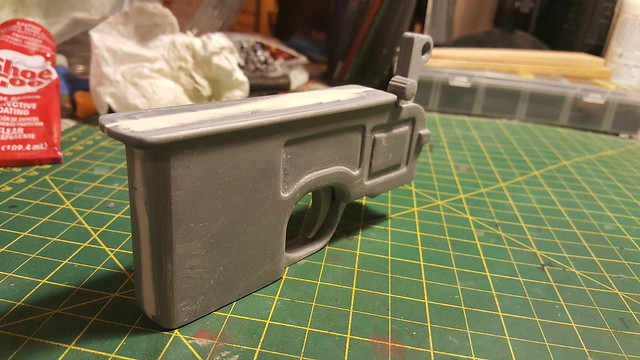
Finally it looks something like a blaster:
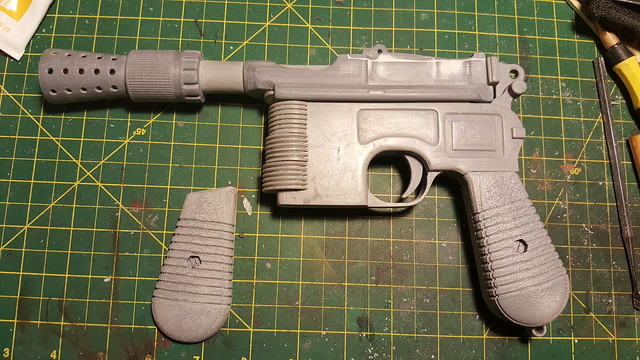 20170217_220437 by Oscar Baez Soria, on Flickr
 20170217_220525 by Oscar Baez Soria, on Flickr
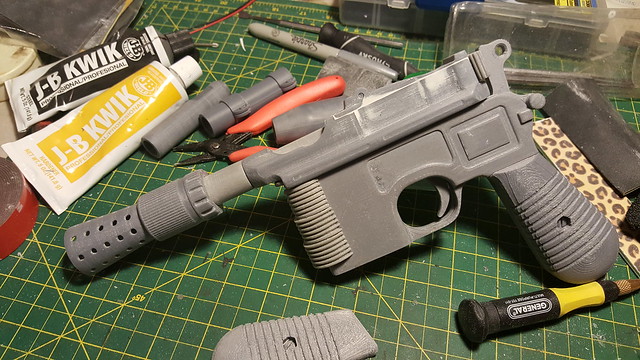
I soon realized that a lot of details could be further improved by removing some details and then adding more realistic looking ones but I decided to force myself and make the details printed on the piece as realistic as possible. For that the prepping should be taken to the extreme. After working on this for various days it finally really looks like Solo beloved blaster.
 20170220_174753 by Oscar Baez Soria, on Flickr
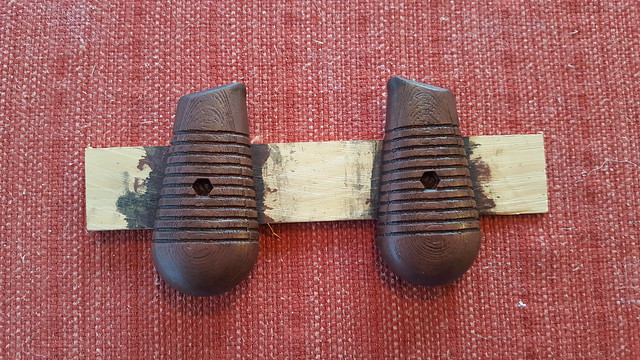
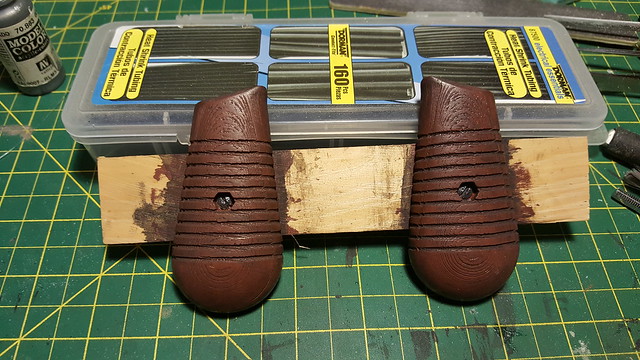
One aspect of this kit that was really worrying me was the grips. The printed grips had the wood grain detail on it but they were very rough looking. Prepping here became critical. I needed to sand them down enough to make them looking polished but preserving the grain detail. When I was satisfied painted them a mahogany color, followed by a gloss coat. Once dried a wash using the base color and black. Various coats were applied trying to leave as much of the wash into the details and building darker with each application. In the end is looking like this:
 20170220_180820 by Oscar Baez Soria, on Flickr
The screws were painted:
 20170220_183208 by Oscar Baez Soria, on Flickr
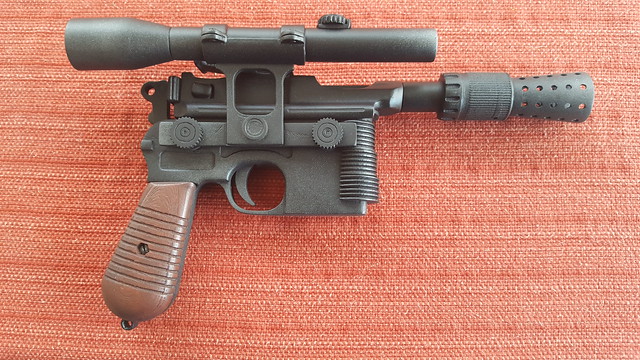
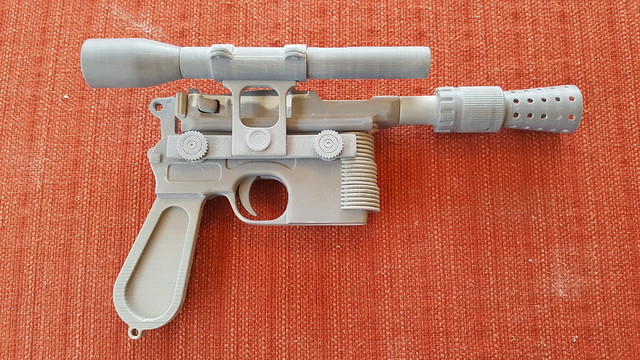
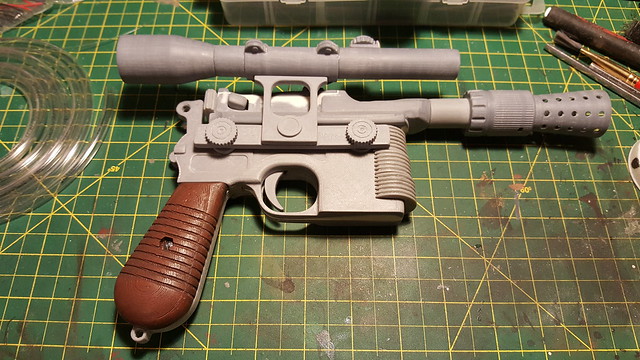
Quick mock up:
 20170220_183346 by Oscar Baez Soria, on Flickr
I will add some plastic clear lenses to the scope to improve a tad on it. Will follow up with the painting process. Hope some find this interesting and as a nice alternative that can be made to look very close to real thing.
Thought it will be easier to tell you the truth. The kit at first looks bad but once you start the tedious process of prepping the details and overall look of the piece is quite impressive. I added some weights to it to improve the feel of it when you handle it and it really makes a difference. I used some white putty to fill some seams and defects. The trigger cocks and "fires"' the receiver can be retracted with a realistic spring action too. At first it looked like this:
20170215_173924 by Oscar Baez Soria, on Flickr20170215_173909 by Oscar Baez Soria, on FlickrSanded, finish starts to visibly improve:
20170215_193355 by Oscar Baez Soria, on Flickr20170215_193412 by Oscar Baez Soria, on Flickr20170216_203154 by Oscar Baez Soria, on FlickrFinally it looks something like a blaster:
20170217_220437 by Oscar Baez Soria, on Flickr20170217_220525 by Oscar Baez Soria, on FlickrI soon realized that a lot of details could be further improved by removing some details and then adding more realistic looking ones but I decided to force myself and make the details printed on the piece as realistic as possible. For that the prepping should be taken to the extreme. After working on this for various days it finally really looks like Solo beloved blaster.
20170220_174753 by Oscar Baez Soria, on FlickrOne aspect of this kit that was really worrying me was the grips. The printed grips had the wood grain detail on it but they were very rough looking. Prepping here became critical. I needed to sand them down enough to make them looking polished but preserving the grain detail. When I was satisfied painted them a mahogany color, followed by a gloss coat. Once dried a wash using the base color and black. Various coats were applied trying to leave as much of the wash into the details and building darker with each application. In the end is looking like this:
20170220_180820 by Oscar Baez Soria, on FlickrThe screws were painted:
20170220_183208 by Oscar Baez Soria, on FlickrQuick mock up:
20170220_183346 by Oscar Baez Soria, on FlickrI will add some plastic clear lenses to the scope to improve a tad on it. Will follow up with the painting process. Hope some find this interesting and as a nice alternative that can be made to look very close to real thing.