ESB AT-ST

Joe

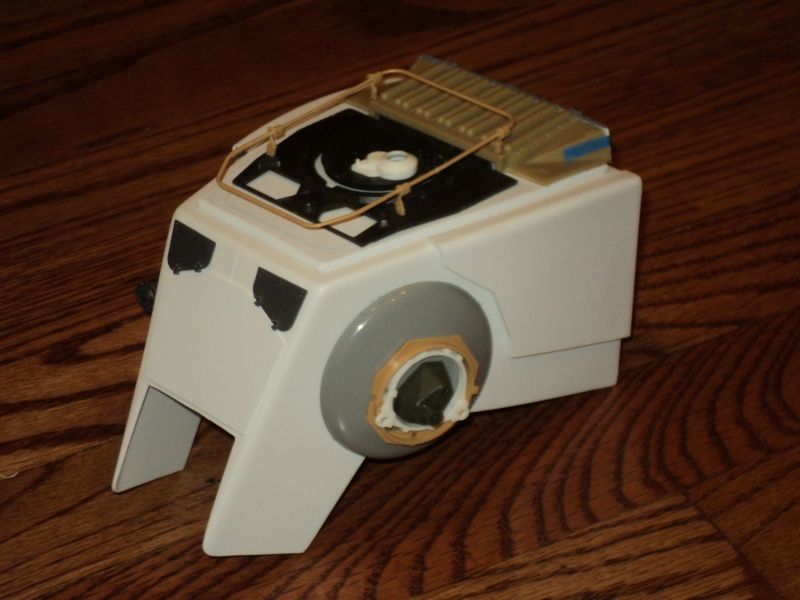
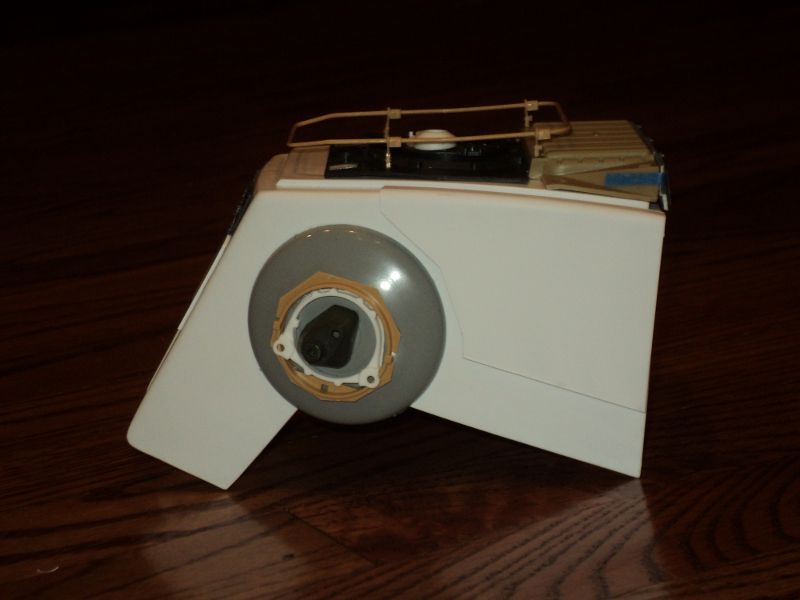
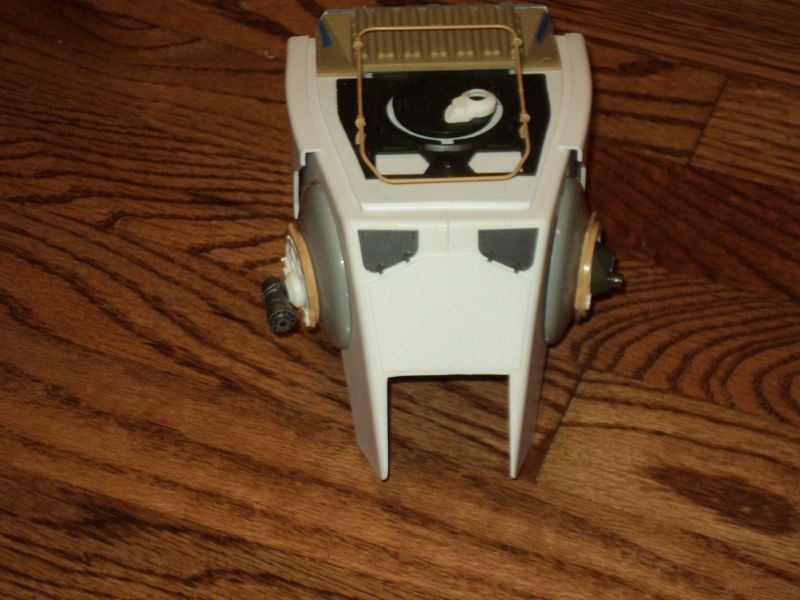
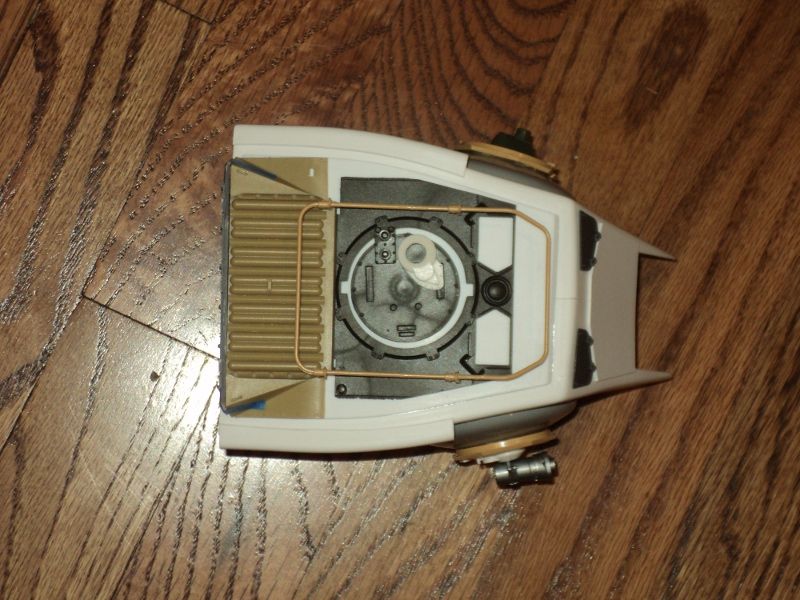
The horizontal cut on the grill is correct, 5 diamonds down. I think I figured out the problem. I was assuming the bottom of it sat perpendicularly on the vac'ed head. After looking at some pics there appears to be a slight angle. It is a tricky part to trim to right.

I did some quick measuring and my rough calculations show the to head plate to be .076. I originally tired .06 and it just did not look right. The .08 looks much better IMO. You are right, .1 would be too much.
 
Cool, I hadn't noticed the angle you are talking about but I did notice the gap between the plate and the 100 part. I thought that might also have contributed to it sitting higher on the SS model. Like I said, I wasn't sure if I was seeing 5 or 5 1/2 diamonds. Thanks for bringing this area up! It'll def help with my build.

I was lying in my last post. I roughly measured the plate at .065-.067". However, I didn't account for the plate sitting just a bit farther back than the 8rad hatches. Quincy mentioned that he measured it at .070". After looking closely at both of your pics, I think I agree with .080".

I packed all my kits today but I can still get to the storage boxes with all the parts to the AT-ST. I think I will fix the head and start tacking parts later this weekend. I'm thinking it'll help seal the deal for the .080".....I'm hard-headed.....gotta see it for myself sometimes! :D

Joe
 
Bump for a great build! Any updates?

I haven't made much progress on my build. Shortly after my last posts I put my house on the market and all my hobby stuff went into storage. The house sold and we moved into the new place. Now I have lots of new home projects.

I have done an overhaul of my head cutting templates. I built a second head to work out some of the kinks from my first. I found more kinks...mainly due to poor alignment and bone head thinking. You can't really see them in the pics, but I am not happy with the way some things line up, mainly the ears/back head. I am happy with the way the kit parts line up. I will be doing another to hopefully get it all right. Here are some pics of the second head.

DSC02827.jpg


DSC02828.jpg


DSC02832.jpg


DSC02834.jpg
 
Last edited:
I hope you like your new place. RL stuff has to come first.

The head looks great, really clean and nice! Ill admit that I have my ROTJ radar on, and cant see the small nuances of the ESB version.

I like how ILM scratched many parts based on the kit parts on this.
 
TBH Scott, that looks superb, very clean, i find it hard to put any crit on it :thumbsup.
Glad the house move went ok bud, must be hell having all those projects teasing you!

lee
 
TBH Scott, that looks superb, very clean, i find it hard to put any crit on it :thumbsup.
Glad the house move went ok bud, must be hell having all those projects teasing you!

lee

seconded scott.
silly clean.
 
Last edited:
Thanks for the compliments guys! I really am happy at how well it is turning out. I hope the rest of the build turns out as good.
 
Not to highjack this thread, but while I'm waiting for my armature to arrive I started on the head. I have two questions you guys may be able to help me with.

First the back plate. Is it cut square or is it tapered towards the bottom?

Second on the edges. I see some build with sharp edges, others with rounded ones and others, most clearly on Allan's build, with chamfered edges. Which is correct?

Cheers,
Marvin
 
I'm still conflicted on the back plate. It is tapered, but I wonder if that was by design or by quickly cutting in order to finish the model for filming. One side looks cut at an angle to me, the other looks less so. Also it seems that the actual plastic of the head is warped some on the more tapered side.

As for the edges, if you are going for total accuracy they need to be much sharper then mine are. I think I can get there with some more sanding. At the same time I kind of like the rounded edges.

Decisions, decisions.
 
Thats how i did it way back Julien, rivet counting, its the best way to cut it, which, may answer Scotts Q, ILM maybe just plain cut it wrong? Who knows.......but, an even cut each side is the way id go.
As for edges, a "slight" round, keep it as sharp as poss, while cleaning the joint i guess.

lee
 
Damn you fellows! I need certainties! I need guarantees damn you! Maybe i should find a different hobbie... :rolleyes

Seriously thanks for the input. I could only get the back profile by tapering the back plate but thought I might have the wrong head shape. From that one extra ref pic that was shared in Scott Graham's thread i can make out a chamfer or roundedness to the edges....

Marvin
 
Last edited:
Not to highjack this thread, but while I'm waiting for my armature to arrive I started on the head. I have two questions you guys may be able to help me with.

First the back plate. Is it cut square or is it tapered towards the bottom?

Second on the edges. I see some build with sharp edges, others with rounded ones and others, most clearly on Allan's build, with chamfered edges. Which is correct?

Cheers,
Marvin

This may help you decide Marvin. If you see it at the source, its easier, and, building it from public ref is how its done.

lee
P1040452.jpg
 
Marvin, you should have received all of these photos. I don't know why you didn't.

Congratulations Lee. You're the first to go against the wishes of Seiji Takahashi, the co-writer of Chronicles, who only asked that you not publish these pics on the internet. They are freely given to any one who builds the AT-ST. I just sent them to another builder recently - all a builder has to do is ask, and everyone who gets the armature is supposed to get the photos as well, and that's how we've been doing this for a half dozen years now. But I guess you want to make a point because you have a beef with me?
 
Lee, please do share them all with these guys. I had no idea the ref wasn't chained to the latest armature.
 
Back
Top