Elise de Laserre

EnfantDeGuerre

Well-Known Member
I am interested in starting a dedicated Elise de Laserre thread to discuss the building of this costume. I am in the early stages of trying to work on this costume with my daughter and I would be interested in sharing patterns or pictures of other people's costumes. I'd be curious to know what fabrics people used, how they made their props, etc. Elise's costume has some very distinctive patterning on it and am thinking of getting some fabric digitally printed. I would like to know if anyone else has done this and what fabric they may have used to print on to.

I will post updates on my own build as things progress.

941477383.jpg
 
So one of the first things I have done is tried to recreate the pattern for Elise's tunic. I have done it in Illustrator and will have this digitally printed on fabric. I am thinking a canvas type fabric of about 250 gsm might be about right.

Screen Shot 2017-09-12 at 5.30.52 pm.png
 
I took a tonne of measurements and did a bit of draping to eventually get this profile for the leather gaiters. We want these to stay up so we have spent a lot of time making sure that the profile is just right and the gaiters will fit snug. I used to draw everything out onto to pattern card but I ended up with all of these giant card patterns taking up space. Now I draw all of my patterns up in Illustrator and then take the PDFs to a nearby Office and Stationery store which has an instant print shop. They have a large format printer which will do an A1 B&W plan print for about $2.50 and an A0 for about $4.00. Pattern card actually costs me more than that to buy and my patterns are stored on my computer instead of in my cupboards, under my bed, in boxes, in drawers, etc.

Screen Shot 2017-09-13 at 7.22.38 am.png
 
So it is really hard to work out what the pattern on the collar looks like, but this is about as close as I can get. I figure that even if it isn't perfect it is going to be close enough once it is part of the whole costume.

Screen Shot 2017-09-13 at 9.39.47 am.png
 
As far as possible we want to make this costume look like it actually could have been made in the 1770s, so we are trying to use all natural materials. The other day we found a red, loose-weave, merino wool scarf, at a charity shop and picked it up for $2. It was branded by some company that makes pearl jewellery and it seemed a shame to repurpose it but it looked like it would make a perfect sash for Elise. However, it was too short being just a little over 1.5m long. So tonight we sliced it in half lengthwise, joined the two halves end to end, then folded it and overlocked it all the way along to make a 3.25m tube. Once it was reversed out it makes a perfectly good sash about 12cm (5in) wide. Because of the very loose weave wool it has a fair bit of stretch to it which means it won't tend to unravel as the body expands and contracts.

Sash.jpg

Merino.jpg
Loose-weave, deep-red, merino wool.

Sash1.jpg
The puny (but very nice) scarf as found at a charity shop for $2.

IMG_5952.JPG
Cut lengthwise.

Sash4.jpg
Now it stretches across the room over 3 metres long.

Sash5.jpg fullsizeoutput_140.jpeg
The ends look a little rough now that the tassels have been cut off. We will probably do a hand whip stitch to close the ends. Now that we know the finished size, we can start making a couple of those little Maltese cross ferules out of EVA foam to slip over the ends of the sash.

The whole job only took half an hour (in fact this post took longer).
 
Last edited:
Interesting choice of costume! Love it already...yes, choice of fabrics will be the diff between good and great. Eager to see the next update!!
 
Pattern for 2mm EVA foam ferule for the ends of the sash. Not sure how we'll stop them from sliding off. Perhaps use a earring glued inside and fixed through a small hole in the back.

Screen Shot 2017-09-14 at 12.01.34 am.png

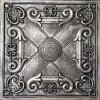
EDIT: We have started thinking that, if these ferules are supposed to be similar to the pressed tin tiles that you sometimes see on 19th and early 20th century ceilings and picture frames, it may be more interesting (and easier) to make these ferules out thick aluminium baking trays and ageing them up with a bit of dry brushing.

s-l225.jpg
A pressed tin ceiling tile,
 
Last edited:
We found this 15mm ribbon for the choker which seems very close to the in-game one. We found a shank button and sanded it down so that it was flat. Then we took a smaller shank button and glued it to the back of the larger one. The button was covered in brown linen. A button hole was sewn into a length of the ribbon and another length of ribbon was hand-sewn into a rosette. The whole lot is put together to form the choker. Need to find a piece of lace to go into the choker sandwich.

fullsizeoutput_144.jpeg fullsizeoutput_146.jpeg fullsizeoutput_145.jpeg IMG_5998.JPG

We'll use a couple of press studs to clasp the choker, however, we'll need to get the shirt finished first in order to get the length right.
 
I haven't posted here for ages but this project is still being worked on periodically.

We have patterns now for the gilet, the tunic and the leather stock or collar (or whatever that thing is that sits on Elise's shoulders) however, the mock-ups still need some adjustment so I won't post those yet.

The pattern and construction notes for the gaiters are complete and I thought I would post the pictures here in case anyone wants to try them out or improve on them. The issue with the gaiters, as they appear in the game, is that they only have four buckles which would not be effective in closing an opening side seam. I have seen a lot of people using a zip down the back seam to close the gaiters but I shied away from that because I wanted to try to embrace the period as much as possible and of course there were no zips in the 18th Century. It has taken a long time and a lot of thought to work out how to make them.

What I have done is adapt a technique that gets used in a lot of very high women's boots - a zip in the centre of the length of the upper allows the leg to be slipped into the boot. I am using a similar technique whereby the top and the bottom of the outside seam of the gaiter is sewn together and then the section of the seam is left open and closed by four 1" buckles. I have attached my drawings below in case anyone else wants to try out the pattern. I hope they make sense.

Remember that the patterns for these gaiters have been made with custom measurements. These are just guidelines and you will have to come up with your own measurements for this guide to work for you.

Elise Gaiter Pattern 1.png
Elise Gaiter Pattern 2.png
Elise Gaiter Pattern 3.png
 
Here is the pattern we made for the collar (leather pauldron). It looks odd in it's flat state but once it is buttoned down over the shoulders it looks pretty much identical to the one in the game. Constructed from the same leather as the gaiters - 2mm hide. Once again use this pattern as a guide and make a cloth mock-up before cutting your leather.

Elise Leather Pauldron.png
 
This is the pattern for Elise's bracers. It was harder to work it out than you would think as we had to make sure that when it was buttoned closed the top blue suede was close to half the size of the bracer. I am going to use shank buttons and will probably use split rings to hold them in place otherwise I was thinking that a length of elastic running through all of the buttons might help to keep the bracers tight as the arm moved.

Elise Bracers 1.png
Elise Bracers 2.png
 
Last edited:
It has been about two months since I update this build thread. I have been working on a few other projects.

I recently took delivery of this fabric (canvas) that I had printed for Elise's tunic. Following are a few images that I used as references for creating the pattern.

60787042_327505337932500_4337352756286193664_n.jpg


Screen Shot 2019-06-29 at 10.13.20 pm.png


Screen Shot 2019-06-29 at 10.14.47 pm.png


Screen Shot 2019-06-29 at 10.15.07 pm.png
 
Glad to see that the project is still on; good pattern on the fabric!!
Yes, still happening. It just had to make way for other priorities, but back onto it now. Half the effort is in getting the patterns right before a thread or a hide is cut. Most of that work has been done now, so it should all come together fairly quickly.
 
I have also had fabric printed for the collar of this costume. The three images below were about the best screen caps I could find of the pattern.

Tunic pattern 3.jpg
Pattern 2.png
Untitled-3.png


This is the pattern I came up with. It is probably truest representation of what is going on with the collar but I think that the pattern will just fade into the general background noise once the whole thing is pieced together. There was a lot of irregularity in the reference pictures so I just came up with a regular pattern that bore some resemblance.

Also, you will notice a very slight line running horizontally through the pattern. This is one of the first fabric patterns I ever did and I made a bit of a mistake in exporting my Illustrator file. I exported it as a JPEG. Exporting an image with two solid colours like this to a JPEG tends to add a bit of noise to the image and around the edges in particular you tend to get one pixel of fading which leads to this annoying stripe running through the pattern. If you are sending off a pattern to print, particularly if it has a solid dark colour as a background, save your image as a PNG document.

IMG_0625.JPG


Below is the first gaiter I have made based on the pattern above. It has turned out almost identical to the drawing so I am pretty happy with it. However, I am yet to find out if it is practical. I am not sure if someone can actually walk around in it. If it doesn't work practically then it might require some elastic hidden in it somewhere to provide a bit of give.

IMG_0624.JPG
 
Update July 10, 2019

I have finished all of the sewing work on Elise's leather and suede bracers based on the pattern some posts back.

IMG_0668.JPG

I have been using this awesome machine which I picked up very cheaply. It is a Singer 31K47 made in 1957 (so it is 62 years old) and has a vibrating foot (similar to a walking foot) and is perfect for evenly feeding leather and suede.

IMG_0671.JPG IMG_0669.JPG IMG_0673.JPG

Finished product.

IMG_0674.JPG


I am going to put these aside for the meantime as doing button holes is so boring. I will do those when I am in the mood (or when I have to).
 
Update July 12, 2019

Leather collar.

Skiving.

IMG_0678.JPG


Sewing

IMG_0679.JPG IMG_0680.JPG IMG_0681.JPG IMG_0683.JPG

Finished

IMG_0682.JPG


Like the bracers I am not going to be doing the button holes on this collar just yet. Something which I failed to photograph was the wadding which I glued between the lining and the leather before finishing the top stitching.
 
This thread is more than 4 years old.

Your message may be considered spam for the following reasons:

  1. This thread hasn't been active in some time. A new post in this thread might not contribute constructively to this discussion after so long.
If you wish to reply despite these issues, check the box below before replying.
Be aware that malicious compliance may result in more severe penalties.
Back
Top