Electronic installation guru's into props-Need help!

tubachris85x

Master Member
I can't seem to find any real help on this, and it's kinda getting frustrating :unsure

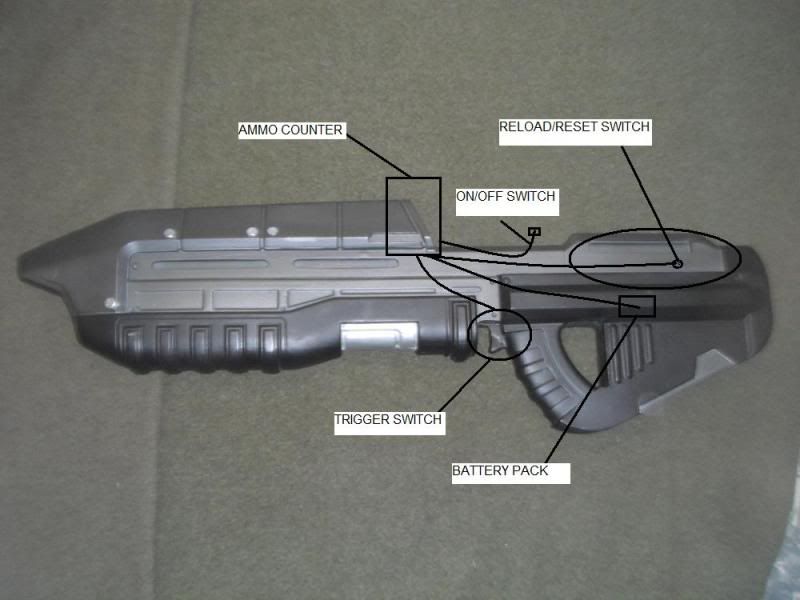
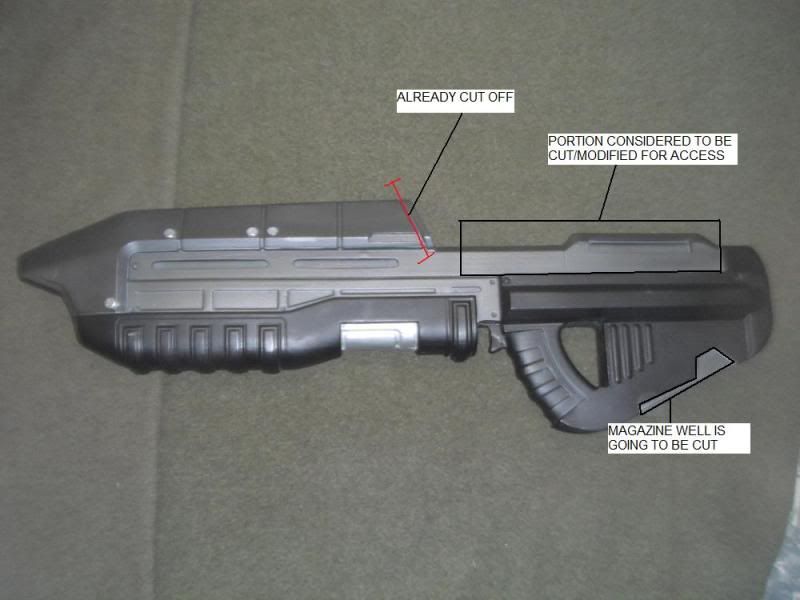
I am trying to get a series of electronics to fit into my halo AR. The issue being is that the rifle is a single piece cast. I have had many ideas, however, I am still loosing sleep on how to actually get the trigger switch and other components where it needs to be. I currently have cut out the main screen (where the counter will be placed) and that right now is my only real point of entry. I will be clearing out the magazine well as well, and that will be my 2nd point of entry.

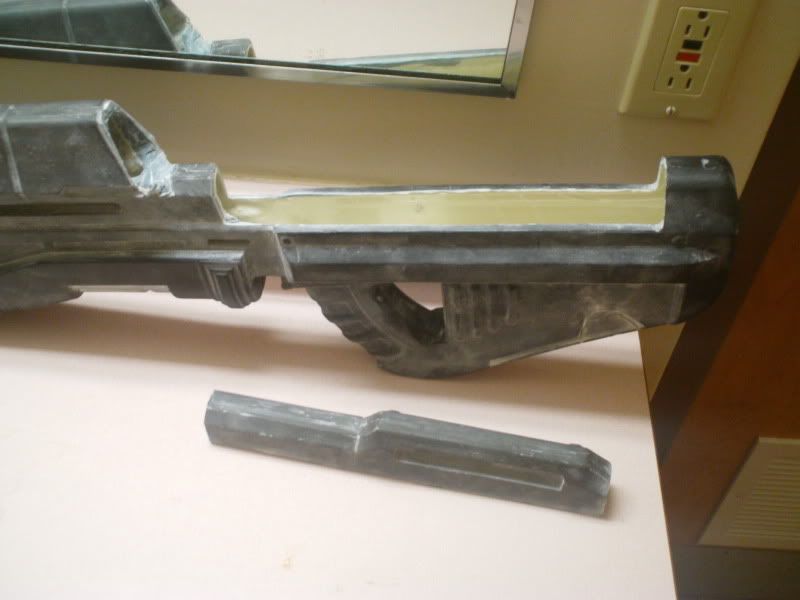
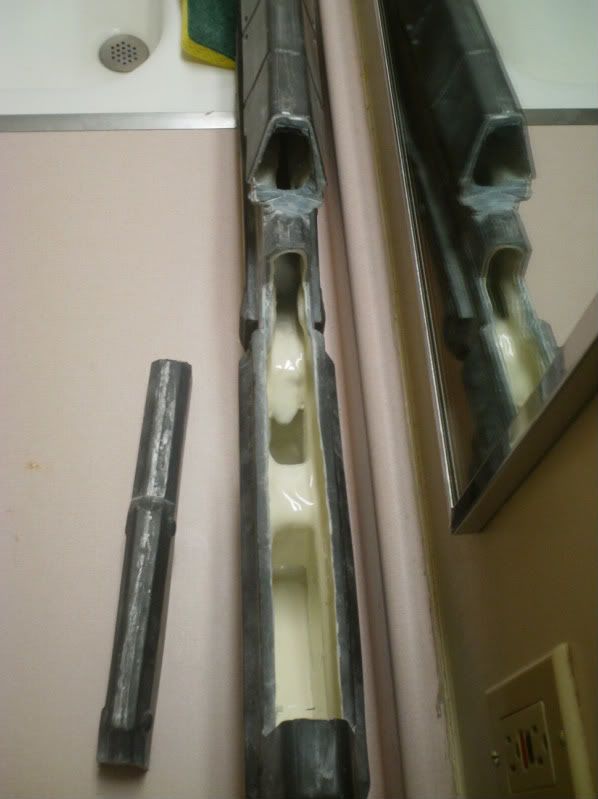
My last resort however, is to cut a section off the top (where the bolt is, just behind the ammo counter screen, which would expose the entire rear inards. This though would be only as a last resort. :wacko

Any suggestions?
 
Last edited:
Eh, well I did some scouting..and I think I can cut the top portion off as I mentioned and make that portion removable, where I will re-attach the ammo counter screen permanantly. Since the piece will be hollow, I can turn it into a housing for the batteries, and it might allow me to try and rig a spring tube rig w/ mock charging handle, to which I can place the reset/reload switch on either end, rather then using the magazine to do that function.

This is going to get messy..
 
That sounds reasonable.

A simple diagram of where you are now and what you plan to do would help us help you. :)

I think, that if you go ahead as planned, going slightly deeper could allow you to reach the trigger area as well.


-Mike
 
That sounds reasonable.

A simple diagram of where you are now and what you plan to do would help us help you. :)

I think, that if you go ahead as planned, going slightly deeper could allow you to reach the trigger area as well.


-Mike


Rough, but here's a basic layout

WIRINGCHARTAR1.jpg


ARCUTDIAGRAM.jpg
 
So pretty much, the first image shows the basic layout of the cables. They are all connected to the circuit board/counter. That portion of the rifle has been cut and I can now feed the wires from that openening into the main body itself. The lines spawning from it represent the switch/equipment attached as well as a generalized area of placement needed for it.

The second image shows what I already cut and what will/suggested to be cut.
 
It looks like a Dremmel and electricians drill bits are going to be your best friend.

I would suggest cutting along the panel lines and removing the entire stock/grip area that would get your trigger area open and keep your cuts hidden.

Or find a vaccuformer and pull a hollow cast.

Tommy
 
It looks like a Dremmel and electricians drill bits are going to be your best friend.

I would suggest cutting along the panel lines and removing the entire stock/grip area that would get your trigger area open and keep your cuts hidden.

Or find a vaccuformer and pull a hollow cast.

Tommy

Hmm...idk about cutting that portion because having to reattach it could cause some structural issues since it would have to bear the weight of the whole front portion. I'm aiming to really do no cuts if possble but I don't have many options.

As far as vacu forming it, yea, can't do that because I didn't fabricate this piece. It is rotocast, so for the most part it is hollow. The area I marked to possibly cut is hollow but with thick walls. I figure if I cut that, I'll have significant space to work on the trigger, pull wires through, build sort of a cradle, which would sit on the top of the magazine well. Hmm.. I could probably try out the faux bolt w/ spring to activate the reset switch?
 
Eh, I went and did it. Relieved that it went much better than I anticipated. The varying thickness throughout the cast could have made or break the entire concept. I grinded down the excess in places. The inside of where the trigger is now very easily accessable and has a good open area for me to construct a trigger mechanism to install.

The portion I cut off is also very hollow and *might* be able to support a fuax bolt/spring mechanism like I suggested earlier.

001-5.jpg


002-5.jpg


Other than the installation of those pieces, the only thing is having to clean up the edges of the removable portion. I'm thinking of either using magnets (large silver ones like at Joanne's) or my roomate actually suggested using a piano hinge one one side with magnet on the other. I'll throw the options around.

I did try to cut the mag portion, but that area turned out to be significantly thicker then I thought. I lost sunlight and will get back at that tomorrow..

-TC
 
Last edited:
This thread is more than 13 years old.

Your message may be considered spam for the following reasons:

  1. This thread hasn't been active in some time. A new post in this thread might not contribute constructively to this discussion after so long.
If you wish to reply despite these issues, check the box below before replying.
Be aware that malicious compliance may result in more severe penalties.
Back
Top