cannibal869
Well-Known Member
Hey everyone!
Well, I haven't posted anything too useful lately, so I thought I would share a tutorial on something I did this past Christmas for a secret santa gift...
To be honest, I was a little reluctant to post this here and I apologize if anyone is offended by me making this... I guess imitation is the sincerest form of flattery?? :confused :unsure
Anyhow, the recipient is a guy who probably already has everything saber related he could possibly want, so that route was a dead end. But what else Star Wars related could I give him that would be cool to get as a recipient?
Then I remembered a pic posted a while back..... A mash-up of Boba Fett and 300:

And I thought... "cool, that doesn't look like it would be all that hard to do... " <famous last words anyone?>
So with that in mind, I scoured two sources : ebay and the dented helmet forums.
On Ebay I was able to find an auction for a "Steel damaged 300 helm Greek Corinthian helmet 403"
Steel damaged 300 helm Greek Corinthian helmet 403 | eBay
The price seemed quite reasonable to me compared to some of the other hits I got when searching for "spartan helmet" and such... Anyway, that was one hurdle down!
The second was finding some patterns of "weathering" to copy from.
I luckily found these reference pics, some from the RPF and some from thedentedhelmet.com
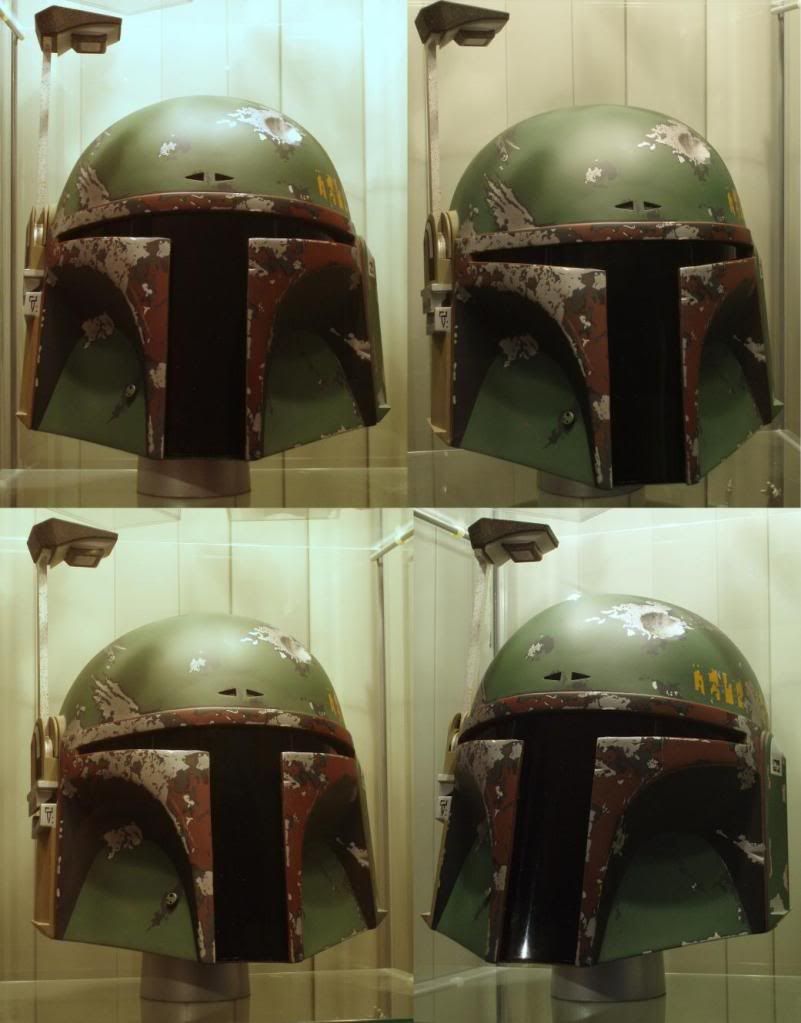
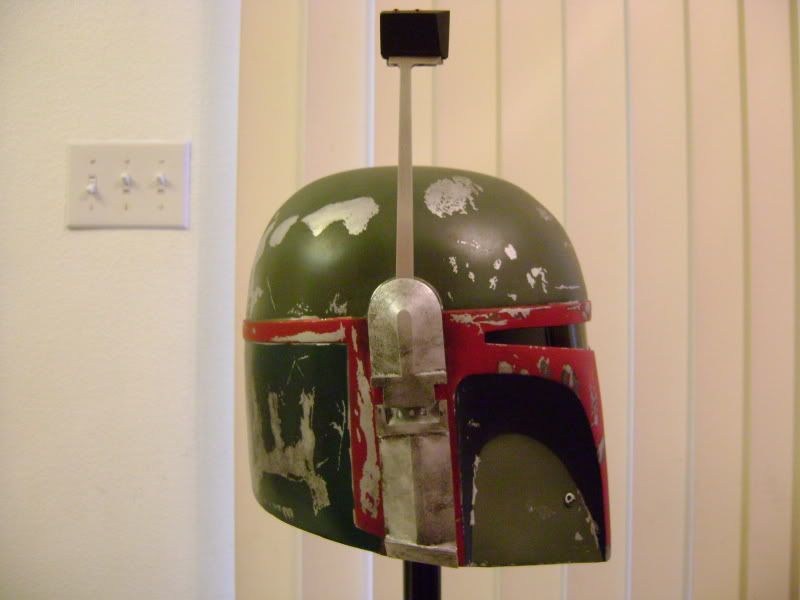
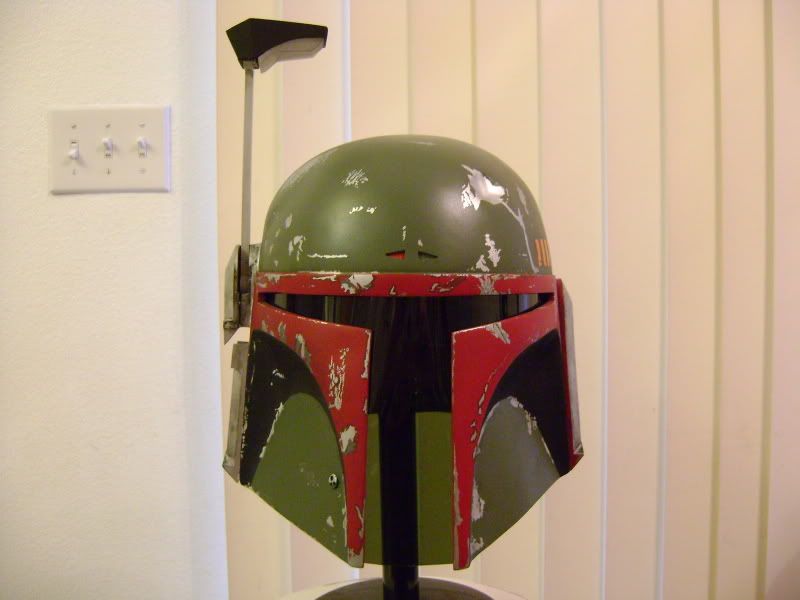
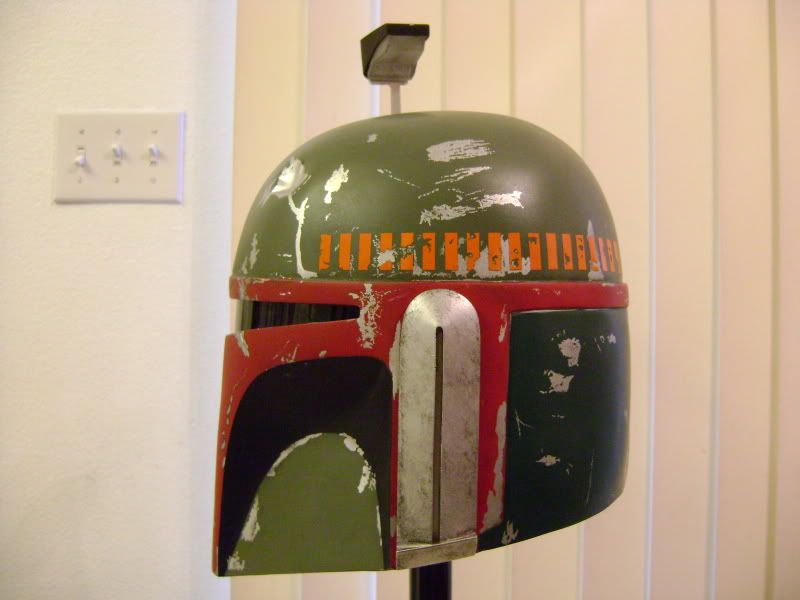
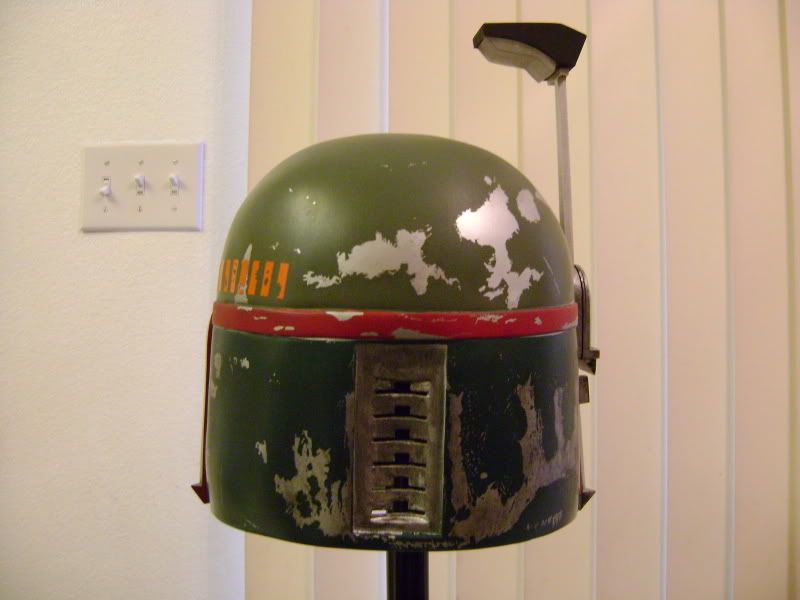
and this cool wraparound pic
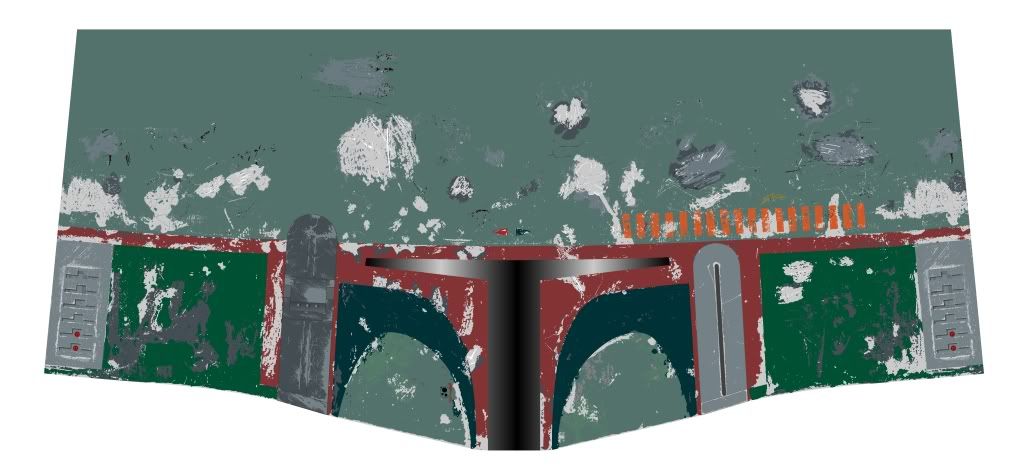
With that in hand, the next step was to find some liquid mask.
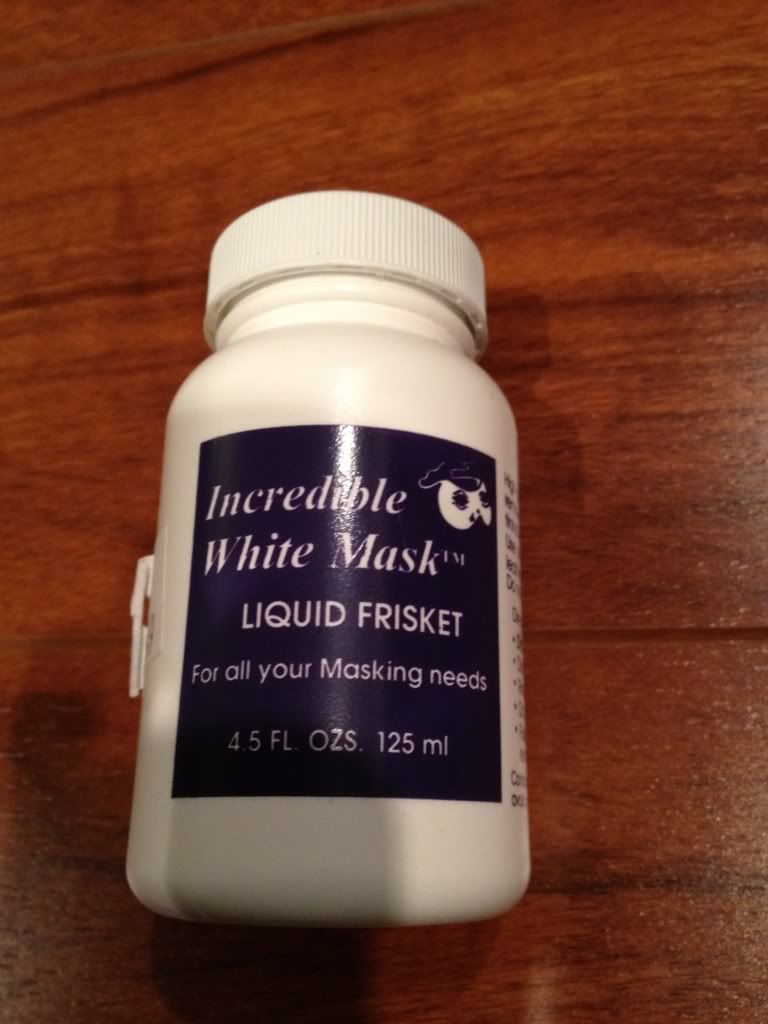
I chose this from Amazon based on the positive reviews from other people
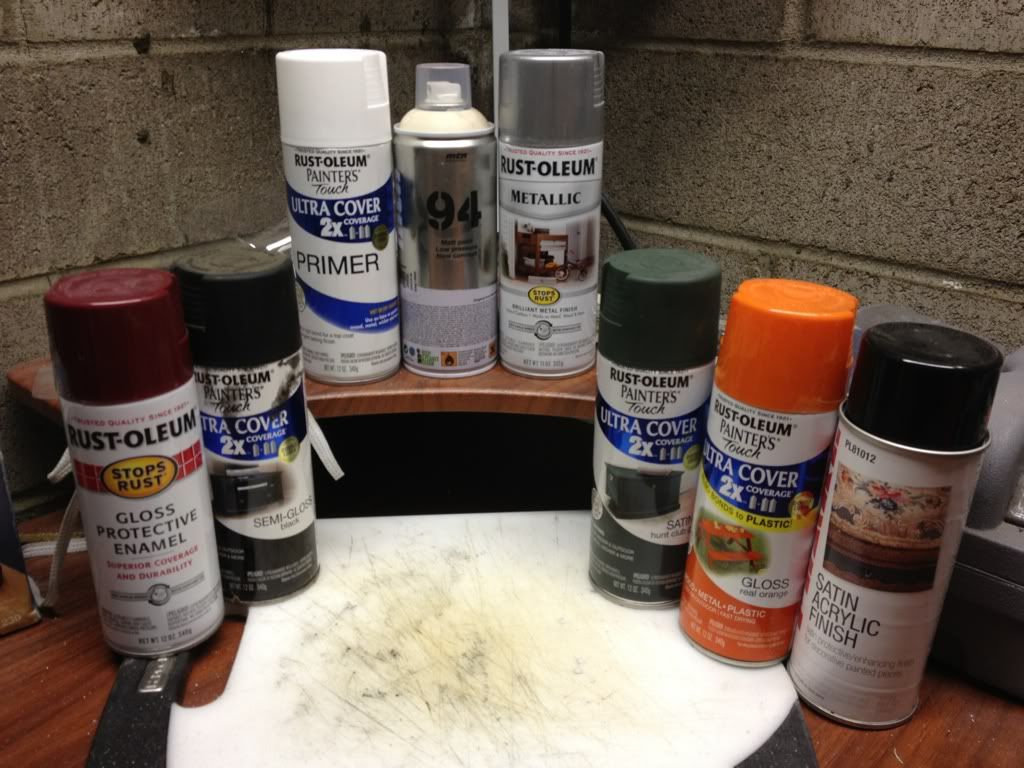
Next up: Paint colors!
Here's what I ended up using:
OK so I waited about a week for my package to arrive and when it got to me, it was covered in a thin sheen of green... grease?
Luckily I had just bought some brake cleaner and was able to use the spray to help remove the green gunk off of the helmet.
Here it is afterwards:
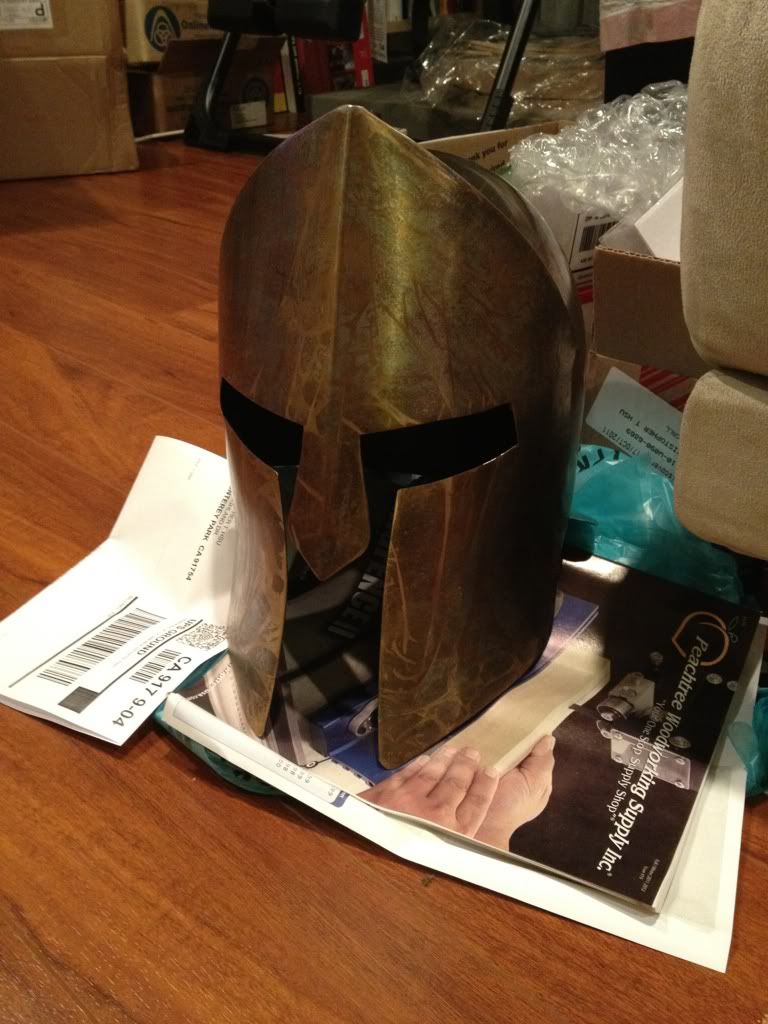
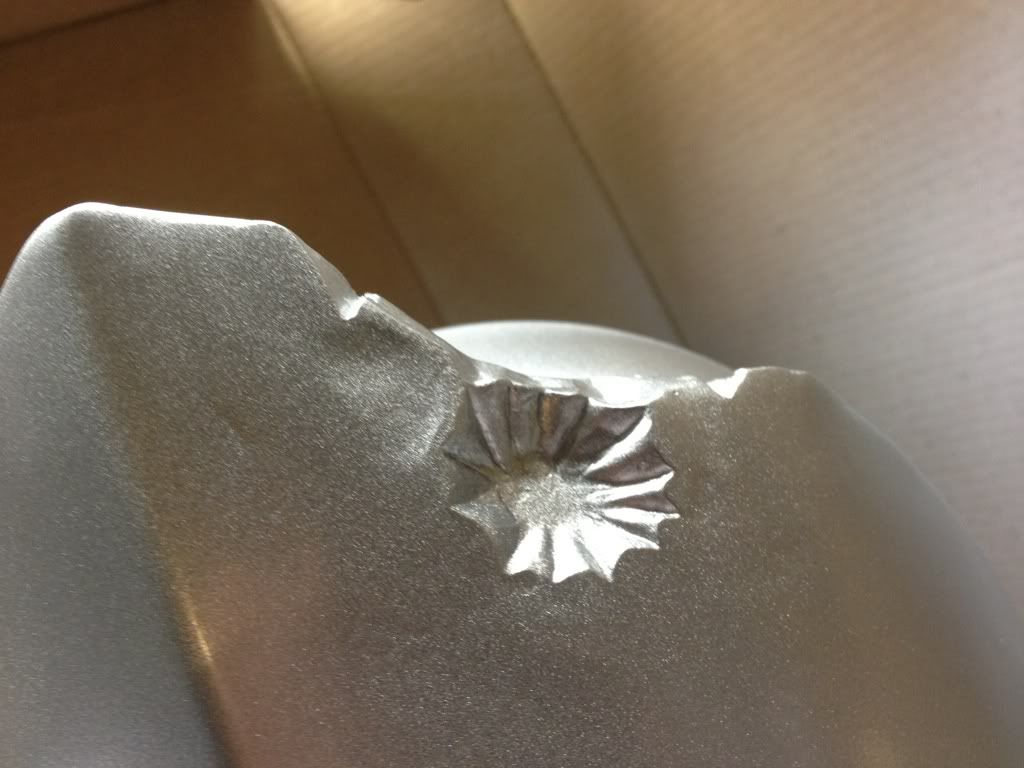
Allright next up: the famous "dent"
Well, to be honest, I figured I might try and just hit the thing with a hammer....
And that didn't work out too well... the rest of the surrounding metal kinda buckled in around the hammer site, so I decided to dremel out some of the top of the helmet crest and then fill it in and "reform" the dent with some self hardening MagicSculpt.
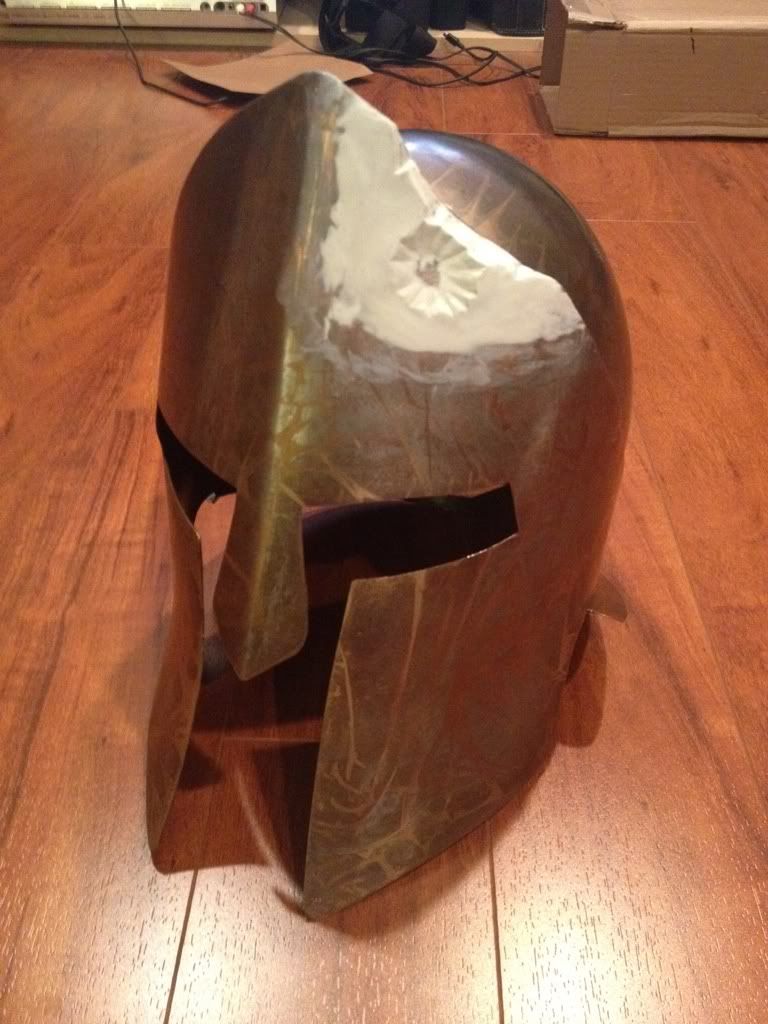
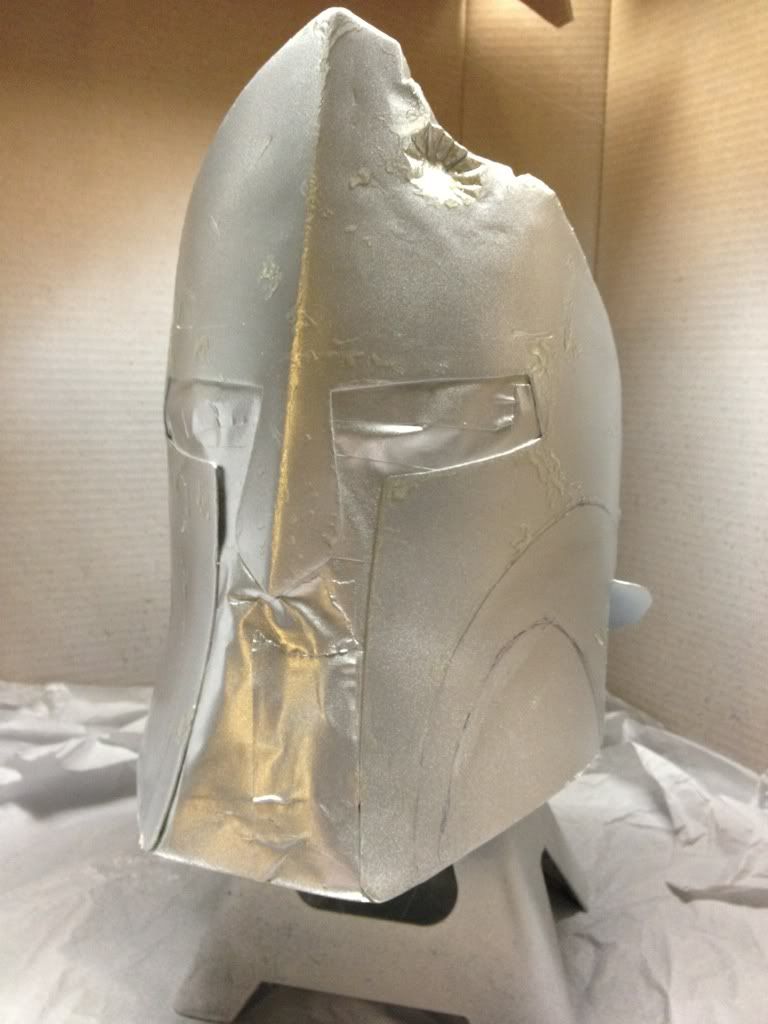
OK making progress here.... Next up, about two or three base coat layers of primer with some light sanding in between. I masked off the "eye holes" and front "mouth" area with some frog tape (basically painter's tape - this brand is supposed to prevent bleeding under the edge):
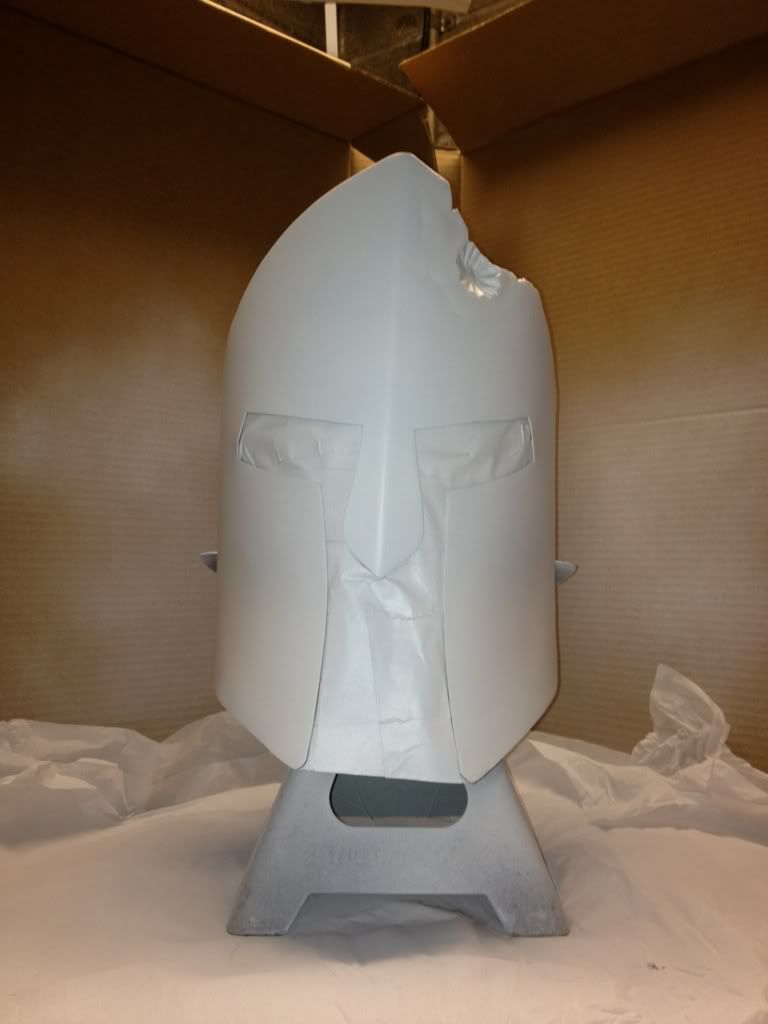
yes that's the helmet sitting on top of my two ton jackstand
next up, another base coat, this time of metallic silver:
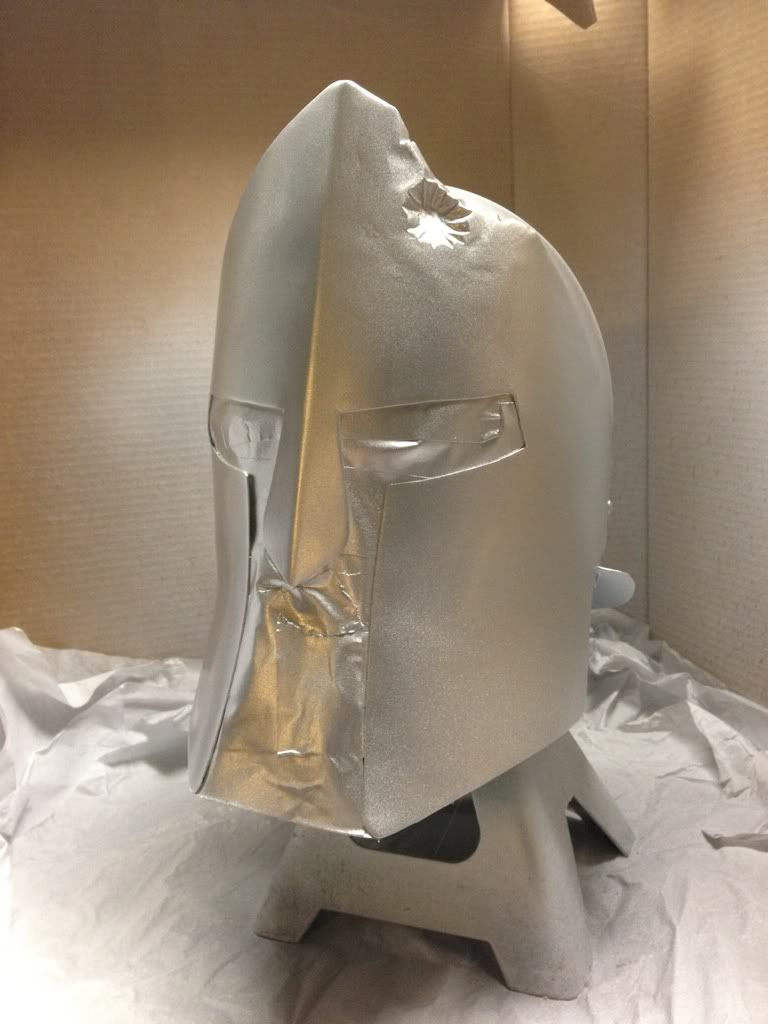
OK, now that I had the basics down it was time to do the frisket.
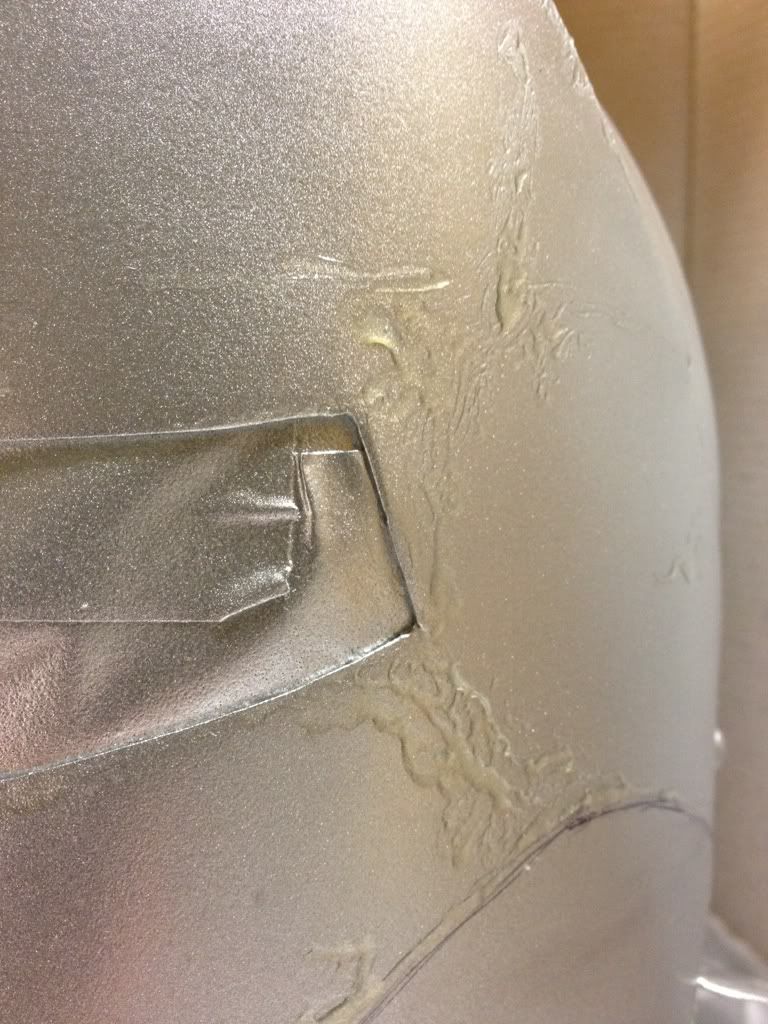
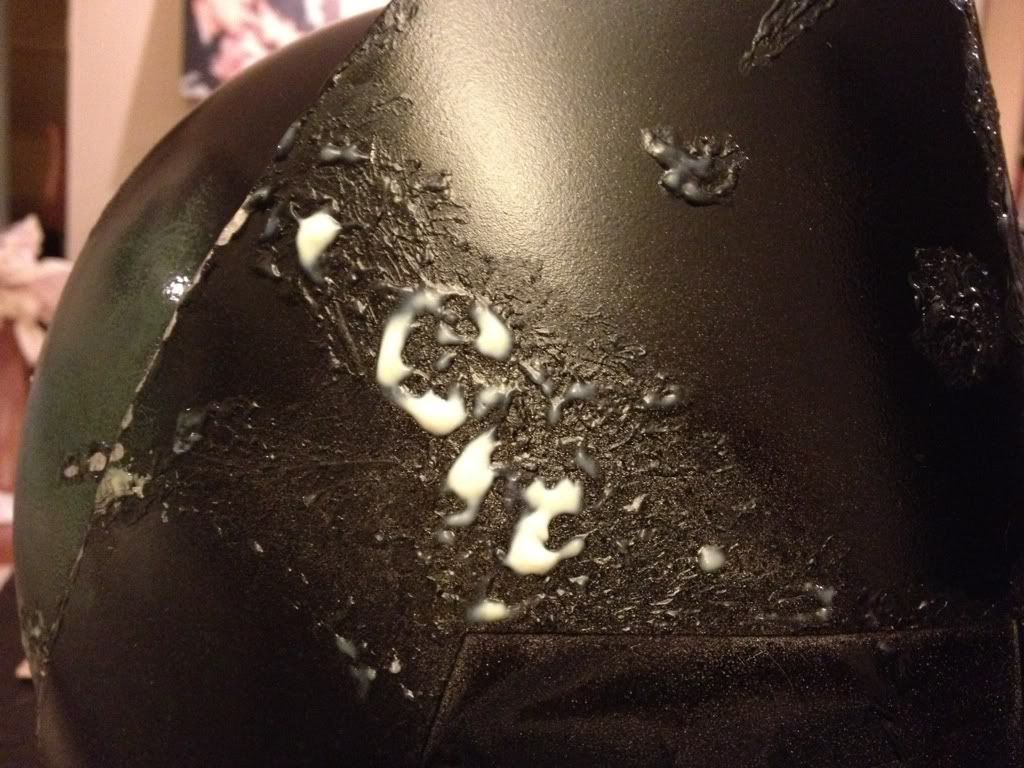
This stuff gets really gooey quite quickly. It goes on white, but then dries clear. The instructions on the bottle say to dip the brush into water to help keep the stuff from sticking too much, but eventually, I got tired of this and would just rip off any accumulated rubbery gunk off of the brush by hand.
I used the above reference pics to help paint the lines onto the helmet in the location of the ridges (i.e. center "nose ridge") as well as long the curves of the "cheek" regions.
here's a closeup of the stuff:
next up, a layer of flat black
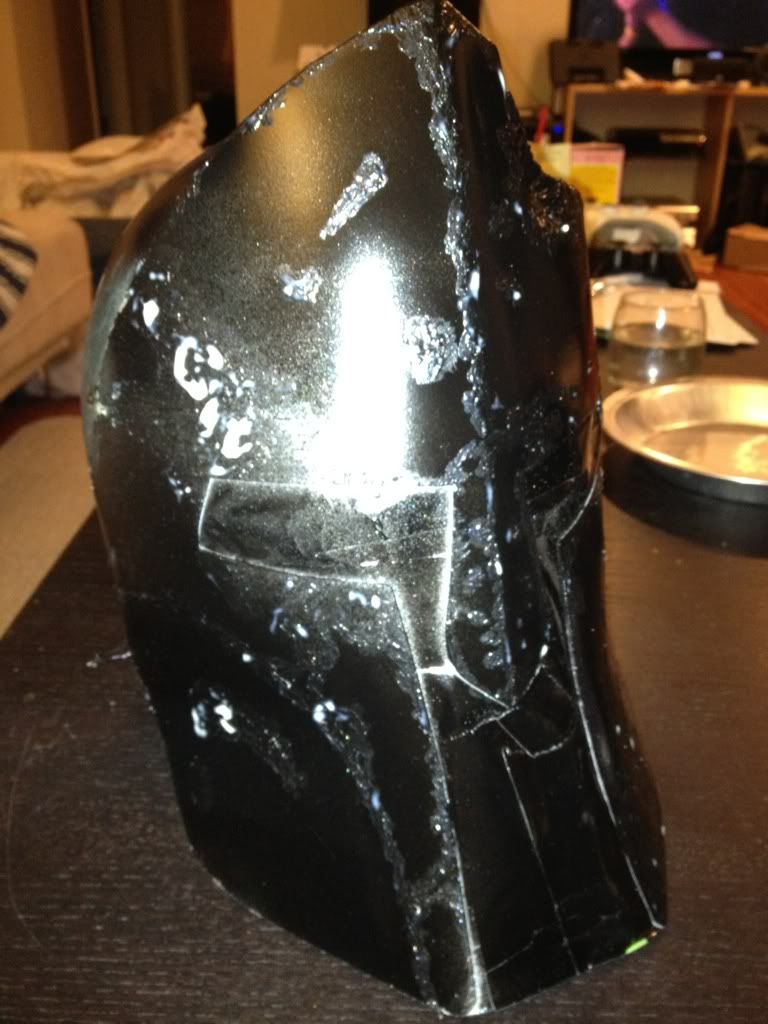
Once the black layer was down, I went around the helmet and painted another wider "rim" of the frisket around what was already there. The idea is that when you remove the stuff (which is kind of like peeling off rubber cement), it should leave the center portion silver (the lower coat) and then have a little bit of an outer rim of black, and then around that another outer rim of your desired helmet cover.
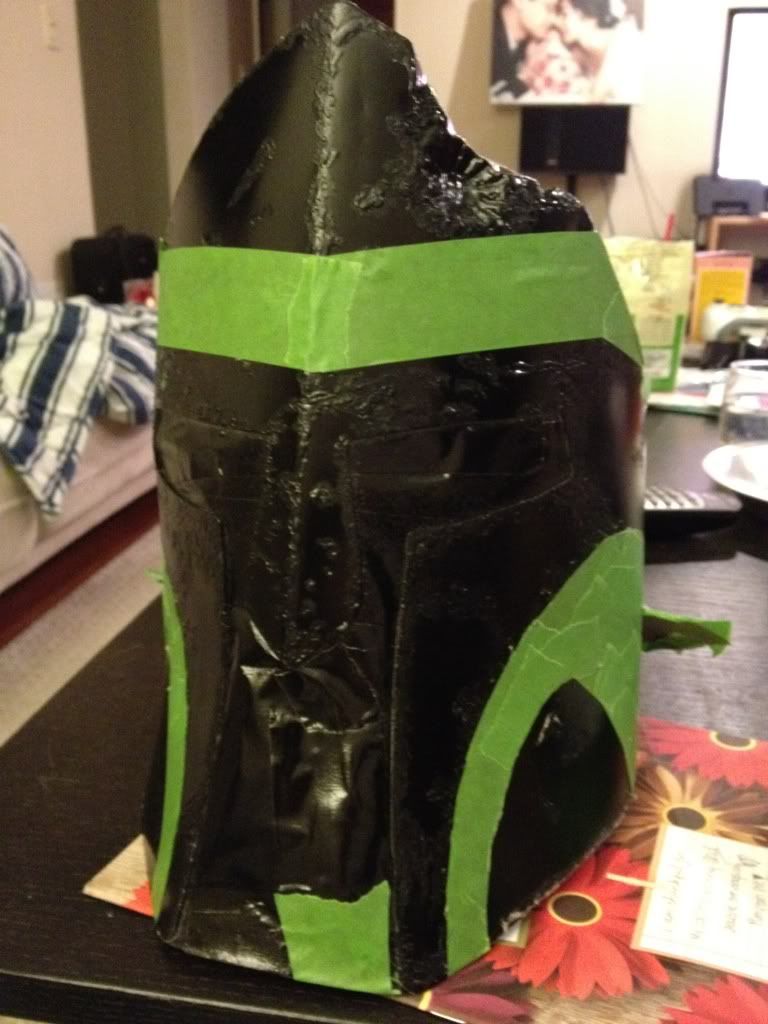
Next up, I masked off the black portions of the "mandibles" and the areas where the maroon would go
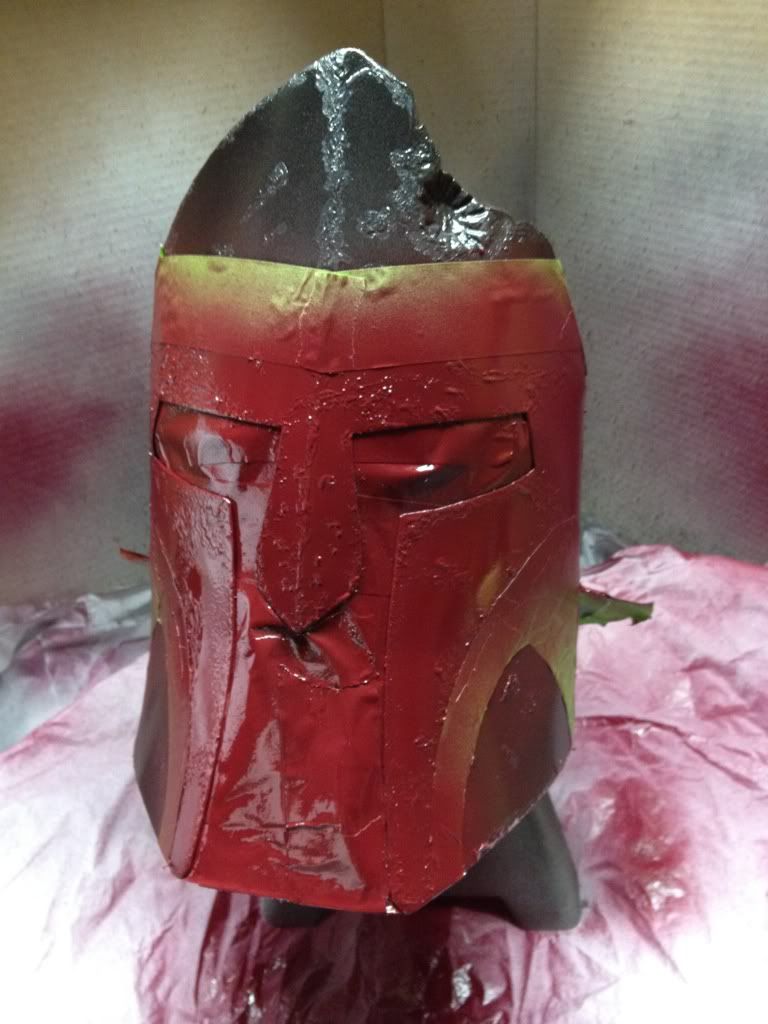
Here we are after the maroon layer:
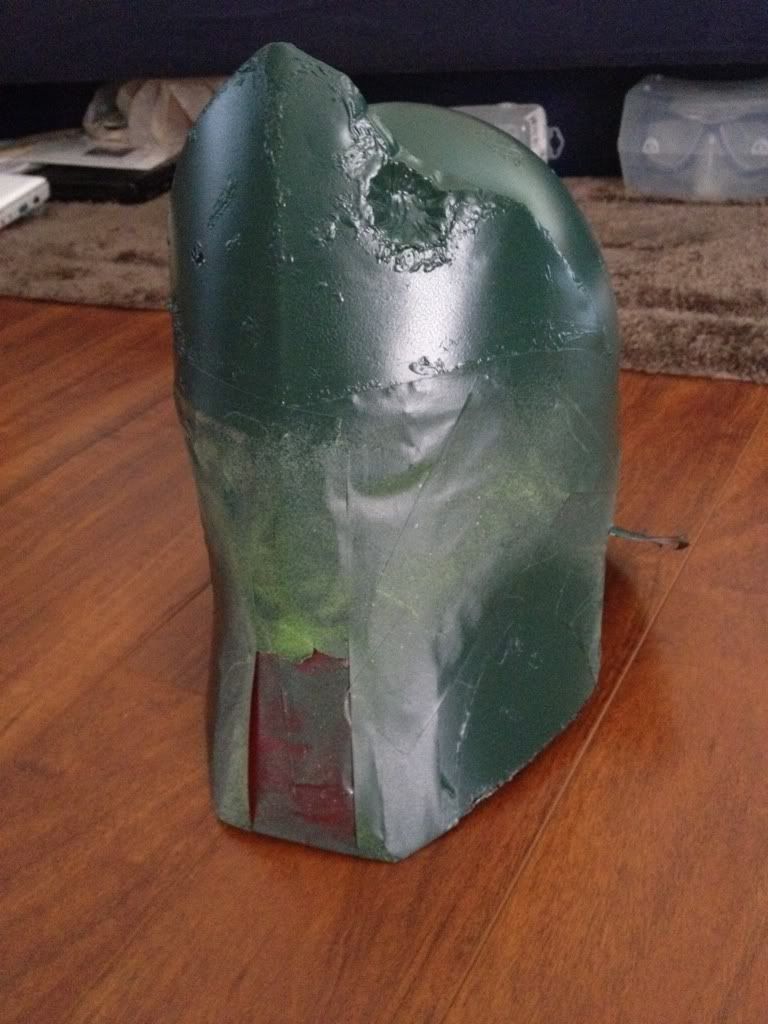
Then after the maroon dried, I masked off all the maroon areas and sprayed everything with hunt club green - almost there!!!
Allright!!! Now it was finally time to see how everything turned out <fingers crossed>
I took off all the masking, and peeled off the frisket stuff and got this:
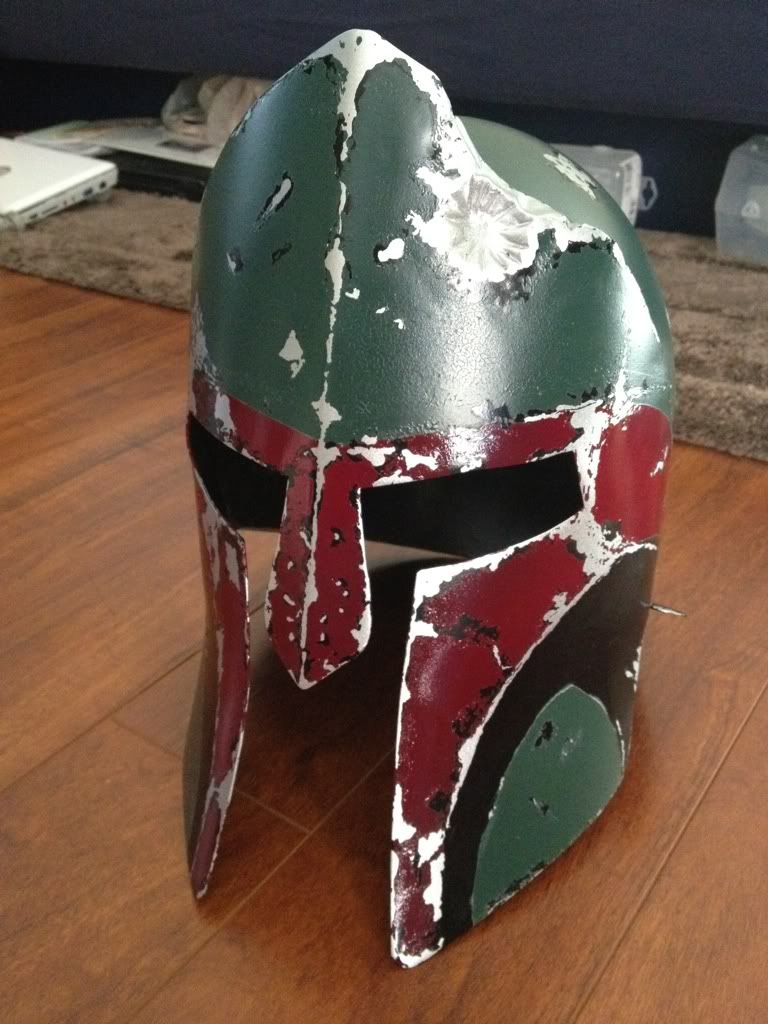
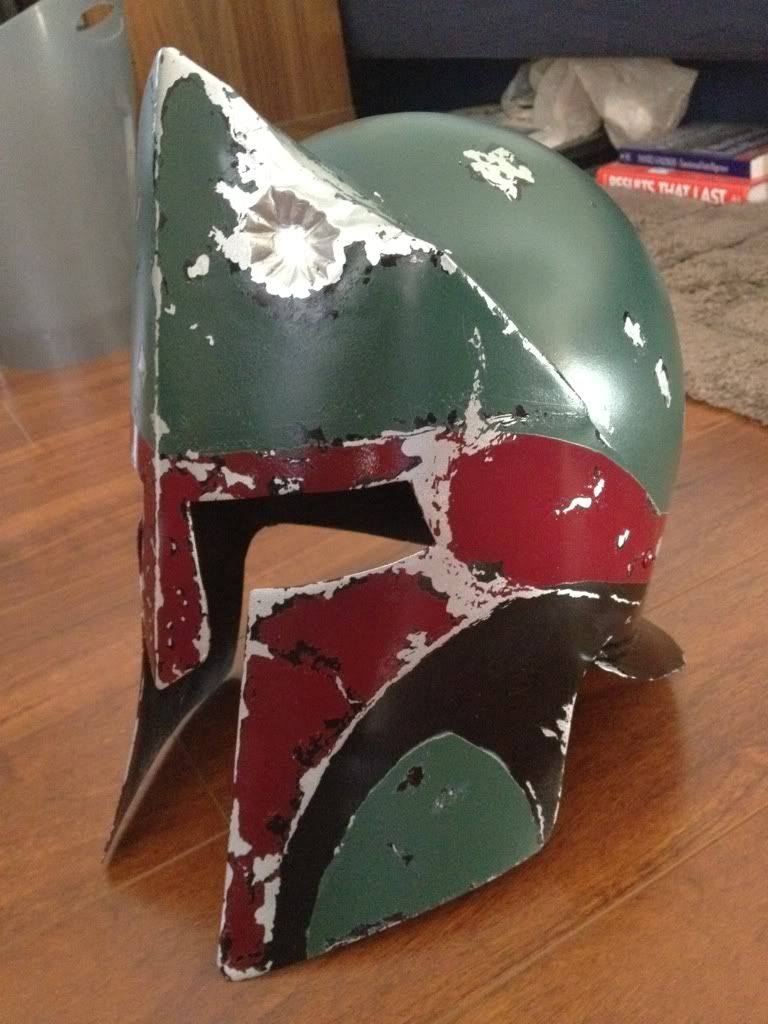
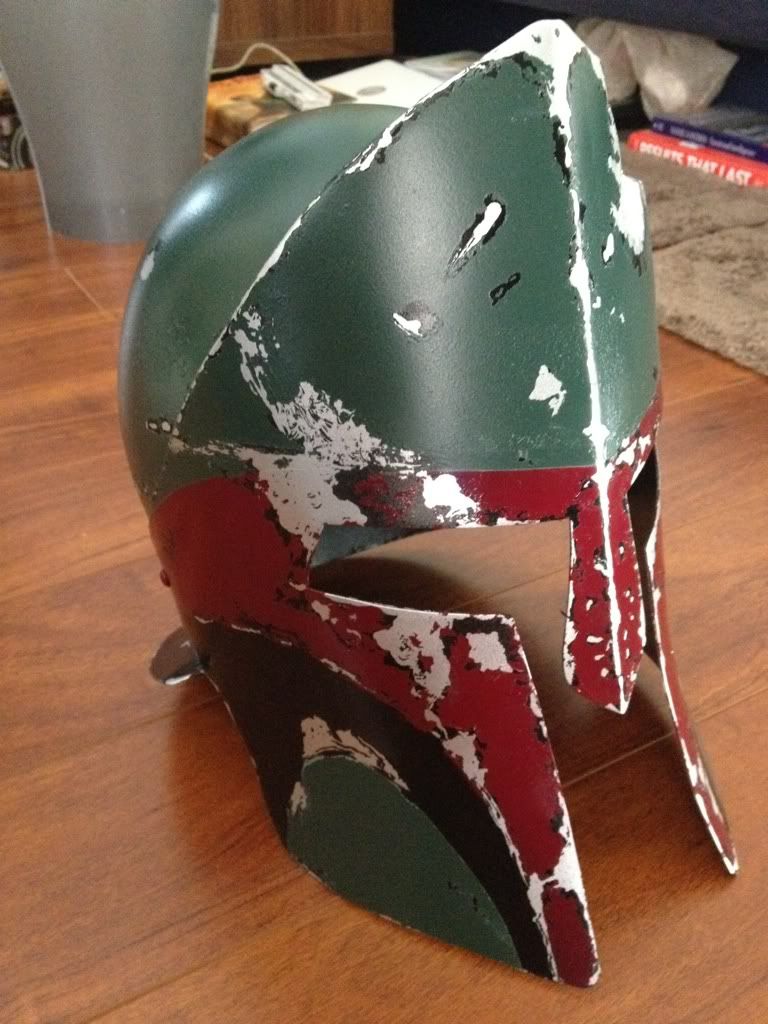
Cool! now to some final details - I had to mask off the "kill marks" on the side of the helmet. I had to use both the frog tape to mask the area as well as the frisket for some of the weathering details. I think the original Boba Fett helmet had 18 of these marks, but I could only fit about 15 of them in there. Well, I'm ok with that, since you get the essence of the helmet and technically speaking, nothing is really "canon" about this job
Plus I was born on the 15th so it was kind of like my little hidden signature
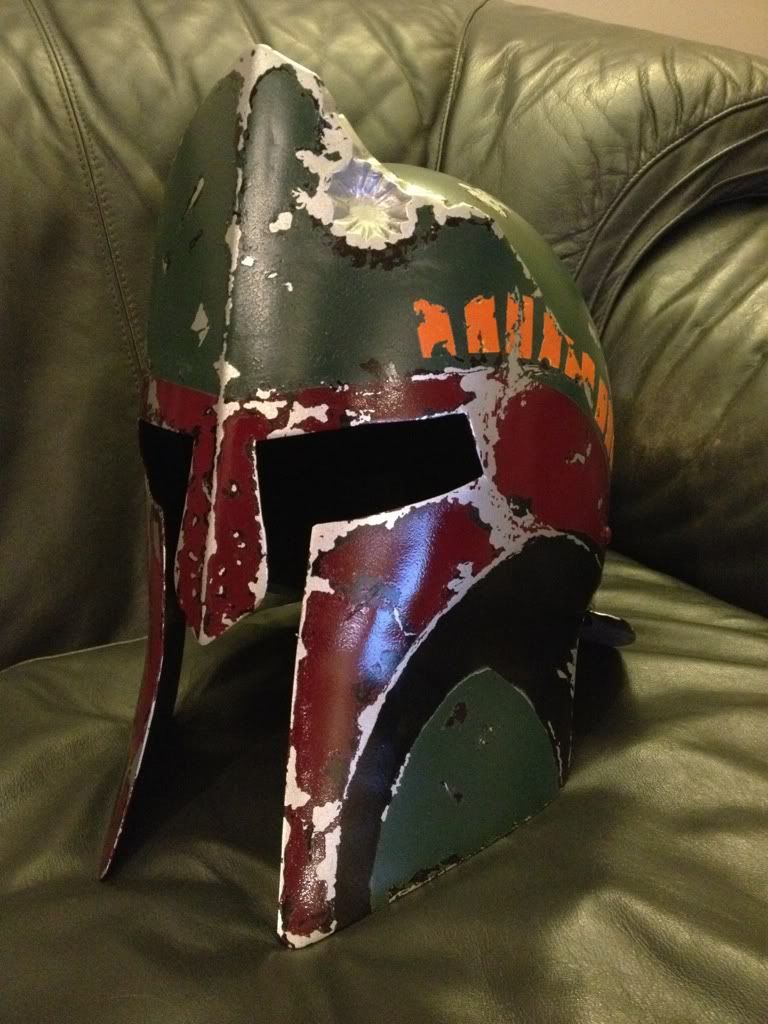
A tinge of light sanding around some of the edges and it was pretty much done.
I gave it about 2-3 coats of clear satin for protection.
Finally, I bought a green face mask off of ebay as well, and dremeled it to fit. It's secured in there with some velcro, so it's removable also - in this way, the helmet can be worn with or without the visor in place.
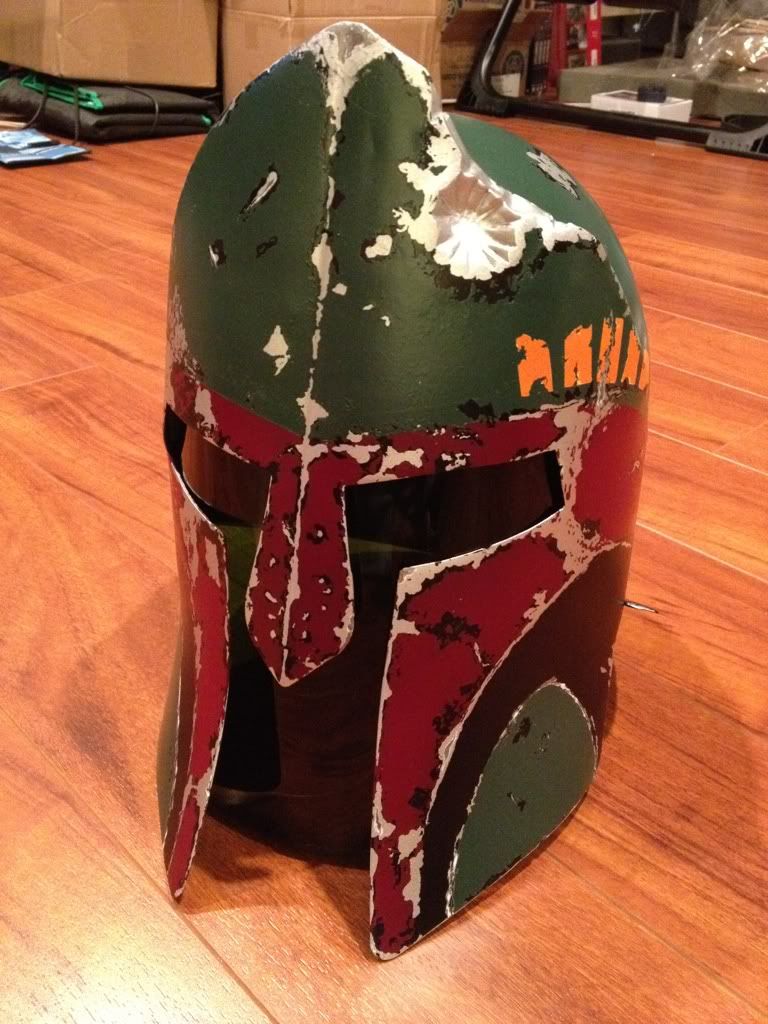
And Voila! The verdict? I think the recipient really liked it!
(strangely, the shipping costs were the most painful part of the whole build - Go figure...)
Cheers,
-C
Well, I haven't posted anything too useful lately, so I thought I would share a tutorial on something I did this past Christmas for a secret santa gift...
To be honest, I was a little reluctant to post this here and I apologize if anyone is offended by me making this... I guess imitation is the sincerest form of flattery?? :confused :unsure
Anyhow, the recipient is a guy who probably already has everything saber related he could possibly want, so that route was a dead end. But what else Star Wars related could I give him that would be cool to get as a recipient?
Then I remembered a pic posted a while back..... A mash-up of Boba Fett and 300:

And I thought... "cool, that doesn't look like it would be all that hard to do... " <famous last words anyone?>
So with that in mind, I scoured two sources : ebay and the dented helmet forums.
On Ebay I was able to find an auction for a "Steel damaged 300 helm Greek Corinthian helmet 403"
Steel damaged 300 helm Greek Corinthian helmet 403 | eBay
The price seemed quite reasonable to me compared to some of the other hits I got when searching for "spartan helmet" and such... Anyway, that was one hurdle down!
The second was finding some patterns of "weathering" to copy from.
I luckily found these reference pics, some from the RPF and some from thedentedhelmet.com


and this cool wraparound pic

With that in hand, the next step was to find some liquid mask.
I chose this from Amazon based on the positive reviews from other people

Next up: Paint colors!
Here's what I ended up using:

OK so I waited about a week for my package to arrive and when it got to me, it was covered in a thin sheen of green... grease?
Luckily I had just bought some brake cleaner and was able to use the spray to help remove the green gunk off of the helmet.
Here it is afterwards:

Allright next up: the famous "dent"
Well, to be honest, I figured I might try and just hit the thing with a hammer....
And that didn't work out too well... the rest of the surrounding metal kinda buckled in around the hammer site, so I decided to dremel out some of the top of the helmet crest and then fill it in and "reform" the dent with some self hardening MagicSculpt.

OK making progress here.... Next up, about two or three base coat layers of primer with some light sanding in between. I masked off the "eye holes" and front "mouth" area with some frog tape (basically painter's tape - this brand is supposed to prevent bleeding under the edge):

yes that's the helmet sitting on top of my two ton jackstand
next up, another base coat, this time of metallic silver:


OK, now that I had the basics down it was time to do the frisket.
This stuff gets really gooey quite quickly. It goes on white, but then dries clear. The instructions on the bottle say to dip the brush into water to help keep the stuff from sticking too much, but eventually, I got tired of this and would just rip off any accumulated rubbery gunk off of the brush by hand.
I used the above reference pics to help paint the lines onto the helmet in the location of the ridges (i.e. center "nose ridge") as well as long the curves of the "cheek" regions.

here's a closeup of the stuff:

next up, a layer of flat black

Once the black layer was down, I went around the helmet and painted another wider "rim" of the frisket around what was already there. The idea is that when you remove the stuff (which is kind of like peeling off rubber cement), it should leave the center portion silver (the lower coat) and then have a little bit of an outer rim of black, and then around that another outer rim of your desired helmet cover.

Next up, I masked off the black portions of the "mandibles" and the areas where the maroon would go

Here we are after the maroon layer:

Then after the maroon dried, I masked off all the maroon areas and sprayed everything with hunt club green - almost there!!!

Allright!!! Now it was finally time to see how everything turned out <fingers crossed>
I took off all the masking, and peeled off the frisket stuff and got this:


Cool! now to some final details - I had to mask off the "kill marks" on the side of the helmet. I had to use both the frog tape to mask the area as well as the frisket for some of the weathering details. I think the original Boba Fett helmet had 18 of these marks, but I could only fit about 15 of them in there. Well, I'm ok with that, since you get the essence of the helmet and technically speaking, nothing is really "canon" about this job
Plus I was born on the 15th so it was kind of like my little hidden signature

A tinge of light sanding around some of the edges and it was pretty much done.
I gave it about 2-3 coats of clear satin for protection.
Finally, I bought a green face mask off of ebay as well, and dremeled it to fit. It's secured in there with some velcro, so it's removable also - in this way, the helmet can be worn with or without the visor in place.

And Voila! The verdict? I think the recipient really liked it!
(strangely, the shipping costs were the most painful part of the whole build
Cheers,
-C
Last edited:
