Blade Runner: Leon's Concept COP (A new interpretation.)

JOATRASH FX

Master Member
RPF PREMIUM MEMBER
Hey everyone.

OK, this one has been bouncing around in my brain for a while, so in between soldering passes on my Orville pistol and other things I've been getting some modeling work done on it, and since I'm about 99% done with the master, I figured it was time to show it off. (Yes, there will be a run.. I'll update as soon as I have the thread up in the junkyard- probably tomorow as well.)

I wanted to interpret this gun by only looking at the concept sketch as much as possible, even keeping the crazy-looking trigger and whatever that little button is on the right hand side. (A safety maybe?) For some details, such as the barrel break lever, I did refer to the real COP.

It has a moving trigger and functional barrel break. I don't have any .357 ammo handy, but I did model the barrels to take it.

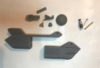
I'm in the process of tinkering with the first test print and will upload some actual photos tomorrow. (I'm also doing a test print of the grip in rubberized resin... we'll see how that turns out!) In the meantime, here's a teaser-render:

1031726


And here's an overlay of my pattern with the original sketch.
1031725


More soon...!
 
If you could make this with Amber grips I would give you any body part you need. That sounded less weird in my head.

Looks awesome. Can't wait for the run!!!!!!!!!!!!!!!!!!
 
If you could make this with Amber grips I would give you any body part you need. That sounded less weird in my head.
Well, I can print clear grips, which could be sprayed with amber paint, like the stuff auto shops sell to spruce up faded turn signals on cars. Would that buy me a spleen?

Here's an update with some more meat to it:

The almost-final body renders (photos will follow shortly):

The 'button' is non-functional. In theory there might be room to do a version using a small keyboard switch/button but it would have to be bigger and I wanted to keep to the drawing as much as possible. (I also didn't see a use for having it functional.)
1031868


There's a recessed space on each side of the front barrel so that there is a natural 'stop' when it's open.
1031869


One thing I'm pretty happy with is the trigger. I managed to keep it pretty seamless, but functional. There's a space behind it, inside the grip, for a small electrical pushbutton. This works great if you just want the functionality, but also if someone wants to add lights/electronics it would be an easy mod to do.
1031870


1031871


I wanted to capture the overall 1950s 'sweeping' look of the grip, and transfered the checkering over directly from the sketch, by tracing it.
1031872


The barrel lock is intended to be spring-loaded. Still working on tweaking this but if I can't sort it, a simple friction-slide will work as well.
1031873


"Let me tell you about my mother..."
1031874


Next update (later today) will have photos of the test-printed body. The grips printed last night (in rubber) and I think they turned out OK, but will not know for sure until I get home and do post-processing on them.
 
That looks amazing. Truly amazing.

Needless to say put me down for one.

Will the grip be a separate piece?
 
Hello all!

Sorry for the tardy update. Got home a bit late yesterday and I wanted to quickly do some mods to the file so that I could put it into the printer ASAP. Also, when I tested the grip (which had printed fine) I realized that I had made it a little too 'thick', so reaching the trigger was a little harder than it needed to be. So I spent a couple hours tweaking the grip to make it more slim without sacrificing the look.

As promised, here are some photos. (Keep in mind that these parts are basically right out of the printer. Only supports have been removed and a couple points trimmed to test the fit.


Still a little wet from the alcohol bath...!
1032643


1032644


Barrel break works nicely in printed form. One less thing to worry about!
1032645


Here you can see the little pushbutton I'm using for the trigger.
1032647


I'm kind of pleased with this solution. Has a nice feel when pressed, and if it were ever to be connected to electronics, it would be super easy to just drill a little hole for the wire. (I would have done it in the 3d model of course, but didn't want to risk weakening the frame, even a little, since I'm not going to add wiring in my own copy... at least not now!
1032648


Most of the parts (missing grip). I have since bored a hole in the end plug so that the grips will be held on by one screw. Not the spring for the barrel break release is from a regular ball point pen!
1032650


Side greeblies in place.
1032651


Aaaaand... with the grips stuck on! The rubber versions are just pressed in place, the clear resin versions will be screwed on (and probably split into halves). Please note that the grips are still kinda rough here... I haven't even removed all the support yet or given them a proper washing bath, I was so eager to try them. The rubberized resin has a tendency to show print lines just a tad (which are almost nonexistent on resin printers compared to FDM) but the awesome thing about the rubber-resin is that is sands smooth like regular resin, even though it's flexible. No idea how it works, since sanding rubber is usually a pain, but here it just... works. The rubberized resin also needs more, and thicker, supports to keep it stable while printing. I cut them off with a scalpel, then sand the points smooth.

1032652


1032653


1032654


1032655


1032656


1032657


Will the grip be a separate piece?

Yes, absolutely. There will be an option for rubber OR clear grips. The rubber will be one piece, but the clear resin ones will most likely have to be split into two halves.

I'm still thinking if there's a good way to print the clear ones as one piece. The challenge is that if I print the grip hollow, there will be support inside and it will be hard (or impossible) to remove and therefore remain visible. If I print the clear grip solid on the other hand, the cost might skyrocket. There's also the problem of getting the receiver to slide into a solid one-piece grip. I have some options, so we'll see where I end up! If possible, I'd like to have the clear and rubber grip be interchangeable.

More to come...!
 

Attachments

  • 1561460898262.png
    1561460898262.png
    286.8 KB · Views: 304
I would love the clear to be two pieces. It would make it easier to mold and make amber grips.

I will need two kits. One with Rubber Grip and one with Clear.

So excited.

Amazing!!!!!!!!!!!!!!!!
 
I would love the clear to be two pieces. It would make it easier to mold and make amber grips.

I will need two kits. One with Rubber Grip and one with Clear.

So excited.

Amazing!!!!!!!!!!!!!!!!
I appreciate the praise and compliments, but please keep all discussion of the run to the junkyard thread once I start it up! Should not be too long, just trying to crunch the numbers. (It will be around the same as previous pistol kits I've done, like the Oblivion and the more recent, ongoing, Orville PM44.) : )

In regards to 'molding'- I had not planned on allowing anyone to make molds or castings of these parts and I don't want folks to assume it will be OK to do so without a serious discussion with me first. I'm not going to be casting any parts myself either- everything will be a direct 1st gen print, as with most of the things I do.

I think The best way to achieve amber grips will be to use transparent paint on them. (Great thing about printing clear parts is that there are no air bubbles. And the optics look rather nice through it too.) For optimal durability, you can have an auto paint shop mix a batch of suitable candy-color with hardener in a spray can. It's fairly inexpensive, and it'll be as strong as car body lacquer.

There is a one-piece grip running in the printer right now. The printer is 'complaining' by making rather loud noises after each layer since I'm printing it solid, so we'll see if that's going to be viable or if I have to hollow it out. (Thick pieces cause a lot more wear on the resin trays and motors.) Cutting the bottom grip fin off the receiver let it slide right into the grip, so that's the current plan if I make it one piece. I also bored out a hole in both the receiver and grip plug so that it can be tapped and take a long hex screw (M4 size for those using metric measurements).

The thinner rubber grip is much better, but now I'm all out of that resin and need to order more! The grip is still rather long, but it will have to stay that way. To modify it more would ruin the almost perfect silhouette of the sketch. And I can reach the trigger OK.

Some other parts I tweaked for functionality seem to have worked out too. The barrel break switch is tighter now, with less play, and moves nicely.

(And I went ahead and added a small hole for wiring from the trigger too... just in case electronics make their way into it.)

From the looks of it, I should have a 'final' set of parts to test (and maybe show) tomorrow evening!
 
Before going to work today I quickly gave the clear grip the post-print alcohol bath because I wanted to see if the receiver would slide in... and success!
1032971


The alcohol makes the resin go frosty. Once I clean it up and hit it with a clear coat (amber tinted) it will glass over again.
 
I'm tired of saying wow or amazing so I used a Thesaurus.

This is truly Prodigious!!!!!!!!!!!!!!!!!!!!!!

Then I had to look up what it means:

1.remarkably or impressively great in extent, size, or degree.
 
Haha, thanks guys. Here's another small update (sorry for the small photos... I sent them to my own mailbox, which is almost full). Also, the run has officially started in the junkyard!

All the parts of the kit:
1033425


Here you can see how I set up the screw that holds the grip on. (Works with both versions.)
1033426


Here's a test I did on a piece of scrap resin with Tamiya "clear red"paint. They have orange too... and I think their orange mixed with a little 'smoke clear' will work great. But you can see how the frosted look disappears:
1033427


Grip plug!
1033428


Some light sanding on the grip... ready for paint! (The weird squiggle on the receiver is a shiny spot reflecting the light.)
1033429


More to come!
 
Back
Top