Bigturc's Iron Man reveal faceplate

Bigturc

Sr Member
I've been working on and off on this one .. mostly when I hit walls on my SS V3 X-Wing! ;)

I won't go in too much details as there's been other build presented here before and this kit is so easy to work on .. it's almost ridiculous! :)

So this is it ...

The kit after a good wash and some small cleanup. I then bent the resin pieces with a hair dryer .. took me about 1h total! Placed with blue tac temporarily ..

126742256.jpg
126742257.jpg
126742260.jpg
126742262.jpg
 
Faceplate has been shot with self etching primer then wet sanded then primered again. Outside is Dupli-Color Honda Polished Metal while inside is black primer.

128889373.jpg
128889375.jpg
128889376.jpg

128889384.jpg
128889385.jpg


Pieces shot with self etching primer ..

128889377.jpg

128889378.jpg
128889381.jpg

128889380.jpg
128889381.jpg
 
Looking goog BT. The only thing I would do, and did on mine, is shorten piece that extends from the nose piece up. Therefore moving the bottom mouthpiece up.

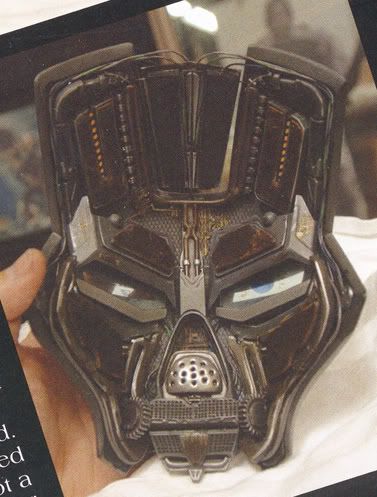
Screen Used:
FACEPLATE.jpg


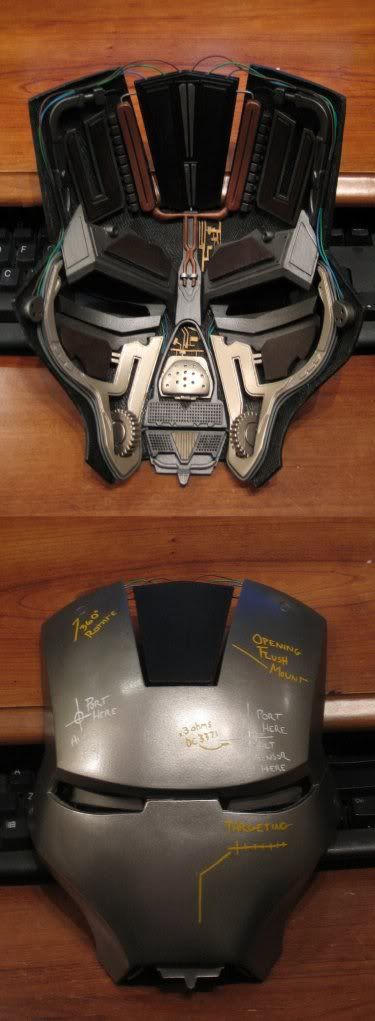
Mine:
Dual.jpg
 
Man those pictures are awesome!
Looking good bud, and yep, like Brad mentioned, once you trim the nosepiece(s) a bit it will make the mouth area go up above the bottom faceplate line.
Great choice of color too, it looks spot on.
 
Looking goog BT. The only thing I would do, and did on mine, is shorten piece that extends from the nose piece up. Therefore moving the bottom mouthpiece up.

Man those pictures are awesome!
Looking good bud, and yep, like Brad mentioned, once you trim the nosepiece(s) a bit it will make the mouth area go up above the bottom faceplate line.
Great choice of color too, it looks spot on.

Hey guys,
Thanks for the input!! I've already shorten that nose piece .. I really liked the result on Brad's build! I need to wait for the temp to warm up to shoot my clear coat and then, I'm on the way for the finish line on this!

Now, to the good news .. hopefully, other building this prop will read this thread .. I think I found the perfect match for the pencil .. couldn't find the info in the 2 other build threads .. but here it is ..

While browsing the pen I would use on this .. I remembered reading something about oil pen .. then found them stashed somewhere at the store .. bought a couple of them .. and bingo! Perfect result!

Here's the pen ... Sharpie Paint Oil-based Extra fine Point Yellow and White .. I also got the gold and silver one .. but white and yellow are closer in match.

128889386.jpg
128889387.jpg
 
And an update you shall have!

As soon as I have nice whether outside, I'll shoot my gloss clear - Tamiya Clear Gloss TS-13!!! And also do my mate clear coat on my X-Wing .. in the meantime .. the pieces are pretty much all painted.

I decided to go with the airbrush on them first cause there wasn't enough variations in metallic colors in can (either Dupli-Color or Tamiya) .. so I bought them in normal size. I was quite surprised to see how little I've used to shoot them all ..

I've used Tamiya Metallic Grey XF-56 for most of them, then the cheak and micro piece are in Tamiya Titan Gold X-31. The other 3 pieces not yet done will be Bronze X-33.

128924834.jpg


128924835.jpg
128924836.jpg
128924837.jpg
128924838.jpg
128924839.jpg
128924840.jpg
 
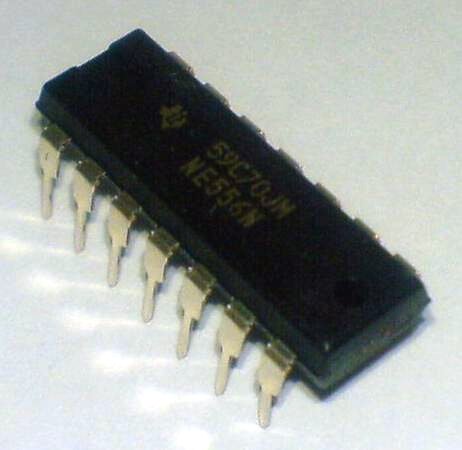
Anyone noticed the bronze pins in the top "U" pieces .. really looks like connection branch from electronic pieces .. this is a 556 timer .. notice the similarities?

Yes I always thought the same thing. I just never got around to adding them to mine. I can't wait to see your parts installed.

What are you using for the faceplate interior backing?
 
Well .. I have Vash drawer lining which I'd like to upgrade to something more accurate .. I see you used something else .. I guess now is a good time to know what you used as I like the look of your material? :)
 
Well .. I have Vash drawer lining which I'd like to upgrade to something more accurate .. I see you used something else .. I guess now is a good time to know what you used as I like the look of your material? :)

Wedding veil material...

IMG_7556.jpg
 
I have to ask, what are you gents using to glue the peices in place? I was thinking<"Spray adhesive?- Nah, too hard to control" "Hot glue? Nah too thick" About the only thing I can think of is maybe six minute epoxy.
 
I was planning to use hot glue .. perhaps 2 parts epoxy would work too but it seems overkilled to me. Perhaps Brad or someone else will chime in?
 
Bronze color shot on top 3 pieces ..

I also shot some Tamiya TS-13 Clear coat on my mask .. I went light on the first coat to see what it would do. Seems a little more shiny so perhaps I'll shoot another one tomorrow when this one is completely dry .. I don't wanna go too shiny anyway.

I also shot some Future Clear on my gold pieces to see what it would do .. I think I like the result so I'll shoot all gold pieces .. and perhaps the bronze too .. a couple coats each should do the trick ...

129002236.jpg
129002237.jpg
129002238.jpg
129002239.jpg
129002240.jpg
129002241.jpg
 
Currently testing some weathering on the little cheek wheels .. and airbrushed more Future on the pieces .. :love
 
nice. As for what glue I used. I used spray adhesive for the wedding veil backing and regular testors model glue for the pieces.
 
Faceplate drawn.

I tried to study what the heck was written .. and I wanted to keep about the same size of text. So I watched closely whatever was going on in terms of text on his computer in that scene where he's holding the faceplate and that's what I cam up with.

A couple more options were to write on the right side
.. something about Titanium alloy/gold mount
.. satellite system mount

But ended up writing whatever what is there now.

Also, notice the 2 yellow circles on the lower left side of the mask, and one drawn circle on the upper right side of the mask!

129109171.jpg
129109172.jpg
 
Back
Top