modelerdave
Sr Member
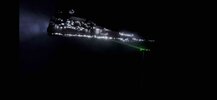
I started this build two years ago when I decided to forgo the Bandai lighting kit (horrible) and use fiber optics for all of the windows. Yes, that was crazy and after getting about halfway through I put it aside because I just couldn't stand threading anymore fiber optics. For you guys who drilled all of the holes and then threaded fibers in your Zevezda Star Destroyers, my hat is off to you.
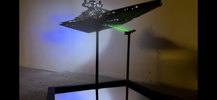
One of the benefits of not using the Bandai lighting kit is a complete lack of the "smile" bend in the trench. This thing is totally straight.
I'm not a purist so I did my own paint thing and painted the panels by hand and then added a gloss coat to some panels to create specular highlighting between the gloss and matte finishes. I know that's more of a Star Trek thing but I think it came out okay.
I wanted to mount a functioning green laser that would use a machine gun effect to hit the Blockage Runner. To may everlasting surprise, it worked! I spent a few weeks trying to get an Adafruit sound board to match the laser fire with a Star Destroyer laser sound effect but it was my first attempt at sound and I could not make it work so I finally gave up.
Some build and final pics below and in the next few posts. It's not perfect but I'm pretty pleased with it.
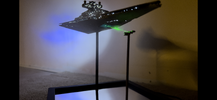
Last edited: