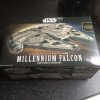
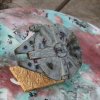
Bandai 1/144 Millennium Falcon GROUP build awakens! OPEN TO EVERYONE! :)

My Shapeways parts arrived today. The turret well rims and the landing gear baffles are spectacular! The dish is rather complex so I can't see all the detail until it's primed, but early indications are of a really good print. I went for the best prints available (frosted extreme detail) as I wanted to really test the medium. Quite an indulgence but I'm happy so far. Thanks to Tony at 308 Bits for great parts. I can't wait to test fit them now... :)

Along with the Green Strawberry grills and my many hours picking at the pipes, this is heading towards a really detailed display piece. My paint job had better do it justice!
 
Last edited:
Some more Shapeways pics through my cheapo macro lens (so excuse the quality). Pretty good and a great fit. Cheers Tony! The dish would benefit from a little bit of cleaning up. Imaging when we get below 10 microns!

These are very clean... does anyone have any suggestions on how to clean these before priming?
 
Last edited:
10259786_10154488677413032_8820816860751555377_n.jpg

Hey lads
finally got my Falcon in the mail today..been a few years since i took on a build but equally terrified and inspired by all the work here. (Mostly terrified) Well done one and all on all your hard work! :)
a few noob questions..

are there english instructions for the kit available yet?(ive looked online but no luck so far)

are lighting kits available that will do for the engine, cockpit(and landing lights?)

and lastly, looking at the cockpit, which aftermarket upgrades should i definitely go for?

thanks in advance and thanks for the inspiration to get back building :)
 
View attachment 579461

Hey lads
finally got my Falcon in the mail today..been a few years since i took on a build but equally terrified and inspired by all the work here. (Mostly terrified) Well done one and all on all your hard work! :)
a few noob questions..

are there english instructions for the kit available yet?(ive looked online but no luck so far)

are lighting kits available that will do for the engine, cockpit(and landing lights?)

and lastly, looking at the cockpit, which aftermarket upgrades should i definitely go for?

thanks in advance and thanks for the inspiration to get back building :)

There will be a cockpit upgrade coming from shapeways but I don't think it's out yet. You should check out the photoetch grill from greenstrawberry!
 
These are very clean... does anyone have any suggestions on how to clean these before priming? Isopropyl alcohol isn't as easy to get in the UK as it is in the US, by the way.
It is alright, in Ireland I got it in an electronics supply chain RS, I'd check in Maplins if I was you
image.jpeg
 
There will be a cockpit upgrade coming from shapeways but I don't think it's out yet. You should check out the photoetch grill from greenstrawberry!

I can vouch for the grills. They're awesome.

See my shapeways parts a couple of posts up. If you want to display the landing gear, TonyRR's landing gear baffles on Shapeways are great. You can also get open turret window frames and I went for the upgraded dish - this isn't quite screen accurate going on some newer reference I've seen but the mounting frame is ten times better than the Bandai and seems about as close in other regards.

I've scored and snapped the 'ears' off the mount so I can put wire there in their place.

A lot of the mods you can do yourself - battle damage, bending hull plates, thinning the cockpit window frames and whittling away at the thick pipework. The problem with detailing is it shows up other clunky bits – it's hard to stop. But it's a fantastic kit to work with and mod.

There's an official Bandai lighting kit but it only lights the ramp, engine and a single LED in the cockpit. I did spot a third party one in a Google search but the only issue is it was missing the running lights on the end of the mandible and landing lights. It looks easy enough to drill the landing lights, but running LEDs of fibre optics up the mandibles takes a decent amount of surgery. It has been done, though!
 
Last edited:
Finally got the kit in. Took a solid two hours of work just putting this thing together. I'm a slow builder, I know.

Major respect to everyone who has built this previously... There were a few points I was almost pulling my hair out. :lol


I don't even know where to start with these colored panels. Do I use the decals? Do I paint each one? I have no clue yet.

Any helpful tips or videos using the decals?

image.jpeg
 
Finally got the kit in. Took a solid two hours of work just putting this thing together. I'm a slow builder, I know.

Major respect to everyone who has built this previously... There were a few points I was almost pulling my hair out. [emoji38]


I don't even know where to start with these colored panels. Do I use the decals? Do I paint each one? I have no clue yet.

Any helpful tips or videos using the decals?

View attachment 579579
If you aren't doing a primer and base coat, and if you don't have an airbrush hen you should totally follow pinousse' builds.

He took the "out of the box" model and did wonders.

Sent from my SM-N910W8 using Tapatalk
 
Thanks for the tip Astroboy. I'll give his thread a look.


The decals are new to me, but definitely not the painting. I will be priming, base coating, and weathering by hand and by airbrush. I'm just not decided on the colored panels themselves.

I chose to assemble first and paint it all in one go because I believe that's how ILM did it on the original models.. May make the task a little more difficult but I'm hoping it'll also be slightly more authentic. I'll be starting tomorrow, so I'll definitely post pics up when I have some paint progress. :)
 
Last edited:
Thanks for the tip Astroboy. I'll give his thread a look.


The decals are new to me, but definitely not the painting. I will be priming, base coating, and weathering by hand and by airbrush. I'm just not decided on the colored panels themselves.

I chose to assemble first and paint it all in one go because I believe that's how ILM did it. May make the task a little more difficult but I'm hoping it'll also be slightly more authentic. I'll be starting tomorrow, so I'll definitely post pics up when I have some paint progress. :)
Gotcha.

If you do have an airbrush then I would forgo the decals altogether. You'll get a much better final product without. (However I would use some of the marking decals that came with it)

I like the idea of building it all as one. I did that with my bandai x wings and it made for a great time painting.

I'm not going to do it here because I've already accepted that mine is not a studio model. I'm just going to make a small falcon. And because of the cool detail on the piping, I'm gonna paint that as seperate components.

Sent from my SM-N910W8 using Tapatalk
 
On the subject of displaying the Falcon as it looked on Jakku with the tarps over part of it - - I have used light weight tin foil to take the place of tarps in model railroad dioramas. I just cut a piece of the foil the right size and form it over the area and take it off carefully and paint it to your taste. It can be shaped in any way you desire, and will take a nice scale drape better than any cloth or plastic alternative; then it can be removed or re-shaped at any time. The nice thing about the foil is it will hold its shape if handled carefully. if you want to pose the model in a different way. Foil is also a great way to make scale Capes or other clothing parts that you want to drape nicely.
 
On the subject of displaying the Falcon as it looked on Jakku with the tarps over part of it - - I have used light weight tin foil to take the place of tarps in model railroad dioramas. I just cut a piece of the foil the right size and form it over the area and take it off carefully and paint it to your taste. It can be shaped in any way you desire, and will take a nice scale drape better than any cloth or plastic alternative; then it can be removed or re-shaped at any time. The nice thing about the foil is it will hold its shape if handled carefully. if you want to pose the model in a different way. Foil is also a great way to make scale Capes or other clothing parts that you want to drape nicely.

Some great ideas! Thanks. I was considering doing this again the other day, but I'd absolutely positively have to 3D model and print a screen accurate version of the funky archway into Niima Outpost, and that would double the price of the project ;)
 
Can this build be done without an airbrush is what I'm wondering?
I really want to get started but have no airbrush and looking at all the extras needed that are necessary with airbrushing has discouraged me from starting.

Made a few Ertl Falcons without any of that.
Im stumped.
 
Can this build be done without an airbrush is what I'm wondering?
I really want to get started but have no airbrush and looking at all the extras needed that are necessary with airbrushing has discouraged me from starting.

Made a few Ertl Falcons without any of that.
Im stumped.


Anything can be done without an airbrush. You can always use rattlecans.

The problem however, is that you can't mix your own colour and you will also spend a lot of money on them. Because of the size of their spray, there is a lot of wasted paint.

If you plan on doing a few models, then you might as well spend the $200 or so on an airbrush and compressor

Yeah but given the smaller size, i was reluctant to go with spray cans on this...have two still in box Ertl falcons in the attic, was gonna do one of them to get back into shape so to speak before I tackled the Bandai :)

Gonna think on this one :)
 
So here is where I'm leaving this one for today. I'd say it's about 80% where I want it at the moment.

Primed and base coated with rattle cans, and the rest is all airbrush. I used the fine molds colored panel diagram because I'm lazy, so it isn't 100% accurate. I missed a few panels here and there, especially towards the back, but I'm happy enough with them.

I will go in and take it the rest of the way by hand once the clear has been given a chance to fully cure.


Like I said, I didn't go for 100% accuracy. I just wanted the look and feel of the original models... To capture the "spirit" in essence. :)


Anyways, here are the pics! One is an in progress, and the other three are where it currently is.
IMG_1891.JPG

image.jpegimage.jpeg
 

Attachments

  • image.jpeg
    image.jpeg
    562.3 KB · Views: 173
Last edited:
Alright, made just a little bit more progress. Hope it's alright to post a few updates directly to this thread. Didn't feel the need to open another thread just for my small updates.

Here is is before the first pass:
image.jpeg

And here it is after:
image.jpeg

I have clearly thrown accuracy right out the window and decided to go for what looks cool. :lol

This is just the first pass of color I'll be doing by hand. I plan to add quite a few more to make everything look a little more natural. I'll be lightening it up a few shades as well, as I feel I may have over done it just a touch with all the dirt and grime. I do really love the green-y grayish color I've got though.

More than happy to hear other people's input. I know it's not going to be everyone's cup of tea, but I hope I've at least got it in "cool" territory!
 

Your message may be considered spam for the following reasons:

If you wish to reply despite these issues, check the box below before replying.
Be aware that malicious compliance may result in more severe penalties.
Back
Top