Attempting to make Pokemon Pokeball for Engagment Ring.

cyberbjjc

New Member
Hi guys.
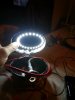
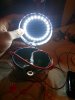
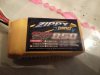
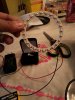
I've seen many versions of Pokémon Pokeball engagement rings. Majority of them are made of wood. I am attempting to re-create one out of aluminum. I have come up with several ideas however having trouble putting it together. Attached are photos of what I have so far.
My biggest problem is that I want to attach the led switch to the led strip so that when she pushes it it lights up the front and when it opens, the led will shine on the pokemon toy (squirtle-her fav) holding the engagement ring. the led seems to run on a 9 volt and so does the switch. Can I use ONE 9 volt to run them both or will it be too weak. Im trying to propose to her mid June of 2014 so any ideas would be gladly appreciated. thanks!!!

20131026_103829.jpgMessenger_5821304569942542343_13879071641016376.jpg20131206_133319.jpg20131206_133206.jpg20131123_120234.jpg20131123_120202.jpg20131123_120154.jpg20131031_135928.jpg20131031_135912.jpg20131026_104439_1.jpg20131026_101043.jpg20131026_101054.jpg20131026_101059.jpgMessenger_5821304701095673628_13879071953775809.jpg
 
Oh I forgot, If anyone wanted to know the stuff I used to build it.

1) Two 4" aluminum spheres
2) a 1" door hinge
3) Dremel to cut the holes for the front switch and to give it that pokeball look.
4) Chrome/Red Spray Paint (Dupli Color Metalcast-The same used in painting Captain America Movie shield). See member "VALOR".
5) 6 inch led strip. I bought a strip with a changer to make lights glow or blink fast/slow.
6) 9 volt (if I can figure it out)
7) a led push button switch (16mm)
9) 4 rivets using a rivet tool to clamp the door hinge
8) Washer to give it that pokemon look and to hold in the switch
 
trying a different approach for the inside.
replacing 2 9volts for a battery pack from rc heli and flexible led with angel eye led.
 
Neat. I was a huge fan of pokemon growing up. I've grown out of it, but I think having a decent and accurate pokeball prop would be neat
 
Sorry here is the pics of the new parts
 

Attachments

  • Messenger_5821304701095673628_13879071953775809.jpg
    Messenger_5821304701095673628_13879071953775809.jpg
    146.9 KB · Views: 159
  • 20140124_132621.jpg
    20140124_132621.jpg
    1.8 MB · Views: 180
  • 20140124_132600.jpg
    20140124_132600.jpg
    1.5 MB · Views: 137
  • 20140124_132558.jpg
    20140124_132558.jpg
    1.4 MB · Views: 151
  • 20140124_132553.jpg
    20140124_132553.jpg
    1.6 MB · Views: 132
  • 20140124_132527.jpg
    20140124_132527.jpg
    2.2 MB · Views: 139
  • 20140124_132534.jpg
    20140124_132534.jpg
    2.9 MB · Views: 156
  • 20140124_132542.jpg
    20140124_132542.jpg
    487.5 KB · Views: 163
  • 20140124_132629.jpg
    20140124_132629.jpg
    949.4 KB · Views: 140
  • 20140124_132638.jpg
    20140124_132638.jpg
    1.2 MB · Views: 169
Last edited:
As you can see with the pics above I used a helicopter battery to power up both the switch and led. The LED is from an auto store that you affixed to your headlights to give it that luxury look. I used it to give it that inner pokemon light and yes that is the ring I will be putting inside along with the Squirtle Pokemon. Just trying to measure how much slack is needed so I can cut away the excess so i can lay a foam bedding to cover the battery and wires and to have squirtle hold on to the engagement ring. The ring will be sitted in the foam, similar to the ring box.
 
Here it is. Just need to polish up some parts and its ready for the big day...(fingers crossed)
 

Attachments

  • 20140131_120310.jpg
    20140131_120310.jpg
    677.2 KB · Views: 138
  • 20140131_120319.jpg
    20140131_120319.jpg
    2.2 MB · Views: 143
  • 20140131_120325.jpg
    20140131_120325.jpg
    2.1 MB · Views: 131
  • 20140131_120340.jpg
    20140131_120340.jpg
    1.5 MB · Views: 126
  • 20140131_120349.jpg
    20140131_120349.jpg
    1.8 MB · Views: 152
  • 20140131_120358.jpg
    20140131_120358.jpg
    1.9 MB · Views: 158
  • 20140131_120407.jpg
    20140131_120407.jpg
    1.8 MB · Views: 237
Back
Top