E Nigma
New Member
Hi everyone, I've been a ghoster for a long time and decided to finally show off a couple of items I've made and figured this place would be the place that it would be appreciated!
This is my latest creation, the Riddler's cane from the new game "Arkham City."
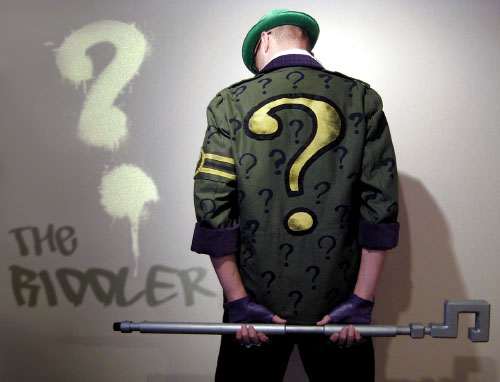
Of course, this was part of a costume, which you can see HERE!
The cane took a couple of days to plan and get the parts needed, but I literally started and finished the entire project in a single day, paint included. (The day before Halloween no less!)
The last time I made a Riddler cane based on the comic, I started with a generic sword cane and heavily modified it. (I also posted the making of that.) While this was a successful project by all accounts, this time around I decided to go with a more simple, yet sturdy design.
The biggest challenge with the sword cane was attaching the question mark head to the cane itself. This time around I decided to use the handle from an old paint roller and a bamboo paint roller extension handle, since it screwed right in. This proved to be brilliant, and MUCH easier!
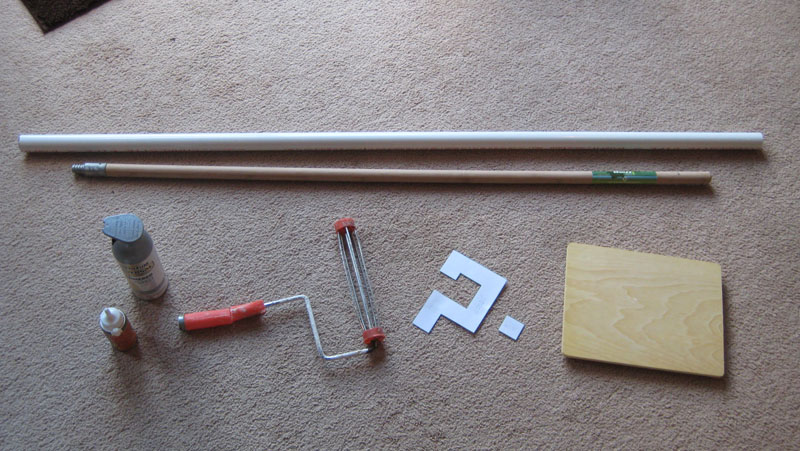
Here are the parts:
1) Bamboo paint roller extension
2) Old paint roller
3) PVC Pipe, that fits over the wooden extension perfectly
4) Plank of wood (placard from Michael's)
5) Paper Cut out (for use as a guide)
6) Gorilla Glue
7) Rustoleum Metallic Spray Paint with 'Hammered' Finish (this stuff is awesome!)
8) Wood screws (not pictured)
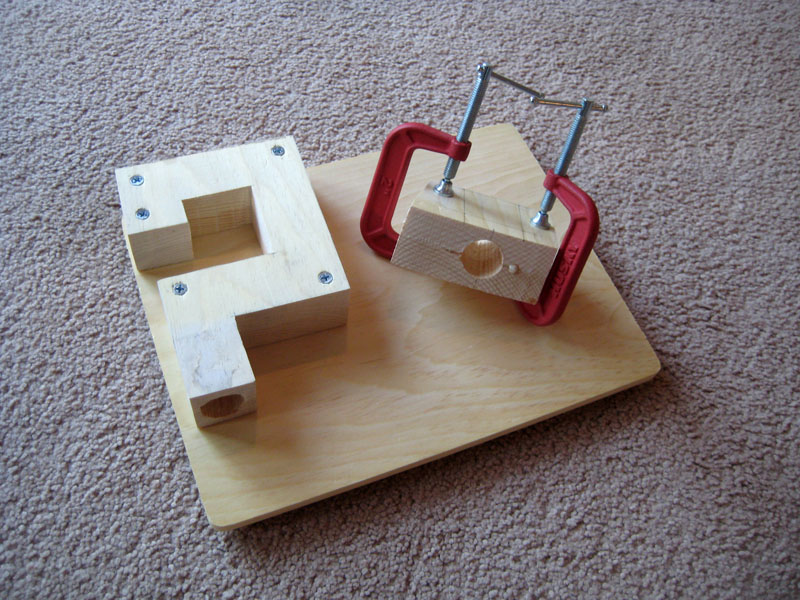
Again, last time I actually bought laser-cut wooden question marks because the design required it. This time, the design of the cane is very geometric, so I made it from scratch. Using a paper cut out as a guide, I cut out two question marks to stack on top of one another using my bandsaw.

Then using the gorilla glue and some clamps, I glued the two piece of wood together. Once the glue dried I drilled the holes which were to receive the paint roller handle and cut out the question mark precisely. The screws were added for effect since the glue is really doing all the work.
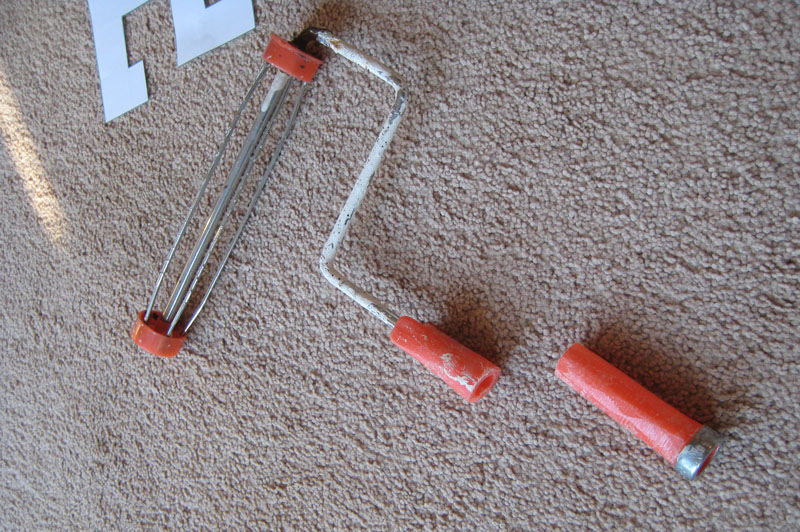
Next I chopped off the handle of the paint roller (where the threaded part is), removed the metal ring at the base and ran it through a belt sander until it was thin enough to fit inside the question mark.
With the holes drilled, screws put in and shape cut out, it was time to add the bevel details. Using the grinding wheel on the belt sander, I used the built in angle attachment to get perfect 45 degree bevels. This worked for most of the outside, but I had to use a handheld dremel tool for the inside. This was by far the hardest part of the project. You can see I used the same technique for the PVC pipes at the top of the picture.

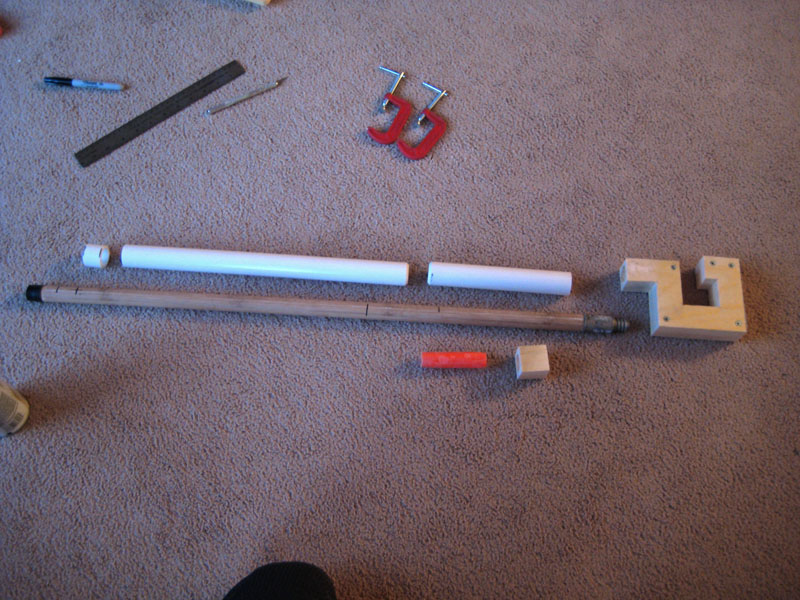
Here you can see all the parts prepped and ready to go, including the PVC cut to size. The orange thing is the paint roller handle, cut down to size.
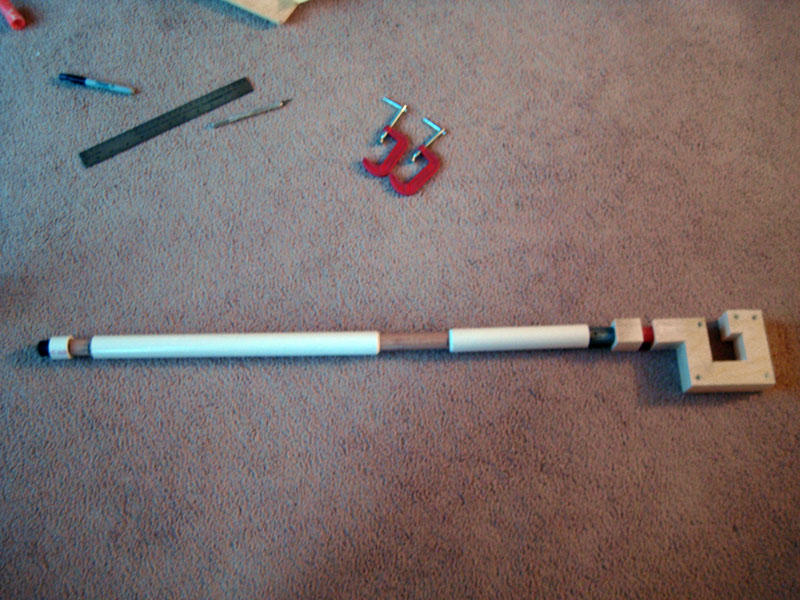
One last assembly before the final push. Nothing is attached, just sitting there in pieces to make sure it all fits. Again, the question mark screws onto the body thanks to the paint roller design.
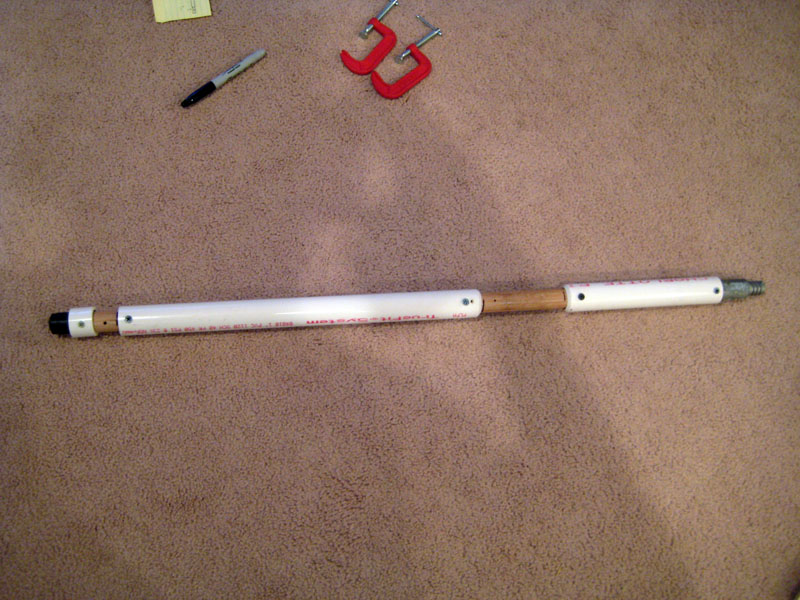
I decided the easiest way to attach the PVC was simply to drill it, plus the screws would give an added element of detail, since the cane was supposed to look very industrial. It was necessary to pre-drill holes first, as the shaft was made of bamboo which is a VERY hard wood. I broke 2 drill bits in the process!
Even though the head screwed on perfectly I ended up gluing it together anyway, just to ensure it would never come loose.
Once it was all done, I hit it with several coats of Rustolem Metallic paint with Hammered finish. This stuff is plain awesome. Without any work, the paint job looks like it's made of old banged up steel.
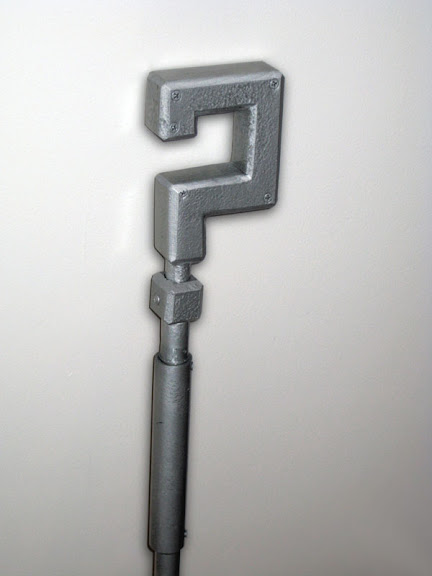
Now that Halloween is over I plan on going back and adding some more detail to the paint job. The hammered base is awesome, but authentically it should look like it was once painted green with heavy paint chipping, exposing the steel underneath.
Thanks for the read, I hope you enjoyed! I also hope to contribute to this site much more going forward!
This is my latest creation, the Riddler's cane from the new game "Arkham City."
Of course, this was part of a costume, which you can see HERE!
The cane took a couple of days to plan and get the parts needed, but I literally started and finished the entire project in a single day, paint included. (The day before Halloween no less!)
The last time I made a Riddler cane based on the comic, I started with a generic sword cane and heavily modified it. (I also posted the making of that.) While this was a successful project by all accounts, this time around I decided to go with a more simple, yet sturdy design.
The biggest challenge with the sword cane was attaching the question mark head to the cane itself. This time around I decided to use the handle from an old paint roller and a bamboo paint roller extension handle, since it screwed right in. This proved to be brilliant, and MUCH easier!
Here are the parts:
1) Bamboo paint roller extension
2) Old paint roller
3) PVC Pipe, that fits over the wooden extension perfectly
4) Plank of wood (placard from Michael's)
5) Paper Cut out (for use as a guide)
6) Gorilla Glue
7) Rustoleum Metallic Spray Paint with 'Hammered' Finish (this stuff is awesome!)
8) Wood screws (not pictured)
Again, last time I actually bought laser-cut wooden question marks because the design required it. This time, the design of the cane is very geometric, so I made it from scratch. Using a paper cut out as a guide, I cut out two question marks to stack on top of one another using my bandsaw.
Then using the gorilla glue and some clamps, I glued the two piece of wood together. Once the glue dried I drilled the holes which were to receive the paint roller handle and cut out the question mark precisely. The screws were added for effect since the glue is really doing all the work.
Next I chopped off the handle of the paint roller (where the threaded part is), removed the metal ring at the base and ran it through a belt sander until it was thin enough to fit inside the question mark.
With the holes drilled, screws put in and shape cut out, it was time to add the bevel details. Using the grinding wheel on the belt sander, I used the built in angle attachment to get perfect 45 degree bevels. This worked for most of the outside, but I had to use a handheld dremel tool for the inside. This was by far the hardest part of the project. You can see I used the same technique for the PVC pipes at the top of the picture.
Here you can see all the parts prepped and ready to go, including the PVC cut to size. The orange thing is the paint roller handle, cut down to size.
One last assembly before the final push. Nothing is attached, just sitting there in pieces to make sure it all fits. Again, the question mark screws onto the body thanks to the paint roller design.
I decided the easiest way to attach the PVC was simply to drill it, plus the screws would give an added element of detail, since the cane was supposed to look very industrial. It was necessary to pre-drill holes first, as the shaft was made of bamboo which is a VERY hard wood. I broke 2 drill bits in the process!
Even though the head screwed on perfectly I ended up gluing it together anyway, just to ensure it would never come loose.
Once it was all done, I hit it with several coats of Rustolem Metallic paint with Hammered finish. This stuff is plain awesome. Without any work, the paint job looks like it's made of old banged up steel.
Now that Halloween is over I plan on going back and adding some more detail to the paint job. The hammered base is awesome, but authentically it should look like it was once painted green with heavy paint chipping, exposing the steel underneath.
Thanks for the read, I hope you enjoyed! I also hope to contribute to this site much more going forward!
Last edited: