KevVader
Sr Member
Well, after a few false starts and some dickin' around....I've finally started my AP Trooper kit in earnest tonight. There have been other threads that are detailed assembly tutorials (thanks Clutch.)...but that is not my intention here per se.
I'd just like to show my progress as I go and post some tips/tricks that I've found along the way. Hopefully, it will assist others who are going to start their AP kits....and I know there's a few of you.") Also, anyone else who has assembly, finishing, painting tips....whatever, please feel free to post here as well....let's have some fun with it.
Also, anyone else who has assembly, finishing, painting tips....whatever, please feel free to post here as well....let's have some fun with it.
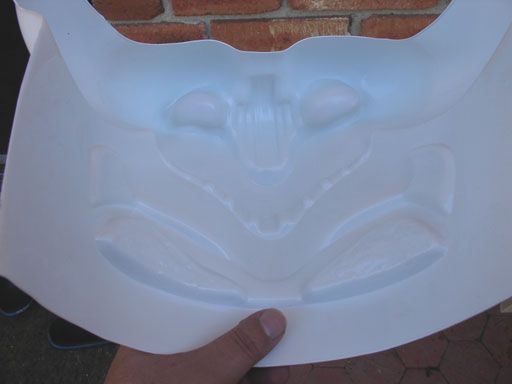
First off, I've assembled a few FX kits in the past...so I do have a bit of experience in assemling a kit. However, the FX kits were already trimmed and ready to be put together. I'd characterize the FX as akin to those Monogram Snap-Tite model kits ...just snap them together and you're done. In contrast the AP kit needs to be trimmed beforehand...which I'm finding out is an art in itself. The pieces come pretty much as how I'd think they'd come out of the vac table....some pieces are rough trimmed but most need to be cut out of their form. The different pieces vary in thickness.....but all are much thicker than the typical FX kit. Here's a few examples...the helmet is mostly trimmed, apart from the eye sockets, teeth, and the ear edges on the cap back. Although, you can see that the hand plates and detonator are in one sheet...

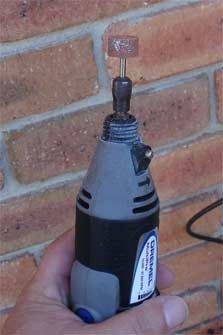
Consequently, you're going to need some heavier hardware to cut and trim. Here's some of the tools that I'm using.....other tools & materials will be needed once I get to the assembly stage...

Dremel with cut off wheels, drill bits
Stanley straight snips ( work great.)
Utility scissors
Hobby Xacto knife set
Utility knife
assorted files
emery boards
screwdriver set
goggles & mask (Safety first kids.)
Large Tim Horton's (double/double)...already ate the apple fritter...
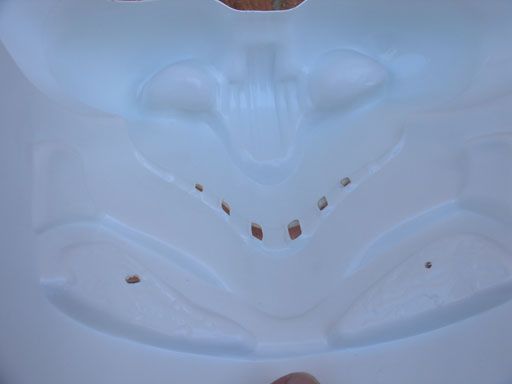
Basically, I've been trying different tools as I trim different pieces. The Stanley snips are great for trimming the large thick pieces from the form sheets (i.e. chest/back plates, hand plates, etc...), the utility scissors work great on the thinner pieces...like trimming the outline of the ears on the cap back. The Dremel with the cut off wheel works great anywhere but you need a steady hand. I was sweating as I cut out the first eye socket....then I used a drill bit...way easier and better control. But you can use the Dremel elsewhere.......perfect for trimming large thick pieces as well........you just get a lot of debris flying everywhere. Plus you will have to de-burr the edges as the ABS melts and collects along the edge of the piece you are trimming.....I used the utility knife to trim that crud away. Not a huge fan of scoring and then breaking the excess away...but that will work as well.
After the final trimming, I then use a file to smooth out the rough edges...especially after using the Dremel...then I finish the edge with the emery boards....gives a nice smooth edge. I bought 5 packs of 50 emery boards for a buck a pack....highly recommend them for finishing sanding.
Here's the few pieces that I've trimmed, filed and sanded....


Assembled the thermal detonator.....

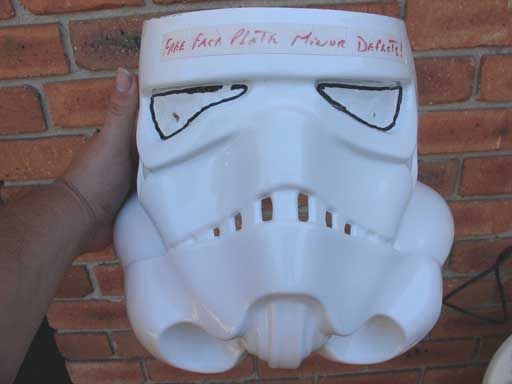
I then wanted to trim the helmet (couldn't wait. )...there's not much to trim...although you really need to take your time with the eye sockets and teeth. One slip and you can totally f*ck up your lid. Needless to say, this trimming and clean up took about an hour. Then of course, I had to test fit the parts together .....


Yeah, baby. :love ...that's what I'm talkin' about. Even without lenses, decals, trim and paint...it looks mean.
Of course, I also had to try it on.....well, it fits...but my wife now calls me Scarface... (note to self: trim screws.). It is a tight fit...the old corkscrew method of putting this thing on works well.
At this point, I decided to call it a night.....and get some bactine and Band Aids for my face.
Stay tuned....the assembly continues.....
I'd just like to show my progress as I go and post some tips/tricks that I've found along the way. Hopefully, it will assist others who are going to start their AP kits....and I know there's a few of you.
Also, anyone else who has assembly, finishing, painting tips....whatever, please feel free to post here as well....let's have some fun with it.First off, I've assembled a few FX kits in the past...so I do have a bit of experience in assemling a kit. However, the FX kits were already trimmed and ready to be put together. I'd characterize the FX as akin to those Monogram Snap-Tite model kits
...just snap them together and you're done. In contrast the AP kit needs to be trimmed beforehand...which I'm finding out is an art in itself. The pieces come pretty much as how I'd think they'd come out of the vac table....some pieces are rough trimmed but most need to be cut out of their form. The different pieces vary in thickness.....but all are much thicker than the typical FX kit. Here's a few examples...the helmet is mostly trimmed, apart from the eye sockets, teeth, and the ear edges on the cap back. Although, you can see that the hand plates and detonator are in one sheet...Consequently, you're going to need some heavier hardware to cut and trim. Here's some of the tools that I'm using.....other tools & materials will be needed once I get to the assembly stage...
Dremel with cut off wheels, drill bits
Stanley straight snips ( work great.)
Utility scissors
Hobby Xacto knife set
Utility knife
assorted files
emery boards
screwdriver set
goggles & mask (Safety first kids.)
Large Tim Horton's (double/double)...already ate the apple fritter...
Basically, I've been trying different tools as I trim different pieces. The Stanley snips are great for trimming the large thick pieces from the form sheets (i.e. chest/back plates, hand plates, etc...), the utility scissors work great on the thinner pieces...like trimming the outline of the ears on the cap back. The Dremel with the cut off wheel works great anywhere but you need a steady hand. I was sweating as I cut out the first eye socket....then I used a drill bit...way easier and better control. But you can use the Dremel elsewhere.......perfect for trimming large thick pieces as well........you just get a lot of debris flying everywhere. Plus you will have to de-burr the edges as the ABS melts and collects along the edge of the piece you are trimming.....I used the utility knife to trim that crud away. Not a huge fan of scoring and then breaking the excess away...but that will work as well.
After the final trimming, I then use a file to smooth out the rough edges...especially after using the Dremel...then I finish the edge with the emery boards....gives a nice smooth edge. I bought 5 packs of 50 emery boards for a buck a pack....highly recommend them for finishing sanding.
Here's the few pieces that I've trimmed, filed and sanded....
Assembled the thermal detonator.....
I then wanted to trim the helmet (couldn't wait.
)...there's not much to trim...although you really need to take your time with the eye sockets and teeth. One slip and you can totally f*ck up your lid. Needless to say, this trimming and clean up took about an hour. Then of course, I had to test fit the parts together .....Yeah, baby. :love ...that's what I'm talkin' about. Even without lenses, decals, trim and paint...it looks mean.
Of course, I also had to try it on.....well, it fits...but my wife now calls me Scarface... (note to self: trim screws.). It is a tight fit...the old corkscrew method of putting this thing on works well.
At this point, I decided to call it a night.....and get some bactine and Band Aids for my face.
Stay tuned....the assembly continues.....