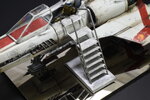
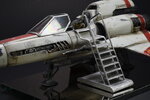
1/32 Moebius Viper MKII Complete

Dean O

Sr Member
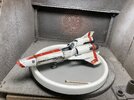
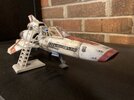
I looked back through my post history to find the original thread. I can’t believe I started this kit in 2010. After a couple of home reorganizations, a move, packing and unpacking , loosing parts and having buy a new kit to replace those parts, I have finally completed my 1/32 Viper MKII.
IMG_0384.jpegIMG_0386.jpegIMG_0388.jpegIMG_0396.jpegIMG_0405.jpeg


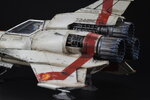
I added photo etched parts to the cockpit, engine service panels, and engine exhaust. Added a tow/launch hook to the front landing gear, made from sheet styrene and Stainless tubing. I drilled out the gun and added a stainless steel tube for a barrel. I had to scrap adding the custom details I CNC machined for the side service panels, since this is one of the parts lost over the years. The photo etched kit did include some detail parts for those as well. I also added Steel tubing in the side panels for the Fuel/life support? ports on either side. The RCS Thrusters were partially drilled out to give some visual depth.
IMG_0363.jpegIMG_0364.jpegIMG_0365.jpegIMG_0360.jpegIMG_0361.jpegIMG_0362.jpegIMG_4185.jpeg


Base paint is a grayish white with Fire red painted stripes. The kit decals, which are known to be brittle, had deteriorated quite a bit over the years, after I lost a few, I salvaged them with a clear coat before applying the rest. Weathering was a combination of salt and painted chipping, Tamiya brown and black panel line liquid and then layers of oil wash over top. Graphite powder was brushed on for RCS Thruster smoke and fuselage strikes.

IMG_4182.jpegIMG_4184.jpegIMG_4190.jpegIMG_4195.jpegIMG_4201.jpeg

I’m very pleased with how it turned out. It is probably a little dirtier than ever seen on screen, but I imagine this shows a viper during back to back missions with little time for maintenance between. If I had it to do over again I would add lighting but project creep is a big reason it takes me so long to complete things!

I plan to 3D print a ladder and make a hanger floor display base at some point. If anyone has a 3D model of the ladder let me know.

IMG_0390.jpegIMG_0392.jpegIMG_0400.jpegIMG_0402.jpegIMG_0401.jpegIMG_0415.jpegIMG_0410.jpegIMG_0412.jpegIMG_0403.jpegIMG_0406.jpeg
 
Last edited:
I looked back through my post history to find the original thread. I can’t believe I started this kit in 2010. After a couple of home reorganizations, a move, packing and unpacking , loosing parts and having buy a new kit to replace those parts, I have finally completed my 1/32 Viper MKII.
View attachment 1911203View attachment 1911204View attachment 1911205View attachment 1911208View attachment 1911217


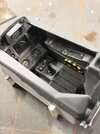
I added photo etched parts to the cockpit, engine service panels, and engine exhaust. Added a tow/launch hook to the front landing gear, made from sheet styrene and Stainless tubing. I drilled out the gun and added a stainless steel tube for a barrel. I had to scrap adding the custom details I CNC machined for the side service panels, since this is one of the parts lost over the years. The photo etched kit did include some detail parts for those as well. I also added Steel tubing in the side panels for the Fuel/life support? ports on either side. The RCS Thrusters were partially drilled out to give some visual depth.
View attachment 1911197View attachment 1911198View attachment 1911199View attachment 1911200View attachment 1911201View attachment 1911202View attachment 1911220


Base paint is a grayish white with Fire red painted stripes. The kit decals, which are known to be brittle, had deteriorated quite a bit over the years, after I lost a few, I salvaged them with a clear coat before applying the rest. Weathering was a combination of salt and painted chipping, Tamiya brown and black panel line liquid and then layers of oil wash over top. Graphite powder was brushed on for RCS Thruster smoke and fuselage strikes.

View attachment 1911218View attachment 1911219View attachment 1911221View attachment 1911222View attachment 1911223

I’m very pleased with how it turned out. It is probably a little dirtier than ever seen on screen, but I imagine this shows a viper during back to back missions with little time for maintenance between. If I had it to do over again I would add lighting but project creep is a big reason it takes me so long to complete things!

I plan to 3D print a ladder and make a hanger floor display base at some point. If anyone has a 3D model of the ladder let me know.

View attachment 1911206View attachment 1911207View attachment 1911209View attachment 1911210View attachment 1911211View attachment 1911212View attachment 1911213View attachment 1911214View attachment 1911215View attachment 1911216

Dean O,

There is a company in the UK, Cozmic Scale Models, that has two boarding ladders in 32nd scale. I have both and I have photos below,
01.jpg

01.jpg


I hope this helps.

Don
 
Dean O,

There is a company in the UK, Cozmic Scale Models, that has two boarding ladders in 32nd scale. I have both and I have photos below,


I hope this helps.

Don
Thanks, Those looks great! I’m familiar with the v1 ladder but not the v2. I did not realize there were two different versions.
 
Beautiful dirty thing. Love it. Great details and weathering! I had one but my daughter stole it for her display. Now they’re 100 bucks!
 
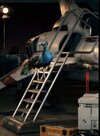
Here is an image of the two ladders on set.

These are my two painted,
Thanks for the pics! I’ve never noticed the two different versions on any of my re-watches!
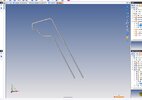
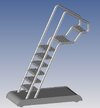
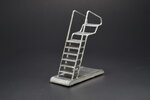
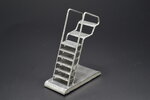
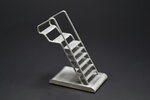
I’ve decided to make my own 3d model. I whipped this up in CAD just now to see how difficult it would be. I need to take a few measurements from the model and to get the right scale
.Ladder test.jpeg
 
Dean O,

There was as .stl file out there but my link was dead. Not that you need it by the looks of it, frakking nice work sir.
Yeah I found a mention of one STL that was on Shapeways but it’s gone now that shapeways is dead. Pretty sure that’s the one I remember seeing.

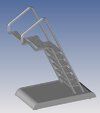
I’ve got my model to a point that I’m happy so I’ll try printing it this weekend or next week and see how it comes out. I changed the expanded metal to a diamond plate and adjusted the shape and size of the steps and rails.
final ladder 3.jpeg
final ladder 2.jpeg
Final ladder 1.jpeg
 
Yeah I found a mention of one STL that was on Shapeways but it’s gone now that shapeways is dead. Pretty sure that’s the one I remember seeing.

I’ve got my model to a point that I’m happy so I’ll try printing it this weekend or next week and see how it comes out. I changed the expanded metal to a diamond plate and adjusted the shape and size of the steps and rails.
View attachment 1912236View attachment 1912237View attachment 1912238

Dean,
I have a Shapeways ladder, did you need any measurements from mine so it scales out right? I have the base at 35.14mm/1.3835 in width , 50.51mm/1.9885 in long.
The ladder is 25.60mm/1.008 in wide and 77.05mm/3.0335 in tall at the peak. comparing mine to your, it looks like you are bang on with the angle of the steps.
Final ladder 1.jpeg


final ladder 2.jpeg
 
Dean,
I have a Shapeways ladder, did you need any measurements from mine so it scales out right? I have the base at 35.14mm/1.3835 in width , 50.51mm/1.9885 in long.
The ladder is 25.60mm/1.008 in wide and 77.05mm/3.0335 in tall at the peak. comparing mine to your, it looks like you are bang on with the angle of the steps.
Thanks so much for those dimensions! I’ll double check mine but I think they are pretty close.
 
I drew this on my work CAD so these are rough measurements from the stl I exported to my iPad but pretty close. I scaled it based on measurements from the kit.
IMG_0457.jpeg
IMG_0456.jpeg
 
This is my test print. I made a mess of the supports and accidentally put a hole through the base when slicing the model. I think the last step is at the perfect height but is a little too big. The second step is a bit too high over the wing, and possibly the whole thing is a bit too tall. I’ll make those adjustments and print again.
IMG_0442.jpegIMG_4251.jpeg
 
Finally got the ladder printed and cleaned up. There were a ton of unnecessary supports that made for a lot of clean up. I’ll print another once I get the supports dialed in but I’m very pleased with the size and shape of it.
IMG_0508.jpegIMG_0507.jpegIMG_0506.jpeg

IMG_0504.jpegIMG_0502.jpegIMG_0500.jpeg
 
Back
Top