Building the defiant captains chair-project started

Sulla

Sr Member
RPF PREMIUM MEMBER
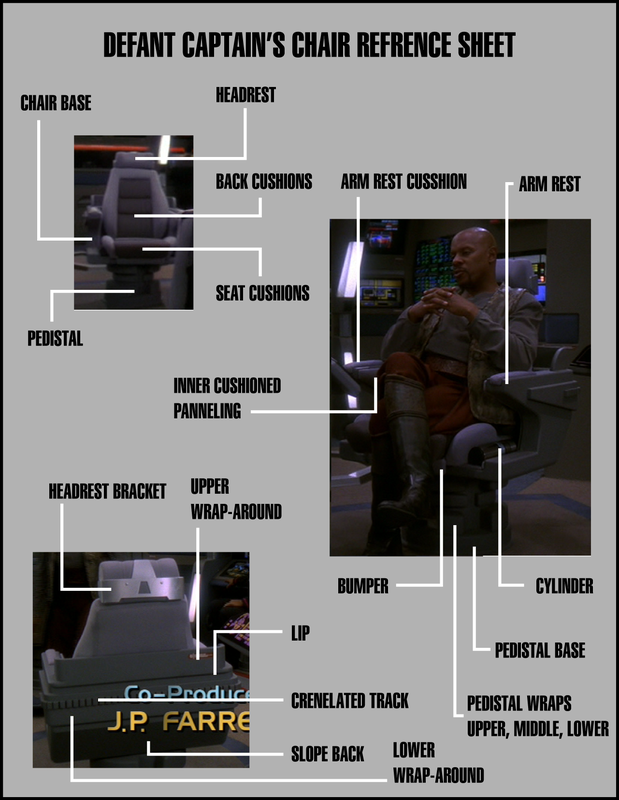
OK. I have always wanted to build the Defiant Captain's Chair. For a while I thought it almost a joke to even think I could do it. I decided to bide my time, crawling through junk yards and scowering ebay expecting to pay $200 to $500.

Then I saw this puppy for a song on ebay! I waited until the end and bought it for my first bid!

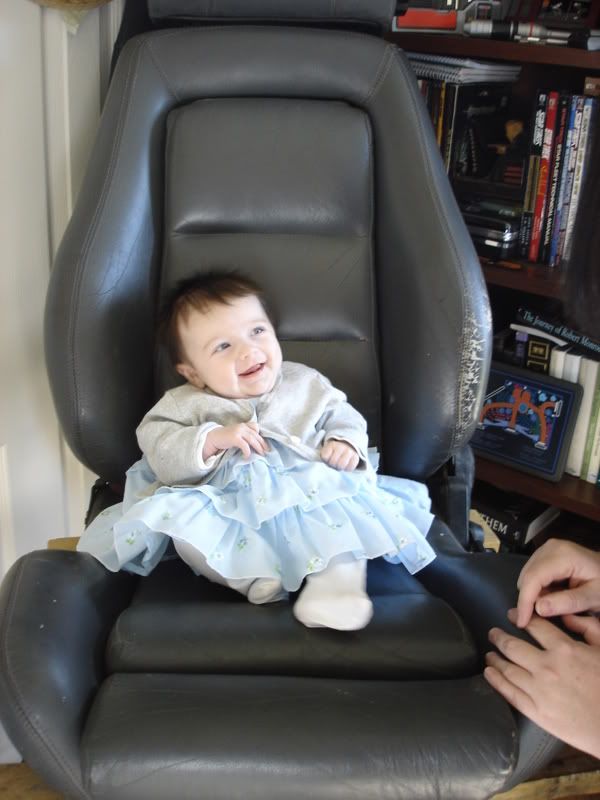
I know by pictures and screen shots of the original that the one I bought isn't a perfect match, but I do know it is the same brand, and it's close enough that once it's reupholstered it'll be hard to tell the difference.

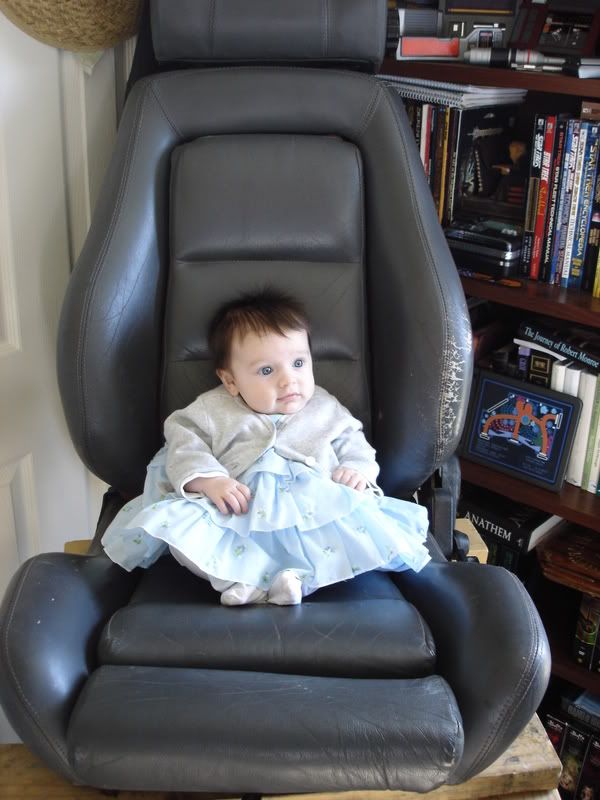
Mine is a driver’s side seat. The original captain's chair on the defiant was a passenger seat. The knob on the headrest is on the wrong side, but it will be removed anyways since I plan on making the later versions with the metal thingie wrapped around the back of it.

fortheuniform039.jpg

DSC04799.jpg


And the most glaring difference is the number of sections in the back cushions. The original has three, but mine has four. When I get it reupholstered I will have this fixed.

DefiantChir.png

DSC04798-1.jpg


All told I am very pleased for such a good cost. Here are some shots of my chair. Now I need to figure out all the rest of this awesome project…

DSC04801-1.jpg

DSC04802-1.jpg

DSC04800.jpg

DSC04796.jpg


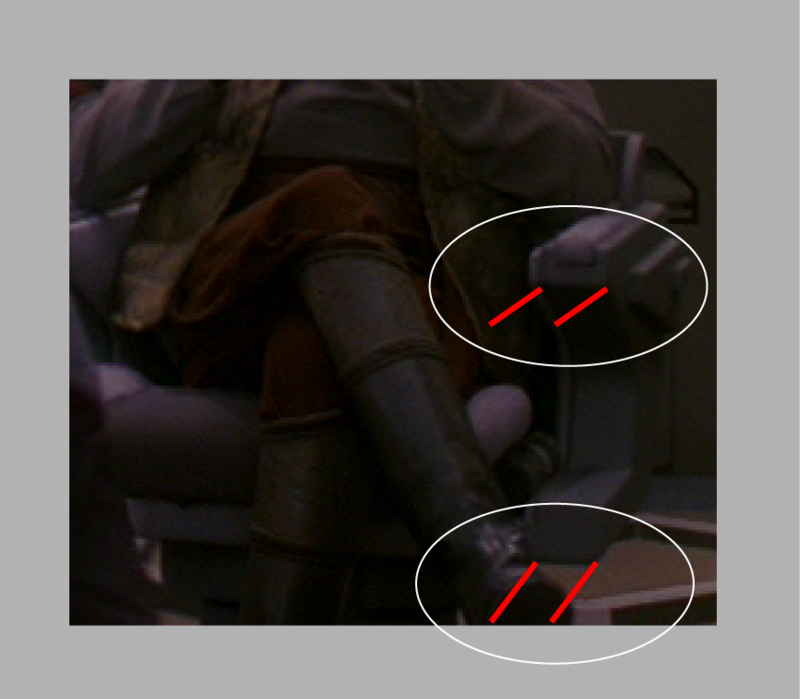
Here’s pictures of another chair used on the defiant bridge and then redressed for a few episodes of VOY (for reference):

defc2.jpg

defc1.jpg

defc3.jpg
 
Last edited by a moderator:
Sulla,
Great find!
I know from seeing your threads about this here and on other boards that you have been looking forward to getting a chair for some time.
Congradulatoins on finding one and getting it for a great price.
Keep us updated on the conversoin. I have always liked that Captain's chair.

Terry
 
Despite a severe sinus infection, I could not keep from working on this. I drew up the headrest bracket in illustrator and made a mock-up of it out of foam board.

What do you think? Keep in mind; the headrest knob is still on there - that's why the end of the bracket furthest from the camera looks like it sticks out too far. It is lying over the knob

DSC04834.jpg

DSC04835.jpg

DSC04836.jpg

vlcsnap-105205.png

vlcsnap-103986.png
 
Last edited by a moderator:
I think that over all size is right, but the bottom cutout is too high, I would say about half that. and the center cutout could be a little wider. Its good to get it right with this material so yo can then take it to a metal shop as a template. :D
 
Its good to get it right with this material so yo can then take it to a metal shop as a template. :D

Exactly!

Yeah, the bottom cutout is 1" tall. And I think it's too big too. I think I'll reduce it a half an inch. This will allow me to scale up the center cutout.

I will cetrainly be revisiting it, I think the both the center cut out and the base of the upper 'tounge' should be widened too.


DSC04837.jpg
 
Here's the tweeked head rest bracket - it's a little off center, I know, but it's only taped in place. Sorry for the lighting.

DSC04839.jpg

DSC04851.jpg

DSC04853.jpg
 
Threw this together for myself. Figured I'd go ahead and share it. It'll probably evolve as I get further into the build.

CAPTAINSCHAIRREFSHEET.png
 
I just wanted some input on this one. I am guessing the width of the arm rest to be about 4".

What do you all think?

upclose1.png
 
Last edited by a moderator:
Well, I lost my original drawings to a spring cleaning this year. I have to re-draw them. But that's OK, I have some new ideas for putting this sucker together.

I plan on using .5" and .75" birch plywood skinned in thin styrene then bondoed and painted. (I used this method on my CNC cut R2 legs - see linked signature below - and it worked out great.) I also think I will use a commercial chair swivel made for boat chairs that can be found in most outdoor type stores.

An I believe I've found an upholsterer who is willing to do this seat for me, though I am still cringing over prices.
 
Finally found some time to play with my designs. Here's my first set of drawings for the chair base. The image was too big to save in a file format like jpg or png, so I put it up here like this. I have a pdf of this image if anyone wants a copy.

I hope to have this chair dome by end of year 2010 sans reupholstering. That is turning out to be a very hard part of the project.

CHAIR1.jpg
 
Nice find & so far so good :D So this going to be the centre piece in the room once done? Or you having a room done to mimic the Defiant Bridge?

Jason
 
You may want to talk with a local car dealer about the re-upholstering. I looked into this a couple of years ago and while my dealer didn't do the work, they had vendors who did. You may get this wrapped in leather for a few hundred bucks.

Good luck!
 
This thread is more than 10 years old.

Your message may be considered spam for the following reasons:

  1. This thread hasn't been active in some time. A new post in this thread might not contribute constructively to this discussion after so long.
If you wish to reply despite these issues, check the box below before replying.
Be aware that malicious compliance may result in more severe penalties.
Back
Top