Hasbro Black Series Stormtrooper Helmet - modding for comfort!

Aldringham

Active Member
Hey everyone, I'm new here and still pretty green as far as prop building goes, so I'm just going to dive in on this and start off with some basic modifications.
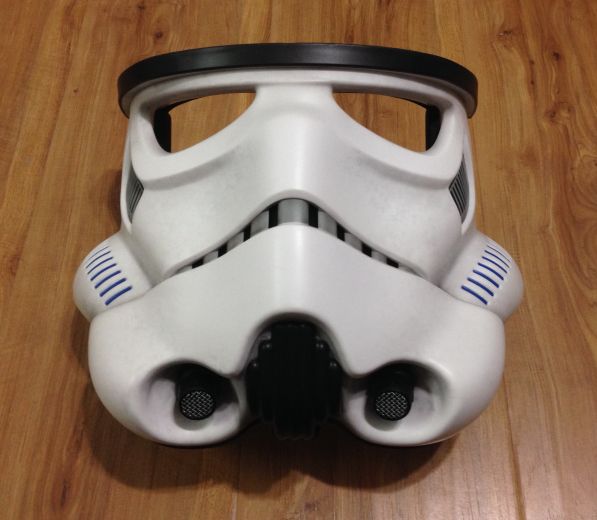
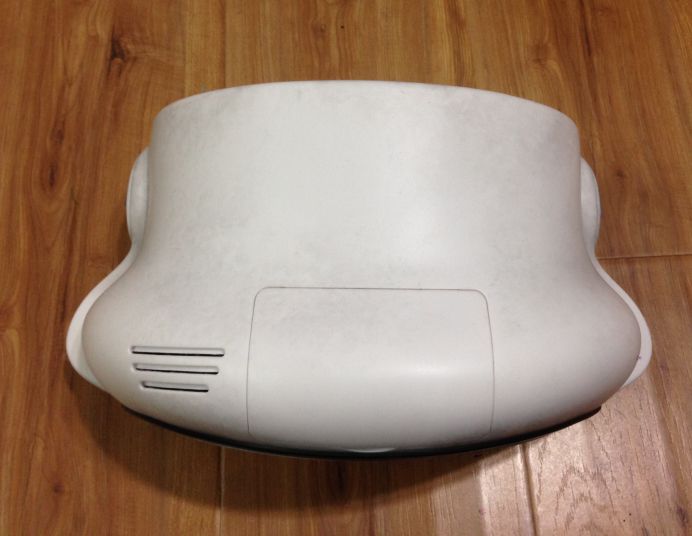
I got a Hasbro Black Series Stormie lid for my birthday the other day and I love how it looks (despite the speaker vent and battery cover on the back), and was hoping to just give it a weathering treatment, but I tried it on and it sits uncomfortably and the voice changer leaves a lot to be desired, so I'm going to 1) make some adjustments to the interior and add some padding, 2) change up the electronics, and 3) give the outside a weathering treatment.

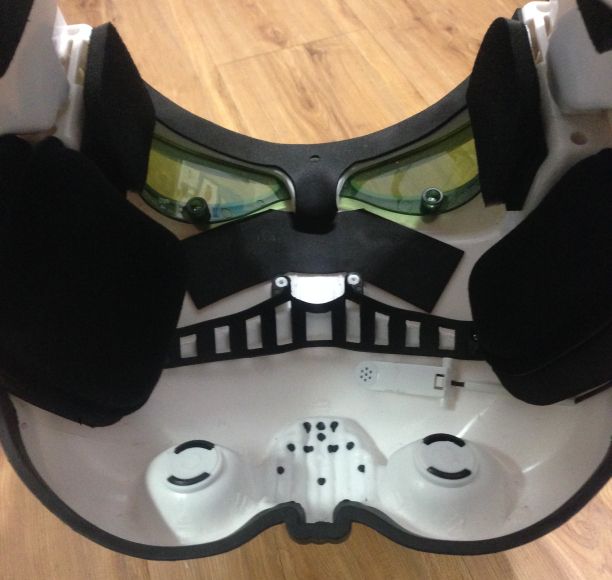
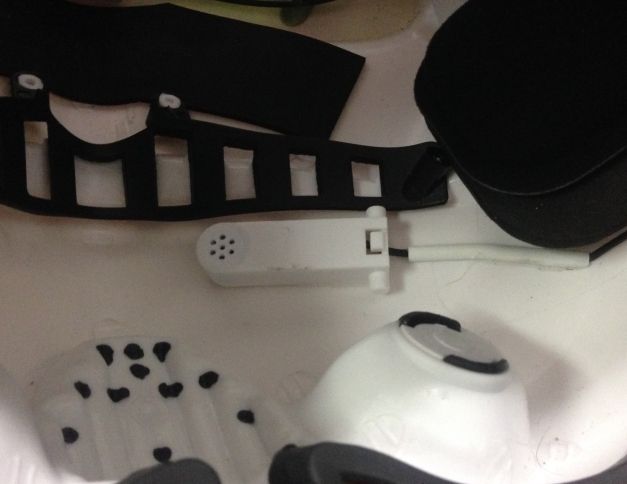
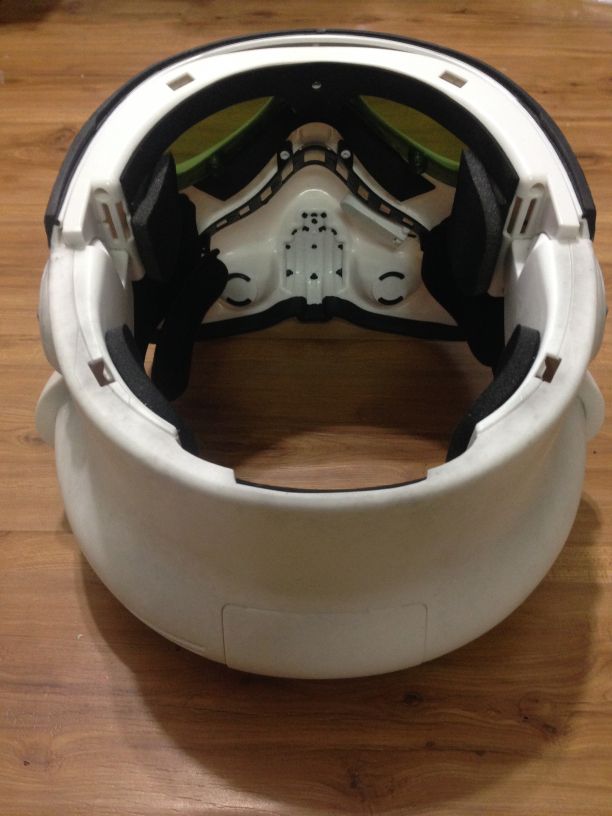
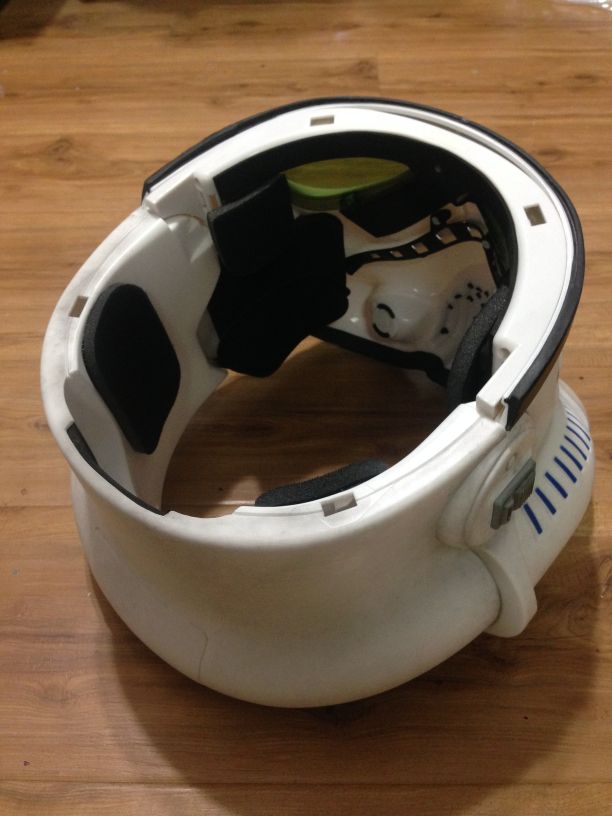
First things first, I had to disassemble the helmet which turned out to be a pain in the backside. The clips that fasten the three sections together have two interlocking tabs that hold it together from two sides, so it took some nerve and muscle to separate them, but I finally managed it. Next, I removed the adjustable headbands along with the lenses, microphone and the rubber nose rest since all it was doing was mashing into my face. The plastic strip behind the faceplate that holds everything in is held on by five screws and wasn't a big deal.

IMG_0569_zpsahp4wsgg.jpg


All the interior plastic trim that goes around the crown will have to be shaved back where it's bumping into my brow and the back of my head. I'm using some epoxy putty to add some mass to them and hopefully make it easier to grind the plastic back.

IMG_0580_zps1vsx5wof.jpg


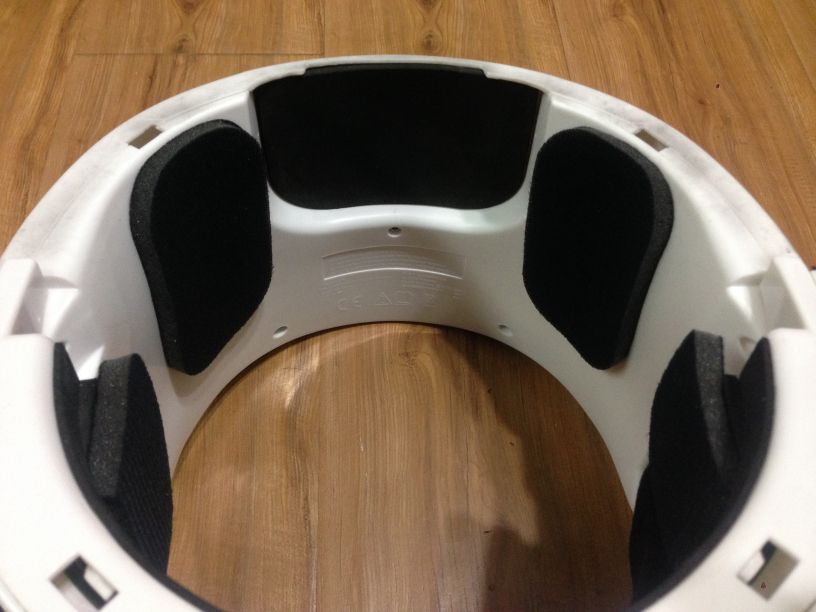
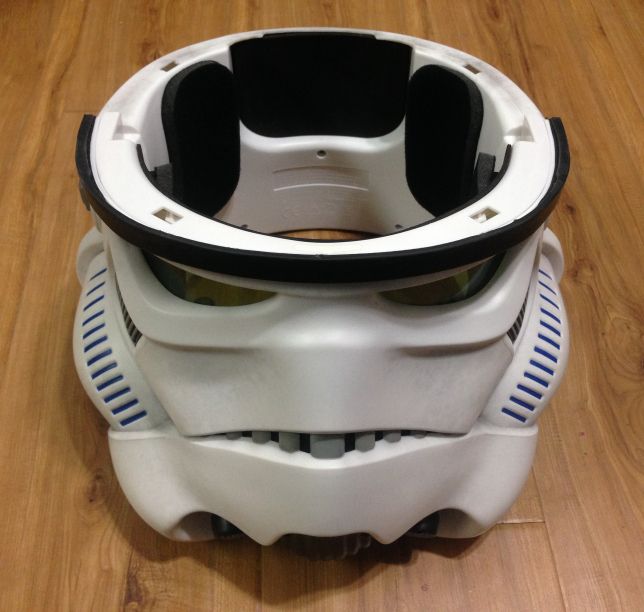
There's a lip on the interior of the back section of the helmet that I want to cut back as well, and checking it against the top of the helmet shows I'll have to adjust the cut to keep it inside the geometry of the helmet exterior.

IMG_0579_zpswgq2v8cs.jpg


Going to knock it on the head for the day, I've ordered the voice changer, some helmet pads and some barge glue. More updates soon...
 
Last edited:
I ditched all the interior stuff for my mod except the ring in the base of the helmet top -- and that I only kept long enough to make sure everything was lined up right and the glue had cured well, then it got ground away, too. And by "all the interior stuff", I mean I took my Dremel to all the support framework, as well.

gdk_zpsohnpltfr.jpg


Building my own voice-amp housing, switching to a Li-ion battery, moving the speaker to the front, installing fans, going with aftermarket bubble lenses... *heh* There's a whole lot more real estate in there when you clear out all the unnecessary clutter Hasbro added.

--Jonah
 
Looking good so far! I just got a baby cordless Dremel 7700 which I am pretty sure I am gonna regret - shoulda gotten something a bit more suited for heavier work. So we'll see if I will get around to further improve upon the internals. Would be interesting to see how to hook up the cooling fans!
 
Great to see someone attempting something similiar and I have been a lurker in this forum for far too long and thought I'd just dive in. I was really inspired by the amount of creativity going on not only with the RPF but also particularly by a YouTuber PITT FORCE FIVE who did a mod of the Kylo Ren helmet using the cheap Voice Changer mod he found on Amazon. I simply tried to replicate the mod with the Hasbro Stormtrooper helmet.

Now, before I dived into this project, I hadn't planned on doing something so major...like just get the Voice Changer, tape the mic and strap on the unit in my belt and be done with it. No I had to take a leap of faith and rely on my rusty soldering skills which I have never used ever since I left Technical School. Anyway, I am now at the point where I have replaced the original helmet's 0.25W speaker and voice changer circuit board to the 0.5W speaker and circuit board from the Amazon Voice Changer.

I wanted to use back the original helmet's ON/OFF switch, but I am unsure how I need to connect the two leads from the helmet switch to the Voice Changer circuit board's toggle switch. I'm not confident in doing a clean removal of the circuit board's toggle switch haha, considering this is the first time I touched a soldering iron since I was 19!

Currently I soldered the helmet's switch leads (blue colour wires) to the last two leads on the circuit board which should be the "Stormtrooper voice". But now when I press once on the helmet switch, yes it will turn off the mic/board but after that I can't get it back on. I have to reset the slider switch on the circuit board instead to turn it back on. Is it even possible to leave the on-board slider switch (set it to the Stormy voice) and hook up the original helmet push-button switch to it? I really suck with electrical/electronics!

IMG_20170126_071900.jpgIMG_20170126_071844.jpgIMG_20170126_071814.jpgIMG_20170126_071741.jpg


This is a short video of the mod and my current wiring diagram. Forgive me if the quality or my speech is bad, as I shot the video just before rushing off to work!

Wiring.JPG https://drive.google.com/open?id=0B2BeSbkoEk7qbFh0S1h5dHE0a0k
 
I ditched all the interior stuff for my mod except the ring in the base of the helmet top -- and that I only kept long enough to make sure everything was lined up right and the glue had cured well, then it got ground away, too. And by "all the interior stuff", I mean I took my Dremel to all the support framework, as well.

http://i118.photobucket.com/albums/o95/Adabiel/Stormtrooper/gdk_zpsohnpltfr.jpeg

Building my own voice-amp housing, switching to a Li-ion battery, moving the speaker to the front, installing fans, going with aftermarket bubble lenses... *heh* There's a whole lot more real estate in there when you clear out all the unnecessary clutter Hasbro added.

--Jonah

Wow! That's cool, it sounds like I'm going to be attempting a lot of things that you did, although you have a much better eye for detail than I do and you know what you're doing, lol! :lol I just read your thread on your Shadowtrooper mod, I wish I'd found it sooner so I would have tracked down the same epoxy putty you recommended. Have you finished your mod? I'd love to see what yours came out like!


Also, I have to ask, what type of glue did you use to secure your helmet pieces together? I believe they are made of ABS so I was planning on sanding the pieces where they meet and hitting them with JB Weld...
 
Great to see someone attempting something similiar and I have been a lurker in this forum for far too long and thought I'd just dive in. I was really inspired by the amount of creativity going on not only with the RPF but also particularly by a YouTuber PITT FORCE FIVE who did a mod of the Kylo Ren helmet using the cheap Voice Changer mod he found on Amazon. I simply tried to replicate the mod with the Hasbro Stormtrooper helmet.

Now, before I dived into this project, I hadn't planned on doing something so major...like just get the Voice Changer, tape the mic and strap on the unit in my belt and be done with it. No I had to take a leap of faith and rely on my rusty soldering skills which I have never used ever since I left Technical School. Anyway, I am now at the point where I have replaced the original helmet's 0.25W speaker and voice changer circuit board to the 0.5W speaker and circuit board from the Amazon Voice Changer.

I wanted to use back the original helmet's ON/OFF switch, but I am unsure how I need to connect the two leads from the helmet switch to the Voice Changer circuit board's toggle switch. I'm not confident in doing a clean removal of the circuit board's toggle switch haha, considering this is the first time I touched a soldering iron since I was 19!

Currently I soldered the helmet's switch leads (blue colour wires) to the last two leads on the circuit board which should be the "Stormtrooper voice". But now when I press once on the helmet switch, yes it will turn off the mic/board but after that I can't get it back on. I have to reset the slider switch on the circuit board instead to turn it back on. Is it even possible to leave the on-board slider switch (set it to the Stormy voice) and hook up the original helmet push-button switch to it? I really suck with electrical/electronics!

View attachment 701545View attachment 701544View attachment 701543View attachment 701542


This is a short video of the mod and my current wiring diagram. Forgive me if the quality or my speech is bad, as I shot the video just before rushing off to work!

View attachment 701546 https://drive.google.com/open?id=0B2BeSbkoEk7qbFh0S1h5dHE0a0k

Dude! That's wild, I think we're using the same voice changer (I'm pretty sure I saw the same video you did and tried to order the same one), and I need to know EXACTLY the same thing!! I'd like to keep the functionality of the pre-existing button if at all possible, otherwise I'm worried I'll need to figure out another on/off switch, how to install it and where to put it, and I'd rather my learning curve not get any steeper on this project if I can help it. :D

If anyone here here can shed some light on this I'd really appreciate it!

You stole the words right out of my mouth when you said " I'd rather my learning curve not get any steeper on this project if I can help it" haha! I would really love to move on with this project as I am kinda stuck with the helmet switch issue. I could desolder the blue leads from the helmet switch and just randomly (maybe tape ém down?) touch the solder points of the circuit board slider switch to see which ones work. Haha should've paid more attention in technical school!

By the way I also noted something interesting --- with my current wiring setup, if I were to set the voice changer switch to position 1 (the deep Kylo Ren voice) and halfway while speaking into the mic, I pressed once on the helmet switch, it will change to the position 3 (the ST voice). Then another press of the helmet switch does nothing and sometimes it will turn it off but not turn it back on.

I am throwing this wiring dilemma to a local electrical/electronic forum and see if I can get someone who might help.
 
Wow! That's cool, it sounds like I'm going to be attempting a lot of things that you did, although you have a much better eye for detail than I do and you know what you're doing, lol! :lol I just read your thread on your Shadowtrooper mod, I wish I'd found it sooner so I would have tracked down the same epoxy putty you recommended. Have you finished your mod? I'd love to see what yours came out like!


Also, I have to ask, what type of glue did you use to secure your helmet pieces together? I believe they are made of ABS so I was planning on sanding the pieces where they meet and hitting them with JB Weld...

It's only now starting to come out the other side of winter. I have to rattlecan or airbrush outside, and it's still a little too cold here. I've been taking the time to tweak the trap and tear slits and side tube slit reworks, finishing the earcap bases, and focusing on the faceplate undercut. And that's in addition to the other projects I'm working toward having ready to paint when it's consistently over 50 and not raining for at least a day or three. I'll have pictures of it in its current state next week sometime.

As for glue, I use one of Locktite' two-part plastic epoxies. Small working surfaces get the maximum-strength one, larger working surfaces get the longer-working-time one.

--Jonah
 
Cool, thanks Inquisitor Perigrinus, I'm looking forward to seeing your finished piece!
Sadly, my choice of 2-part putty wasn't the best in hindsight. I went with Miliput as I had some to hand and felt it's white color would be more innocuous, but while it's good for sanding into shape it's brittle and didn't adhere to the plastic. I ended up using CA glue and baking soda to fill some gaps, but it keeps the screw hole on the bracket secure after a lot of surrounding material was sanded away, and as the bracket pieces are screwed into the front and top helmet sections that should keep them rigid so I'm not too worried about it... yet.

BROW_zpsnfvfn3ym.jpg

CROWN_BOTTOM_zpswmwa4vvn.jpg

CROWN_TOP_zpsqhr9pdou.jpg


The fit is certainly better in terms of space, although I'm still getting some pressure on my brow as it sits at the moment. When my padding comes in I'll arrange it so it's taking off the pressure and I'm not supporting the weight of everything on the bridge or my nose. I'm also planning on cutting some thin craft foam to stick on the bracket that secures to the faceplate so there will be a little padding in my nose. Speaking of my nose, I removed the bracket that used to hold the mic so it eliminates the chances of it catching my nose when I put it on and take it off.

NO__NOSE_zpsr8wiixy0.jpg


Also, I cut the lip on the back of the helmet. Thank god I checked the tapering, I nearly cut too far and there were almost holes in the back of my helmet! Luckily, it sits perfectly and you can't see anything from the back.

BACK_CUT_zpsktpq1czo.jpg


More soon!
 
Last edited by a moderator:
Just to update on the voice changer mod - I finally got it working right! With some help from a local forum, a guy showed my the right wiring I needed to do. You can compare my previous wiring diagram with the right one below.

Wiring.JPG

So I now have the original helmet switch working, BUT since it is a momentary switch, it will only work like PTT (push-to-talk). You got to hold down the switch to talk. This is probably due to the original voice changer circuit design which has some sort of timer to keep the circuit closed before it automatically opens. A trip down the local electrical shop to get a maintained latching push-button will do the trick. Just have to find one small enough to fit
 
Just to update on the voice changer mod - I finally got it working right! With some help from a local forum, a guy showed my the right wiring I needed to do. You can compare my previous wiring diagram with the right one below.

View attachment 701653

So I now have the original helmet switch working, BUT since it is a momentary switch, it will only work like PTT (push-to-talk). You got to hold down the switch to talk. This is probably due to the original voice changer circuit design which has some sort of timer to keep the circuit closed before it automatically opens. A trip down the local electrical shop to get a maintained latching push-button will do the trick. Just have to find one small enough to fit

That's great reezahl, please let us know the details of the switch you use when you're done! Also, I think you may have posted the same diagram as before :p If you have a new one I'd really like to see your solution :D
 
Ooops my bad! This is the actual diagram. But unlike me, it would be better if you have a latching switch to replace the original. Unless you don't mind the helmet switch to function like a walkie talkie's PTT. Yup the original switch is a momentary switch so after swapping out the original voice changer, you have to hold down the switch to speak.


Wiring v1.0.JPG
 
That's great, thanks for the info reezahl! I looked in my local electronics store and got a replacement 3xAA battery holder and had a look at their range of latching push-button switches. All of them would require some modification to the button on the helmet and the fabrication of a bracket to hold everything in, but your idea should be sound!
Unfortunately, I've run into a bit of a problem: after getting in my voice changer I set about extracting the electronic components so I could figure out their placement inside the helmet, and a couple of wires came free. I could see where everything went, and so I started to replace the monofilament wires with some a little stronger. I tried connecting it to the new battery holder to make sure it still works, but it was dead, no sound at all. Right now I don't know if I made a bad connection, burnt out a component or if something's just broken... Anyway, unless I can figure out what's wrong I'm going to be stuck with my original setup that came with the helmet. I have a backup plan to reposition the mic so it will be closer to my mouth and have a better connection between the front and back sections, but I'm still disappointed that I may not be able to go with my plan A (along with kissing goodbye to about 25 bucks). Either way, I can't put the helmet together without having the electronics sorted out so I'll need to come to a decision soon. In the meantime, the helmet pads I've ordered have come in so I'm going to focus on how they will sit and leave the back section alone for a bit while I ponder my voice changer dilemma.
 
Oh gosh that's a bummer! You could try like me to hook it up with the original 3xAAA battery compartment. It still works so long as it is the same 1.5 voltage. The shops are cl;osed over the weekend because it was Chinese New Year here. So i am gonna head down to my local equivalent of Fry's and have a look at the available micro latching push-on/off switches. I intend to cut out the original shape of the helmet circuit board/switch from some an old plastic card or stiff cardboard, make holes for the switch to sit in it, and try to jimmy it to the helmet somehow. I don't think you shorted out the circuitry...could try my wiring setup with the original 3xAAA and see if it works.
 
Wow, I can't believe how long its been since I was able to post on my project! Luckily I was able to finally able to spend some time on this! I ordered two sets of pads that I thought looked like they might work, one 5/16" thich and one set about 11/16" thick to give me some variety to work with.

https://www.amazon.com/gp/product/B00DGFBIEI/ref=oh_aui_detailpage_o03_s00?ie=UTF8&psc=1

https://www.amazon.com/gp/product/B01MCT2J71/ref=oh_aui_detailpage_o02_s00?ie=UTF8&psc=1

I also went to my local Michael's and picked up some 1" upholstery padding, as well as some 1/4" black craft foam and some 1/16" black craft foam with adhesive backing. I used some of the 1/16" adhesive on the inside of the faceplate to cover the bridge of my nose.


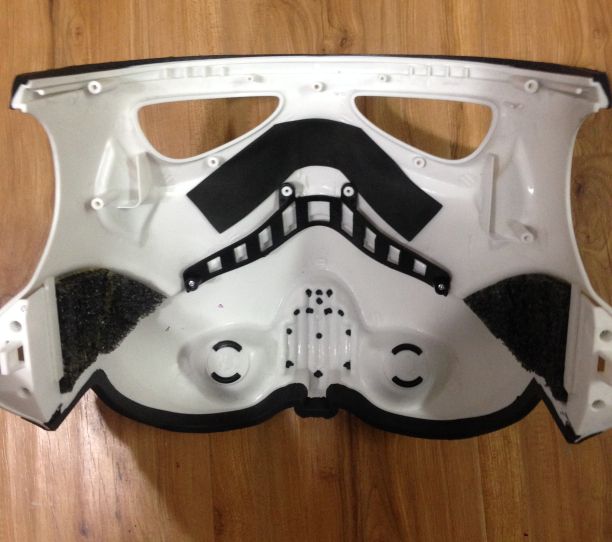
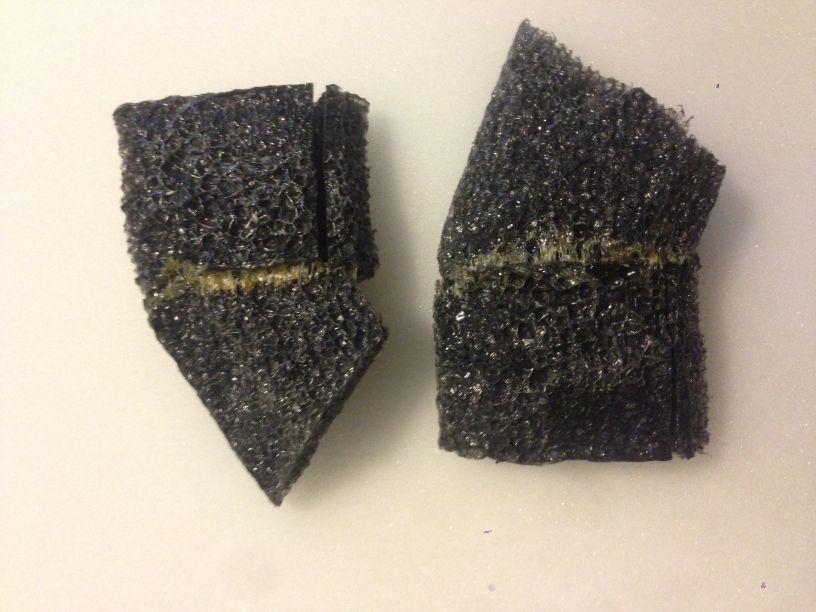
I have some pieces I want to apply around the inside "cheek" area, but because of the way these helmets are molded there are two big hollow gaps with not a lot of area to attach the pads to, so I made two inserts out of some foam that I salvaged from the packaging from a computer tower, Its rigid but has some give to it so I carved out the shapes using a long razor blade and attached the sections together with Barge glue.


I'm still trying to figure out what happened with the voice changer, but at least I've got the ball rolling again, more to come soon...
 
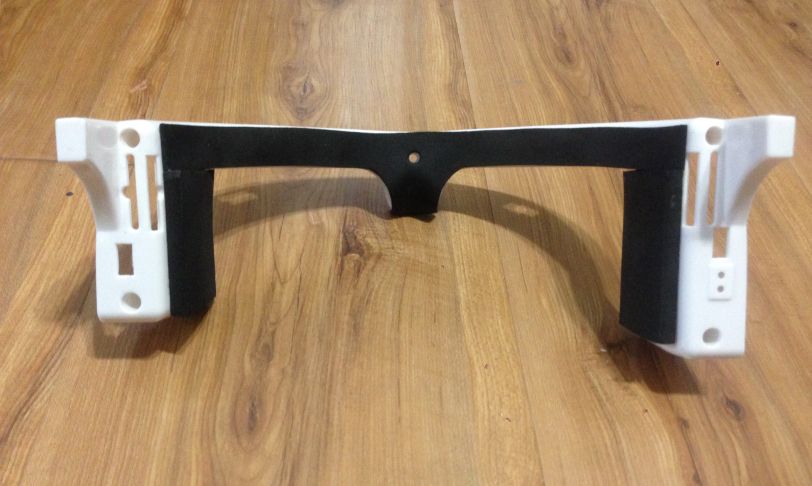
First off, a picture I forgot to upload yesterday: I lined the forehead strip with the adhesive backed foam. Before I removed the paper backing I used a punch to knock out the hole where the screw will have to pass through to secure the forehead strip to the face piece. I used barge glue to secure the foam where it meets the nose at the front, since I wrapped it pretty taught and it's compensating for the arc I sculpted in on the nose so the barge glue will help hold it down over time. I also glued in strips of the thicker craft foam on the temples.


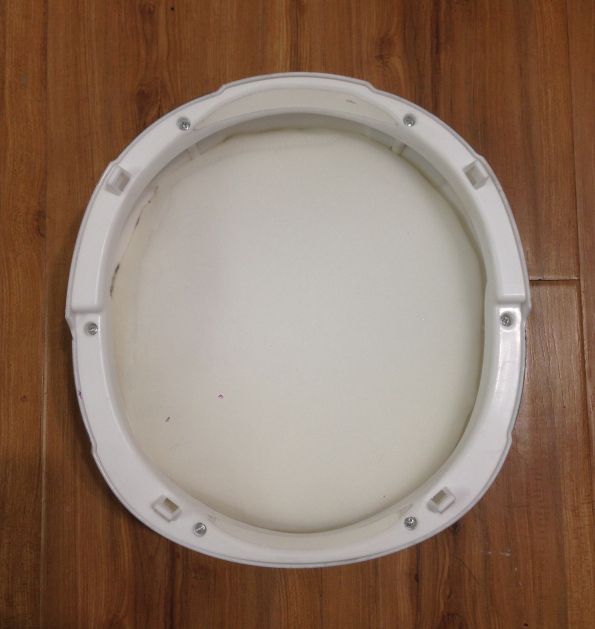
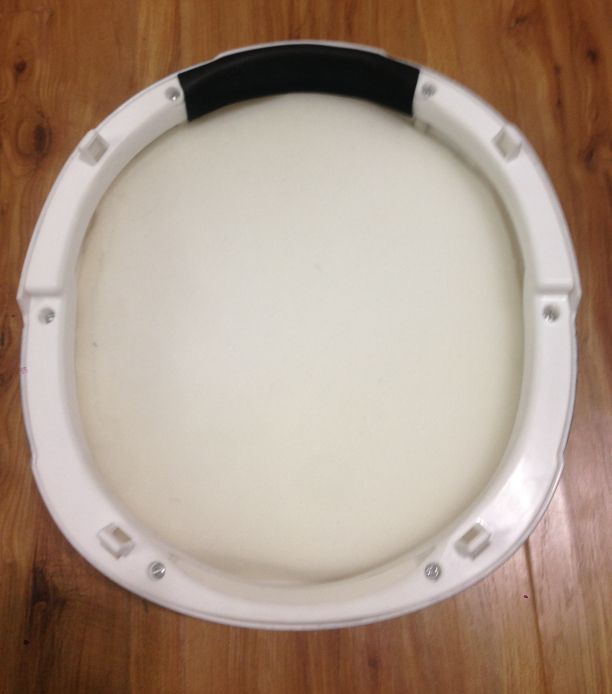
It's been a productive evening, but only after making the tough decision to abandon the voice changer mod. After several attempts I was having zero success with resurrecting my components from the Halloween store special, and I was worried of the project losing momentum again, so I resolved to make the best out of the setup I already had and make it better. I'm going to directly solder the mic into the socket on the side to ensure a good connection, then run the wire down the side, under the outer padding on the right cheek and secure it closer to my mouth. Once I made my peace with this decision I was able to figure out where to go next; I used the bottom of the top lid of the helmet as a template and marked it out on the 1" upholstery foam. I cut it out and will use it as a cushion to take the pressure off the crown of my head. The bracket that runs around the bottom of the top lid holds it in perfectly, which means I'll be able to remove and replace it easily to help keep it fresh. I might wrap the padding in black cloth or a bandanna or something as well to tie it in.


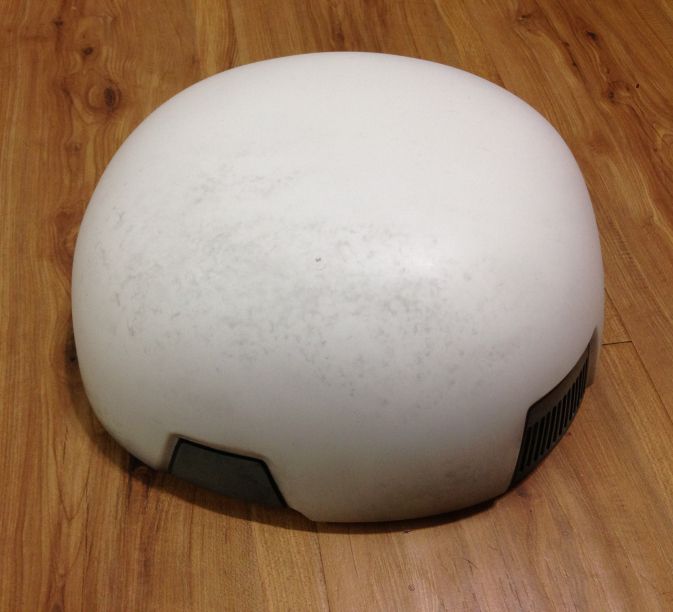
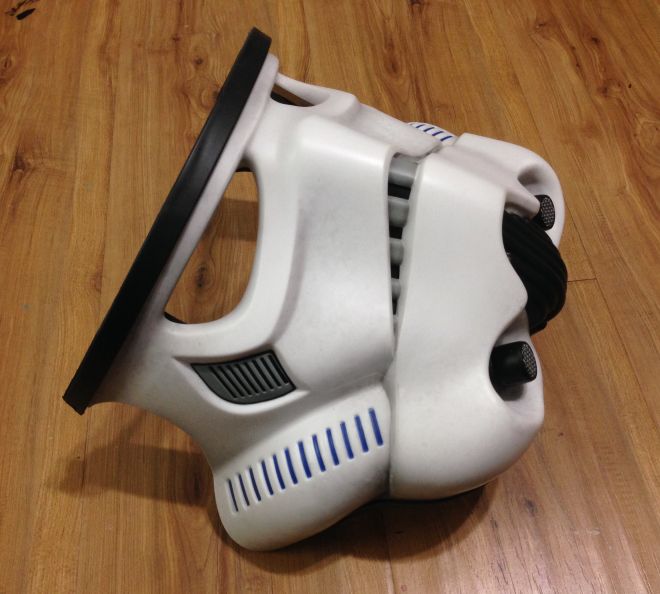
Next up was my weathering treatment! I wanted to keep it pretty light, Not quite as worn as a Sandtrooper, but I wanted it to look "lived in". I used Golden brand fluid acrylics, specifically Shade Gray, some 70% alcohol and a natural sea sponge, and used liquid latex applied with a toothpick to mask off the speaker vents at the back to make sure the electronics stayed dry. Luckily, before I started I tried using some 91% alcohol to neaten up some of the blue markings on the sides and I found out that alcohol will eat through the printed markings on the helmet, so before I started I sprayed all the printed colors with Krylon Matte Sealant to make sure they wouldn't get messed up with my weathering. Normally when painting on plastic like this I'd wash the plastic to remove any mold release from the factory, but since I was using alcohol as a medium it seemed to do a good job of burning through anything on there, and as alcohol stippling with a sponge is intended to be patchy and random it turned out pretty well as I was trying yo keep it patchy. After that had dried I sealed the helmet with matte. Once that had dried I used an airbrush VERY lightly just to accentuate some of the lines and subtleties of the helmet's curves and make a couple of details pop or recede more. Once that was dry I hit it again with the Matte sealant.


It may look very subtle in the photos, but I'm quite happy with it. It almost reminds me of the look of the armor in Clone Wars or Rebels. Not quite as beat up as the trooper from the prison transport in Rogue One, but it's a muted grime that makes it step away from the fresh-out-of-the-box plastic (and also hides the small imperfections visible on mine before I set to work on it).

I feel I have made progress today.
 
After a couple of late nights and a day of power outages from the storm that tore through So Cal I finally epoxied the front and back halves of my helmet together! First I soldered the connection of the microphone to the socket in the right ear. The tricky part was bracing the two halves of the helmet while I worked on them because the wire wasn't that long and I needed to lay the line down precisely so it would reach to where I wanted to attach the mic. I epoxied the mic where I wanted it to be, and used a stirene tube I shaved in half to attach the wire. Once I'd run it up the cheek I screwed the forehead plate into place on the front of the mask, feeding the wire between two channels I cut in the right temple of the headband to accommodate them. Once that was secure I glued the thick craft foam section over the exposed wire on the right cheek.


I also cut a section of the thick foam to fit the cavity at the back of the helmet. The pads on either side were secured with adhesive velcro tabs.


Once that was all set up I roughed up the helmet with some 180 grit sandpaper where the two halves met and applied some 5 minute epoxy, wiping the seams with a Q-tip to get rid of any drips. If you decide to do this, be really careful of any paint you may have already applied as the solvents in the glue can wipe the paint straight off!


Once the front and back were set I found the time to bind the back of the top bracket with some of the thin craft foam with some barge glue to help keep if wrapped tightly.


Going to call it an evening, tomorrow I'll secure the top lid and look around for any fine tuning.
 
Finally finished!

final01_zpsc2sezhau.jpg

final02_zpsoo6zo30z.jpg

final03_zpsxcu12tqi.jpg

final04_zpsc0cuzc7e.jpg


After securing the top lid all that was left was to try it on and do any fine tuning. Because of the way the helmet was constructed it made it difficult to do test fits as the locking method on the tabs were tricky to pry apart and I was worried something would bend or snap if I pushed my luck too much. Initially my head sat too far in, so I used the round pad from the thicker set I got and attached it to the foam I'd cut out (this ended up needing some Barge glue to make sure the velcro pad stuck).

final06_zpsits6ky2v.jpg


Once this was set up the helmet fit much better, and the mic I'd re-installed was at the right level that I'd estimated. I decided to cut some styrene tube at an angle and afix it to the mic head to help funnel the sound into it and it worked really well! I was corried about it catching on my nose when I put the helmet on, but because I'd off-set the mic to the side it worked really well!

final05_zpsipg0xeue.jpg


So there we have it! This was a very modest build, but I found it a good primer for other projects I might like to do going forward, and taught me valuable lesson: I need to work on my circuit building! I'm not completely happy with everything, aside from not being able to install the new voice changer, the foam strip I stuck to the bracket that sits in the top piece ended up pushing up the back of the lid and accentuating the seam around the back, Also, if I were to do this again I'd probably want to figure out a way cut out more of the brackets that join everything together. The helmet is greatly improved in terms of its fit, but I think it could use another 1/8 of an inch clearance maybe.
Anyway, I'm really happy with it overall and I had fun working on this. Thanks again to everyone who offered advice and encouragement, I hope this hasn't been to boring and that it may help someone with their build, even if it's just motivation to go above and beyond what I did.
Cheers!

done_zpsvmd4lnff.jpg
 
This thread is more than 7 years old.

Your message may be considered spam for the following reasons:

  1. This thread hasn't been active in some time. A new post in this thread might not contribute constructively to this discussion after so long.
If you wish to reply despite these issues, check the box below before replying.
Be aware that malicious compliance may result in more severe penalties.
Back
Top