You are using an out of date browser. It may not display this or other websites correctly.
You should upgrade or use an alternative browser.
You should upgrade or use an alternative browser.
ROGUE ONE K-2SO Puppet Build
- Thread starter DrscifiProps
- Start date
-
- Tags
- star wars
DrscifiProps
Well-Known Member
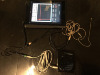
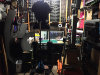
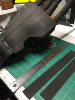
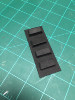
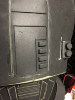
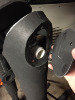
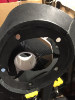
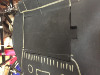
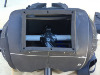
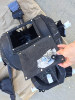
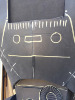
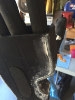
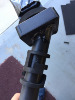
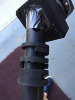
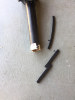
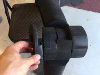
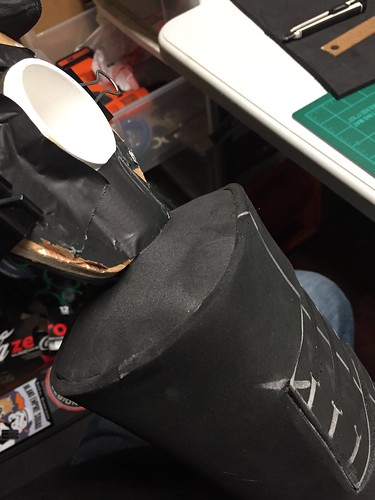
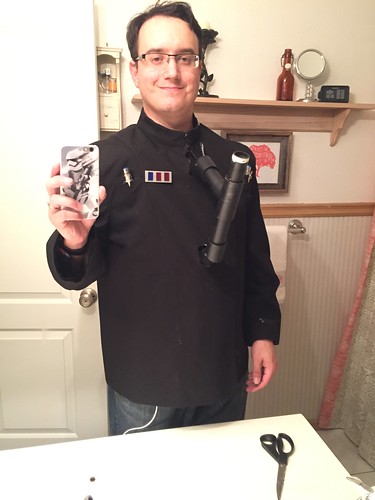
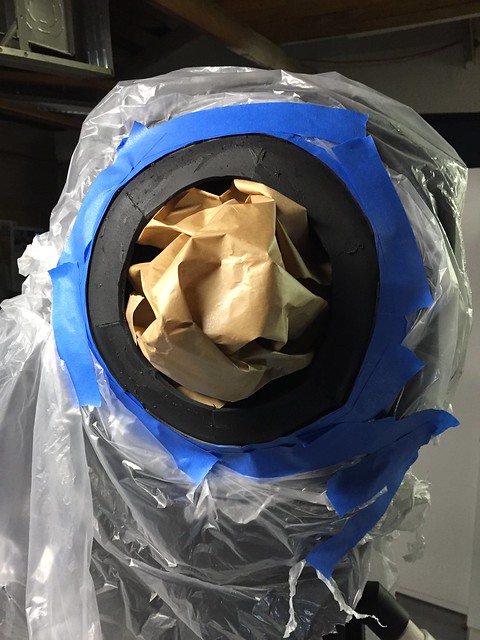
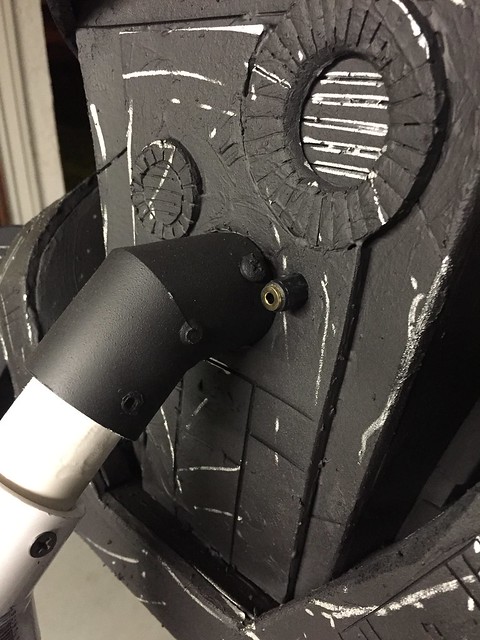
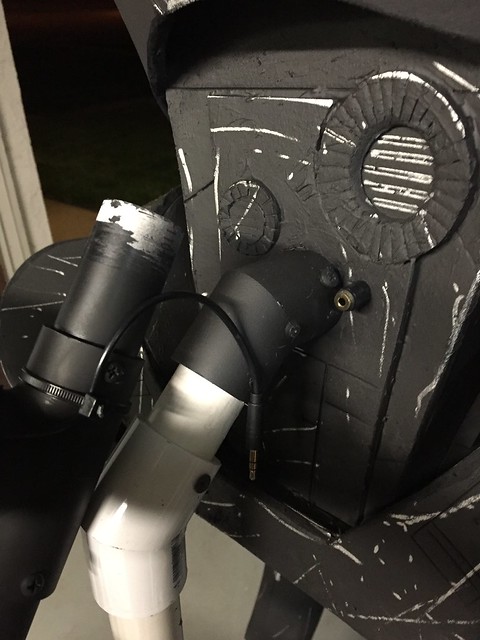
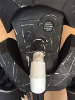
Received my new audio connection cable suggested by Tumbler It works!
My over the ear mic goes through the input and the output passthrough ends up in the aker.

Setup 3 different voice options for K2. Will try them out once I start full puppet testing.

More foam work tomorrow night.
My over the ear mic goes through the input and the output passthrough ends up in the aker.
Setup 3 different voice options for K2. Will try them out once I start full puppet testing.
More foam work tomorrow night.
Attachments

Last edited by a moderator:
This is very kool build way to go on this your helmet came way nice love the idea in making it.
- - - Updated - - -

 heres what i did few months ago just finished last week getting everything together
- - - Updated - - -
heres what i did few months ago just finished last week getting everything togetherThis is such a great project. This is actually how they did C3PO from Star Wars The Phantom Menace (for a lot of it).
DrscifiProps
Well-Known Member
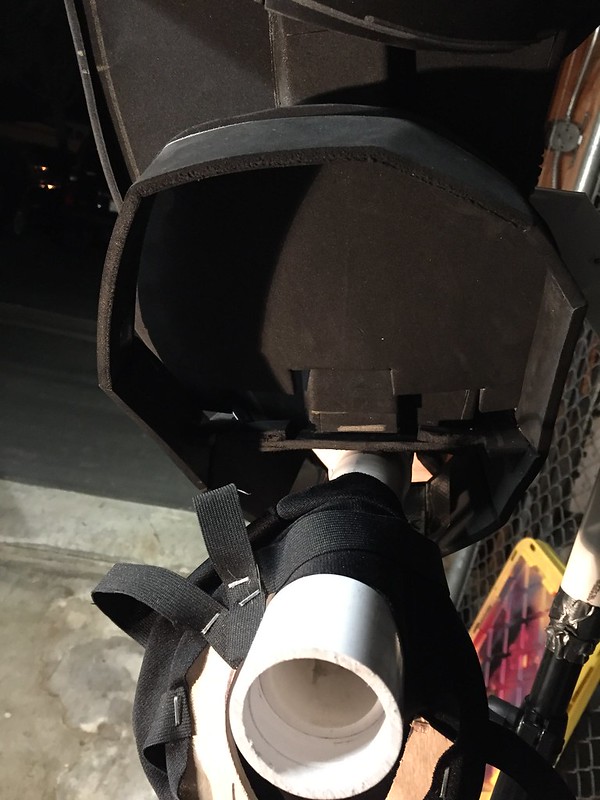
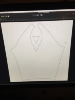
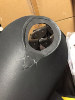
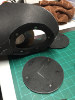
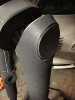
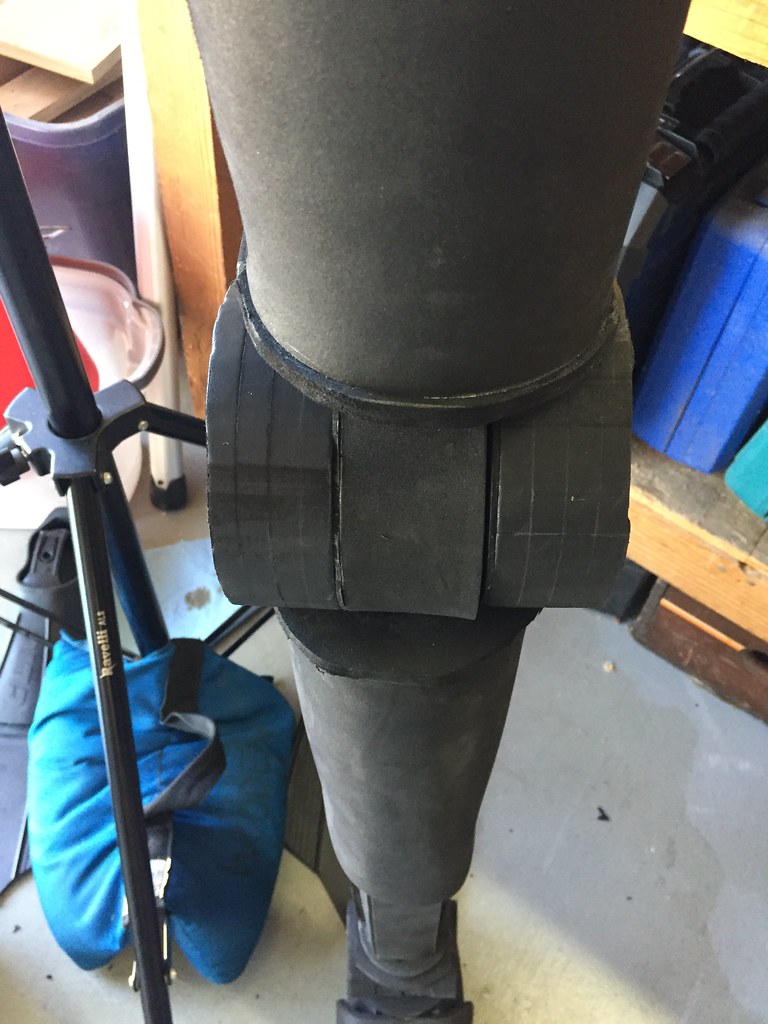
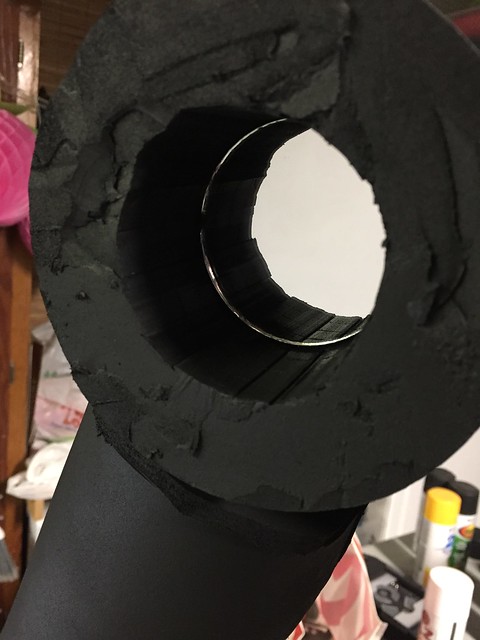
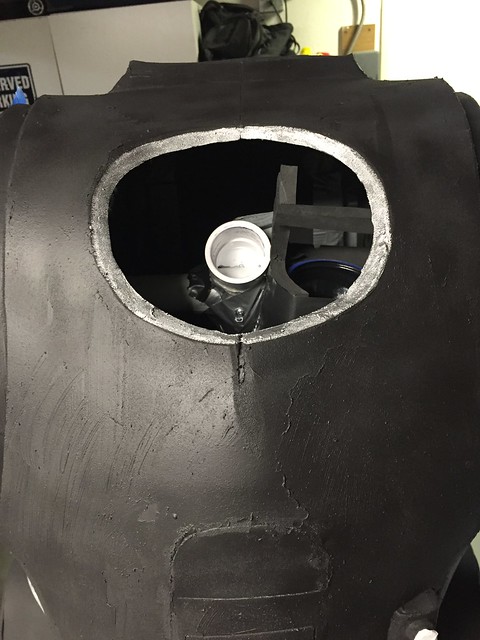
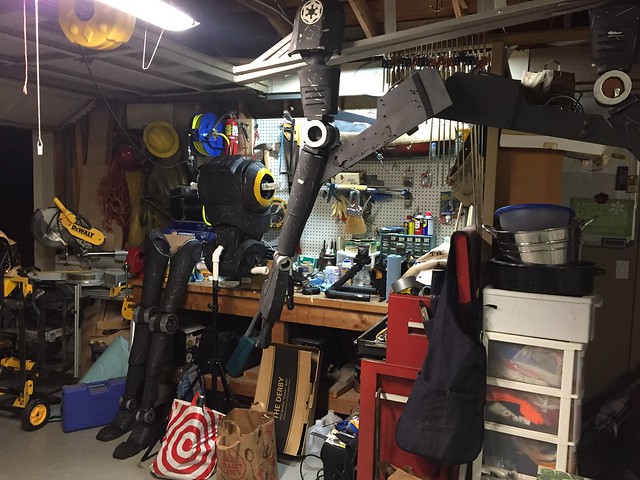
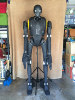
More work on the pelvis tonight. I traced the outer and inner plates before putting the V frame on the pipe. This part of K2 will need to be built on him instead of built then added at the end.

More of a sculpting type of piece.

The side rings are too small and don't go up enough towards his upper torso. Cut a seam to add more material.

Making these rings about 10" wide.

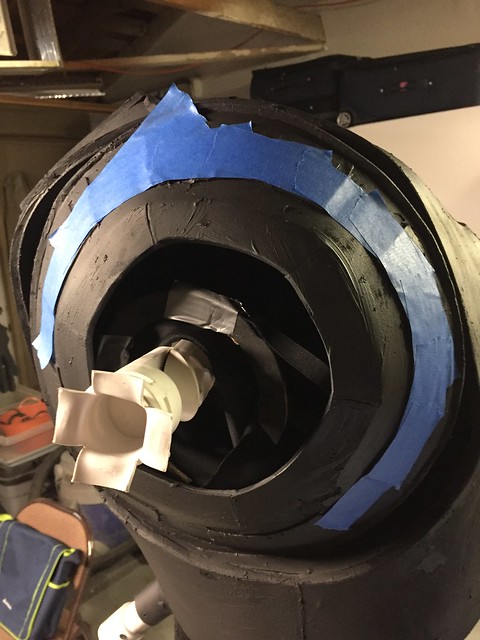
Added some notched pieces to support the pelvis on the front and the back.

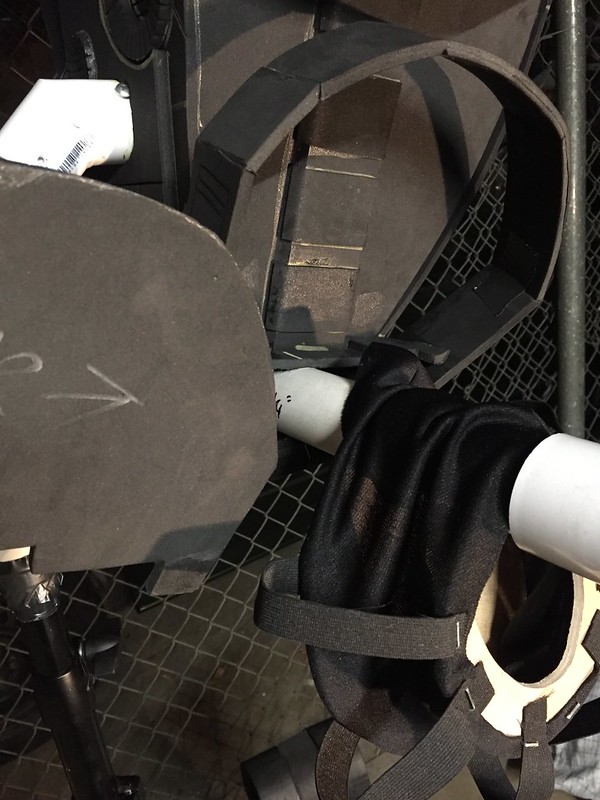
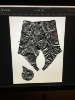
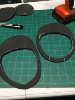
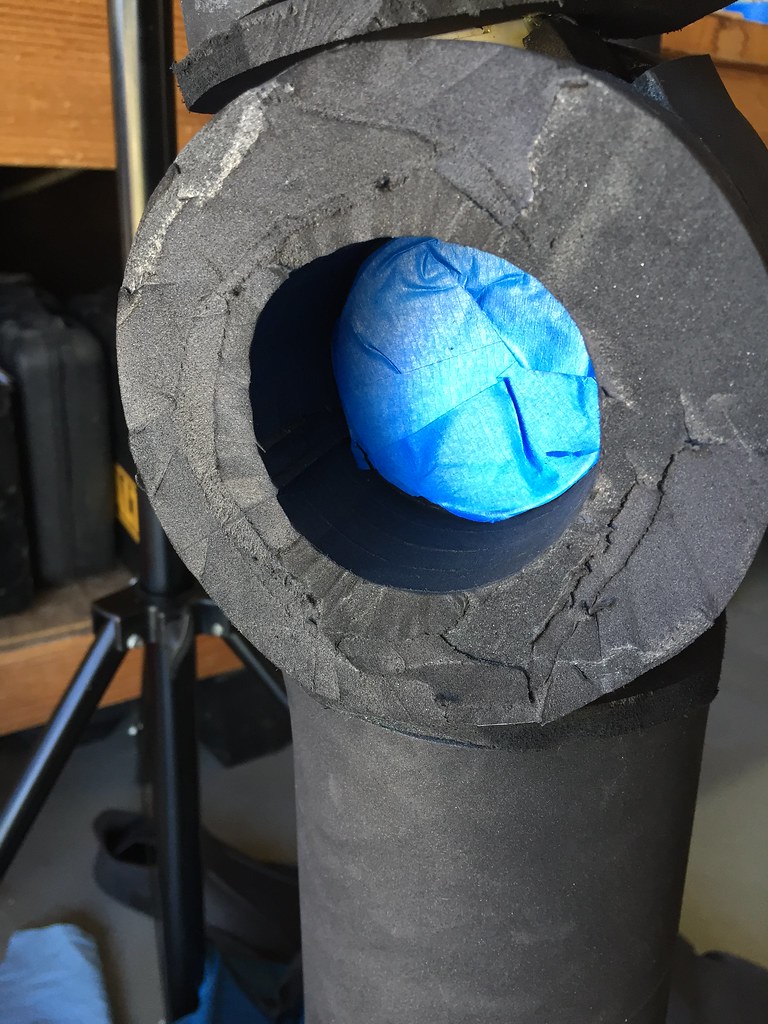
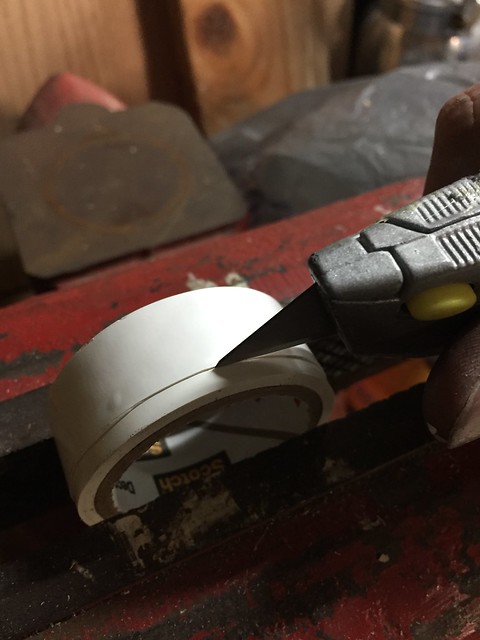
Mocked up the shorts attachment rings.

Ready to cut the shorts attachment rings.

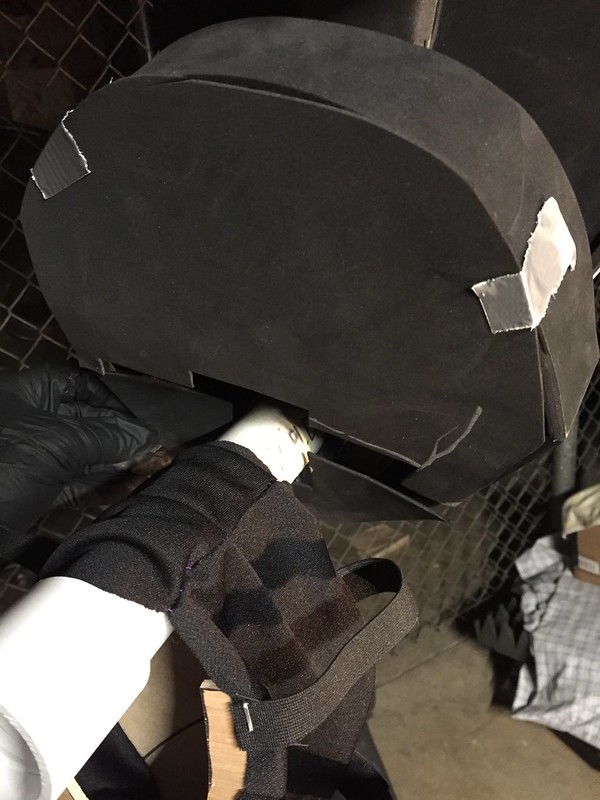
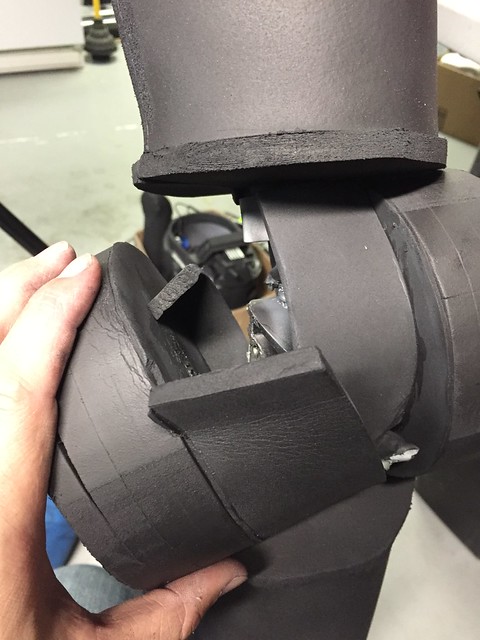
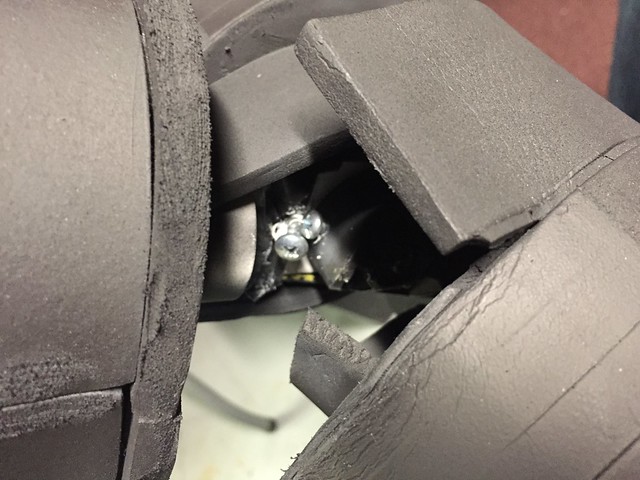
This uses the same technique as the shoulder sleeves. The large ring and the narrow small ring are permanently attached to the shorts fabric. They join to the fatter small ring to hide the hip PVC pipe once the legs are attached.

The pieces fit snugly to the pipe and slip ring.

Binder clips will be used again. Accessed through the removable 5" disc on the outside of the upper legs.

Getting the dimensions down. The upper leg will be supported by 3 foam discs inside it.

Cutting the shorts fabric.

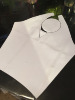
Sewing the edge seam then turning inside out.

Sturdy.

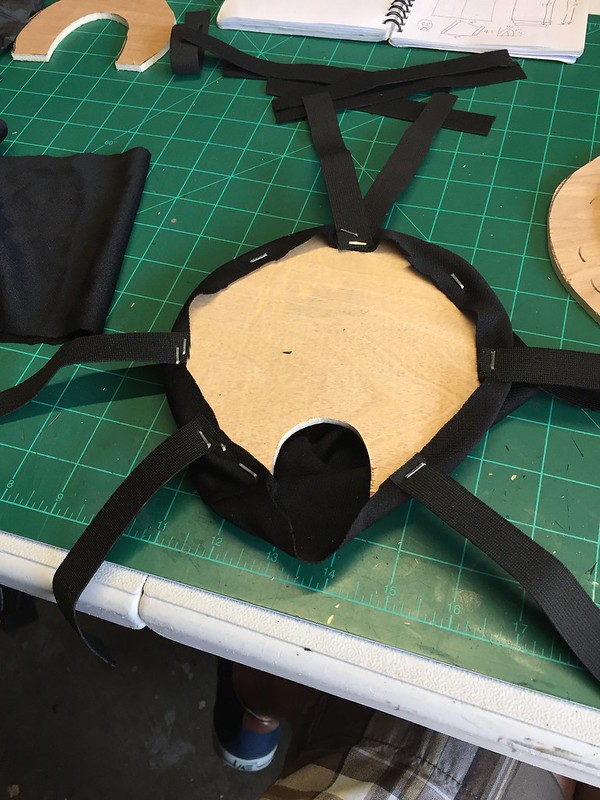
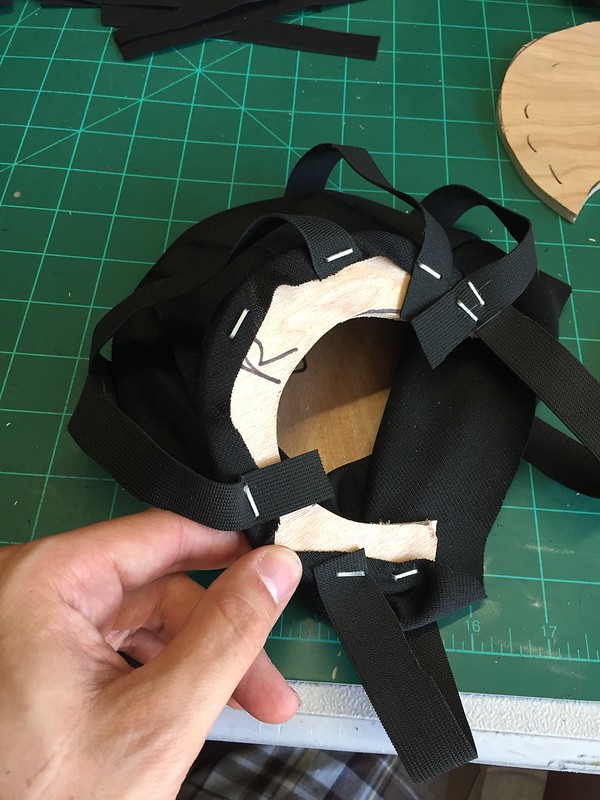
Cutting 12 strips of elastic to act as the pistons of the hips. Again the same technique as the shoulder sleeves.

I'll staple gun the fabric and elastic to the wood rings tomorrow night. Then flush out the foam pieces to finish the pelvis.
Had fun watching AlpacaAsh on twitch while I worked. She was doing some 3d modeling on her Sheikah Slate.
15 days until the reveal.
More of a sculpting type of piece.
The side rings are too small and don't go up enough towards his upper torso. Cut a seam to add more material.
Making these rings about 10" wide.
Added some notched pieces to support the pelvis on the front and the back.
Mocked up the shorts attachment rings.
Ready to cut the shorts attachment rings.
This uses the same technique as the shoulder sleeves. The large ring and the narrow small ring are permanently attached to the shorts fabric. They join to the fatter small ring to hide the hip PVC pipe once the legs are attached.
The pieces fit snugly to the pipe and slip ring.
Binder clips will be used again. Accessed through the removable 5" disc on the outside of the upper legs.
Getting the dimensions down. The upper leg will be supported by 3 foam discs inside it.
Cutting the shorts fabric.
Sewing the edge seam then turning inside out.
Sturdy.
Cutting 12 strips of elastic to act as the pistons of the hips. Again the same technique as the shoulder sleeves.
I'll staple gun the fabric and elastic to the wood rings tomorrow night. Then flush out the foam pieces to finish the pelvis.
Had fun watching AlpacaAsh on twitch while I worked. She was doing some 3d modeling on her Sheikah Slate.
15 days until the reveal.
Last edited by a moderator:
DrscifiProps
Well-Known Member
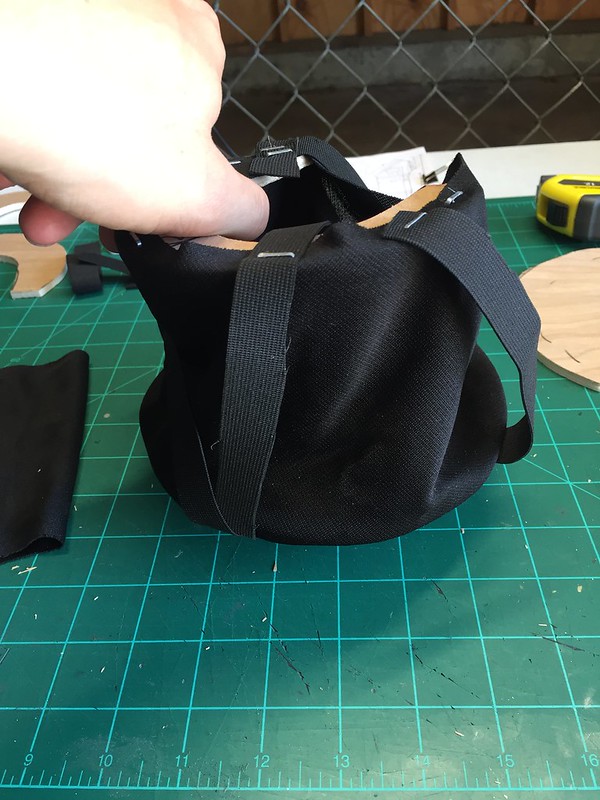
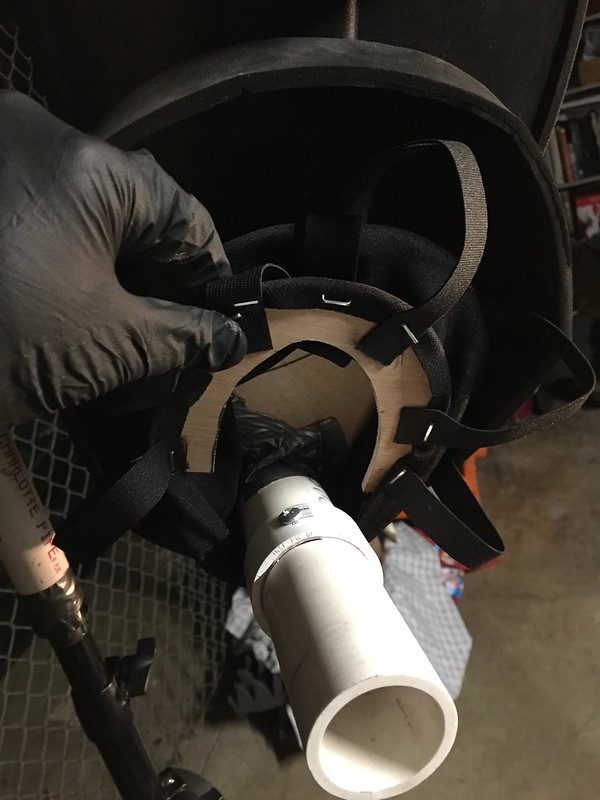
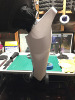
Stapled the shorts cloth to the inner wooden disk. Again using the same technique used in the shoulder sleeves.
Then stapled the narrow end of the the shorts cloth to the thin horseshoe.
Makes a nice little cone.
Glued and taped the thick horseshoe to the top of the hip slip ring. This surface will be clamped with binder clips to the shorts cloth.
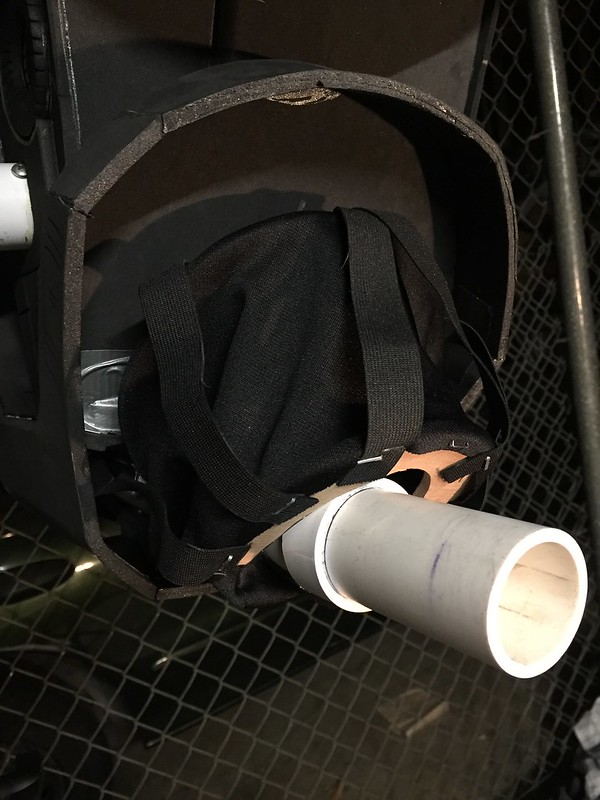
Notched the side foam to fit the wooden large disc. Also glued down the front and back foam connections.
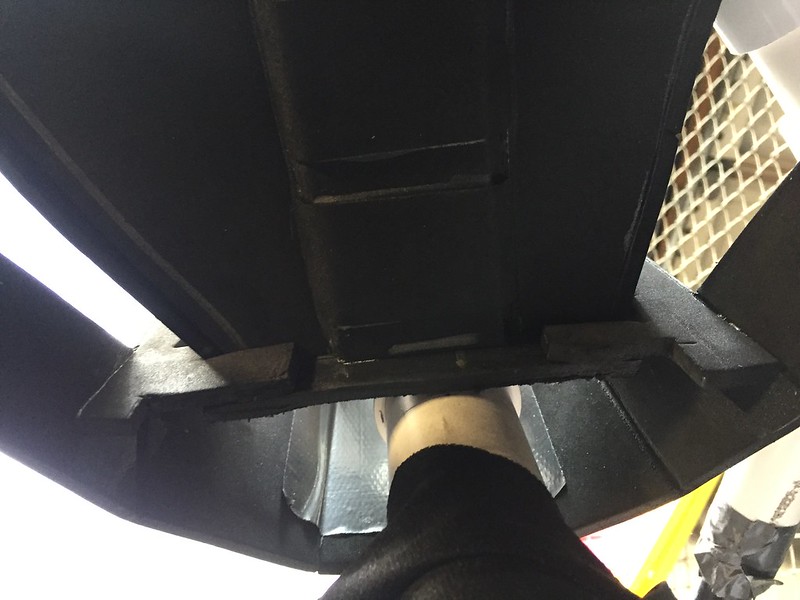
Added some spacers on the bottom glued between the foam and the PVC skeleton. This will help the pelvis keep shape and not shift around.

Remade the front panel. I've never been happy with the 2mm gap around the edges. Just needed to increase the size slightly. Cut off the original and traced around it. The pen width was about the increase I needed.
Glued up for the new front panel.
Old on the left, new on the right. I almost forgot to add the heat seared lines on the front before gluing it in.
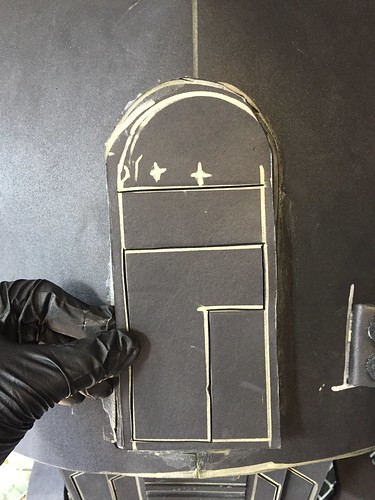
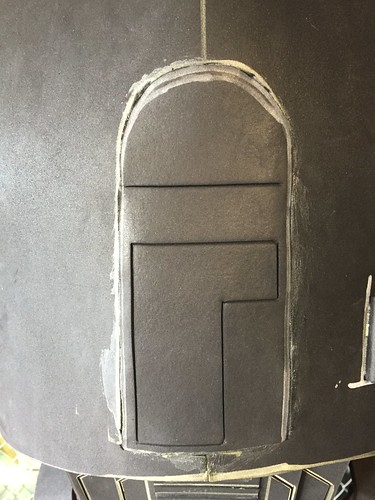
I really like how the edges of the front panel turned out. I'll still add a little bit of filler but It's much smoother.
I had a great time working while chatting with the crew of Making It Up out in Atlanta. https://www.twitch.tv/makingitup We talked about first cosplays, K-2SO and puppetry.
Also got to chat/watch with Zonbi while she was weathering. https://www.twitch.tv/zonzonzonbi
Watching Twitch is so fun while working. It's like being in a makerspace or co-op instead of your own garage.
More pelvis work tonight.
Then stapled the narrow end of the the shorts cloth to the thin horseshoe.
Makes a nice little cone.
Glued and taped the thick horseshoe to the top of the hip slip ring. This surface will be clamped with binder clips to the shorts cloth.
Notched the side foam to fit the wooden large disc. Also glued down the front and back foam connections.
Added some spacers on the bottom glued between the foam and the PVC skeleton. This will help the pelvis keep shape and not shift around.
Remade the front panel. I've never been happy with the 2mm gap around the edges. Just needed to increase the size slightly. Cut off the original and traced around it. The pen width was about the increase I needed.
Glued up for the new front panel.
Old on the left, new on the right. I almost forgot to add the heat seared lines on the front before gluing it in.
I really like how the edges of the front panel turned out. I'll still add a little bit of filler but It's much smoother.
I had a great time working while chatting with the crew of Making It Up out in Atlanta. https://www.twitch.tv/makingitup We talked about first cosplays, K-2SO and puppetry.
Also got to chat/watch with Zonbi while she was weathering. https://www.twitch.tv/zonzonzonbi
Watching Twitch is so fun while working. It's like being in a makerspace or co-op instead of your own garage.
More pelvis work tonight.
DrscifiProps
Well-Known Member
What? 2 posts in the same night! I must be cranking.
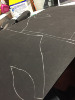
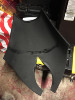
Templated out the inner pelvis pieces off of 2mm foam then transferred that to 6mm foam.
The insert fits around the center spine.
I decided to put the inner plate on the inside of the wing to keep the thickness down.
All glued in.
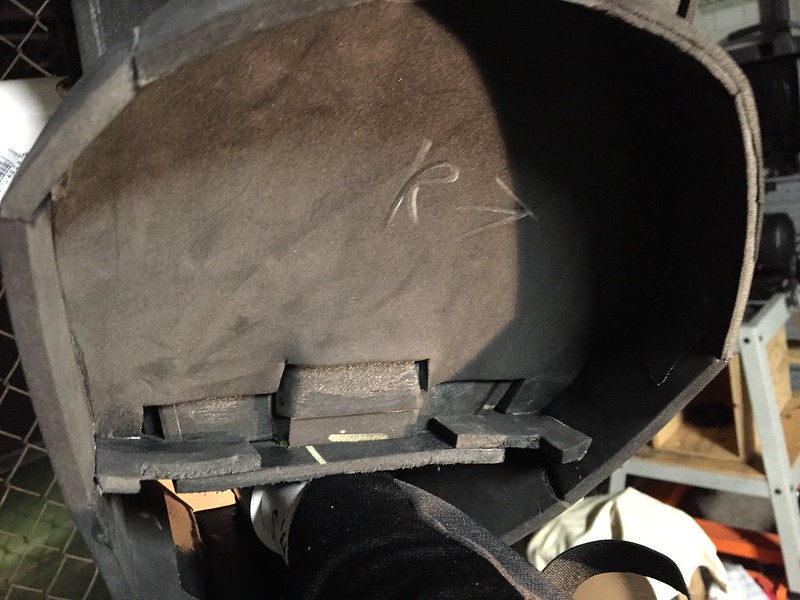
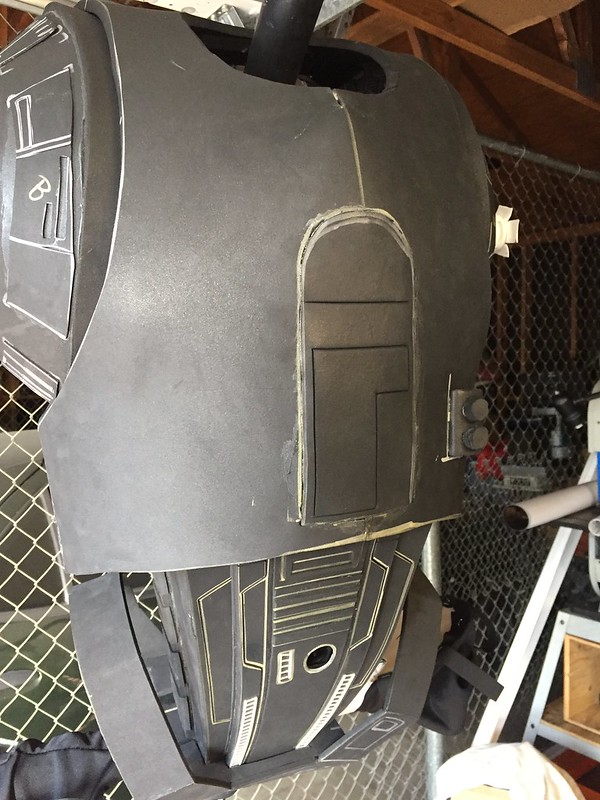
I'll touch up the seams a little but the removable front plate still fits in without pinching anything.
Reused that 2mm foam to template the outer plate.
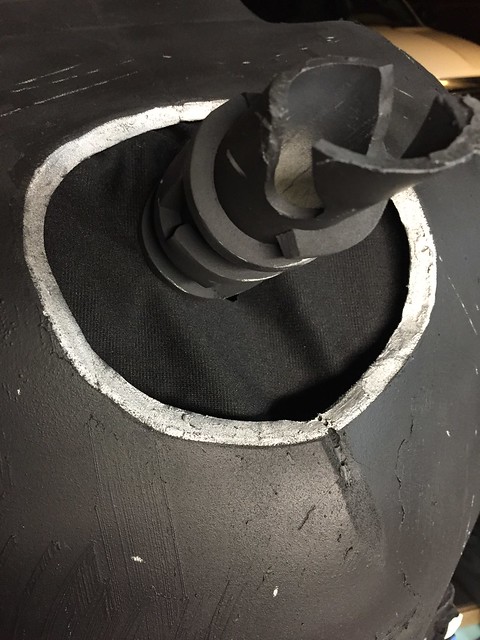
Cut out circle to funnel the shorts cloth. Similar to how the shoulders were funneled.

Glued and taped in the large wooden disc.
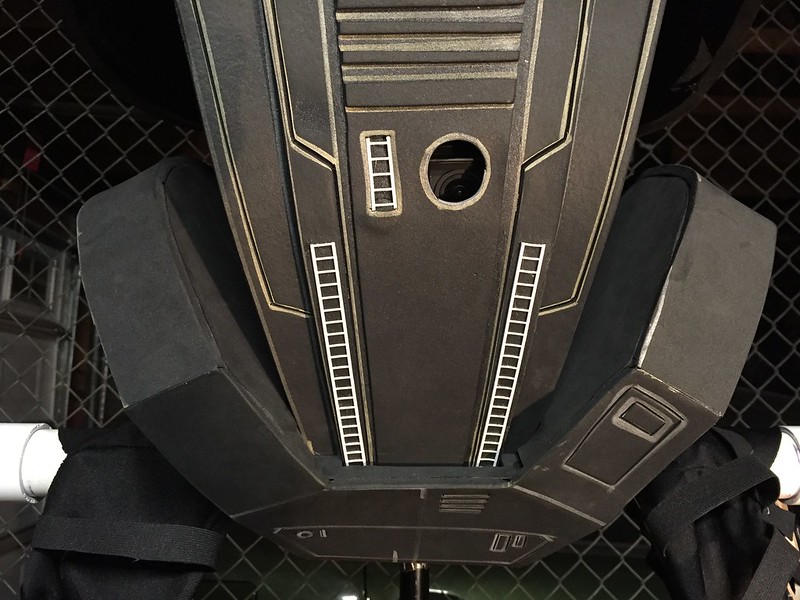
Glue primed on the outer plates. Made the funnel hole bigger to let as much of the fabric stretch as possible.

Moment of truth, sealing up the sides.
The outer plate goes on the outside edge of the pelvis wing. It lined up great and looks very smooth.
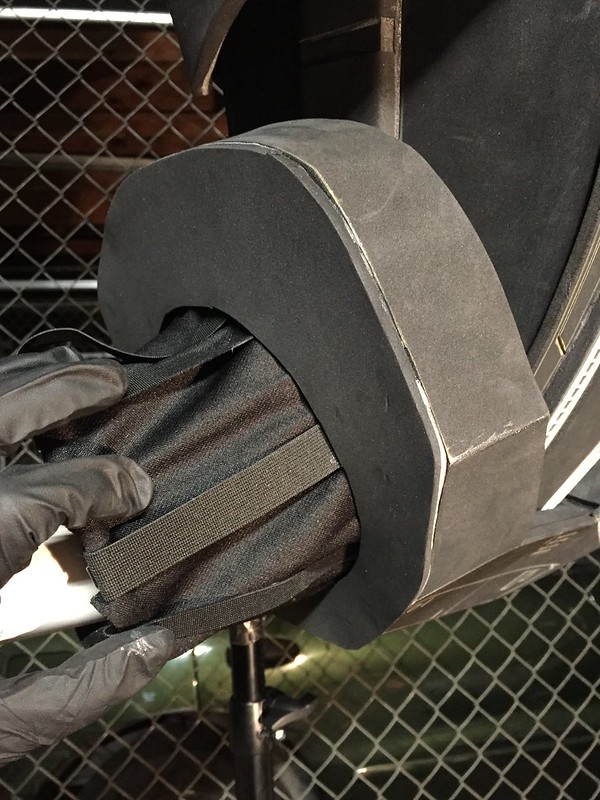
The small disc is clamped to the leg slip ring and the shorts fabric ring can stretch and twist as the leg moves.
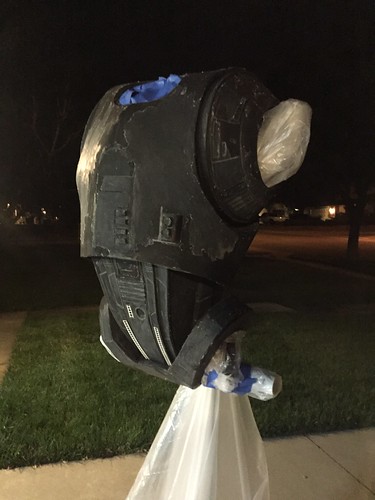
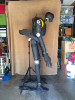
One of my new favorite shots. The torso is DONE!
Don't get dizzy.
Watched some of KayPikeFashion on Twitch as I finished the night. https://www.twitch.tv/kaypikefashion
Now off to bed. Upper legs tomorrow.
Templated out the inner pelvis pieces off of 2mm foam then transferred that to 6mm foam.
The insert fits around the center spine.
I decided to put the inner plate on the inside of the wing to keep the thickness down.
All glued in.
I'll touch up the seams a little but the removable front plate still fits in without pinching anything.
Reused that 2mm foam to template the outer plate.
Cut out circle to funnel the shorts cloth. Similar to how the shoulders were funneled.
Glued and taped in the large wooden disc.
Glue primed on the outer plates. Made the funnel hole bigger to let as much of the fabric stretch as possible.
Moment of truth, sealing up the sides.
The outer plate goes on the outside edge of the pelvis wing. It lined up great and looks very smooth.
The small disc is clamped to the leg slip ring and the shorts fabric ring can stretch and twist as the leg moves.
One of my new favorite shots. The torso is DONE!
Don't get dizzy.
Watched some of KayPikeFashion on Twitch as I finished the night. https://www.twitch.tv/kaypikefashion
Now off to bed. Upper legs tomorrow.
Rogue1Luvr
Active Member
Re: ROGUE ONE K-2SO Puppet Build - Torso Done
You know I think that K-2SO is my favorite droid, even better than C-3PO and R2-D2.
You know I think that K-2SO is my favorite droid, even better than C-3PO and R2-D2.
Re: ROGUE ONE K-2SO Puppet Build - Torso Done
") ..
..
sent from the cockpit of SLAVE I
That's it... I don't know who you are... I don't know what you want.. but I will find you.. and I will kill youYou know I think that K-2SO is my favorite droid, even better than C-3PO and R2-D2.
..sent from the cockpit of SLAVE I
DrscifiProps
Well-Known Member
Re: ROGUE ONE K-2SO Puppet Build - Torso Done
Hey now! Go stay in the ship. The captain says you have to.
That's it... I don't know who you are... I don't know what you want.. but I will find you.. and I will kill you
sent from the cockpit of SLAVE I
Hey now! Go stay in the ship. The captain says you have to.
Re: ROGUE ONE K-2SO Puppet Build - Torso Done
Oucchh. No comeback[emoji38]Hey now! Go stay in the ship. The captain says you have to.
DrscifiProps
Well-Known Member
Re: ROGUE ONE K-2SO Puppet Build - Torso Done
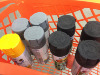
Another busy week. Picked up several cans of primer and paint and the yellow for the accent rings around the shoulders and hips.

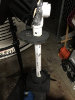
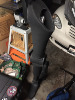
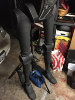
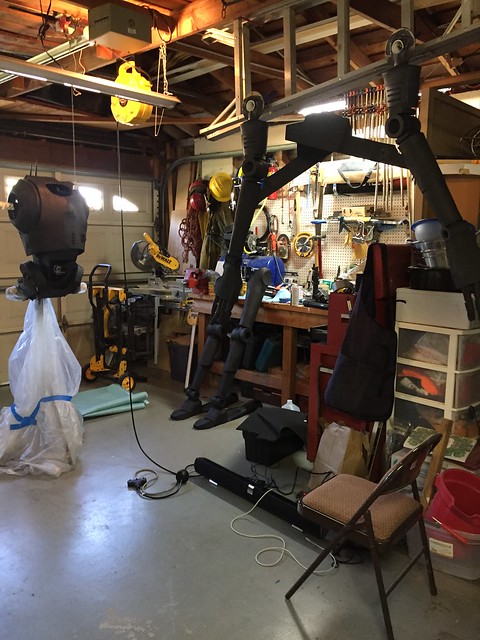
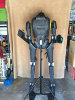
New garage setup. Purged the garage and moved against the back wall. Now my patient lovely and understanding wife can park her car in the garage. First time in 2 months.

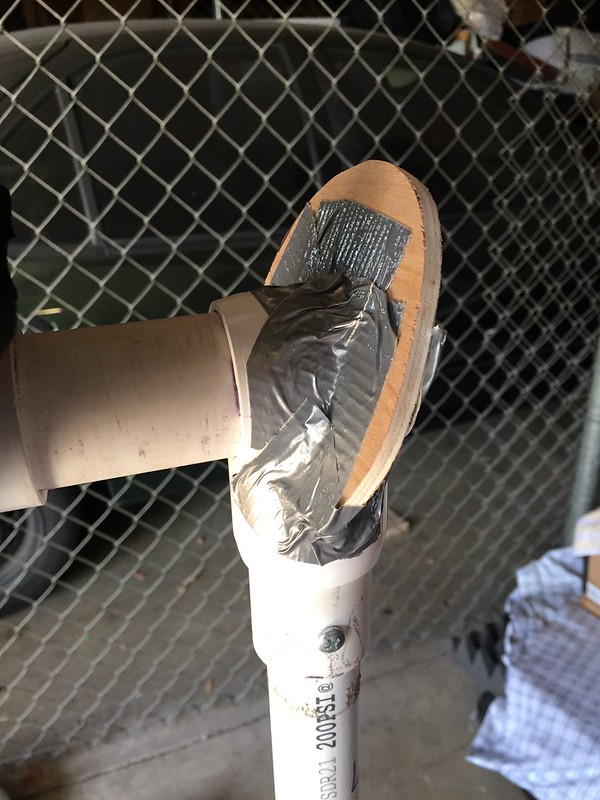
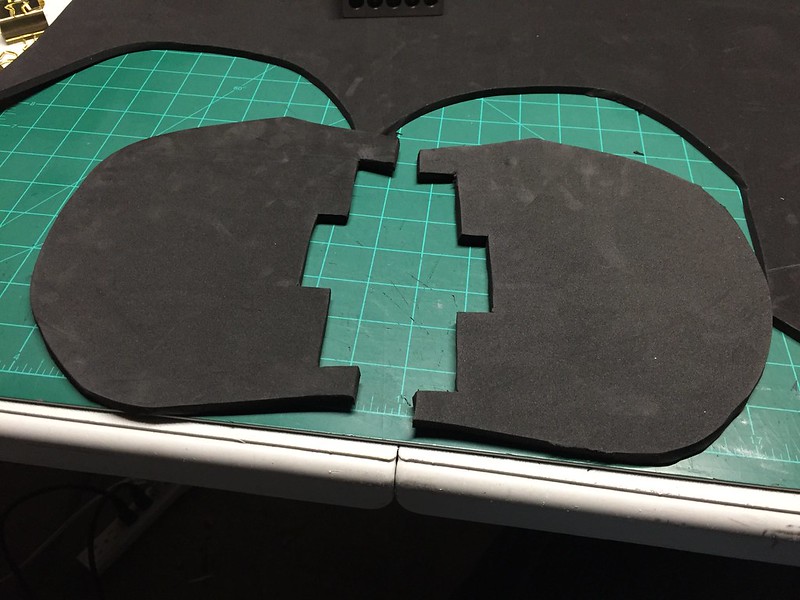
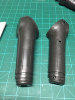
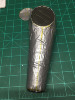
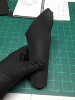
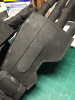
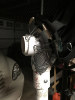
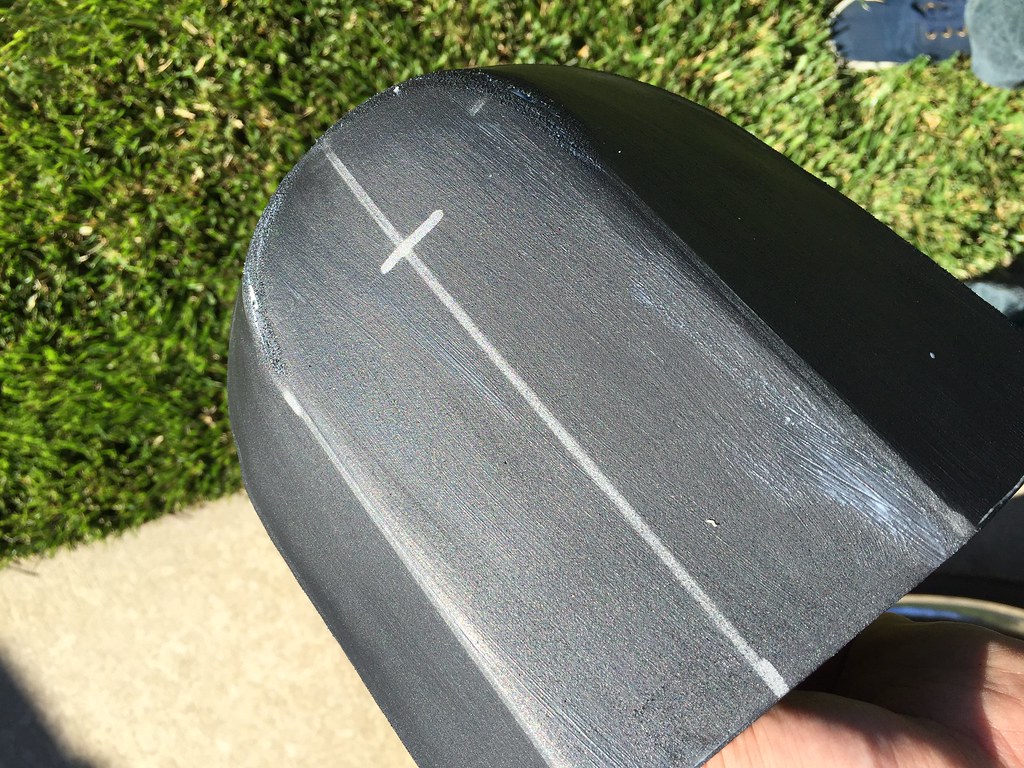
Time to finish the upper legs. This curve is just beyond my brain to turn inside out and flatten. Time to make a template. Sorry 31" big fig you're loosing your right leg.

Opened up to remove the upper portion of the leg.

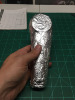
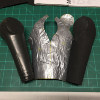
First cover in foil so the tape doesn't stick.

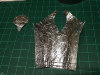
Then cover in tape and cut along seams.

Kept it only 2 pieces. Had to make a small notch below the outer circle so it all fits.

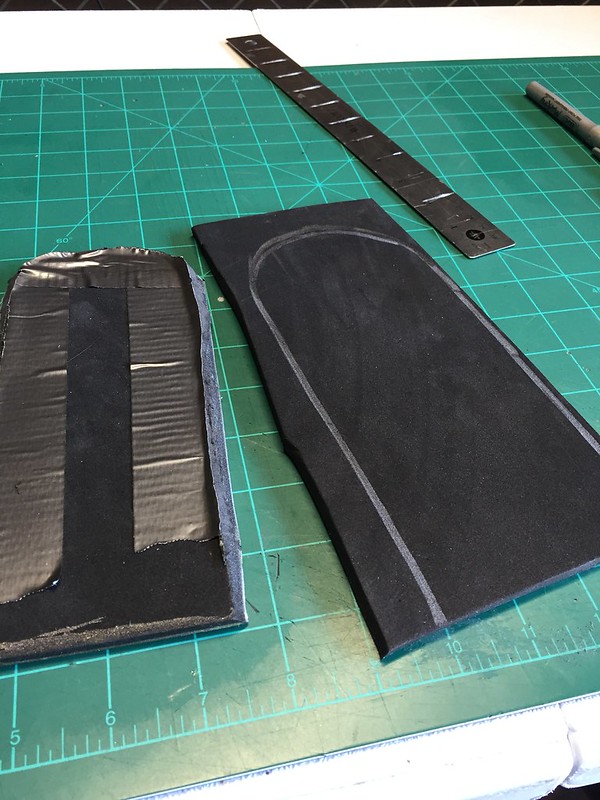
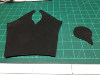
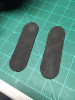
Decided to make a small scale test out of 2mm foam.

All cut out.

Turned out great, onward to full size.

I've seen this method used a lot by other builders but never used it until today.

Finally finishing the detail oval on the back of the hands.

I'm always making 2 of everything on this build.

Detail in place.

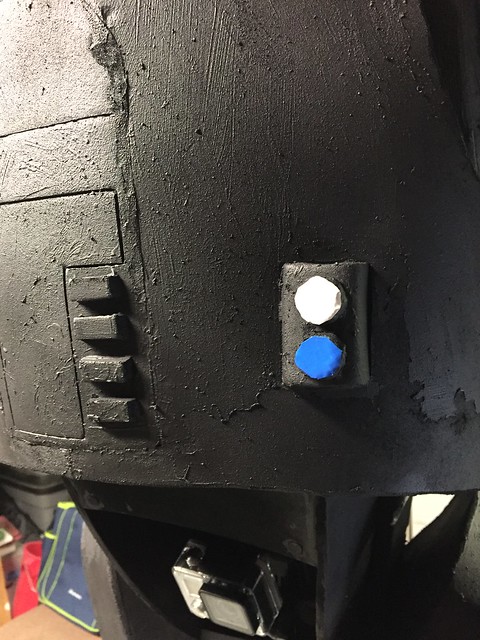
Also made the coin slot buttons for the front chest panel.

These look great. Another Star Wars part that we see on Vader's chest box and R2-D2's front.

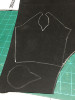
Scanned the template for the leg.

Upscaled to 21" high.

Printed out at full size over 6 sheets of paper.

Ready to transfer to foam.

But first a paper test. I'll need to use the inner support rings to have it hug the inside of the leg, and need to add 2" to the bottom but it looks good.

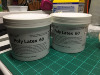
My Poly Latex 60 arrived for sealing all of this foam.

Marked up the two templates for the legs.

Added a little to the outer edge you can see here.

Determining how best to mount this.

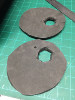
Made a custom support disc at the bottom of the leg (at the knee) and just below the side notch.

These will support the leg and keep it in place. I ended up moving the top placement hole, but why use more foam when the old one will be hidden.

Readying the glue.

Glued a ring to the inside of the side circle. This will be a mount point for the cover cap. Some registration marks on the wedge piece.

The inner seam lined up nicely.

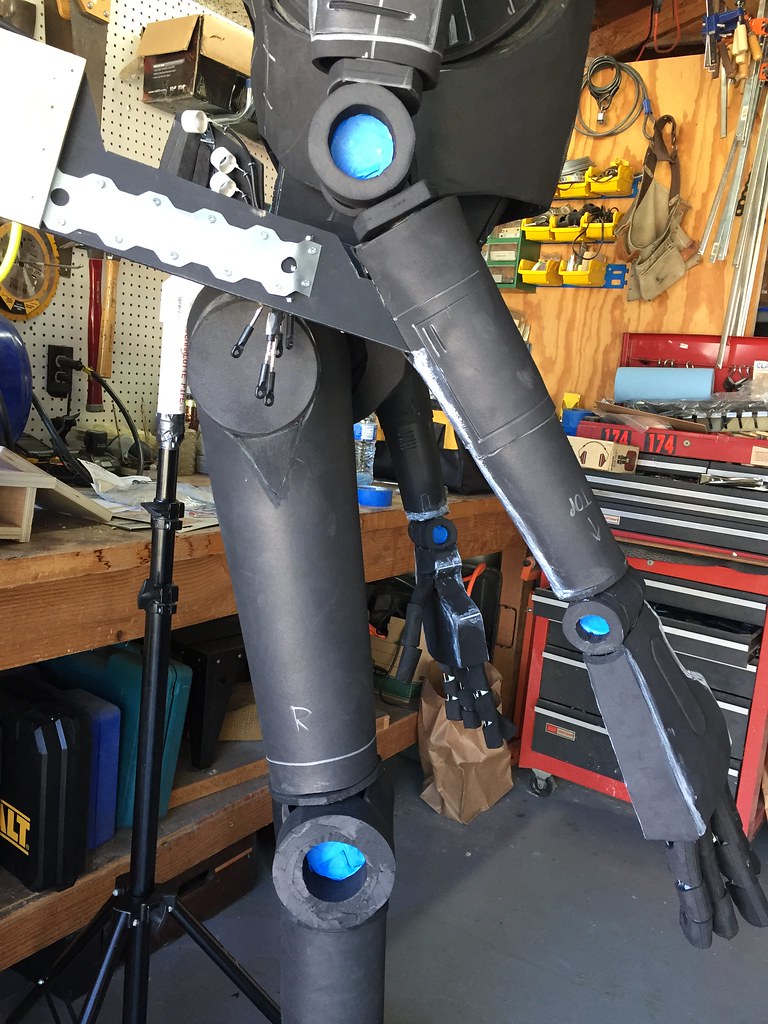
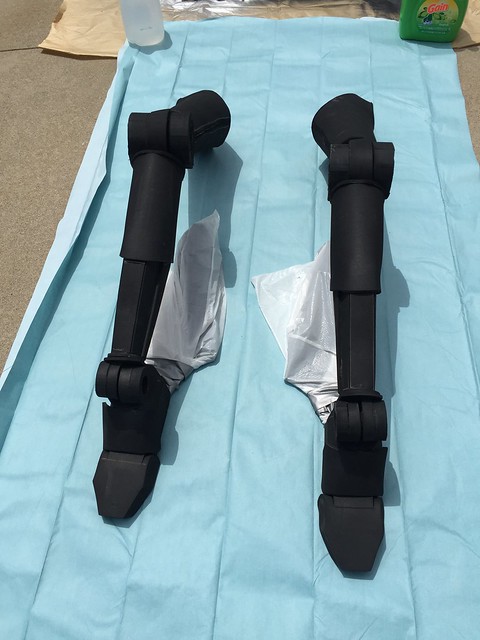
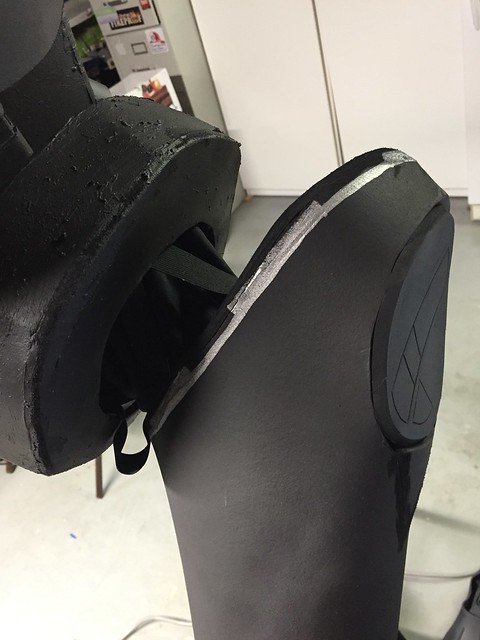
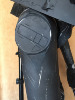
He's got a full leg!

Worked hard to make sure this placed where I wanted it so when K2 takes a step there is enough clearance for the leg to swing.

2 legs!

Cutting down some old circles of foam to make the cover caps.

Checking the circle size.

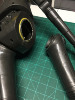
Readying some magnets, marking the polarity.

Counter sunk 5 magnets into the legs. This way the cover cap has an Up.

Matched up the magnets.

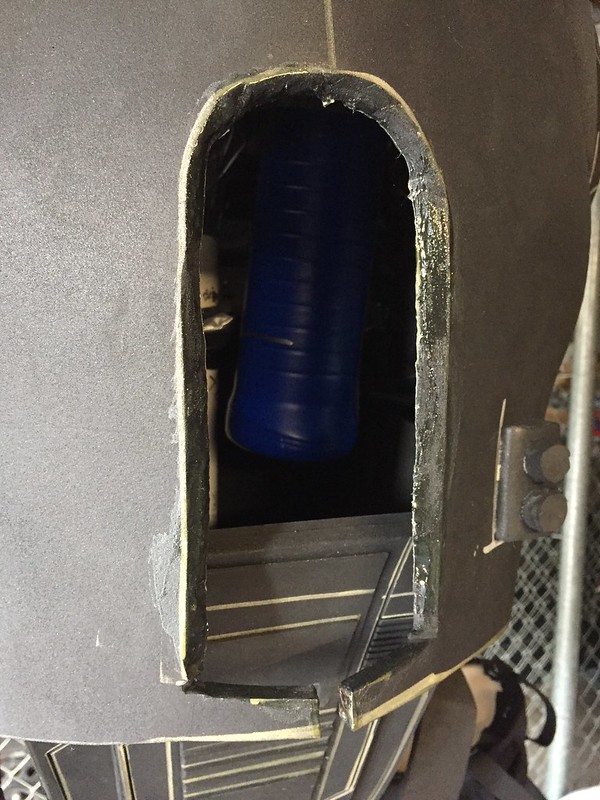
This access cap lets me reach in to secure the shorts cloth and attach the hip ring to keep the slip ring on.

Looks pretty good.

Cutting some foam to cap the top of the legs.

Leaving a lot of room for the shorts skirt.

Great set of legs.

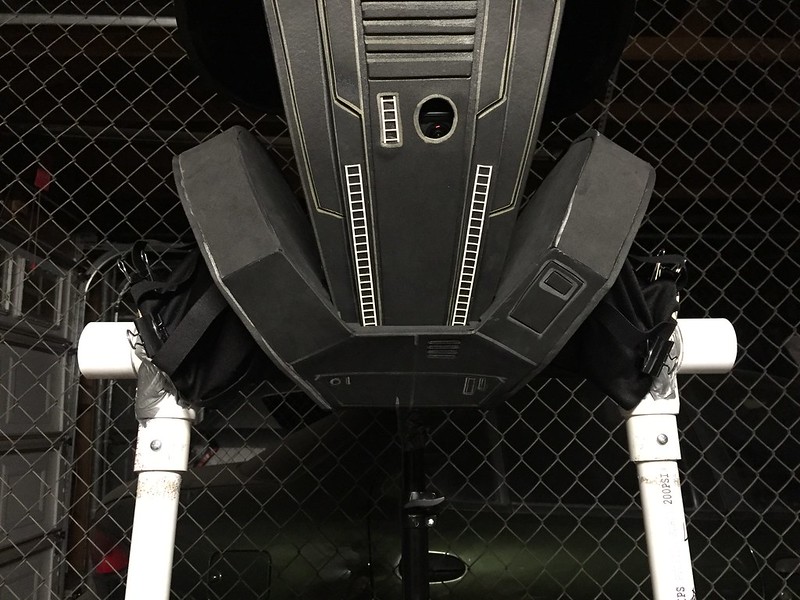
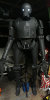
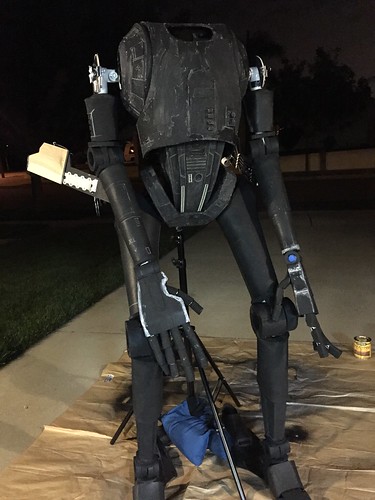
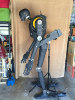
K-2SO, fully assembled the main components. Boy how far we've come.

Speaking of that, he was just a PVC skeleton in January. Sometimes you have to see past your current step to what will be.

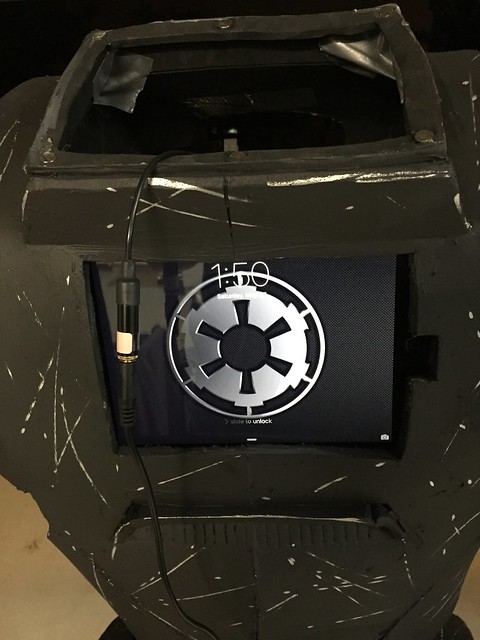
Time for some more details. Made a small cover for the iPad mini slot. This way if the picture is of the back I can cover it.

Had some help for the first time working on K2 parts. Dremeled the edges off most pieces. The fingers look much better now.

Added some magnet points for the back cog/bar access panel.

Removed the unseen electronics from the back panel. It snaps on and lines up nicel.

Rounded many of the edges with the sanding drum.

More rounded edges.

Added Kwik seal into many of the seams. Used @chinbeard video as my tutorial.

Here is that tutorial.
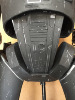
Adding this arch detail in the back.

Cut out a nice notch.

Taped in a piece of 8mm foam and heat scored the detail.

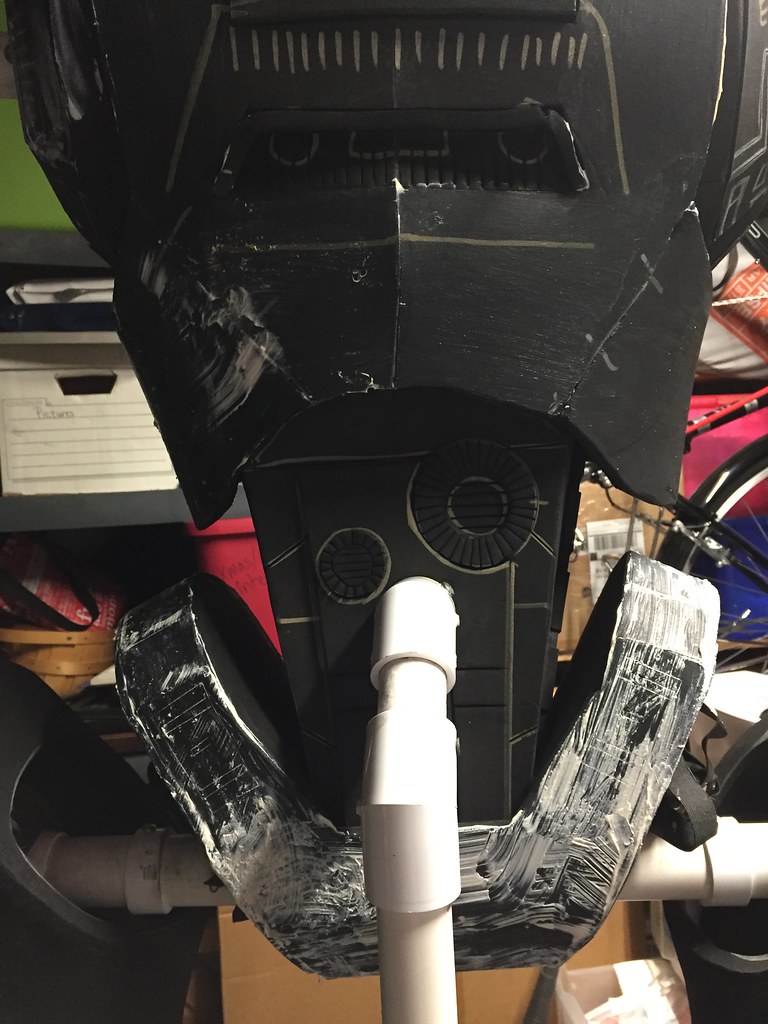
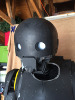
Prepping thin strips of foam for the neck detail.

These are glued on in no particular pattern but reflect what is on his neck.

I really like this little detail. But need to make some sort of cover for the bottom of the pan/tilt unit. At least before the neck servos are installed for head 2.0.

Also bit the bullet and trimmed off 1/5th of the knee joint puck. It split right along the glue line. This helps reduce the 3PO knee feel these have. I'll remove the other outer layers from both knees.

Lots of progress. Only 6 more days until his premier. But I feel right on schedule.
More progress pictures will be out this week as I work and hopefully some more live streams.
Another busy week. Picked up several cans of primer and paint and the yellow for the accent rings around the shoulders and hips.
New garage setup. Purged the garage and moved against the back wall. Now my patient lovely and understanding wife can park her car in the garage. First time in 2 months.
Time to finish the upper legs. This curve is just beyond my brain to turn inside out and flatten. Time to make a template. Sorry 31" big fig you're loosing your right leg.
Opened up to remove the upper portion of the leg.
First cover in foil so the tape doesn't stick.
Then cover in tape and cut along seams.
Kept it only 2 pieces. Had to make a small notch below the outer circle so it all fits.
Decided to make a small scale test out of 2mm foam.
All cut out.
Turned out great, onward to full size.
I've seen this method used a lot by other builders but never used it until today.
Finally finishing the detail oval on the back of the hands.
I'm always making 2 of everything on this build.
Detail in place.
Also made the coin slot buttons for the front chest panel.
These look great. Another Star Wars part that we see on Vader's chest box and R2-D2's front.
Scanned the template for the leg.
Upscaled to 21" high.
Printed out at full size over 6 sheets of paper.
Ready to transfer to foam.
But first a paper test. I'll need to use the inner support rings to have it hug the inside of the leg, and need to add 2" to the bottom but it looks good.
My Poly Latex 60 arrived for sealing all of this foam.
Marked up the two templates for the legs.
Added a little to the outer edge you can see here.
Determining how best to mount this.
Made a custom support disc at the bottom of the leg (at the knee) and just below the side notch.
These will support the leg and keep it in place. I ended up moving the top placement hole, but why use more foam when the old one will be hidden.
Readying the glue.
Glued a ring to the inside of the side circle. This will be a mount point for the cover cap. Some registration marks on the wedge piece.
The inner seam lined up nicely.
He's got a full leg!
Worked hard to make sure this placed where I wanted it so when K2 takes a step there is enough clearance for the leg to swing.
2 legs!
Cutting down some old circles of foam to make the cover caps.
Checking the circle size.
Readying some magnets, marking the polarity.
Counter sunk 5 magnets into the legs. This way the cover cap has an Up.
Matched up the magnets.
This access cap lets me reach in to secure the shorts cloth and attach the hip ring to keep the slip ring on.
Looks pretty good.
Cutting some foam to cap the top of the legs.
Leaving a lot of room for the shorts skirt.
Great set of legs.
K-2SO, fully assembled the main components. Boy how far we've come.
Speaking of that, he was just a PVC skeleton in January. Sometimes you have to see past your current step to what will be.
Time for some more details. Made a small cover for the iPad mini slot. This way if the picture is of the back I can cover it.
Had some help for the first time working on K2 parts. Dremeled the edges off most pieces. The fingers look much better now.
Added some magnet points for the back cog/bar access panel.
Removed the unseen electronics from the back panel. It snaps on and lines up nicel.
Rounded many of the edges with the sanding drum.
More rounded edges.
Added Kwik seal into many of the seams. Used @chinbeard video as my tutorial.
Here is that tutorial.
Adding this arch detail in the back.
Cut out a nice notch.
Taped in a piece of 8mm foam and heat scored the detail.
Prepping thin strips of foam for the neck detail.
These are glued on in no particular pattern but reflect what is on his neck.
I really like this little detail. But need to make some sort of cover for the bottom of the pan/tilt unit. At least before the neck servos are installed for head 2.0.
Also bit the bullet and trimmed off 1/5th of the knee joint puck. It split right along the glue line. This helps reduce the 3PO knee feel these have. I'll remove the other outer layers from both knees.
Lots of progress. Only 6 more days until his premier. But I feel right on schedule.
More progress pictures will be out this week as I work and hopefully some more live streams.
Attachments
-
 34335115020_04327f40b3_c.jpg177.3 KB · Views: 65
 -
 34557741582_a39443793a_c.jpg131 KB · Views: 68
 -
 34689041286_c2dda2e1cd_c.jpg123.4 KB · Views: 64
 -
 34689041536_af46ab1e74_c.jpg149.3 KB · Views: 68
 -
 34728972425_eaa37651f9_c.jpg149.1 KB · Views: 71
 -
 33920049263_7023fdff5b_c.jpg149.9 KB · Views: 67
 -
 33920142513_f84cea9278_c.jpg164.9 KB · Views: 75
 -
 34567606022_e4d696ddf8_c.jpg129.8 KB · Views: 77
 -
 34567605922_a6535e26f6_c.jpg143.9 KB · Views: 70
 -
 33920249433_eedd879019_c.jpg125.3 KB · Views: 76
 -
 33920342453_a4ecdd7f2d_c.jpg183.8 KB · Views: 74
 -
 34345389770_5c8934a39a_c.jpg192.4 KB · Views: 67
 -
 34598580251_b12f4ea8c9_c.jpg153.4 KB · Views: 67
 -
 34689605726_79e6efd797_c.jpg159.1 KB · Views: 77
 -
 34568062892_a756f141d0_c.jpg141.7 KB · Views: 65
 -
 33887911634_b4d8cbed04_c.jpg160.4 KB · Views: 72
 -
 34616450682_98c8334154_c.jpg104.5 KB · Views: 66
 -
 34646478121_04ef887c64_c.jpg160.2 KB · Views: 66
 -
 34690255336_4f9d51e300_c.jpg165.8 KB · Views: 80
 -
 34778747585_dbae29e653_c.jpg109.3 KB · Views: 68
 -
 34738488796_a295b7daa5_c.jpg165.6 KB · Views: 73
 -
 34616448062_17a05fcdce_c.jpg119 KB · Views: 71
 -
 34646474781_9003c042cb_c.jpg161.9 KB · Views: 76
 -
 34616448572_39487da092_c.jpg164.6 KB · Views: 76
 -
 34778743485_99decdb51d_c.jpg161.5 KB · Views: 79
 -
 34738485656_42da538a5e_c.jpg97.6 KB · Views: 69
 -
 34646474101_8912cc0dd7_c.jpg77 KB · Views: 70
 -
 34738482856_18fe61817a_c.jpg116.4 KB · Views: 80
 -
 34616447612_045177f0bf_c.jpg150.3 KB · Views: 67
 -
 34738482376_f9c71128b1_c.jpg108.3 KB · Views: 75
 -
 34646471611_b7e5f08b87_c.jpg150.6 KB · Views: 69
 -
 33970035543_8707d6c25a_c.jpg110.4 KB · Views: 74
 -
 34778740055_a3f241637c_c.jpg120.7 KB · Views: 75
 -
 33936923394_dd4f688fc1_c.jpg197.7 KB · Views: 75
 -
 34616445272_efec06e2b4_c.jpg112.7 KB · Views: 72
 -
 34778739825_5890f33c74_c.jpg136.8 KB · Views: 69
 -
 33936920734_a5463eb8c2_c.jpg159.5 KB · Views: 72
 -
 34616445312_ddb0c3fcd8_c.jpg106.6 KB · Views: 69
 -
 34738480786_8eedaeb230_c.jpg147.9 KB · Views: 63
 -
 34778736705_792a81cc36_c.jpg123.5 KB · Views: 68
 -
 34778736985_5fa7a7b551_c.jpg108.2 KB · Views: 77
 -
 34778737205_ed588f7f1e_b.jpg97.3 KB · Views: 72
 -
 34616442672_d5edc743ce_c.jpg190.9 KB · Views: 75
 -
 34738477816_cf712cd9fb_c.jpg148.4 KB · Views: 68
 -
 34738840146_1a1c94601f_b.jpg86.1 KB · Views: 79
 -
 33971521163_bae4f3fbac_c.jpg162.5 KB · Views: 69
 -
 34403068860_ec194113f4_c.jpg143.9 KB · Views: 73
 -
 34626419662_e6f830d2e0_c.jpg162.4 KB · Views: 71
 -
 33979871193_d005828d5a_c.jpg163.9 KB · Views: 67
 -
 34626419612_ff5df8152d_c.jpg150.6 KB · Views: 68
 -
 33946488574_823a9f2b18_c.jpg171.5 KB · Views: 78
 -
 33946488544_fc7b641541_c.jpg199 KB · Views: 77
 -
 33979867003_824ec46739_c.jpg99 KB · Views: 71
 -
 34656380721_cf29067709_c.jpg228 KB · Views: 67
 -
 34656380761_11e38ef353_c.jpg217.4 KB · Views: 66
 -
 34626415902_a562dfab67_c.jpg135.4 KB · Views: 68
 -
 34788986535_1743dee685_c.jpg125.3 KB · Views: 67
 -
 34656380221_36d6271d03_c.jpg110.8 KB · Views: 77
 -
 34748548596_76073cbef2_c.jpg89.3 KB · Views: 69
Last edited by a moderator:
Looks f'n amazing!! I love the template making technique you used! Never thought of that! Great job so far and I can't wait to see more!
sent from the cockpit of SLAVE I
sent from the cockpit of SLAVE I
DrscifiProps
Well-Known Member
I finished taking the outer layers of 10mm foam off the knees. Now they look much more balance and less like C-3PO knees.
I also put blue painters tape over all of the mirrors. All 16 of them.
Just call him blue joints McGee.
I did a single coat of Poly Latex 60 on the shoulder bells as a test. Spread on with first a chip brush then a sponge brush to remove the brush strokes.
So my small test worked fine so time for the rest right? Wrong. The Poly Latex 60 started curing too fast as I painted it on. It was almost like spreading suntan lotion.
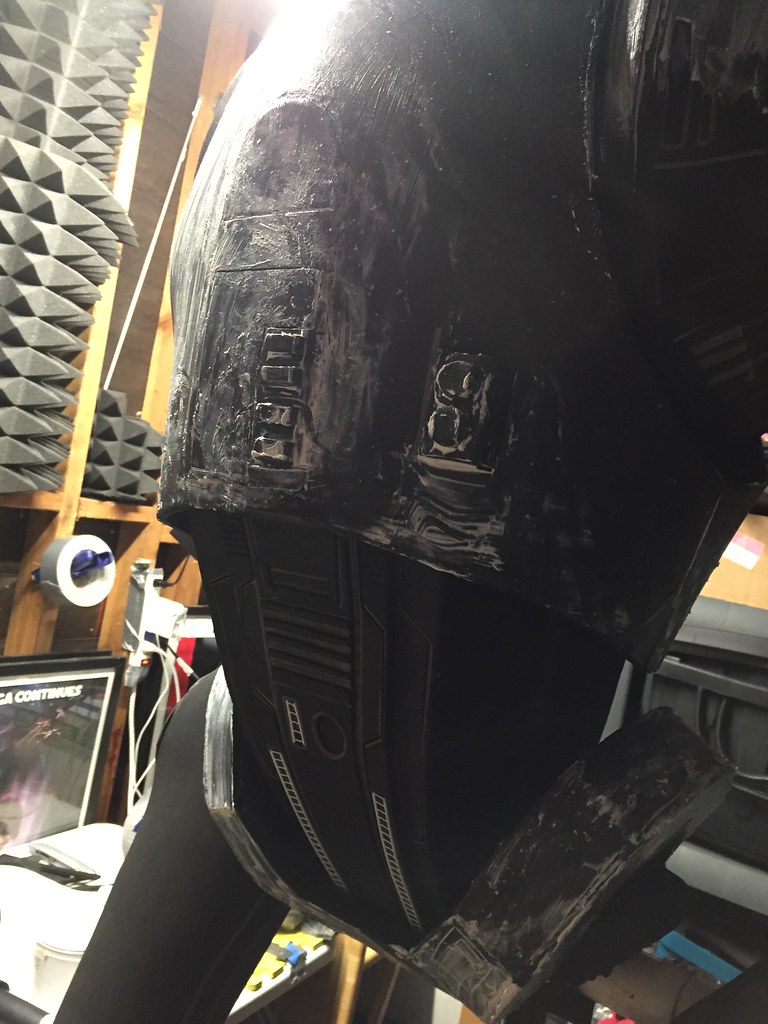
It looks like a mess. Fortunately it's not permanent.
Though it dries clear it does have a lot of texture so I've started to peel it all off the torso. Fortunately I didn't go any further than that.
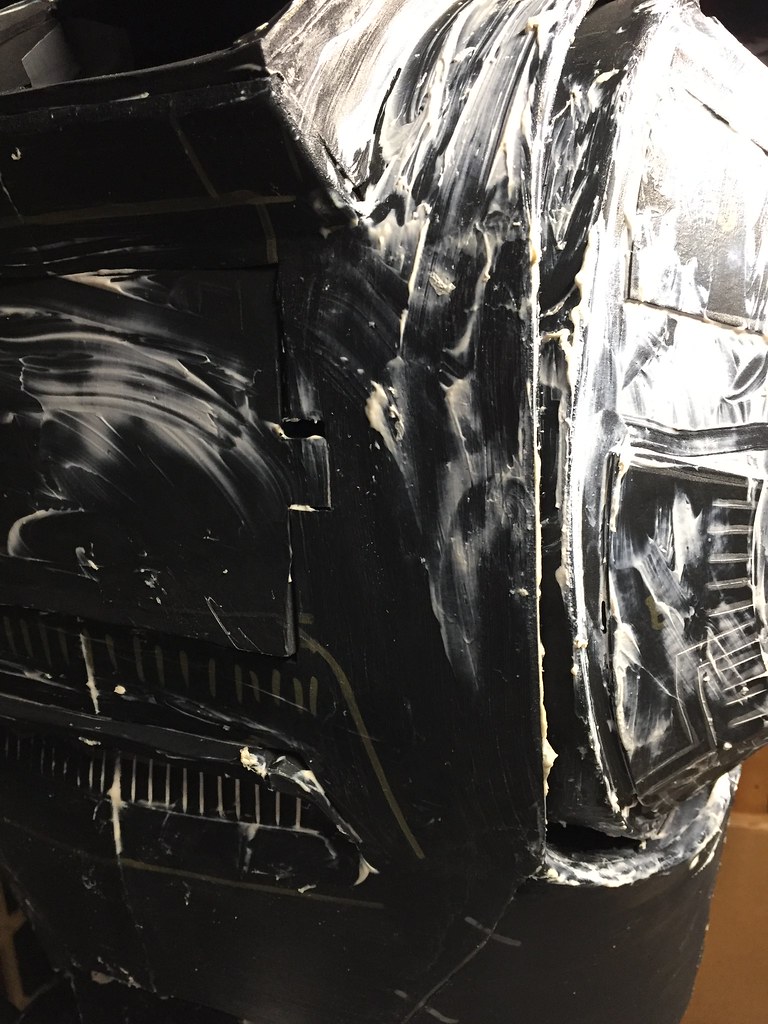
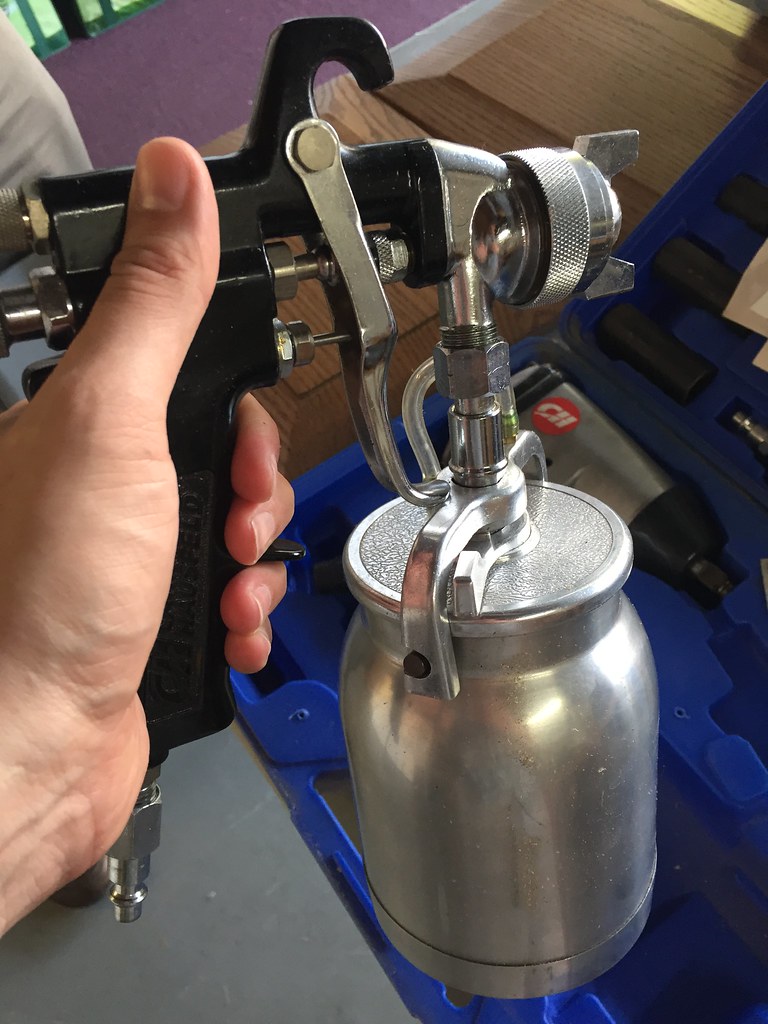
I gained access to a critter gun and tomorrow night I'll dilute the Poly Latex 60 with distilled water. (A 50/50 blend) This will help apply the latex over all of K-2SO.
I still feel on schedule for Saturday. Just need to do a step each night. Sealing, Priming, Painting and Weathering are left. Plus wiring up the hands again.
I also put blue painters tape over all of the mirrors. All 16 of them.
Just call him blue joints McGee.
I did a single coat of Poly Latex 60 on the shoulder bells as a test. Spread on with first a chip brush then a sponge brush to remove the brush strokes.
So my small test worked fine so time for the rest right? Wrong. The Poly Latex 60 started curing too fast as I painted it on. It was almost like spreading suntan lotion.
It looks like a mess. Fortunately it's not permanent.
Though it dries clear it does have a lot of texture so I've started to peel it all off the torso. Fortunately I didn't go any further than that.
I gained access to a critter gun and tomorrow night I'll dilute the Poly Latex 60 with distilled water. (A 50/50 blend) This will help apply the latex over all of K-2SO.
I still feel on schedule for Saturday. Just need to do a step each night. Sealing, Priming, Painting and Weathering are left. Plus wiring up the hands again.
DrscifiProps
Well-Known Member
You have come a long way and I've loved every post can't wait to see the final results ( not that I want it to end )
congrats on your build
Great legs fantastic idea on getting the right shape and contours ( hope you rebuild 31" )
Ben
Thanks Ben. Don't worry, even after he's "done" I still have some upgrades planned. And I want to edit a 30 minute build story with my pictures.
It's been a fun adventure. I can't wait to get photos of him out in the world.
DrscifiProps
Well-Known Member
Only one more day of building left!
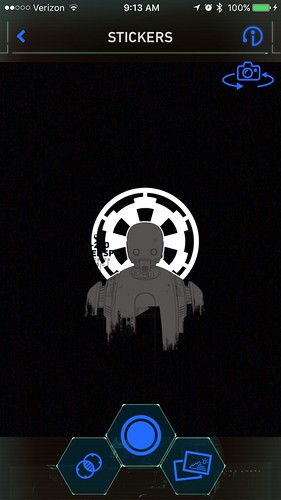
On a fun note I'm thinking of getting one of these large Hawaiian shirts so I can replicate my favorite K-2SO T-shirt.


Also the Star Wars app has some new stickers including a cool K2 one.
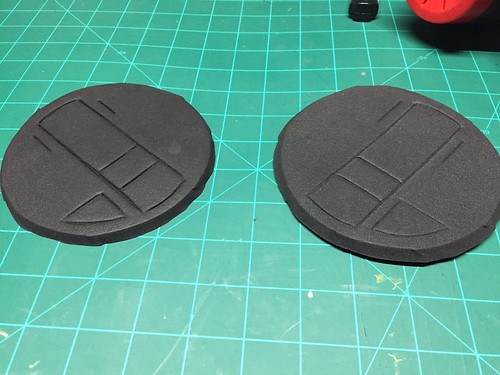
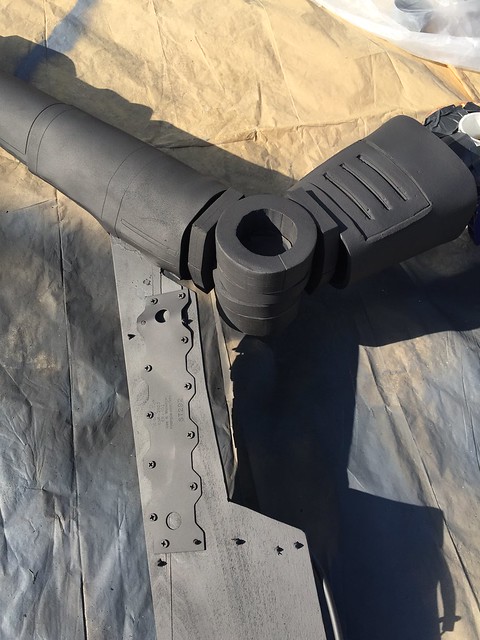
Did the detail lines on the leg hip covers.
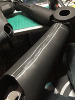
Added a little disc of foam at the top of the arms to help hide more of the PVC.
Ready to be sealed by spraying on a layer of Poly Latex 60.
Masked off the shoulder/hip/neck areas.
Mixed 8oz of distilled water with 8oz of Poly Latex 60.

More masking.
Cut two holes in my extra officer tunic for the harness.
I don't need this part screwed together as friction and gravity will hold it down. Nice that I don't have to cut too much of the tunic away.

Hand sewed around the cut holes for reenforcement.

Big day tomorrow finishing the rest of the steps. I might not update the RPF until late Saturday. But i'm sure pictures of K2 and I will begin spreading around the web.
Thank you to everyone who's read along with this project. I still have some upgrades in mind for the next month or two. So stay tuned.
-Dr. Sci-fi
On a fun note I'm thinking of getting one of these large Hawaiian shirts so I can replicate my favorite K-2SO T-shirt.
Also the Star Wars app has some new stickers including a cool K2 one.
Did the detail lines on the leg hip covers.
Added a little disc of foam at the top of the arms to help hide more of the PVC.
Ready to be sealed by spraying on a layer of Poly Latex 60.
Masked off the shoulder/hip/neck areas.
Mixed 8oz of distilled water with 8oz of Poly Latex 60.
More masking.
Cut two holes in my extra officer tunic for the harness.
I don't need this part screwed together as friction and gravity will hold it down. Nice that I don't have to cut too much of the tunic away.
Hand sewed around the cut holes for reenforcement.
Big day tomorrow finishing the rest of the steps. I might not update the RPF until late Saturday. But i'm sure pictures of K2 and I will begin spreading around the web.
Thank you to everyone who's read along with this project. I still have some upgrades in mind for the next month or two. So stay tuned.
-Dr. Sci-fi
DrscifiProps
Well-Known Member
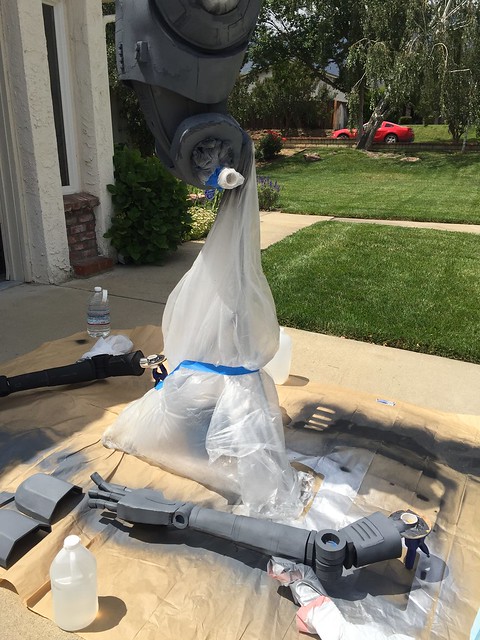
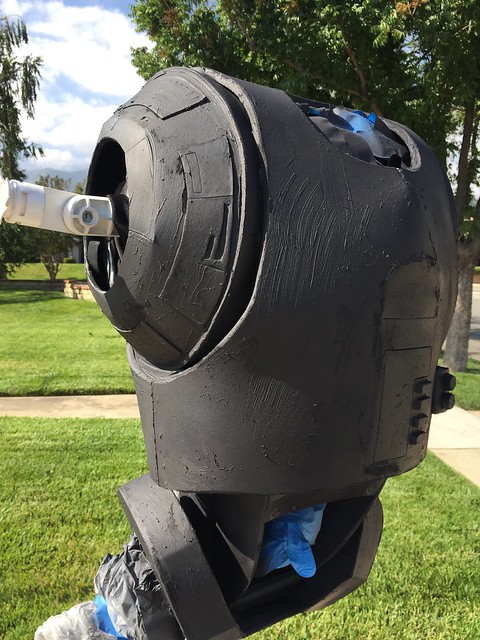
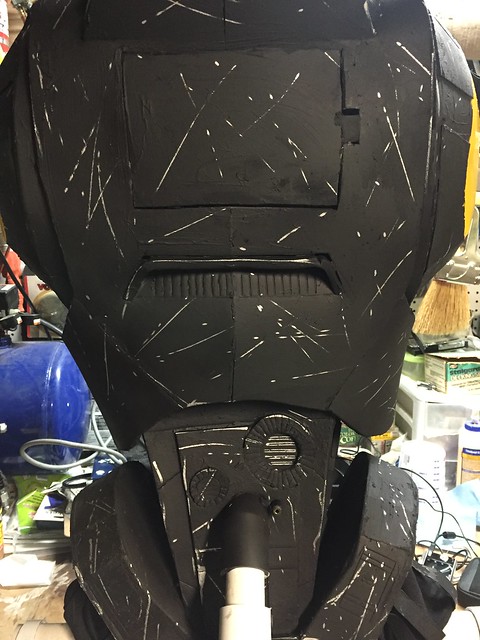
Friday was panting day! The night before I sealed the foam with the critter gun and Poly Latex 60.
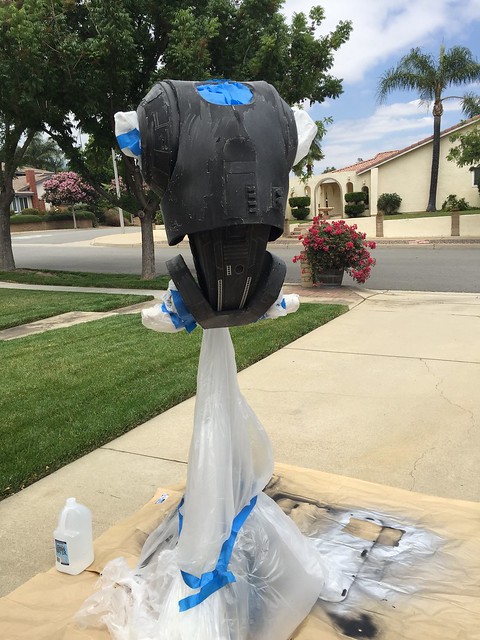
Ready for paint, sealed foam.
A light coat of primer. I took my time making sure the paint didn't pool.
Went through 5 cans of primer.
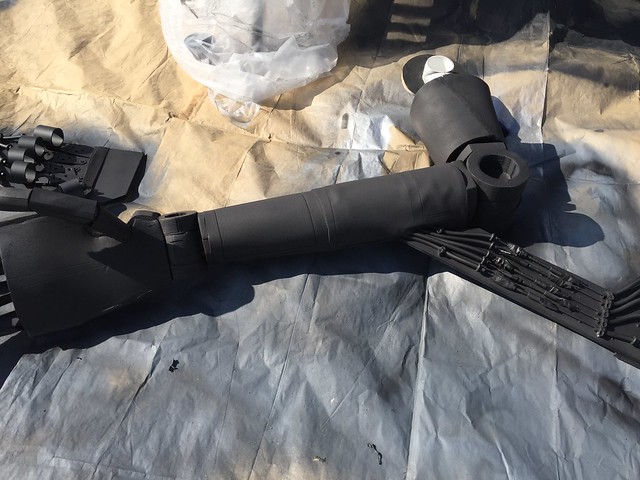
Finished wiring up the right hand fingers. Made the rest of the wire loops and reconnected the nylon line.
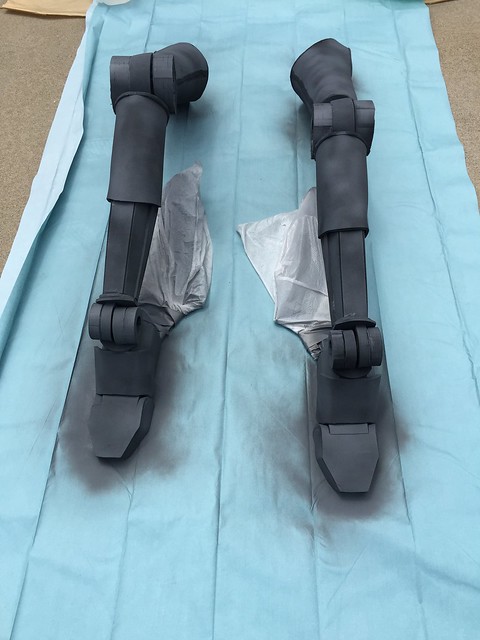
Some pieces are almost ready for the black BBQ top coat.
Again, taking several passes and coats to cover the foam so it doesn't run.
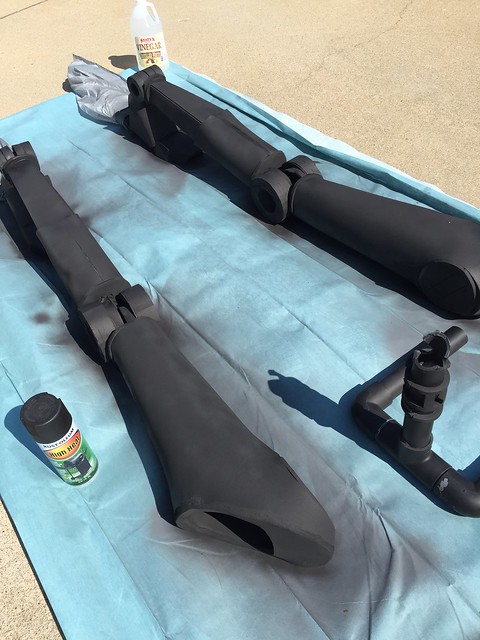
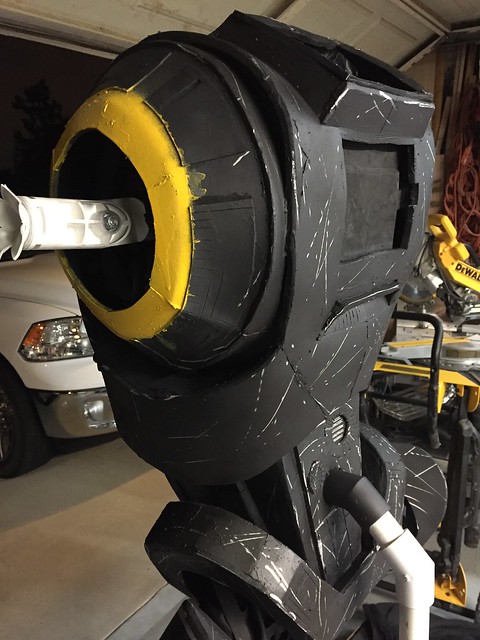
Looking much better in flat black.
Covered the finger linkages too in black.
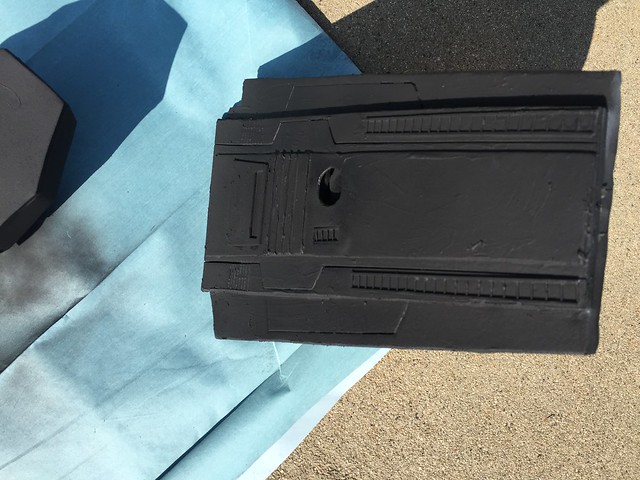
Ab plate.
Compilation of painting the Imperial cog stencils on the shoulders.
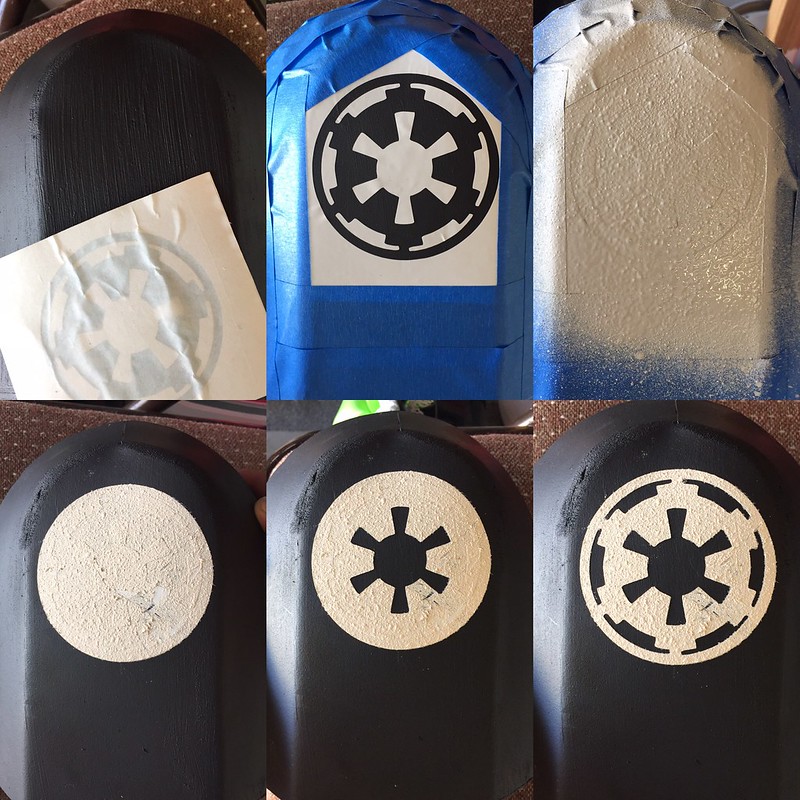
It's looking better and better with each coat.
Still have some leftover texture from the brushed on latex on the torso, but it works out.
Pieces are drying for the weathering step.
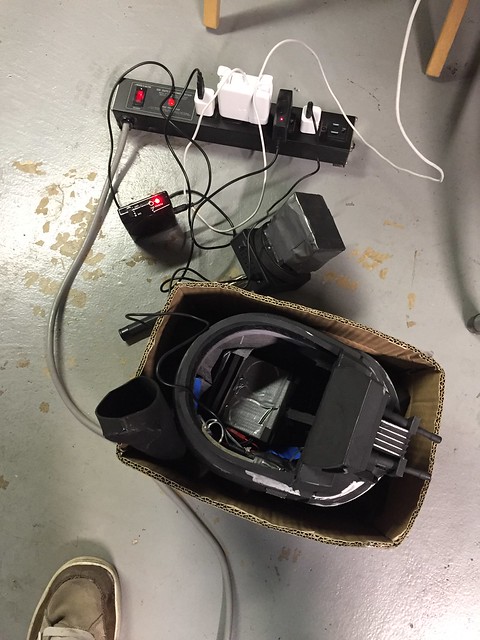
Charging up all of my electronics for tomorrow. Aker speaker, pan tilt motor, pov camera wifi and iPad mini.
When I peeled off all of the painters tape from the mirrors they all survived beautifully!
Masking off for the yellow ring on the shoulders.
Cut some electrical tape into circles and glued to his front buttons.
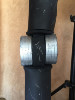
Silver sharpie for the metal ring on his hips.
More silver sharpie on his neck ring.
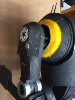
I decided to pull apart his left knee and replace the stopping screws.
New screw in place to keep the knee locked.
Made some pin striping tape for the front panel with a roll of electrical tape.
Covered the rest of him from overspray.
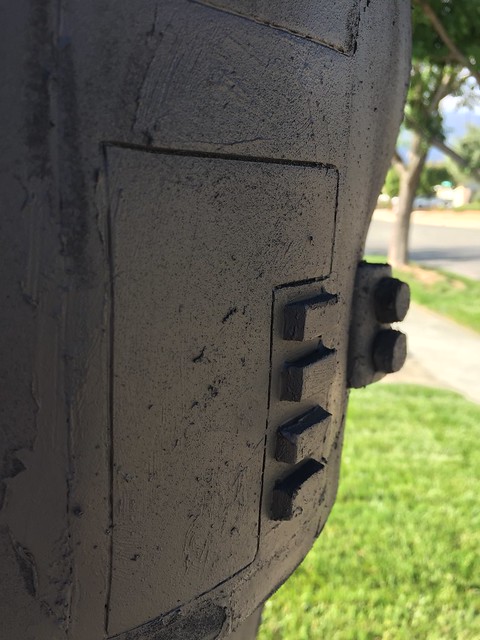
Yellow ran a little but still looks good. Also added many strike marks all over his body.
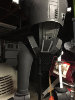
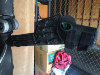
Wiring up the electronics now that the painting is done. The pink/green connectors break out the microphone and speaker to the iPad mini.
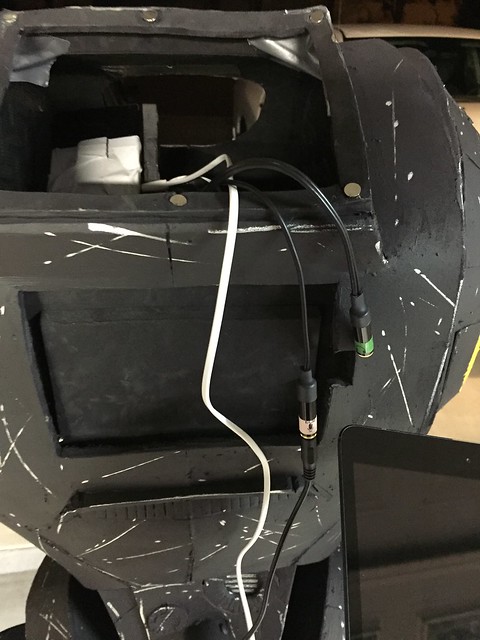
Systems coming online.
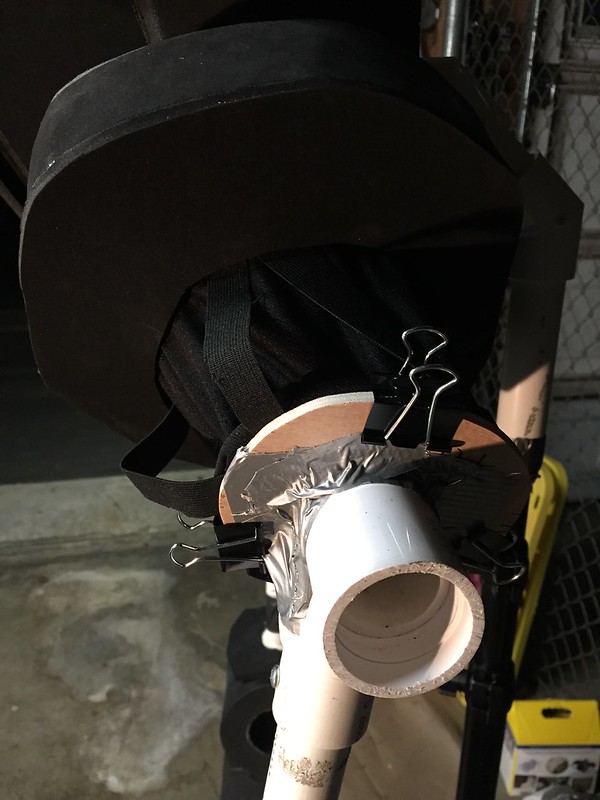
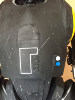
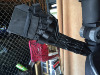
The microphone input jack for connecting with the harness.
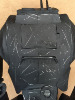
Wire runs on the harness through the connection pipe. My over the ear mic connects on the vest.

One more plug in shot.
Added fabric around the neck to let the amplified voice out.
Strike mark weathering on the torso.
All pieces weathered and ready. Added silver on the joints.
Don't worry, another post is coming right after this one to see his premier day. Just breaking them apart for the blog.
I finished K-2SO at 3:30am the night before. Got 3 hours of sleep then packed him in the car and rolled out.
Ready for paint, sealed foam.
A light coat of primer. I took my time making sure the paint didn't pool.
Went through 5 cans of primer.
Finished wiring up the right hand fingers. Made the rest of the wire loops and reconnected the nylon line.
Some pieces are almost ready for the black BBQ top coat.
Again, taking several passes and coats to cover the foam so it doesn't run.
Looking much better in flat black.
Covered the finger linkages too in black.
Ab plate.
Compilation of painting the Imperial cog stencils on the shoulders.
It's looking better and better with each coat.
Still have some leftover texture from the brushed on latex on the torso, but it works out.
Pieces are drying for the weathering step.
Charging up all of my electronics for tomorrow. Aker speaker, pan tilt motor, pov camera wifi and iPad mini.
When I peeled off all of the painters tape from the mirrors they all survived beautifully!
Masking off for the yellow ring on the shoulders.
Cut some electrical tape into circles and glued to his front buttons.
Silver sharpie for the metal ring on his hips.
More silver sharpie on his neck ring.
I decided to pull apart his left knee and replace the stopping screws.
New screw in place to keep the knee locked.
Made some pin striping tape for the front panel with a roll of electrical tape.
Covered the rest of him from overspray.
Yellow ran a little but still looks good. Also added many strike marks all over his body.
Wiring up the electronics now that the painting is done. The pink/green connectors break out the microphone and speaker to the iPad mini.
Systems coming online.
The microphone input jack for connecting with the harness.
Wire runs on the harness through the connection pipe. My over the ear mic connects on the vest.
One more plug in shot.
Added fabric around the neck to let the amplified voice out.
Strike mark weathering on the torso.
All pieces weathered and ready. Added silver on the joints.
Don't worry, another post is coming right after this one to see his premier day. Just breaking them apart for the blog.
I finished K-2SO at 3:30am the night before. Got 3 hours of sleep then packed him in the car and rolled out.
DrscifiProps
Well-Known Member
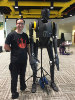
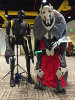
He's DONE! I packed up K-2SO after a few hours sleep and took him to the Star Wars Reads event in Rancho Cucamonga, California. It's our largest 501st event in the Inland Empire and so much fun. Enjoy the pictures!
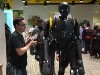
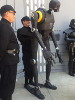
Creator standing with creation. All assembled on the staging floor.

He's looking great.

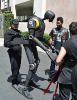
Explaining his pieces to the gathered costumers.

Wearing my Imperial Officers uniform behind K2 at the Death Star Wall photo booth.

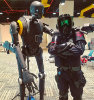
Another black and shiny friend.

K2 likes shadow scouts.

General Grievous makes for a good bookend.

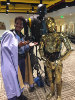
C-3PO and K-2SO, but who's taller!

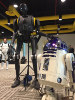
Searching for the Scarrif base.

Beautiful shot walking around.

Replacing C-3PO

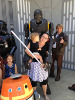
Posing with my wonderful family who has lived with K2 these past year.

General Grievous, my friend Jeremy https://www.instagram.com/stormtrooperbusiness/ So glad I got to see his costume in person finally. We need to hit up a con together.

Getting ready for the character parade, about 5 minutes before the neck failed and his head fell 7' 2" onto asphalt. Survived though!

Very popular at the Death Star wall.

One of my favorite pics of the day.

Photoshopped K2 into the U-Wing interior. He fits.

Took documentation detail pictures for submitting him to the Rebel Legion. Enjoy.
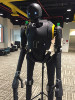
Front

Back

Left

Right

Shoulder detail

Hand

Chest

Abs

Head, you can see the new "weathering" on the front plate from when his head took a fall.

Knee

Foot

Hip

Back

Lower back

Upper back panel

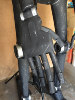
Right puppet hand plate. This one is strapped to my hand for better control.

Left puppet hand plate. This one I can slip in and out of so I still have a free hand when needed.

Shot a time-lapse video putting his components together.
I've gathered many pictures and details on the components I've used on my website here: http://drscifi.com/k2so
Was interviewed by the Skyhoppers Podcast's new YouTube series on Star Wars Makers. Give it a look.
Also, a highlight of the day, tagged Luke D Fisher in one of my instagram posts. He was the designer of K-2SO and often posts concept art and maquette sculptures. Received a kind response back.

Wow, what a day! I am exhausted, had 3 hours of sleep before a whole day of cosplay with a brand new puppet. I've learned a lot and already have some modifications to make before his next outing. But he was so well received by the crowd, I saw nothing but smiles and looks of surprise as I walked him around.
He is heavy and pulls me forward a bit. I need to re-balance him and work on my endurance. I also plan to rework the knee stops so I can lock them with some custom 3d printed pieces. Then he can take his own weight while standing. That would help a lot.
Thank you to all of my 501st and Rebel Legion brothers and sisters for helping me get suited up, walking me through the crowds and keeping me safe. I could not have done it without you.
I'll be posting more pictures and videos here on the RPF as well as my website in the next few weeks. There is a dancing video! Now I need to prep him for our big Rogue One photo shoot in late June.
If you have any questions or kind remarks please post them below I would love to hear them and share more about K-2SO with whoever is interested. He's been a great project. Thank you RPF for your support as I worked through his build. Thank you Tested.com for showcasing him at the RPF party. I hope we get to catch up now that he's complete for an update. I'll post here what con I'll be brining him next to once I know.
Now it's time for some sleep. Keep on making, and may the force be with you.
-Darren (Dr. Sci-Fi)
Creator standing with creation. All assembled on the staging floor.
He's looking great.
Explaining his pieces to the gathered costumers.
Wearing my Imperial Officers uniform behind K2 at the Death Star Wall photo booth.
Another black and shiny friend.
K2 likes shadow scouts.
General Grievous makes for a good bookend.
C-3PO and K-2SO, but who's taller!
Searching for the Scarrif base.
Beautiful shot walking around.
Replacing C-3PO
Posing with my wonderful family who has lived with K2 these past year.
General Grievous, my friend Jeremy https://www.instagram.com/stormtrooperbusiness/ So glad I got to see his costume in person finally. We need to hit up a con together.
Getting ready for the character parade, about 5 minutes before the neck failed and his head fell 7' 2" onto asphalt. Survived though!
Very popular at the Death Star wall.
One of my favorite pics of the day.
Photoshopped K2 into the U-Wing interior. He fits.
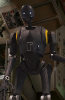
Took documentation detail pictures for submitting him to the Rebel Legion. Enjoy.
Front
Back
Left
Right
Shoulder detail
Hand
Chest
Abs
Head, you can see the new "weathering" on the front plate from when his head took a fall.
Knee
Foot
Hip
Back
Lower back
Upper back panel
Right puppet hand plate. This one is strapped to my hand for better control.
Left puppet hand plate. This one I can slip in and out of so I still have a free hand when needed.
Shot a time-lapse video putting his components together.
I've gathered many pictures and details on the components I've used on my website here: http://drscifi.com/k2so
Was interviewed by the Skyhoppers Podcast's new YouTube series on Star Wars Makers. Give it a look.
Also, a highlight of the day, tagged Luke D Fisher in one of my instagram posts. He was the designer of K-2SO and often posts concept art and maquette sculptures. Received a kind response back.
Wow, what a day! I am exhausted, had 3 hours of sleep before a whole day of cosplay with a brand new puppet. I've learned a lot and already have some modifications to make before his next outing. But he was so well received by the crowd, I saw nothing but smiles and looks of surprise as I walked him around.
He is heavy and pulls me forward a bit. I need to re-balance him and work on my endurance. I also plan to rework the knee stops so I can lock them with some custom 3d printed pieces. Then he can take his own weight while standing. That would help a lot.
Thank you to all of my 501st and Rebel Legion brothers and sisters for helping me get suited up, walking me through the crowds and keeping me safe. I could not have done it without you.
I'll be posting more pictures and videos here on the RPF as well as my website in the next few weeks. There is a dancing video! Now I need to prep him for our big Rogue One photo shoot in late June.
If you have any questions or kind remarks please post them below I would love to hear them and share more about K-2SO with whoever is interested. He's been a great project. Thank you RPF for your support as I worked through his build. Thank you Tested.com for showcasing him at the RPF party. I hope we get to catch up now that he's complete for an update. I'll post here what con I'll be brining him next to once I know.
Now it's time for some sleep. Keep on making, and may the force be with you.
-Darren (Dr. Sci-Fi)
Attachments
-
 34134099564_ddfb9d40d3_c.jpg136.3 KB · Views: 58
 -
 34771880722_98ca101315_c.jpg180.9 KB · Views: 67
 -
 34134099564_ddfb9d40d3_c.jpg136.3 KB · Views: 51
 -
 34134099564_ddfb9d40d3_c.jpg136.3 KB · Views: 56
 -
 34771880722_98ca101315_c.jpg180.9 KB · Views: 66
 -
 34771880722_98ca101315_c.jpg180.9 KB · Views: 67
 -
 34112906464_b86208be76_c.jpg186.8 KB · Views: 58
 -
 34112906464_b86208be76_c.jpg186.8 KB · Views: 64
 -
 34112906464_b86208be76_c.jpg186.8 KB · Views: 61
 -
 34134099184_4fb6e78350_c.jpg127.2 KB · Views: 60
 -
 34813164732_508eda4940_c.jpg152.4 KB · Views: 67
 -
 34813164732_508eda4940_c.jpg152.4 KB · Views: 64
 -
 34134099184_4fb6e78350_c.jpg127.2 KB · Views: 59
 -
 34134099184_4fb6e78350_c.jpg127.2 KB · Views: 62
 -
 34813164732_508eda4940_c.jpg152.4 KB · Views: 70
 -
 34134099404_28998e0262_c.jpg252.2 KB · Views: 56
 -
 34134099404_28998e0262_c.jpg252.2 KB · Views: 58
 -
 34134099484_340d53d44d_c.jpg206.3 KB · Views: 66
 -
 34134099404_28998e0262_c.jpg252.2 KB · Views: 53
 -
 34134099484_340d53d44d_c.jpg206.3 KB · Views: 63
 -
 34134099484_340d53d44d_c.jpg206.3 KB · Views: 69
 -
 34134099804_6505b45984_c.jpg100.4 KB · Views: 53
 -
 34589187400_292111bb96_c.jpg165.7 KB · Views: 60
 -
 34589187400_292111bb96_c.jpg165.7 KB · Views: 54
 -
 34134099804_6505b45984_c.jpg100.4 KB · Views: 58
 -
 34589187400_292111bb96_c.jpg165.7 KB · Views: 59
 -
 34134099804_6505b45984_c.jpg100.4 KB · Views: 59
 -
 34894923566_3419f31a69_c.jpg174.4 KB · Views: 63
 -
 34894923566_3419f31a69_c.jpg174.4 KB · Views: 65
 -
 34813164912_b1dbbd930f_c.jpg122.4 KB · Views: 65
 -
 34813164912_b1dbbd930f_c.jpg122.4 KB · Views: 62
 -
 34813164912_b1dbbd930f_c.jpg122.4 KB · Views: 67
 -
 34894923566_3419f31a69_c.jpg174.4 KB · Views: 68
 -
 34547932400_d7c8e5d06c_c.jpg182.2 KB · Views: 67
 -
 34547932400_d7c8e5d06c_c.jpg182.2 KB · Views: 69
 -
 34547932400_d7c8e5d06c_c.jpg182.2 KB · Views: 66
 -
 34803338351_d4640e8049_c.jpg195.3 KB · Views: 66
 -
 34803338351_d4640e8049_c.jpg195.3 KB · Views: 63
 -
 34803338351_d4640e8049_c.jpg195.3 KB · Views: 67
 -
 34152998733_32cd81a1a2_c.jpg64.3 KB · Views: 55
 -
 34152998733_32cd81a1a2_c.jpg64.3 KB · Views: 58
 -
 34915646186_e16bebb18c_b.jpg88.5 KB · Views: 68
 -
 34915646186_e16bebb18c_b.jpg88.5 KB · Views: 62
 -
 34915646186_e16bebb18c_b.jpg88.5 KB · Views: 66
 -
 34145681083_38c57c4de2_b.jpg79.7 KB · Views: 62
 -
 34145681083_38c57c4de2_b.jpg79.7 KB · Views: 55
 -
 34145681083_38c57c4de2_b.jpg79.7 KB · Views: 58
 -
 34134099694_f8c06f69aa_c.jpg170.4 KB · Views: 59
 -
 34134099694_f8c06f69aa_c.jpg170.4 KB · Views: 54
 -
 34152998733_32cd81a1a2_c.jpg64.3 KB · Views: 58
 -
 34134099694_f8c06f69aa_c.jpg170.4 KB · Views: 57
 -
 34831181181_6dcc3805e5_c.jpg149.5 KB · Views: 65
 -
 34831181181_6dcc3805e5_c.jpg149.5 KB · Views: 59
 -
 34152623673_ae80c7f1f1_c.jpg142.5 KB · Views: 57
 -
 34152623673_ae80c7f1f1_c.jpg142.5 KB · Views: 51
 -
 34152623673_ae80c7f1f1_c.jpg142.5 KB · Views: 55
 -
 34831181181_6dcc3805e5_c.jpg149.5 KB · Views: 63
 -
 34831180931_43b5a22bfe_c.jpg155.2 KB · Views: 57
 -
 34831180931_43b5a22bfe_c.jpg155.2 KB · Views: 57
 -
 34831180931_43b5a22bfe_c.jpg155.2 KB · Views: 60
 -
 34152623323_91ff25683b_c.jpg148.5 KB · Views: 66
 -
 34152623323_91ff25683b_c.jpg148.5 KB · Views: 64
 -
 34152623323_91ff25683b_c.jpg148.5 KB · Views: 63
 -
 34831180731_c3e9735eae_c.jpg137.5 KB · Views: 58
 -
 34831180731_c3e9735eae_c.jpg137.5 KB · Views: 49
 -
 34831180731_c3e9735eae_c.jpg137.5 KB · Views: 58
 -
 34922466456_11f78fed6d_c.jpg130.4 KB · Views: 61
 -
 34831180121_1999cbb55e_c.jpg147.4 KB · Views: 65
 -
 34831180121_1999cbb55e_c.jpg147.4 KB · Views: 60
 -
 34831180121_1999cbb55e_c.jpg147.4 KB · Views: 67
 -
 34922466456_11f78fed6d_c.jpg130.4 KB · Views: 60
 -
 34922466456_11f78fed6d_c.jpg130.4 KB · Views: 59
 -
 34152621923_fd5b797119_c.jpg100.3 KB · Views: 65
 -
 34831180311_6e2b2bb59a_c.jpg157.3 KB · Views: 58
 -
 34831180311_6e2b2bb59a_c.jpg157.3 KB · Views: 55
 -
 34831180311_6e2b2bb59a_c.jpg157.3 KB · Views: 65
 -
 34152623023_4778cd1777_c.jpg183.2 KB · Views: 64
 -
 34152623023_4778cd1777_c.jpg183.2 KB · Views: 62
 -
 34152623023_4778cd1777_c.jpg183.2 KB · Views: 58
 -
 34152621923_fd5b797119_c.jpg100.3 KB · Views: 69
 -
 34152621923_fd5b797119_c.jpg100.3 KB · Views: 71
 -
 34831180491_f2d9ddaa4a_c.jpg147.8 KB · Views: 61
 -
 34831180491_f2d9ddaa4a_c.jpg147.8 KB · Views: 60
 -
 34831180491_f2d9ddaa4a_c.jpg147.8 KB · Views: 59
 -
 34152621183_a9d88a7553_c.jpg133.9 KB · Views: 67
 -
 34152621183_a9d88a7553_c.jpg133.9 KB · Views: 69
 -
 34152620873_180861efc5_c.jpg147.1 KB · Views: 65
 -
 34152621183_a9d88a7553_c.jpg133.9 KB · Views: 65
 -
 34922467246_a280d50387_c.jpg130.9 KB · Views: 60
 -
 34152620873_180861efc5_c.jpg147.1 KB · Views: 64
 -
 34575781050_ceb0746c57_c.jpg119.8 KB · Views: 59
 -
 34575781050_ceb0746c57_c.jpg119.8 KB · Views: 55
 -
 34152620873_180861efc5_c.jpg147.1 KB · Views: 60
 -
 34922467246_a280d50387_c.jpg130.9 KB · Views: 58
 -
 34922467246_a280d50387_c.jpg130.9 KB · Views: 57
 -
 34575781050_ceb0746c57_c.jpg119.8 KB · Views: 60
 -
 34922466046_c9b8275e1b_c.jpg171.1 KB · Views: 54
 -
 34922466046_c9b8275e1b_c.jpg171.1 KB · Views: 60
 -
 34922466046_c9b8275e1b_c.jpg171.1 KB · Views: 57
 -
 34831178731_399bbbe1e8_c.jpg209.6 KB · Views: 62
 -
 34831178731_399bbbe1e8_c.jpg209.6 KB · Views: 62
 -
 34831178731_399bbbe1e8_c.jpg209.6 KB · Views: 70
 -
 34823923011_69a93a1f7b_c.jpg76.6 KB · Views: 66
 -
 34823923011_69a93a1f7b_c.jpg76.6 KB · Views: 66
 -
 34823923011_69a93a1f7b_c.jpg76.6 KB · Views: 73
Last edited by a moderator:
Pcoz
Well-Known Member
Re: ROGUE ONE K-2SO Puppet Build - Finished (Pictures)
Congratulations on a fantastic build !
Great problem solving, documentation and photography. Such a fun build to see come to life !
I just want to borrow it for one night so I can stand it over my son's bed so when he wakes up.....lolthumbsup
Congratulations on a fantastic build !
Great problem solving, documentation and photography. Such a fun build to see come to life !
I just want to borrow it for one night so I can stand it over my son's bed so when he wakes up.....lol
thumbsupSimilar threads
- Replies
- 15
- Views
- 772
- Replies
- 45
- Views
- 3,172
- Replies
- 3
- Views
- 583