You are using an out of date browser. It may not display this or other websites correctly.
You should upgrade or use an alternative browser.
You should upgrade or use an alternative browser.
Millennium Falcon Bunk Bed Build - TFA Details 5/8 Scale
- Thread starter Holy Wookiee
- Start date
-
- Tags
- star wars
MoSc0ut
New Member
This is really awesome! I wish my dad was as creative as you when I was your kids age. As for the LEDs and dimmer switch, in my experience it didn't work. it was on/off and maybe some intermittent "twitching" in between. I think it's because most string lights are poor quality. I'm sure someone with more knowledge can chime in to. IKEA had some string LED lights that can with a dimmer but they might be more than you want to spend. And/or IKEA has something one time you're there and the next time it's gone, never to be seen again. -Eagerly Awaiting The Outcome, Jim
Jim
Jim
As long as you're potty trained. :lol Thanks TT!
Oh...well crap.
They don't call my TT for nothin'!
Holy Wookiee
Active Member
Oooo so pretty!
Thank you!
This is really awesome! I wish my dad was as creative as you when I was your kids age. As for the LEDs and dimmer switch, in my experience it didn't work. it was on/off and maybe some intermittent "twitching" in between. I think it's because most string lights are poor quality. I'm sure someone with more knowledge can chime in to. IKEA had some string LED lights that can with a dimmer but they might be more than you want to spend. And/or IKEA has something one time you're there and the next time it's gone, never to be seen again. -Eagerly Awaiting The Outcome, Jim
Jim
Thanks, Jim. I've been blessed with a wife that enjoys my crazy ideas (it helps that I made a TARDIS bedroom door for her). After cobbling together a dimmer device, I see what you mean about the twitching. I am able to dim the lights just enough to a setting between retina burst and epilectic shock. Thanks for the heads up and encouraging words!
Holy Wookiee
Active Member
Have you ever awoken to a vomiting baby and you had to clean it up with the nearest cloth object… your shirt? :sick Needless to say, I didn’t have much time to work. I spliced a cheap dimmer switch into an extension cord and plugged in the lights… success! I didn’t take pictures… it’s ugly… but it gets the job done. There is some flickering at certain settings but there’s a sweet spot I was able to hit. I want to enclose that to keep it away from little hands.
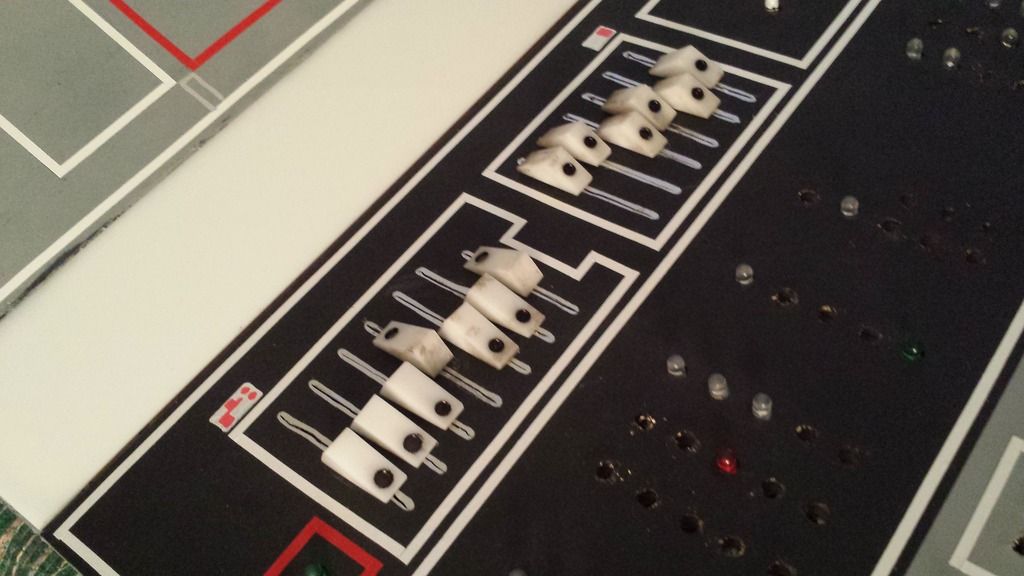
Yesterday I took some time in the shop to do something fun. I cut up some 1” plastic to make faders for the co-pilot side. First, I cut the 3/8" width. Then, cut the resulting disk in half. Next, I milled the surfaces on a small, manual mill.
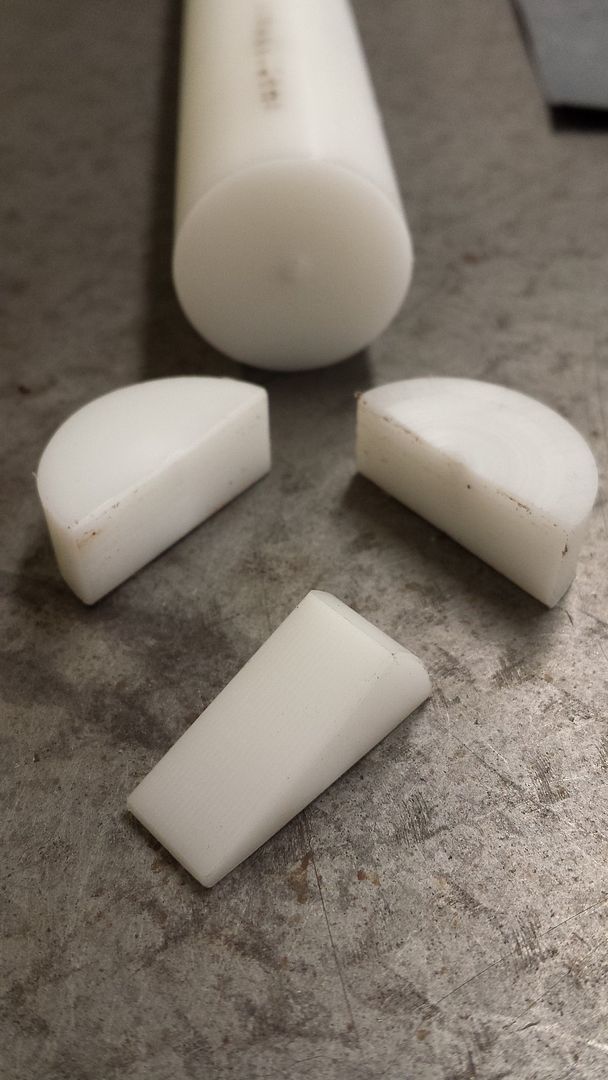
Recessed hole milled, painted, and distressed.
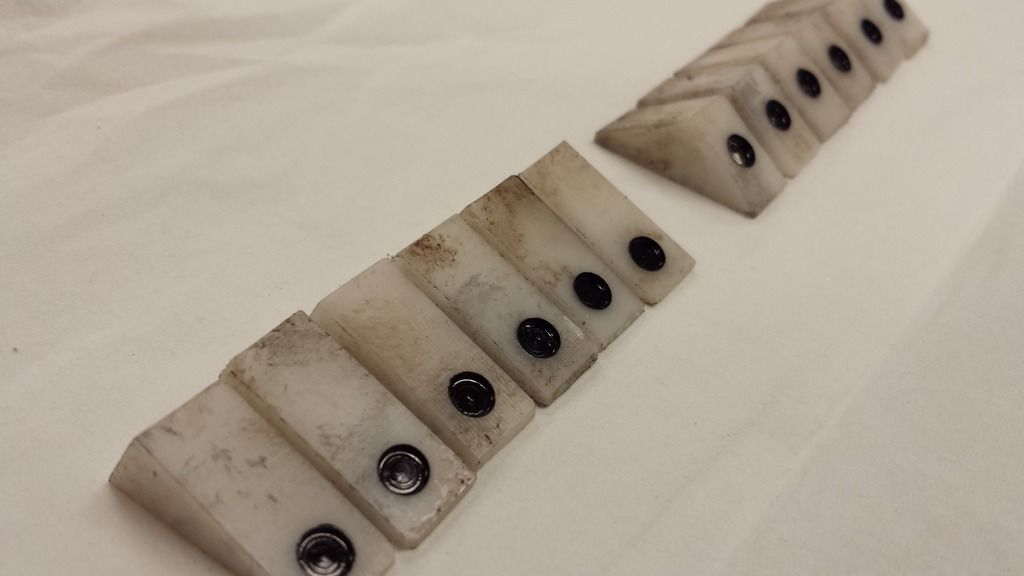
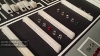
That was a nice distraction. As I’ve stated before, I tend to get bored and jump around at times. I’m also keeping a look out for anything greeblie-ish and scored these on a trip to the local Restore (like a thrift store for materials… and proceeds benefit Habitat for Humanity). They’re listed as 3/4” cathedral balls. I envision some more holes and getting mounted to the top of the console.
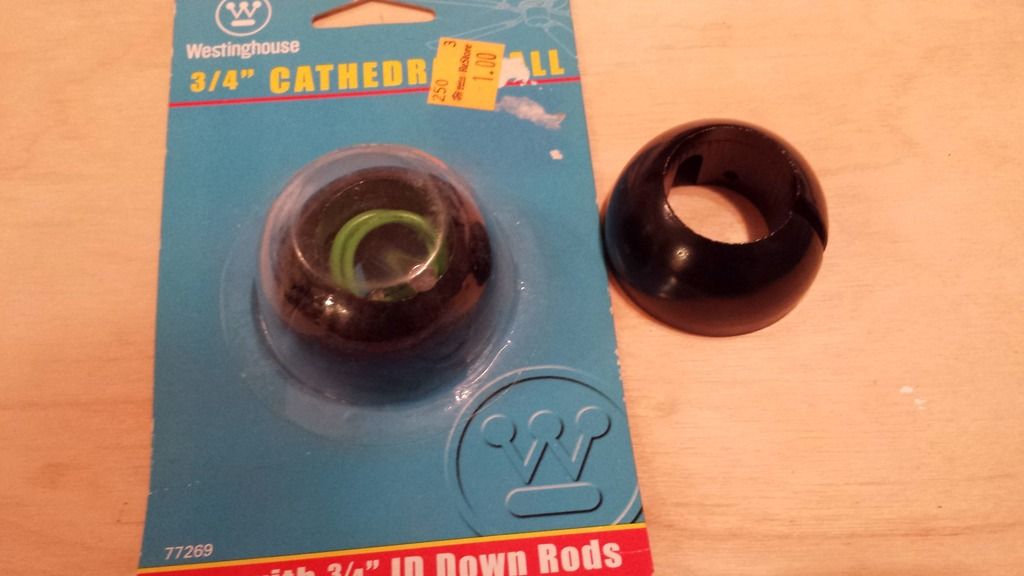
That’s all for now. I’ll cut slots in the faders and make brackets to mount them (maybe tonight). I’m still looking for 300 more mini dome Christmas lights (ugh!). Until then, I’ll work on more panel greeblies and whatever else pops into my head. Most importantly… I’ll keep building.
Yesterday I took some time in the shop to do something fun. I cut up some 1” plastic to make faders for the co-pilot side. First, I cut the 3/8" width. Then, cut the resulting disk in half. Next, I milled the surfaces on a small, manual mill.
Recessed hole milled, painted, and distressed.
That was a nice distraction. As I’ve stated before, I tend to get bored and jump around at times. I’m also keeping a look out for anything greeblie-ish and scored these on a trip to the local Restore (like a thrift store for materials… and proceeds benefit Habitat for Humanity). They’re listed as 3/4” cathedral balls. I envision some more holes and getting mounted to the top of the console.
That’s all for now. I’ll cut slots in the faders and make brackets to mount them (maybe tonight). I’m still looking for 300 more mini dome Christmas lights (ugh!). Until then, I’ll work on more panel greeblies and whatever else pops into my head. Most importantly… I’ll keep building.
Toxx
Well-Known Member
Holy Wookiee;3951441 The lights are too intense so I’m thinking of installing a dimmer switch… that should work said:Not really, LEDs need a constant current and they way to dimm them is using pulse width modulation.
Holy Wookiee
Active Member
Good morning, all! I’ve been putting little details on the panels and whatnot. The replacement Christmas lights finally arrived but lo and behold, they are slighter LARGER. I’ll ream the existing holes and try not to damage the vinyl front. I installed the faders and I’ve been working on an idea for the 1,286 toggle switches. The weather has improved and I found myself in the garage again jigsawing away!
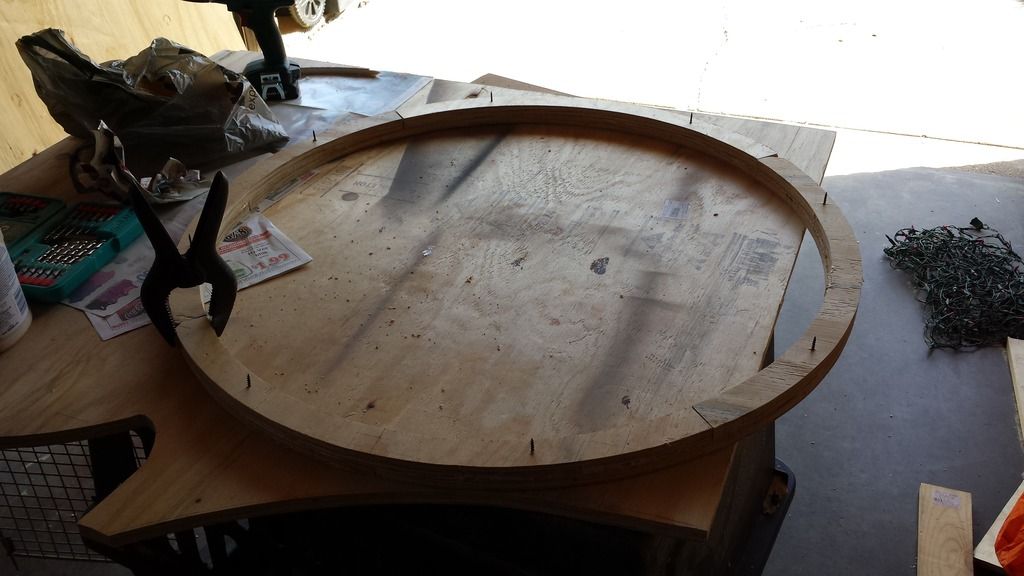
This took a bit of ‘ciphering. There’s an outer radius of 17.5 inches and inside of 16.25. This will become the 35 inch cockpit ring (just in front of the console). I cut a total of eight pieces, 4 from each thickness of wood so that I can stack them and achieve a width of 1.25.
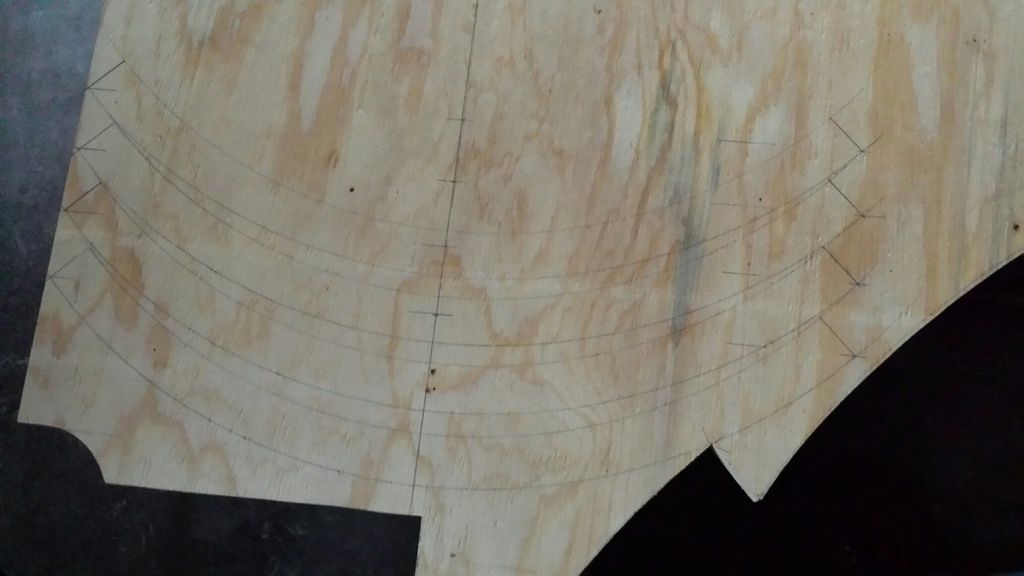
Here they are glued and screwed. I staggered the pieces and with the screw placement, there’s some pivoting going on! That worked in my favor as I tried to get all the pieces to match up and at least resemble a circular shape. Success!
And a close-up of the faders installed. You may notice the markings above them as well... these are directly copied from the cockpit pano recently posted. I’m still trying to get a decent amount of screen accurate detail when possible.
I’m hoping for some major progress this weekend. The kids have promised to help paint the rest of the bed frame and with the nicer weather, I’ll be in the garage into the wee hours. Hope you enjoy the update. I’ll keep building!
This took a bit of ‘ciphering. There’s an outer radius of 17.5 inches and inside of 16.25. This will become the 35 inch cockpit ring (just in front of the console). I cut a total of eight pieces, 4 from each thickness of wood so that I can stack them and achieve a width of 1.25.
Here they are glued and screwed. I staggered the pieces and with the screw placement, there’s some pivoting going on! That worked in my favor as I tried to get all the pieces to match up and at least resemble a circular shape. Success!
And a close-up of the faders installed. You may notice the markings above them as well... these are directly copied from the cockpit pano recently posted. I’m still trying to get a decent amount of screen accurate detail when possible.
I’m hoping for some major progress this weekend. The kids have promised to help paint the rest of the bed frame and with the nicer weather, I’ll be in the garage into the wee hours. Hope you enjoy the update. I’ll keep building!
Holy Wookiee
Active Member
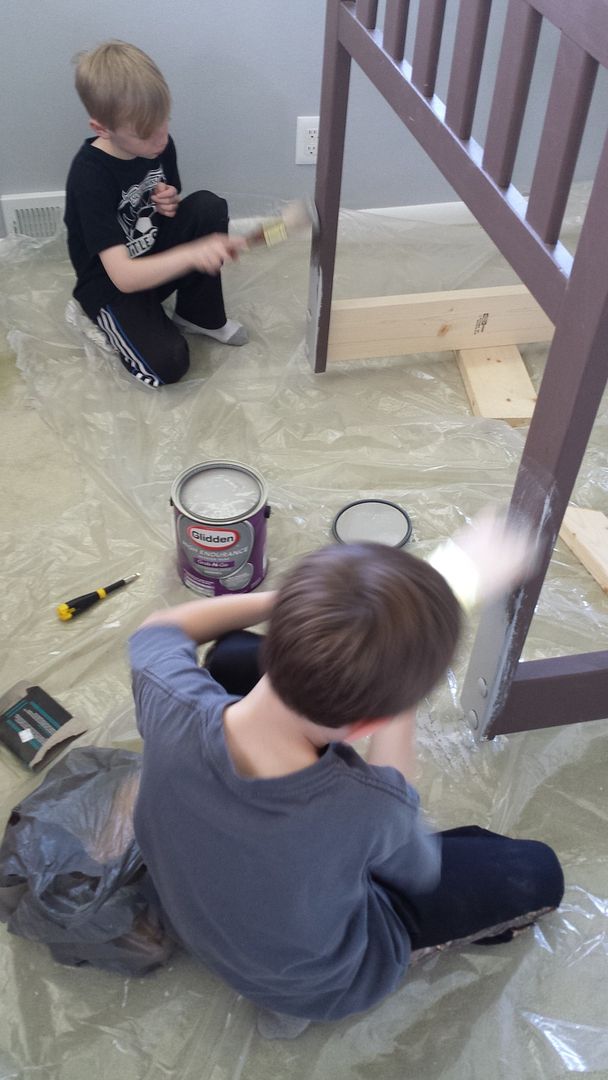
Major progress wasn’t in the stars this weekend… just baseball practice after baseball practice. The kids made good on their word though and we finished the bed frame.
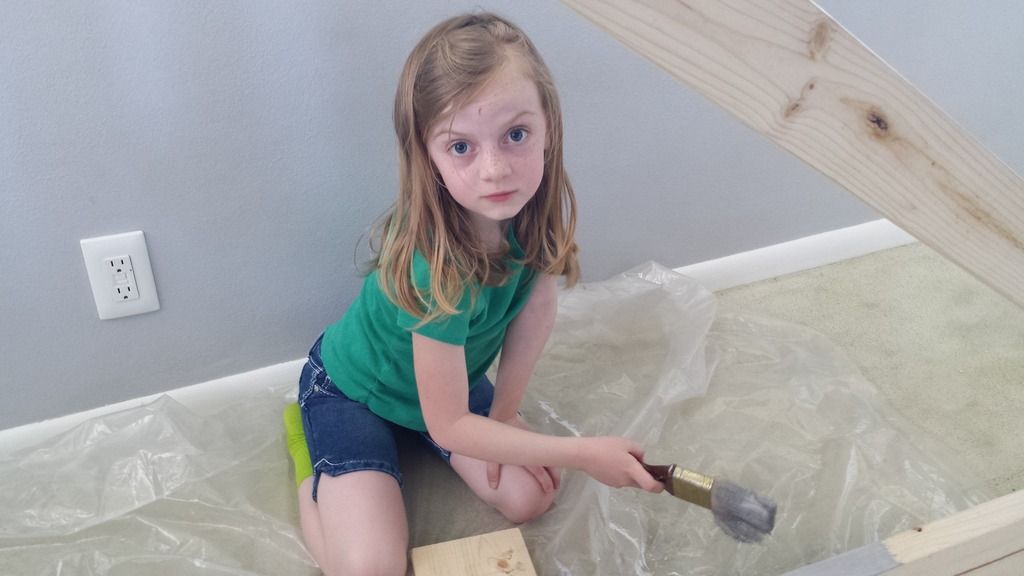
My daughter was less thrilled.
It wasn’t long before they were out on the trampoline and I was painting… wait for it… SOLO. The finished product -
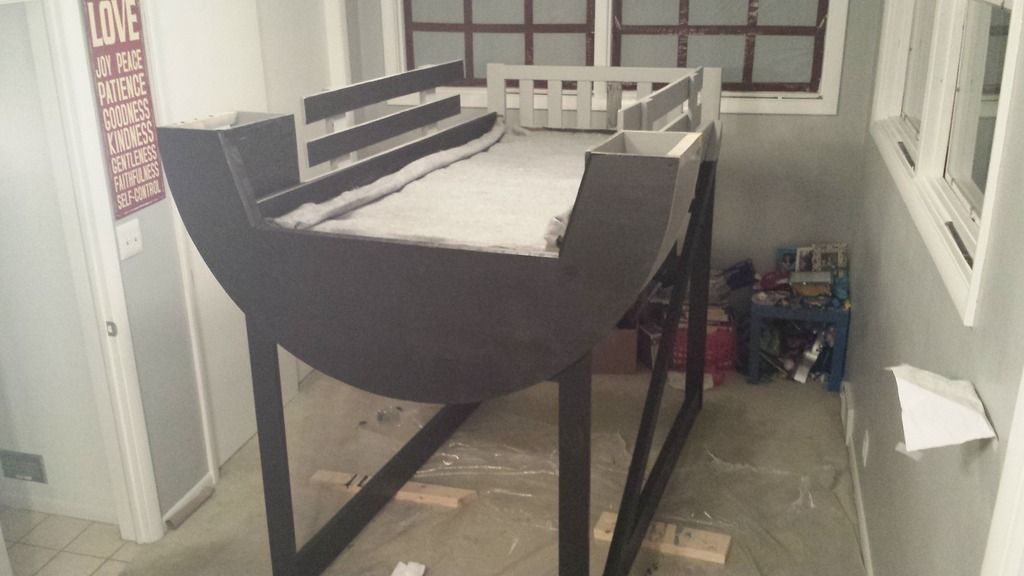
The outside is gray while the inside and frame are black. I plan on adding some detail to the exterior when it all comes together. I’ll keep building and keep the dad jokes to a minimum.
My daughter was less thrilled.
It wasn’t long before they were out on the trampoline and I was painting… wait for it… SOLO. The finished product -
The outside is gray while the inside and frame are black. I plan on adding some detail to the exterior when it all comes together. I’ll keep building and keep the dad jokes to a minimum.
MoSc0ut
New Member
Major progress wasn’t in the stars this weekend… just baseball practice after baseball practice. The kids made good on their word though and we finished the bed frame.
http://i649.photobucket.com/albums/uu215/HolyWookiee/MF/20160415_135051_zpswf2zsfdr.jpg
My daughter was less thrilled.
http://i649.photobucket.com/albums/uu215/HolyWookiee/MF/20160415_143058_zpsmpynoxxj.jpg
It wasn’t long before they were out on the trampoline and I was painting… wait for it… SOLO. The finished product -
http://i649.photobucket.com/albums/uu215/HolyWookiee/MF/20160417_231431_zpsproefkeg.jpg
The outside is gray while the inside and frame are black. I plan on adding some detail to the exterior when it all comes together. I’ll keep building and keep the dad jokes to a minimum.
I say keep the dad jokes coming! Awesome progress, I am really wishing my kids were smaller (or I was smaller) so that I could get in on some of this greatness! Great job!
Those switches look fantastic! Looking forward to seeing more. ")
Holy Wookiee
Active Member
I say keep the dad jokes coming! Awesome progress, I am really wishing my kids were smaller (or I was smaller) so that I could get in on some of this greatness! Great job!
That's very kind, MoSc0ut. Thank you. It's never too late to start some crazy project!
Those switches look fantastic! Looking forward to seeing more.
Thanks, SK! You haven't seen anything yet... wait till you see the ghetto-tastic way I'm making paddle switches
Oh Man So cool, How did you go about designing it. Is there are pattern you used or just reference pics and went for it?
Great work on the lights and switches and paint job!
Thank you, canister! I started by measuring the room and existing bed frame. After I figured the outside diameter, I just started sketching and trying to fit whatever I could into the design. I grabbed a lot of reference photos and trolled SK's build extensively. The official panoramic that just came out blew me away but I still have time to re-design the console to get it closer to the TFA details. Overall, it's been a fun process that I wish I had more time for. As I say though... I'll keep building!
Holy Wookiee
Active Member
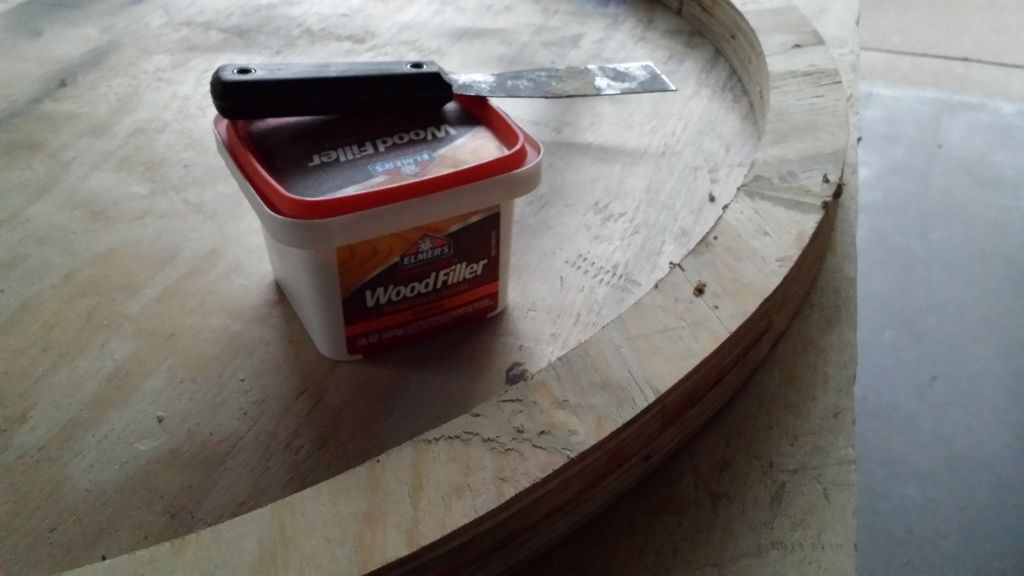
Tonight, I snuck into the garage for 1/2 hour and applied some wood filler to the large cockpit ring. I can already tell that this is going to be very difficult to match up the edges without a LOT of sanding (or perhaps more jigsawing).
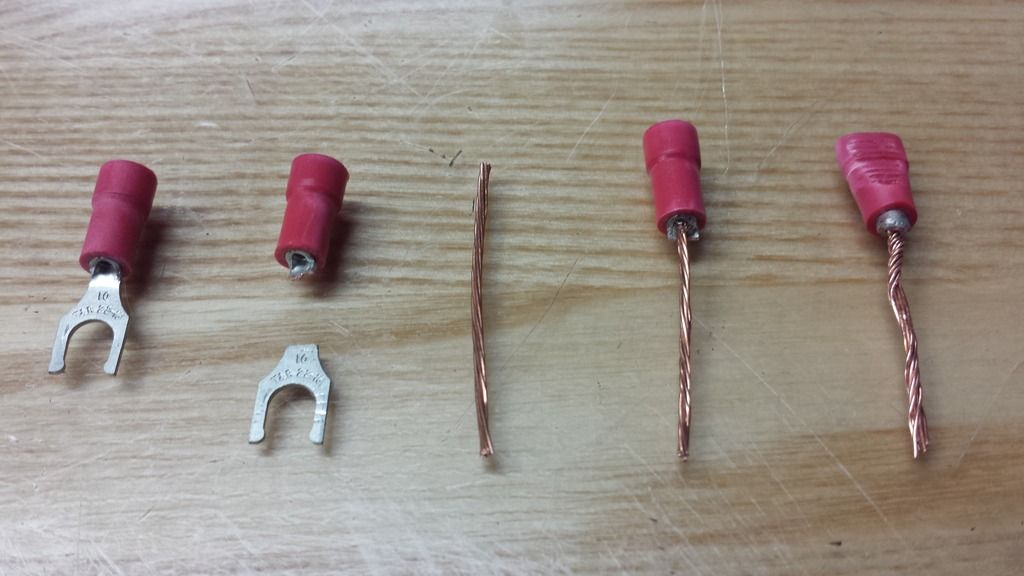
I strive to make this project as inexpensive as possible without compromising safety. I bought Christmas lights on clearance, picked up used hardware at the Restore, even snatched stuff from curbs. Now I'm faced with a dilemma... what to do about the (literally) hundreds of toggle switches? My first inclination was to leave the area blank but I promised SK some ghetto paddle switches so here we go. Here's my process and the results. First (left) is an electric wiring connector of some kind. I found bags of 25 for a quarter so I cleaned them out. Next, I cut the end off and stripped some old speaker wire. Then came a bead of glue and thread the wire through. After that, I crimped the end with plyers (BONUS - the serrations on the tool left a nice grip-like pattern).
After hitting it with a paint marker, I'm left with this:
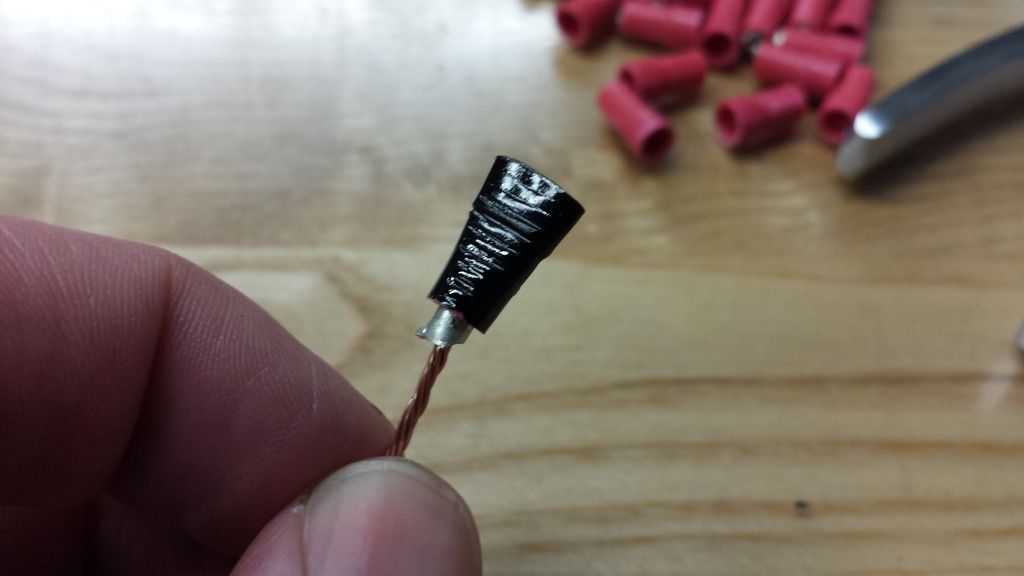
I finished a few and installed them in my test piece by drilling 1/16" hole and inserting the wire.
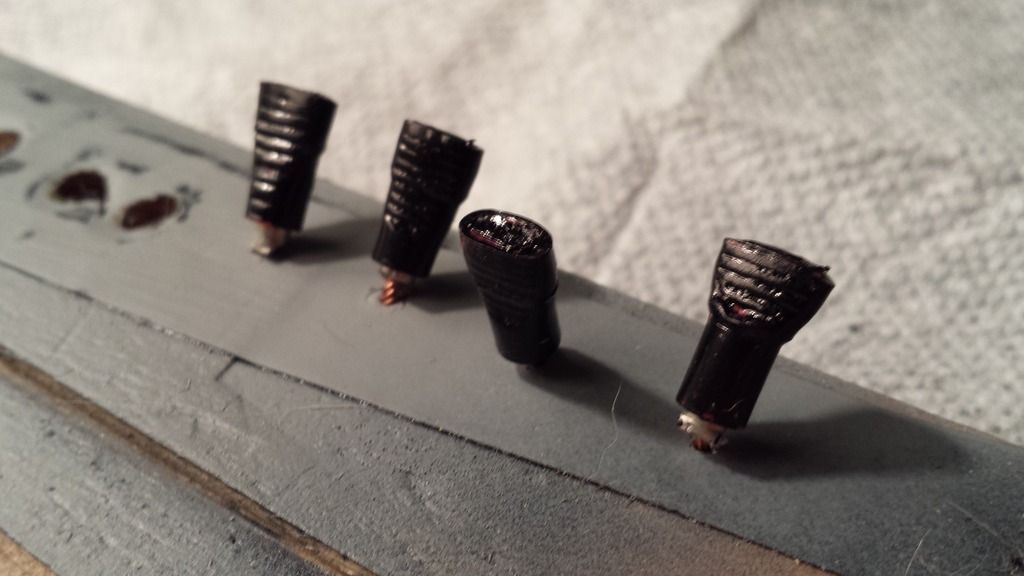
And there you have it! The drawbacks include time consuming labor, no click noise when flipping, and they can be mashed in any direction. On the bright side, they're ONE PENNY each compared to almost a dollar, they look good from a distance, and it gives the children something tactile to manipulate. I'm curious to hear your thoughts... should I crank them out and install? Go back to the drawing board? Should I leave the areas blank? Should I get this mole with irregular borders looked at? Let me know!
In the meantime, I'll keep building!
I strive to make this project as inexpensive as possible without compromising safety. I bought Christmas lights on clearance, picked up used hardware at the Restore, even snatched stuff from curbs. Now I'm faced with a dilemma... what to do about the (literally) hundreds of toggle switches? My first inclination was to leave the area blank but I promised SK some ghetto paddle switches so here we go. Here's my process and the results. First (left) is an electric wiring connector of some kind. I found bags of 25 for a quarter so I cleaned them out. Next, I cut the end off and stripped some old speaker wire. Then came a bead of glue and thread the wire through. After that, I crimped the end with plyers (BONUS - the serrations on the tool left a nice grip-like pattern).
After hitting it with a paint marker, I'm left with this:
I finished a few and installed them in my test piece by drilling 1/16" hole and inserting the wire.
And there you have it! The drawbacks include time consuming labor, no click noise when flipping, and they can be mashed in any direction. On the bright side, they're ONE PENNY each compared to almost a dollar, they look good from a distance, and it gives the children something tactile to manipulate. I'm curious to hear your thoughts... should I crank them out and install? Go back to the drawing board? Should I leave the areas blank? Should I get this mole with irregular borders looked at? Let me know!
In the meantime, I'll keep building!
That is Brilliant! And at a penny each? You can't beat it!
Holy Wookiee
Active Member
That is Brilliant! And at a penny each? You can't beat it!
You're too kind, SK. Thank you!
Seems like a perfectly acceptable solution, remember when building backgrounds for movies they do lots of "looks like" stuff so this seems right in that vein!
Thank you, mmhnc. I've used cardboard and spray paint for great results when making backdrops and sets. My hesitation was that my kids will be handling and playing with these switches.
The final 'aye' vote came this morning when my eldest saw my test piece and was like, "Are those... switches?!?" lol. Yeah kid, they'll move but you have to supply the sound effects and imagination :lol Looks like I've got some crimping to do! I'll keep building!
Holy Wookiee
Active Member
I had a surprisingly productive weekend… my insomnia is your gain! The new lights arrived about .020” bigger than what I had planned. It doesn’t sound like much until you’re trying to jam them into the holes. I reamed the holes and hand filed almost every light to ensure a good fit. What a task! I also got busy on making over 100 switches so my hands hurt… bad. But it will all be worth it in the end, right? Enough talk… to the picture gallery!
First up, I got these plastic pieces and filled them with cotton to diffuse the light.

They’re going on the co-pilot side in lieu of the new white panels with red markings seen in the TFA version. Not screen accurate but fun to look at anyway.

I installed several switches by carefully drilling through the panels and praying that I miss the wires! Just threaded the switches in and hot glued the back afterwards.

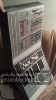
Here is the (nearly) finished product. Sorry about the blurry pic! I still have to add some greeblies and weather, but other than that, it’s done!

And as a BONUS… I took a video of the panel in all its glory
I hope you enjoy viewing as much as I do making it. I am thrilled with the results and look forward to getting back in the garage this week. After these panels are complete, I want to build out the nose. And you know I’ll keep building!
First up, I got these plastic pieces and filled them with cotton to diffuse the light.
They’re going on the co-pilot side in lieu of the new white panels with red markings seen in the TFA version. Not screen accurate but fun to look at anyway.
I installed several switches by carefully drilling through the panels and praying that I miss the wires! Just threaded the switches in and hot glued the back afterwards.
Here is the (nearly) finished product. Sorry about the blurry pic! I still have to add some greeblies and weather, but other than that, it’s done!
And as a BONUS… I took a video of the panel in all its glory
I hope you enjoy viewing as much as I do making it. I am thrilled with the results and look forward to getting back in the garage this week. After these panels are complete, I want to build out the nose. And you know I’ll keep building!
Attachments
-
 20160424_065224_zpsl352dldg.jpg236.9 KB · Views: 40
 -
 20160424_065224_zpsl352dldg.jpg236.9 KB · Views: 32
 -
 20160424_205933_zpsx2qxabvs.jpg307.4 KB · Views: 44
 -
 20160424_205933_zpsx2qxabvs.jpg307.4 KB · Views: 37
 -
 20160424_205953_zpsaqgmmrje.jpg229.2 KB · Views: 41
 -
 20160424_205953_zpsaqgmmrje.jpg229.2 KB · Views: 37
 -
 20160424_224620_zpsy3jcacdn.jpg796.1 KB · Views: 52
 -
 20160424_224620_zpsy3jcacdn.jpg796.1 KB · Views: 47
Last edited by a moderator:
Friendly flyer
Well-Known Member
This is so cool! Lucky kids!
Similar threads
- Replies
- 18
- Views
- 1,563