You are using an out of date browser. It may not display this or other websites correctly.
You should upgrade or use an alternative browser.
You should upgrade or use an alternative browser.
Show your custom Lightsabers!
- Thread starter GreenCircleCube
- Start date
-
- Tags
- custom highrepublic lightsaber
GreenCircleCube
Active Member
This Speedgun flash was in a lot of vintage 3 cell flashes and reflectors from a recent ebay purchase. It was originally last in line to convert, but for some reason it went right to the front.
The grips are my usual ones, everything drilled & tapped. The D-ring and the pieces of smooth/textured chrome tape came from The Custom Saber Shop.
The circuit board is cut from a a bunch of boards that I scavenged from work around 15 years ago. I had it bolted to the clamp bar all by itself and it looked "blah." A piece of my grip material turned upside down and put between the clamp bar and circuit board made it look right to me.
The piece in the emitter is from the lot of flashes/reflectors and it's held in place by the long greeblie on the bottom of the flash. It's threaded and it holds the emitter piece in like a set screw.
This flash tube got the same 220 grit/320 grit wet-sanding treatment, just like my King Sol saber a few posts back.
All in all a neat little saber that would look good in the hands of a Jedi that with a smaller build. These Speedguns are 9" long. I'm not including the extra length provided by the emitter addition.
http://i1200.photobucket.com/albums/bb333/Scott_D_1969_007/Prop Collection/DSC03611_zpscsskoswf.jpg
http://i1200.photobucket.com/albums/bb333/Scott_D_1969_007/Prop Collection/DSC03612_zpsewt0j7wn.jpg
http://i1200.photobucket.com/albums/bb333/Scott_D_1969_007/Prop Collection/DSC03613_zpsf8ky4yit.jpg
This looks awesome. Looks very clean!
- - - Updated - - -
The last out of the bench:
http://i1065.photobucket.com/albums/u391/Ben_Hobbies/SAM_4758_zpspo2spkc3.jpg
http://i1065.photobucket.com/albums/u391/Ben_Hobbies/SAM_4759_zpsiiy2m3tv.jpg
http://i1065.photobucket.com/albums/u391/Ben_Hobbies/SAM_4760_zpsged2bavu.jpg
http://i1065.photobucket.com/albums/u391/Ben_Hobbies/SAM_4761_zpskf3loiqa.jpg
http://i1065.photobucket.com/albums/u391/Ben_Hobbies/SAM_4762_zpsq2oke88m.jpg
http://i1065.photobucket.com/albums/u391/Ben_Hobbies/SAM_4763_zpsprvvcaeu.jpg
http://i1065.photobucket.com/albums/u391/Ben_Hobbies/SAM_4765_zpsrl9zn1ju.jpg
http://i1065.photobucket.com/albums/u391/Ben_Hobbies/SAM_4766_zpsh6hwoftk.jpg
http://i1065.photobucket.com/albums/u391/Ben_Hobbies/SAM_4767_zpsngelt5cn.jpg
http://i1065.photobucket.com/albums/u391/Ben_Hobbies/SAM_4768_zpsibdauz7g.jpg
http://i1065.photobucket.com/albums/u391/Ben_Hobbies/SAM_4769_zpsnumom8jo.jpg
http://i1065.photobucket.com/albums/u391/Ben_Hobbies/SAM_4770_zpspkmd9pej.jpg
http://i1065.photobucket.com/albums/u391/Ben_Hobbies/SAM_4771_zpsk3y5rliu.jpg
http://i1065.photobucket.com/albums/u391/Ben_Hobbies/SAM_4772_zpsncjtpi9e.jpg
http://i1065.photobucket.com/albums/u391/Ben_Hobbies/SAM_4775_zpsrzckqwqm.jpg
http://i1065.photobucket.com/albums/u391/Ben_Hobbies/SAM_4808_zpsuumkfxfp.jpg
http://i1065.photobucket.com/albums/u391/Ben_Hobbies/SAM_4809_zpspax7q5v1.jpg
http://i1065.photobucket.com/albums/u391/Ben_Hobbies/SAM_4815_zpszs7anl2t.jpg
http://i1065.photobucket.com/albums/u391/Ben_Hobbies/SAM_4816_zps2njvcu2x.jpg
http://i1065.photobucket.com/albums/u391/Ben_Hobbies/SAM_4817_zpsr1ghlsxt.jpg
http://i1065.photobucket.com/albums/u391/Ben_Hobbies/SAM_4818_zpsihxlyt19.jpg
http://i1065.photobucket.com/albums/u391/Ben_Hobbies/SAM_4819_zpssoqoe5ot.jpg
http://i1065.photobucket.com/albums/u391/Ben_Hobbies/SAM_4820_zpsfn2xniyi.jpg
http://i1065.photobucket.com/albums/u391/Ben_Hobbies/SAM_4821_zpsl1xzbwvm.jpg
http://i1065.photobucket.com/albums/u391/Ben_Hobbies/SAM_4822_zps09soovqz.jpg
http://i1065.photobucket.com/albums/u391/Ben_Hobbies/SAM_4823_zpsed09kgfy.jpg
Awesome weathering job!
Last edited by a moderator:
RocketProps
New Member
Hey everyone! I have recently gotten in to saber building. These are pics of my Mk III Nightsaber of Ultimate Truth, a commission for a bicycle game that I am a part of. In addition to machining all of the parts myself, I have also been working on a project I will tease right now. I am currently developing the TOSSP, The Open Source Saber Project. At the moment, I have completed a 10W, 4 channel (1 Amp on each channel), up to 8 LEDs per channel, with PWM dimming via an external microcontroller such as an arduino pro mini. This saber, has color changing, eventually will have color mixing for custom colors. After checking out the saber pics, check out the bicycle gang site. http://imgur.com/a/8n63G www.scul.org


Last edited:
The last out of the bench:
http://i1065.photobucket.com/albums/u391/Ben_Hobbies/SAM_4758_zpspo2spkc3.jpg
http://i1065.photobucket.com/albums/u391/Ben_Hobbies/SAM_4759_zpsiiy2m3tv.jpg
http://i1065.photobucket.com/albums/u391/Ben_Hobbies/SAM_4760_zpsged2bavu.jpg
http://i1065.photobucket.com/albums/u391/Ben_Hobbies/SAM_4761_zpskf3loiqa.jpg
http://i1065.photobucket.com/albums/u391/Ben_Hobbies/SAM_4762_zpsq2oke88m.jpg
http://i1065.photobucket.com/albums/u391/Ben_Hobbies/SAM_4763_zpsprvvcaeu.jpg
http://i1065.photobucket.com/albums/u391/Ben_Hobbies/SAM_4765_zpsrl9zn1ju.jpg
http://i1065.photobucket.com/albums/u391/Ben_Hobbies/SAM_4766_zpsh6hwoftk.jpg
http://i1065.photobucket.com/albums/u391/Ben_Hobbies/SAM_4767_zpsngelt5cn.jpg
http://i1065.photobucket.com/albums/u391/Ben_Hobbies/SAM_4768_zpsibdauz7g.jpg
http://i1065.photobucket.com/albums/u391/Ben_Hobbies/SAM_4769_zpsnumom8jo.jpg
http://i1065.photobucket.com/albums/u391/Ben_Hobbies/SAM_4770_zpspkmd9pej.jpg
http://i1065.photobucket.com/albums/u391/Ben_Hobbies/SAM_4771_zpsk3y5rliu.jpg
http://i1065.photobucket.com/albums/u391/Ben_Hobbies/SAM_4772_zpsncjtpi9e.jpg
http://i1065.photobucket.com/albums/u391/Ben_Hobbies/SAM_4775_zpsrzckqwqm.jpg
http://i1065.photobucket.com/albums/u391/Ben_Hobbies/SAM_4808_zpsuumkfxfp.jpg
http://i1065.photobucket.com/albums/u391/Ben_Hobbies/SAM_4809_zpspax7q5v1.jpg
http://i1065.photobucket.com/albums/u391/Ben_Hobbies/SAM_4815_zpszs7anl2t.jpg
http://i1065.photobucket.com/albums/u391/Ben_Hobbies/SAM_4816_zps2njvcu2x.jpg
http://i1065.photobucket.com/albums/u391/Ben_Hobbies/SAM_4817_zpsr1ghlsxt.jpg
http://i1065.photobucket.com/albums/u391/Ben_Hobbies/SAM_4818_zpsihxlyt19.jpg
http://i1065.photobucket.com/albums/u391/Ben_Hobbies/SAM_4819_zpssoqoe5ot.jpg
http://i1065.photobucket.com/albums/u391/Ben_Hobbies/SAM_4820_zpsfn2xniyi.jpg
http://i1065.photobucket.com/albums/u391/Ben_Hobbies/SAM_4821_zpsl1xzbwvm.jpg
http://i1065.photobucket.com/albums/u391/Ben_Hobbies/SAM_4822_zps09soovqz.jpg
http://i1065.photobucket.com/albums/u391/Ben_Hobbies/SAM_4823_zpsed09kgfy.jpg
im a big fan of this, if i were a jedi in real life id design my saber like this. sleek and simple, big thumbs up!
Scott D
Sr Member
If someone chose to scroll through the following pics wihtout reading, they would say to themselves "Oh, look, Scott D built up another Peaksaber™ *Yawn*"
WRONG.") This is a 3 cell Minicam flash that I got in a lot of flashes on Ebay recently. It does look a lot like one of my converted peak flashes, though.
This is a 3 cell Minicam flash that I got in a lot of flashes on Ebay recently. It does look a lot like one of my converted peak flashes, though.

The flash had a lot of minor scratches. After disassembly, the main tube got turned in a piece of 3M brown scuffing pad, followed by wet-sanding with an old piece of 1000 grit sandpaper. Made it look nice.
The D-Ring, chrome textured tape, grips and replica Graflex clamp came from The Custom Saber Shop. The 7 grips are actually Blast-Tech grips (a nice suprise) and the clamp is from Parks, I'm guessing. These Parks clamps are out of spec, by the way. The bands are a little small when compared to a Romans Empire replica Graflex clamp.
The circuit board is from a Magnavox Odyssey2 video game cartridge, cut to properly fit in the wider gap of the Parks clamp.
The black button within the knurled knob near the emitter is not original to this flash. There used to be nothing except a little red button there and it looked very "blah," The pieces that make up the new button came from my greeblie stash. (vintage camera flash parts)
The D-ring is attached to an existing 1/4" X 20 threaded hole in the end cap.
Another custom saber project completed. I've been trying to work up the inspiration to finish my "Brute 2.0" custom hardware saber... maybe that'll be next in line.


WRONG.
This is a 3 cell Minicam flash that I got in a lot of flashes on Ebay recently. It does look a lot like one of my converted peak flashes, though. The flash had a lot of minor scratches. After disassembly, the main tube got turned in a piece of 3M brown scuffing pad, followed by wet-sanding with an old piece of 1000 grit sandpaper. Made it look nice.
The D-Ring, chrome textured tape, grips and replica Graflex clamp came from The Custom Saber Shop. The 7 grips are actually Blast-Tech grips (a nice suprise) and the clamp is from Parks, I'm guessing. These Parks clamps are out of spec, by the way. The bands are a little small when compared to a Romans Empire replica Graflex clamp.
The circuit board is from a Magnavox Odyssey2 video game cartridge, cut to properly fit in the wider gap of the Parks clamp.
The black button within the knurled knob near the emitter is not original to this flash. There used to be nothing except a little red button there and it looked very "blah," The pieces that make up the new button came from my greeblie stash. (vintage camera flash parts)
The D-ring is attached to an existing 1/4" X 20 threaded hole in the end cap.
Another custom saber project completed. I've been trying to work up the inspiration to finish my "Brute 2.0" custom hardware saber... maybe that'll be next in line.
Last edited by a moderator:
Mean Obiwan
Well-Known Member
Well guys, remember that tube thing my dad gave me? Finally got it pretty much done tonight. Against the better judgment of other members I decided to make that black piece (now painted silver) the emitter. Here's what I got so far.

how to use print screen

photo hosting sites
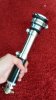
Pommel made from a sink knob acquired at Lowes

photo hosting
Here's the emitter. I added an additional piece to the top. Some metal thing, have no clue what it is, but I think it looks great.

free uploader
Some additional grips on top

photo hosting
Right now its using recycled t-track-like grips from my previous saber since that one got better ones.

image upload no compression

free pic
Love the whole sink knob thing. I will probably continue this method on future sabers.

image upload
how to use print screen
photo hosting sites
Pommel made from a sink knob acquired at Lowes
photo hosting
Here's the emitter. I added an additional piece to the top. Some metal thing, have no clue what it is, but I think it looks great.
free uploader
Some additional grips on top
photo hosting
Right now its using recycled t-track-like grips from my previous saber since that one got better ones.
image upload no compression
free pic
Love the whole sink knob thing. I will probably continue this method on future sabers.
image upload
Luke the Belter
Well-Known Member
I found the first saber I built.
It is a Qui Gon hilt out of wood.


It is a Qui Gon hilt out of wood.
Scott D
Sr Member
Looks good Scott D, ... though to me it's shouting out for an emitter kind type of shroud or extension on top .... but that's just me :wacko
Chaim
Thanks, Chaim. :cool
Yeah, I think that is where our tastes differ. "Less is more" has always been my primary saber building style. I am working on two Heiland Sols that are going to have Heiland shrouds on them when completed, though. One looks like the vader shroud and the other is the shorter version.
I made a jig on my borrowed drill press and drilled 32 stainless steel grips after cutting them to length last weekend. Enough for 4 custom sabers. One set is for my Hardware Brute 2.0 saber, another set was used on the custom below.
This Peak 3 cell came in an ebay lot of flashes purchased recently and I considered it to be a "beater." Lots of small dings and dents. The clamp is apparently an earlier version without the flip-lever. It looks like a King Sol clamp, but it isn't as wide. It was missing the endcap, but there are spares in my stash, so that was not a problem.
This one was kind of an oddball when compared to my other (nicer) Peak flashes, so I went in a slightly different direction with it.
My thought was "If I wanted to build a wearable Lightsaber prop to go with a jedi costume, what would I build?"
The first thing would be to use a Peak 3 cell, of course, and the second would be to make it sturdy. Everything bolted together and no risk of losing parts while wearing it.
The eight grips are my usual stainless steel ones, cut to 3-5/8". The D-ring came from The Custom Saber Shop and the circuit board is from a 1970's Magnavox Odyssey2 video game cartridge. Big thanks again to Dr. Talyn for finding these. :thumbsup They look great on custom sabers. It's hand-cut to fit tight in the clamp grooves, so no bolting/gluing needed.
I like using chrome textured tape on my customs, but that wouldn't survive while costuming, so it was left off.
The endcap is "pinned" to the tube under two of the grips, using two tiny 1/72 phillips head screws and flat washers. No chance of the endcap twisting loose while wearing it.
Last edited by a moderator:
Scott D
Sr Member
Finished up three more customs over the past few weeks. All started out as King Sol 3 cell flashes.
One was in excellent condition, one was in good condition with a few finish issues, and the third one was in pretty bad condition. One of the clamp's two set screws was gone and the other was loose, so it scratched up one side of the tube. I bought the rough one to get the clamp and shroud, but after cleaning it up, I thought it could still be made into a decent custom. Grips can (and did) cover up a lot of the scratches.

There's a few minor differences, but I was going for a similar look for all three. All the usual refinements, built sturdy as possible.
The nice one with the taller black button is the "hero" and the other two are "Stunts."


One was in excellent condition, one was in good condition with a few finish issues, and the third one was in pretty bad condition. One of the clamp's two set screws was gone and the other was loose, so it scratched up one side of the tube. I bought the rough one to get the clamp and shroud, but after cleaning it up, I thought it could still be made into a decent custom. Grips can (and did) cover up a lot of the scratches.
There's a few minor differences, but I was going for a similar look for all three. All the usual refinements, built sturdy as possible.
The nice one with the taller black button is the "hero" and the other two are "Stunts."
Last edited by a moderator:
Scott D
Sr Member
Nice. What about adding that shroud I see?
Chaim
Thanks!
The shroud is for one of my Heiland Sol custom projects. The hard work (making the grips) is already done, These will get assembled soon.

mikemakesmovies
New Member
My first saber: Custom
View attachment 525589View attachment 525590 Not much to say about this one. It was the fist thing I've ever built out of metal so far and it's a little wonky in some places but I'm proud of it. Mistakes were made and lessons were learned.
Second saber build: Kylo Ren replica
View attachment 525591View attachment 525592 You know what I said about lessones learned? Well here is the lesson in action. It is purely PVC pipe. No glue or anything at the moment.Its going to take some major finishing work but I am really happy how it turned out. So far
Brevin Din-Shay
Sr Member


Scott D
Sr Member
Back in post #248, I posted pics of my hardware "Brute" custom saber, which was loosely based on the Mara Jade Lightsaber. A few posts later, I had mentioned that I had enough parts in my greeblie stash to build another one. Here's the final result.
My original Brute saber is 12" long. This one was cut down to 11". The clamps are originally from a Heiland SOL and a Heiland Syncronar. The SOL clamps do not have sidebars, so those were fabricated from a couple pieces of 1/4" steel. The emitter/innards are from a Graflite slave flash. All of the rectanguler slots were cut with a dremel tool, along with a lot of hand-filing to match the sockets in the Graflite innards.
The circuit board in the forward clamp is from a section of a Magnavox Odyssey 2 video game cartridge that I normally do not use on my saber projects. The knob that holds it in place is from a Heiland shroud. The threads were the same, so no need to re-tap.
Total cost for this one was less than $20.00 just like my first version. The only actual purchases were the sink tube and the 16 stainless steel button-head allen head screws.
Last edited by a moderator:
Delerane
New Member
Hi guys !
Here's my lightsaber:

This is the first one I've build. Of course it is not as good as someone we can see it but I think it is not bad !
It's a big one, a bit too big I think but I really like it. It is 27,2cm long. It looks like a big torch lamp !


All made of silver and black part, there is a golden one at the pommel.
Here's a detail of the blade source:

And here of the pommel:

If you want to see more of it, and to see pics taken from the construction, here's my topic: http://www.therpf.com/showthread.php?t=246716
Here's my lightsaber:
This is the first one I've build. Of course it is not as good as someone we can see it but I think it is not bad !
It's a big one, a bit too big I think but I really like it. It is 27,2cm long. It looks like a big torch lamp
! All made of silver and black part, there is a golden one at the pommel.
Here's a detail of the blade source:
And here of the pommel:
If you want to see more of it, and to see pics taken from the construction, here's my topic: http://www.therpf.com/showthread.php?t=246716
Attachments
Delerane
New Member
I feel your pommel is a bit to small thus giving the impression of a lightsaber not fully balanced in the Force ... perhaps a larger part could be sourced to add on?
Chaim
Yes that's right the pommel is small. I wanted someone bigger but I found nothing at the hardware store... Yes it is possible to add another part to it (I have a big octogonal ring that could be nice but I prefer the actual version). However it is pretty balanced. It's heavier at the upper part (the shroud) but it is very confortable to take it in my hands so it's not really a problem. But as I said, there's still a hole under the pommel and I have to find something to pulg it. So maybe a new pommel will come later
.Delerane
New Member
Okay so I changed the pommel.
Here is the actual version of my lightsaber:


If you want to see more, you are welcomed on my topic: http://www.therpf.com/showthread.php?t=246716 !
Thank you Sym-Cha for your comment !
Here is the actual version of my lightsaber:
If you want to see more, you are welcomed on my topic: http://www.therpf.com/showthread.php?t=246716 !
Thank you Sym-Cha for your comment
!Peep Williams
Well-Known Member
Back in post #248, I posted pics of my hardware "Brute" custom saber, which was loosely based on the Mara Jade Lightsaber. A few posts later, I had mentioned that I had enough parts in my greeblie stash to build another one. Here's the final result.
My original Brute saber is 12" long. This one was cut down to 11". The clamps are originally from a Heiland SOL and a Heiland Syncronar. The SOL clamps do not have sidebars, so those were fabricated from a couple pieces of 1/4" steel. The emitter/innards are from a Graflite slave flash. All of the rectanguler slots were cut with a dremel tool, along with a lot of hand-filing to match the sockets in the Graflite innards.
The circuit board in the forward clamp is from a section of a Magnavox Odyssey 2 video game cartridge that I normally do not use on my saber projects. The knob that holds it in place is from a Heiland shroud. The threads were the same, so no need to re-tap.
Total cost for this one was less than $20.00 just like my first version. The only actual purchases were the sink tube and the 16 stainless steel button-head allen head screws.
Every time I see one of your posts I am just filled with admiration for your work. I keep going back to your Peak Sabers picture with all of them lined up and can't stop drooling! I've got a few star wars related props and projects going on but a lightsaber is not presently one of them. I'm constantly searching for a vintage flash like your Peak flashes or King Sol's to name a few, but without much luck. One day I hope to build a custom OT inspired saber half as nice as anything you've made. Thank you for posting your projects and writing so much about them, it's always a joy to see your work.
Last edited by a moderator:
Similar threads
- Replies
- 20
- Views
- 1,252
- Replies
- 0
- Views
- 473