'70s starship scratchbuild

Will Vale

Member
Hi folks,

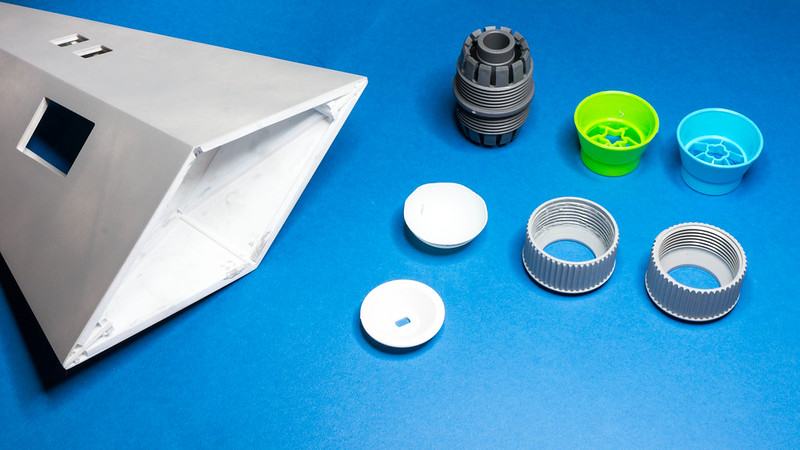
I've been messing around assembling some GW stuff since I finished the Viper but haven't really got my teeth into anything. And then I spotted an interesting part in a kit, turned it upside down, and went and got my big Chris Foss book out...

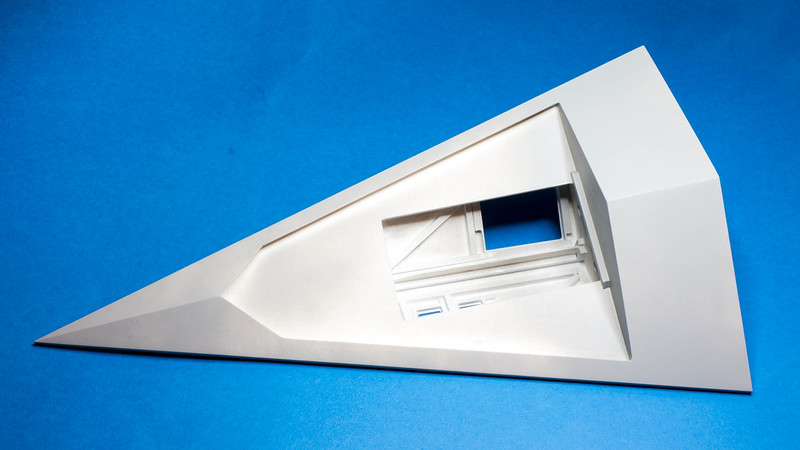
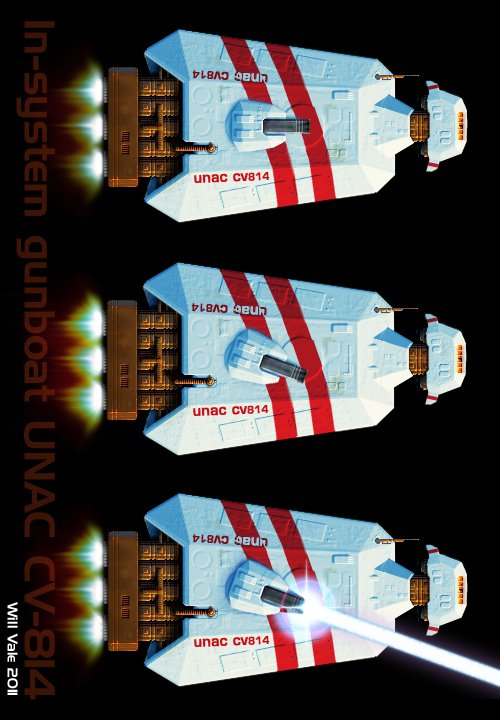
I've wanted to build some '70s or '80s sci-fi for a while and this should scratch that itch. The part I found (can you spot what it is?) looks great when inverted as an under-slung bridge. I did a couple of designs around this - one as a tug or recovery vehicle, with a hexagonal body and arms sticking out the front, and one as a more conventional starship with a pyramidal body.


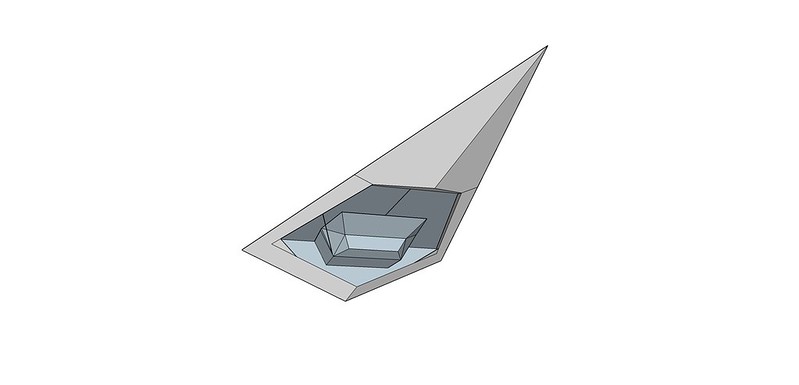
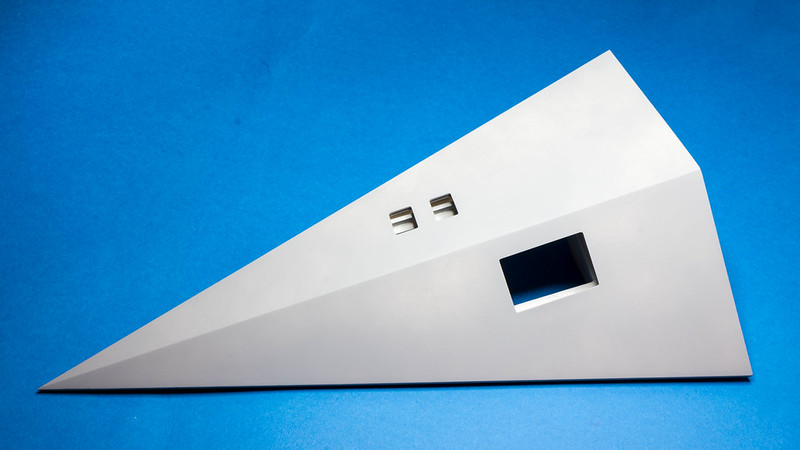
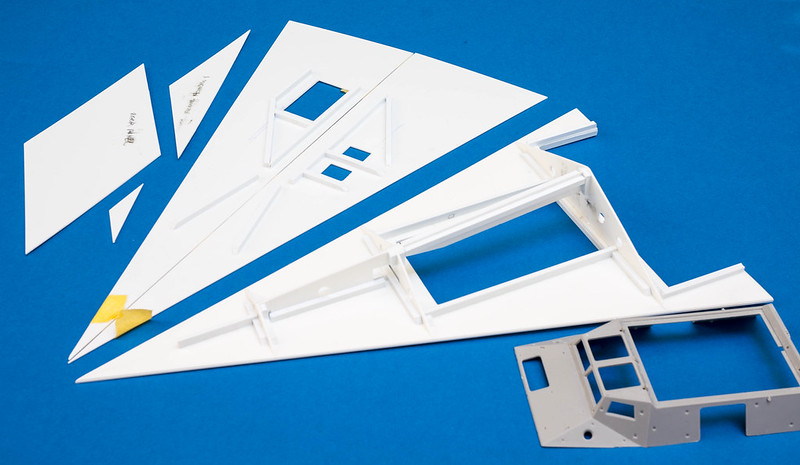
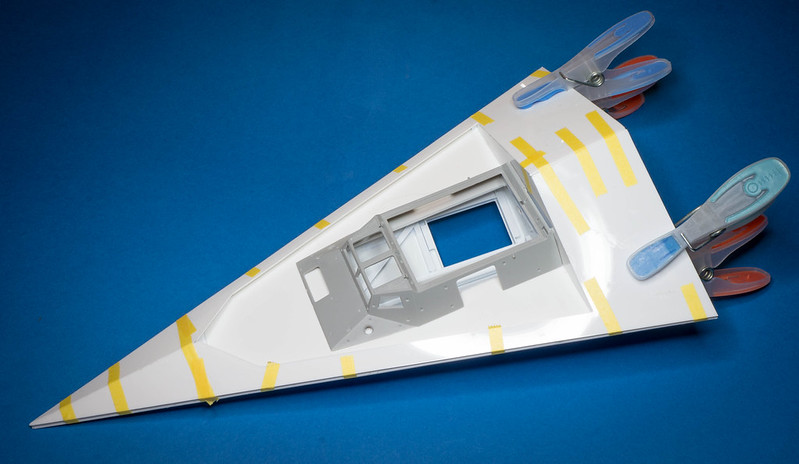
I taught myself to use Sketchup (very basically) at the weekend and worked out the dimensions, so last night I was able to cut some parts and tape them up:


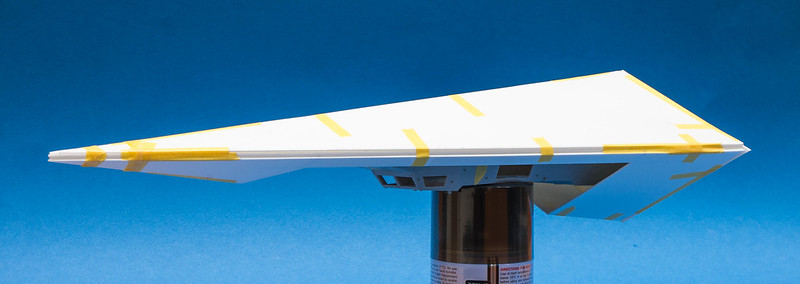
The core is a plate of 2mm styrene, and the rest is 1mm. I laid it out with a ruler and dividers, taking the dimensions from the Sketchup model, and cut the parts out with a Tamiya scriber. Amazingly, it fits quite well despite the model not accounting for thickness. I did have to build a second version of the rear plate though since my first attempt had the angles very slightly out.

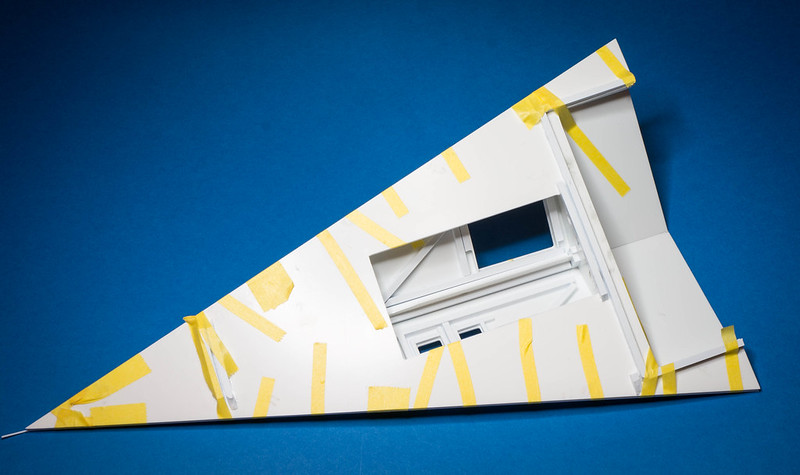
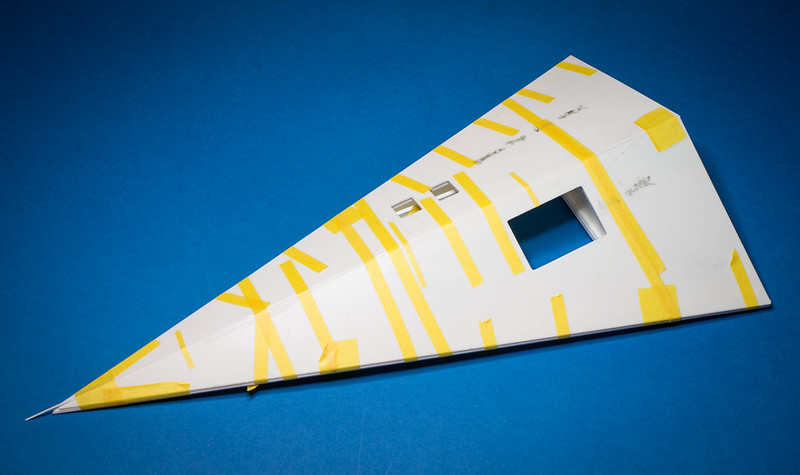
The idea is to cover it in plating and nurnies (flat ones on the surface, dense ones in the notch around the bridge) and paint it with bold stripes! Hopefully that will stop it from looking too much like a Star Destroyer.

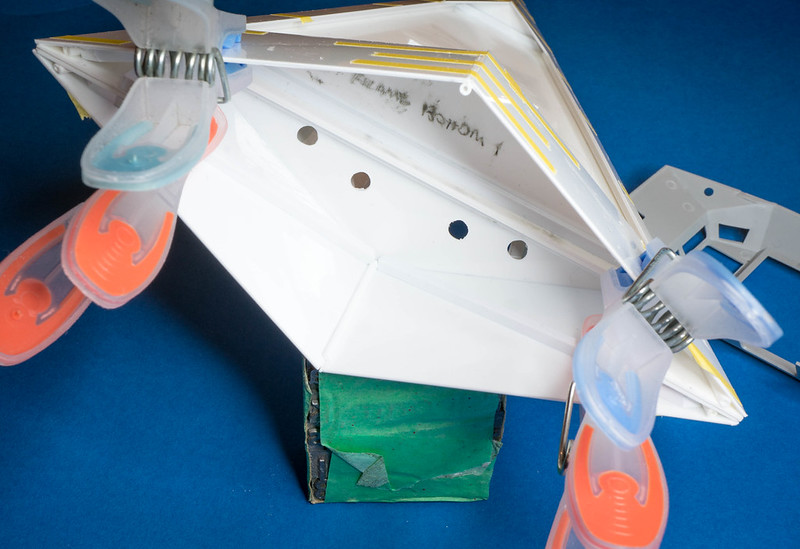
First of all though, I need to cut out various access hatches and internal access holes, then make the bulkheads to fix the angled plates to the core.

Cheers,

Will
 
It is indeed an M1117 - the Trumpeter kit. It does look a lot like the UCHG hover-thing cab but that's nearly twice the size and too dear to sacrifice!

@struschie Hey, nice to see you. I'm not sure what you mean about breaking the edges - it's all raw scribed-and-snapped pieces at the moment, unglued. I'm not sure if I want to try and profile them to give more gluing surface, or just go for it and build up the grooves with CA and talc later? Profiling means I might end up with short parts since I didn't allow extra for this when measuring and laying out.

W
 
Last edited:
I have the same kit, both kit's actually that's how I knew what it was.
Am trying to convert it into a hover vehicle like the truck for a diorama.
 
I know there are a lot of really cool Lego '70s book cover/Homeworld ships, I haven't seen many models though. Maybe I'm not looking in the right places?
 
Thanks! The finished one is quite nice - the card planning model seems to translate into very hard-edged shapes that suit the art. I don't know if I'd pay 2700 pounds for it though!

The other two are a bit deceptive as they're pictures of stands Photoshopped onto the original artwork. Keen to see how the yellow/black one turns out still.

Will
 
I had a committee meeting last night but I have managed to build up the skeleton of the upper hull:


Sorry about the blurry foreground - I was racing against a dying camera battery and didn't have my glasses on! Hopefully you can see the bracing bits. I measured the transverse bulkheads from the Sketchup model, added 1/8" strip to create slots so they'd stand vertical, and did the rest by cutting and trimming bits to fit in between the bulkheads.

Unsurprisingly, the spine didn't end up perfectly straight but I didn't have to sand it too much to remedy that. The top plates now fit quite well. Speaking of which, these have had some misc bracing added to the insides and I also cut out some holes for potential nurnie pits. I think the big one will probably hold a fold-out antenna of some kind, not sure about the two little ones.

I've fitted the slots for the underside bulkheads too (this has now eaten nearly a whole packet of 1/8" strip) and might get the top half of the hull closed up tonight. The thing which is putting me off is that I'm not sure if I want to fit LEDs or fibre in the front part of the ship. It's not big enough for lots of tiny windows, but maybe it would have a strobe or something near the front as well as/instead of near the back?

The other thing which needs considering is how and where to mount it. At the moment I think I might fit a brass tube or two against the rear bulkheads, which will give rather an off-centre mount, but otherwise it'll be in the way of the details on the underbelly.

I guess I also need to think if I want to display it in space, or hovering over some planet surface. It sort of feels like it shouldn't be inside an atmosphere, but the planet surface would look prettier...

Cheers,

Will
 
I decided to press on and get the hull together, since indecision is usually the thing that paralyses my builds. I cleaned up the openings first and lined them with 3mm and 2mm strip, so that I can easily insert the insides from inside the hull later.


Then I applied Contacta to the bulkheads and spine, fitted it all together with a styrene rod between the two plates at the spine, and taped it up. Then removed the tape a bit at a time and ran Extra-Thin into the joins, and replaced the tape after a few seconds.


I haven't glued the last few inches at the nose yet since I wanted to have something stable behind it first. That bit's not really got any support apart from the outer plates joining the central one.

I'm going to need to do a fair bit of CA-and-talc filling tomorrow, but it's quite exciting to see something which I was sketching on paper a few days ago turn into something I can hold.

Hopefully get the bottom half of the hull on tomorrow, so I can start doing something about the seams.

Edit: I forgot to say - I had a flash of inspiration yesterday and realised that what I'm building isn't exactly Foss-inspired, it's my subconscious trying to recreate the starship from the back pages of the Usborne Book of the Future. This was my bible as a kid, I probably haven't read it for 30 years, and yet what I have in mind for this build is spookily close to those pictures.

https://archive.org/stream/Usborne_Book_of_the_Future_1979_pointlessmuseum#page/n93/mode/2up

I even did some quick and dirty pixel art for a friend's game jam entry a couple of years ago which I realise now was channeling the same thing.


My brain is weird...

Cheers,

Will
 
Last edited:
Kind of amusing looking through that book.
Some of the things in it have already come and gone while others still aren't achieved.
 
It's funny isn't it? They absolutely nailed mobile 'phones, flat screen TVs and LCACs, the space stuff not so much.

I haven't done too much today, but I sealed up the nose, which required some fiddling to get the rod I'm using in the join to sit nicely between the two plates.

Then I fitted the lower bulkheads and laid out the lower hull. I discovered I'd just cut the central join between them off-centre. Or maybe I laid them out back to back? I forget. Anyway, one was wider than the other in the engine section. I trimmed a bit off and fitted them into place.


It fits reasonably well but I think the lower stern seam (the short one) might be skew? It could be an optical illusion though, I guess I'll find out tomorrow. You can see in the pic below - I think one side of the cut-and-replaced strip is straight, and the other is skew?


I've been reinforcing the angled joints from the inside with 3mm tube. This only gives small contact surfaces, but does guarantee that they'll be tangent to the plates so the joins end up being pretty strong. And it's easier than trying to sand wedges of the kind of length that would be needed!

Filler next :)

Will
 
Great to see that progress - as usual, you're fast. The benefit of smaller subjects. Lessons learned ;)
That book is coole - never saw it before!
For our project we didn't sand the edges but darkend it with black Edding and used an Exacto knife to roughly scrap off the edges. Worked pretty well as you might have seen from the containers and the hull. Even for this angle it should give you a tad more flat contact. The rod seems smarter though ;D
What scale should it be?
 
Thanks struschie!

I labelled it as 1/350 on Flickr. I'm assuming that the bridge windows are full-height and I reckon I could stand one of my Fujimi sailors behind them. I suppose if they were sitting down in pilot seats it could be as large as 1/144, which would give more options figure-wise. Plus those sailors are really small - maybe I should measure tomorrow :)

You scraping trick is good - Edding is a marker pen? Does that give you a guide as to the angle - when you eliminate the pen mark you know you're there?

I did most of the filling and sanding today - lots of CA and talc, it looks like a mess on my desk. Big cleanup tomorrow, then some primer to check the edges. I know they aren't quite right yet but I think the rest is pitting (which I can use filler on) rather than building up the angles which I was doing today.

The rear lower spine is definitely misaligned - I've done some sanding to try and change the angle, but it might be better to round it off and fit a couple of plating pieces on either side which are lined up?

I also bought some bits of dirt cheap plastic homewares from our local Japanese shop which look like they might make good engines.

Cheers,

Will
 
I thought Edding is global vrand - indeed black narker. And yes: Instant control due to contrast.
I hoped for some pictures of your mess :D
 
I've heard of Edding (vaguely) but they aren't a brand synonymous with "marker" like "Sharpie" is in the US. I was always more of a Rotring fan anyway :)

I was so ashamed of the mess that I tidied up the office/workroom and did a serious clean up. So not much modelling today, but I did put some primer on the hull to get a look at it. It appears I have a clean (ish) hull to work on. There are some pits in the outer edges which need filling with something a bit softer than CA, but they aren't really visible from this angle.


(Click for bigger)

The seam on the bottom is clearly not in line, I'll probably have to slice a bit off at the stern and make sure the outer skin pieces do line up and cover the mistake.


I also bought some more junk for possible engine parts - a hose coupler, some Japanese novelty sausage extruders, and the back bit of a suction cup hook. I'm not sure if primer will stick to any of these, but I guess I'll find out.


I was thinking about two engines, but that's a terrible design - if either one fails I don't think the ship can fly. There'd be no way (assuming that the main engines are a lot more powerful than the maneuvering system) to thrust without spinning. If there were three engines you could have one fail and always get thrust through the CoG.

Mind you, I could be totally wrong - I'm not a rocket scientist :)

Cheers,

Will
 
This thread is more than 9 years old.

Your message may be considered spam for the following reasons:

  1. This thread hasn't been active in some time. A new post in this thread might not contribute constructively to this discussion after so long.
If you wish to reply despite these issues, check the box below before replying.
Be aware that malicious compliance may result in more severe penalties.
Back
Top