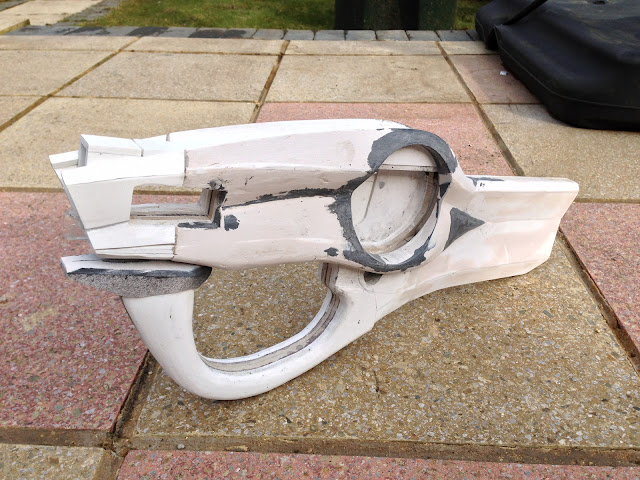
Borderlands 2 Maliwan Hellfire (Legendary) - In Progress

I've got a new hybrid stepper motor on order, hopefully it'll come before the weekend and I'll be able to demonstrate the electronics behind it. I've also ordered a bunch of orange LEDs for the other parts. I was tempted to use orange acrylic or similar and white LEDs but I though I'd give the coloured LEDs a try.
I was also thinking of packing the SMG with a LiPo battery to be able to achieve 11.1v for the stepper motor (12V motor), it should fit but I need to shop around a bit more.
 
Remember as well the the mag only spins when you are firing the gun. Might want to set it up to just do that. I also noticed on some of the versions it has 4 flaps that open wider as the gun gets "hotter" the more you fire, like cooling fins or so. Are you planning on doing that as well?
 
I believe the clip constantly spins and goes faster when firing. So I'll be getting it to do that, as well as flashing an LED from the muzzle to simulate it firing.
The wings you're thinking of usually appear on the e-tech guns.
 
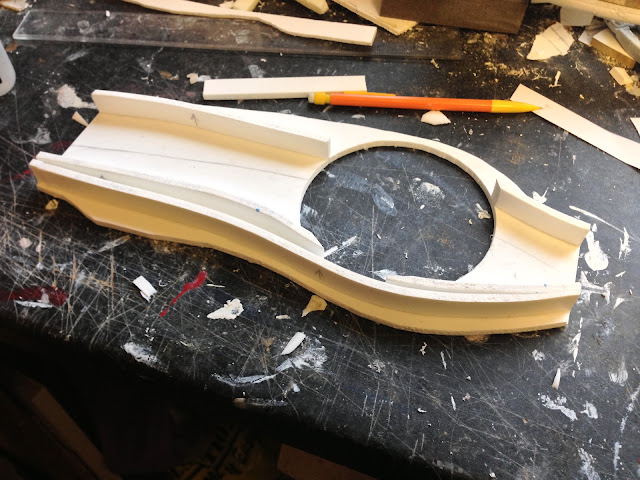
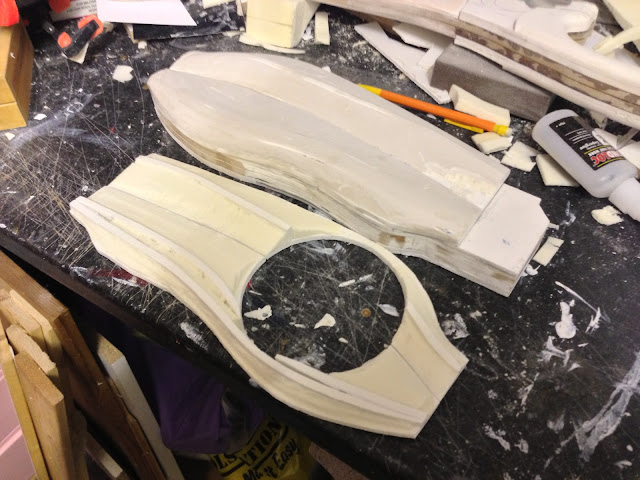
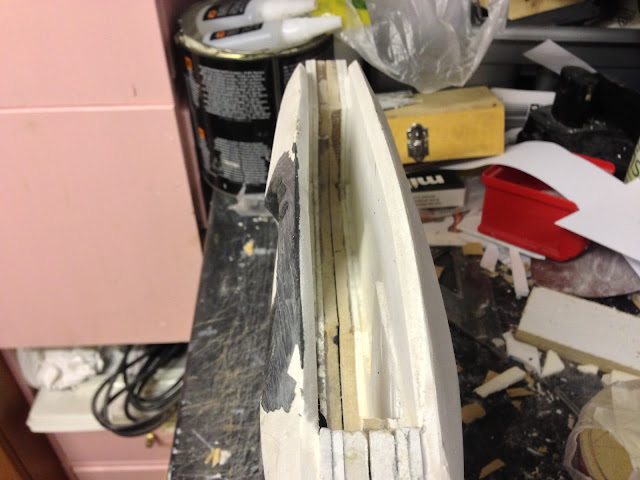
This weekend I made a decent amount of progress on the side panels of the main body. Building up the panels with body filler alone was taking too long so I decided to use a different technique I've seen used by other prop makers like Punished Props and Volpin Props. They've used insulation foam to build up the prop and then laminated resin or filler over the top. Luckily I had some left over foam from when I insulated my shed which was perfect.
So I started the same, building up fences and then gluing blocks of foam to the panel and fences. This was then filed and sanded down to under the required shape. I also cut the panels in half so I could easily shape the bevels.
I then put a layer of filler down and did an initial sanding pass.
Finally I glued the panel pieces onto the inner frame. During this I accidentally snapped a thin section which is why there's a stop and clamp in one of the pictures.

2013_%25203_17_22_30.jpg


2013_%25203_17_22_30.jpg


2013_%25203_17_22_31.jpg


2013_%25203_17_22_31.jpg
 
Impressive. Funny thing about all of this. I've been looking at the Arduino stuff and how I can use it because it looks very cool. My son and I play Borderlands 1 and 2 together and we're working on a Hornet Pistol for him at the moment.

He really wanted to to a Hellfire but rather than start and not finishing something big and time consuming I though it best to start small. But I might in secret make a Hellfire for him on my own. Now that I've seen what you're up to, I think putting my Arduino curiosity and a Hellfire together for him. I've got until Christmas.

I'll start with a vector image much like you have.

Any tips you could offer would be helpful.

Thanks.
 
The first thing you need is reference shots. I had to farm the gun from Scorch, then later bought a bunch of similar guns from Moxxie by tipping her. They're basically the same gun but stocks, sights and grips can vary.

Photoshop a bunch of reference shots in scale to each other next to each other.

Next download a copy of Inkscape and get to work. Load your compiled image to the bottom layer and lock it. Create a new layer to work in. I also created a locked top layer which had horizontal and vertical rules to help you align parts between different reference shots.
 
This weekend I reattached the body to the stock and grip. I did this by cutting rectangle pieces of MDF and slots into the two parts. I then super glued these rectangles to attach all the parts.
I then went onto bevel the top edge to a point. And finally I used some black Milliput (epoxy putty brand) to give a nicer edge to the clip socket.

2013_%25203_24_22_10.jpg


2013_%25203_24_22_10.jpg
 
I'm pretty skilled in Illustrator for making vector drawings, enough at least to make curves, deal with layers. Using rulers and guides are very helpful. We did this for the Hornet pistol without a sight to get some good working lines out of.

As for reference shots I have Borderlands 2 on the computer and I'm able to get good images on every single component with and with out texture. So thats what I'm working with so far.

When I get a good image to rough out the MDF I found a transfer pen by Chartpak. I haven't used it yet but apparently it will transfer toner based image from paper to MDF.
 
When I get a good image to rough out the MDF I found a transfer pen by Chartpak. I haven't used it yet but apparently it will transfer toner based image from paper to MDF.

I originally used some of those t shirt transfers to iron onto the MDF, which worked perfectly well. Although I did end up peeling it off later.

Another trick you can try is to print using a laser printer, and then use acetone to transfer the print onto the wood. This works extremely well, give it a shot. Photocopies work as well because they're laser set. Just remember to mirror the print horizontally, you could flip it in Inkscape if need be.
Inkjets don't work, the colours just run.
 
Easter weekend, 4 days, should've had lots of time to work on the gun. Unfortunately it didn't turn out that way. Only got about 4 hours in over the long weekend, plus about 2 midweek last week.
I found a plastic lid which was almost the perfect fit for the clip, so I filled it with resin to make it solid as it was quite flimsy. I then cut out an MDF circle and epoxied it to the top.
I made the clip opening a little larger to fit and found it to be too close to the top. So I cut more off the bottom part and added some Milliput to the top section to move the opening down.
I then decided to cut the window which will house the guns display. I could only do this on one side as the Milliput was still drying on the other.
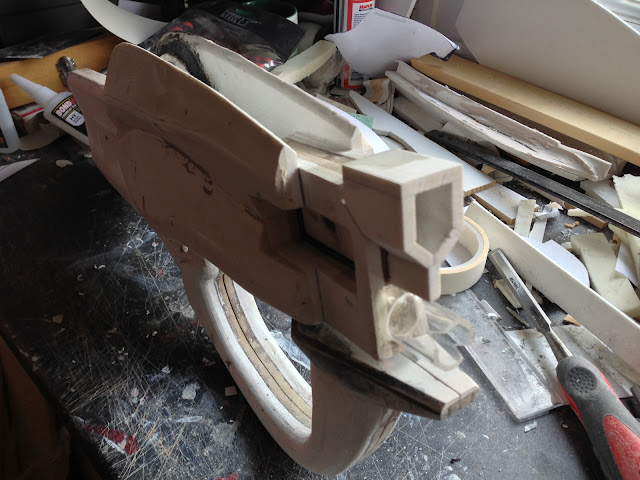
I also started working on the detail near the muzzle. I taped this on temporarily in the picture below.

Check out my blog for more pictures.

2013_%25204_%25201_20_18.jpg


2013_%25204_%25201_20_19.jpg
 
Got a lot of work done this weekend, the front end in particular is coming together well. I started by cutting out the display panel out of the other side, putting the two sides together and filing the cavity.
I then started to use my rotary tool to merge the main body to the stock. Unfortunately I didn't get far before the tool packed it in, luckily my drill was still up for the job. I then used a combination of body filler and Milliput to finished it off. Lots of sanding later and it was done.
On Sunday I worked on the front end, cutting and bevelling the panels. These were then super glued in place and body filler squeezed into the cavities underneath and on top, leaving the panels open at the end. There's a nice picture of this in my image gallery.


Jon

2013_%25204_%25207_21_48.jpg


2013_%25204_%25207_21_48.jpg


2013_%25204_%25207_21_48.jpg
 
Yeah, this is beyond epic. I love borderlands, been playing it every day since release, and some of the gun designs are just amazing.

Does anyone know if its possible to extract them as 3D models so they can be converted to paper models?
 
Ya got some skillz brah nice an clean structure lines goin on. :p:thumbup:

Sent from my SGH-T989 using Xparent Skyblue Tapatalk 2
 
This thread is more than 7 years old.

Your message may be considered spam for the following reasons:

  1. This thread hasn't been active in some time. A new post in this thread might not contribute constructively to this discussion after so long.
If you wish to reply despite these issues, check the box below before replying.
Be aware that malicious compliance may result in more severe penalties.
Back
Top