Yodajammies
Sr Member
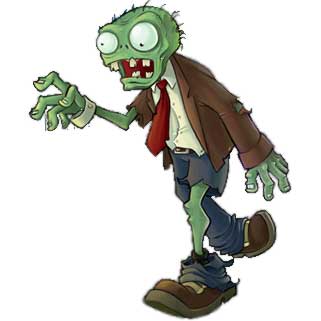
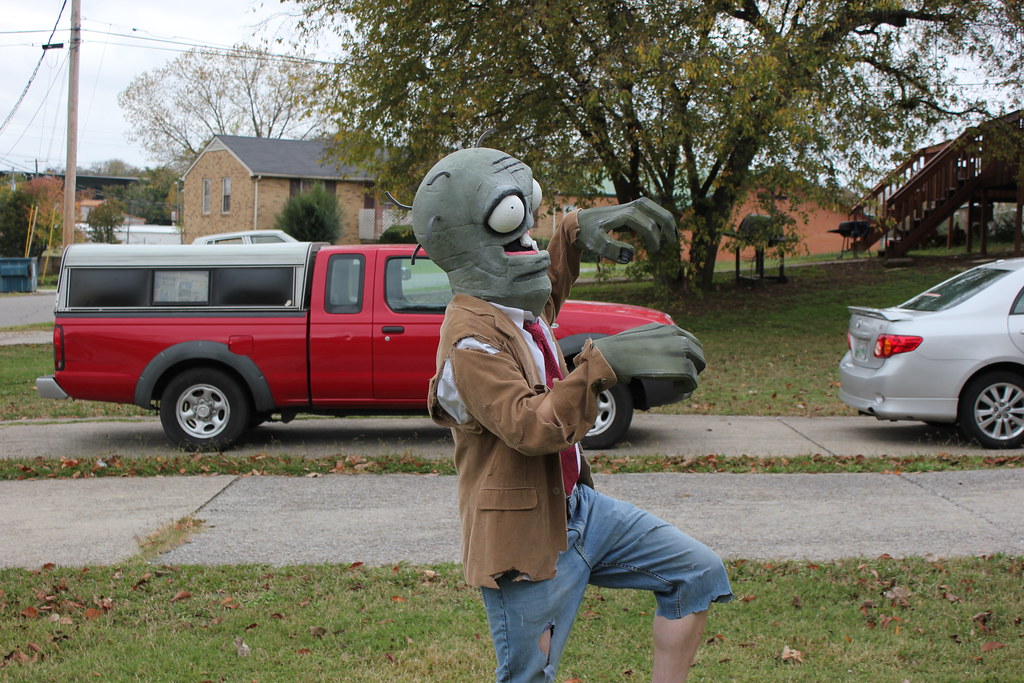
Halloween 2012! Brains for everyone!
It was kind of a last minute idea, so it was a quick and dirty build.
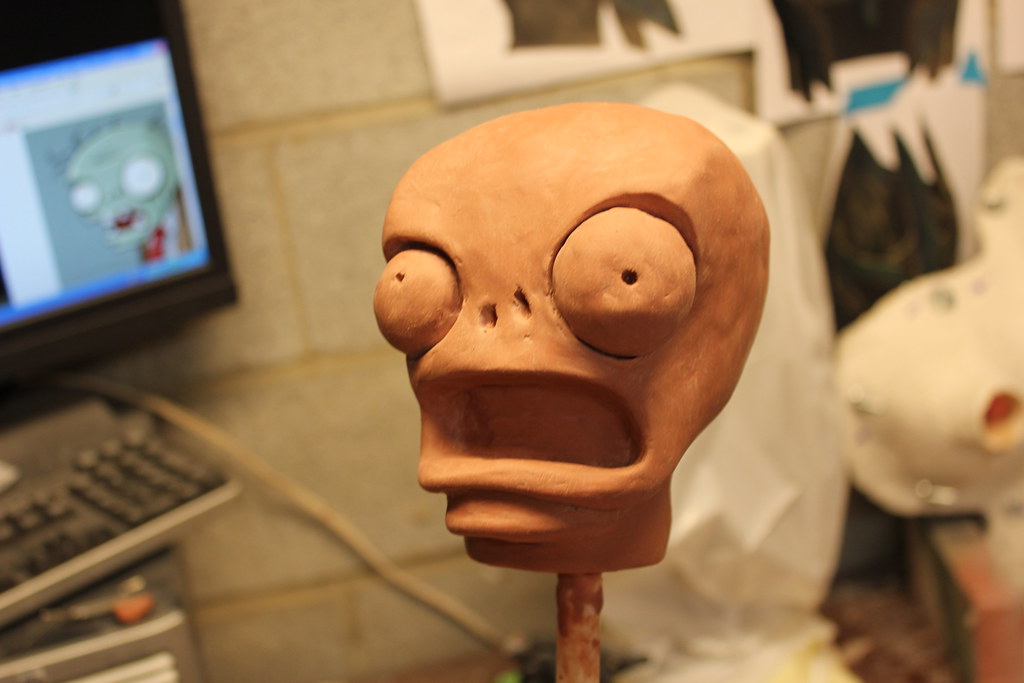
First, I sculpted out a rough maquette in clay to pattern over.
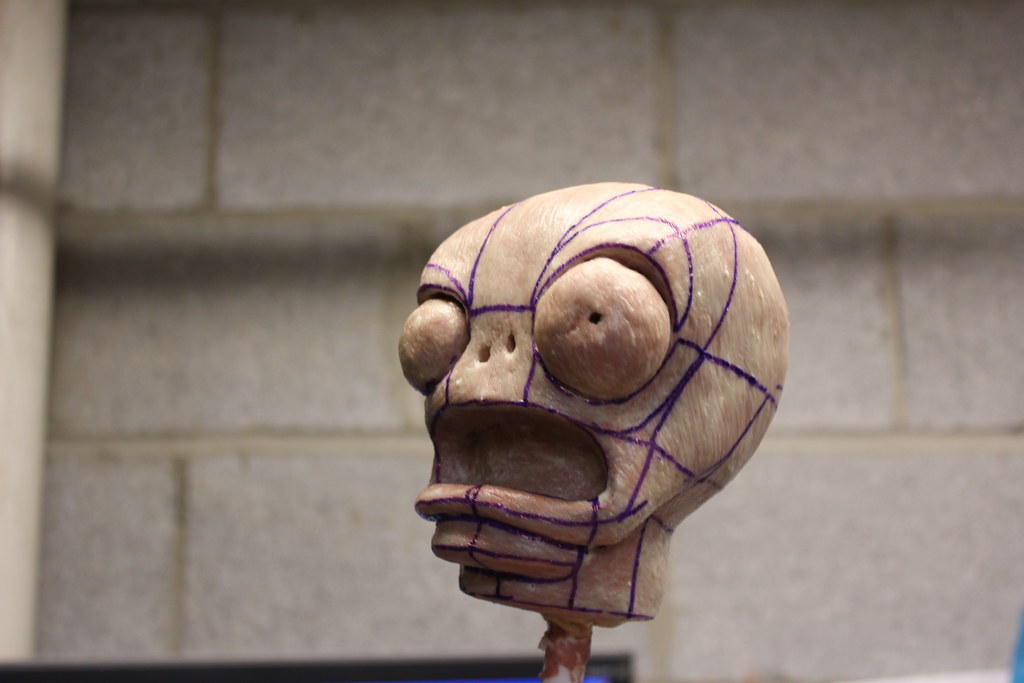
Then I brushed up 5-8 layers of RD-407 latex in order to draw out my pattern. This was my first foam patterning project so in retrospect I definitely see things I would have done differently.
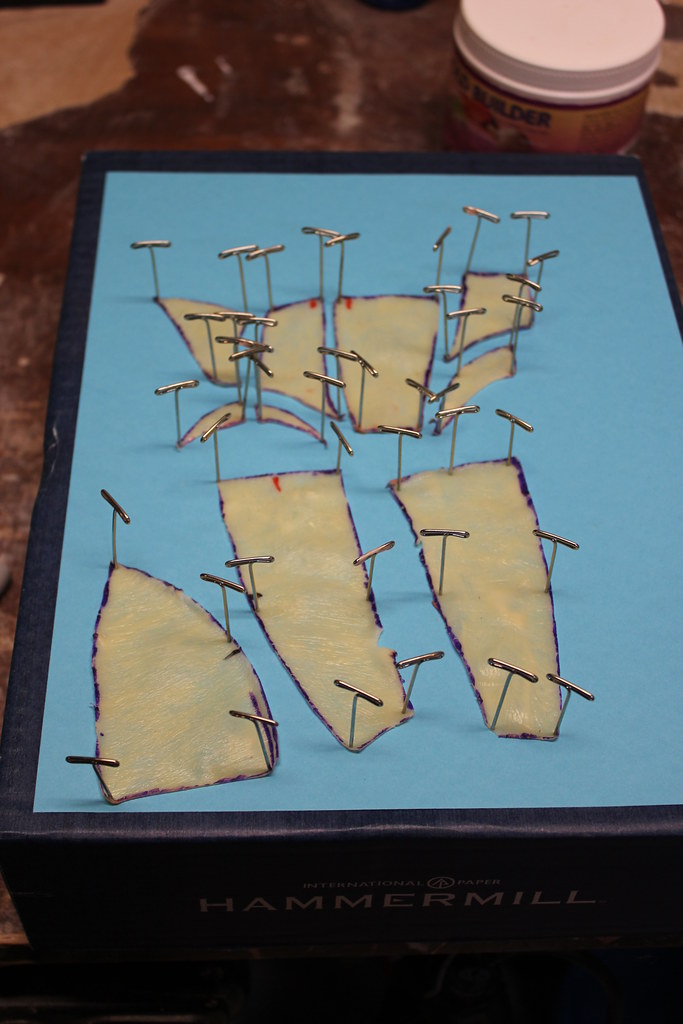
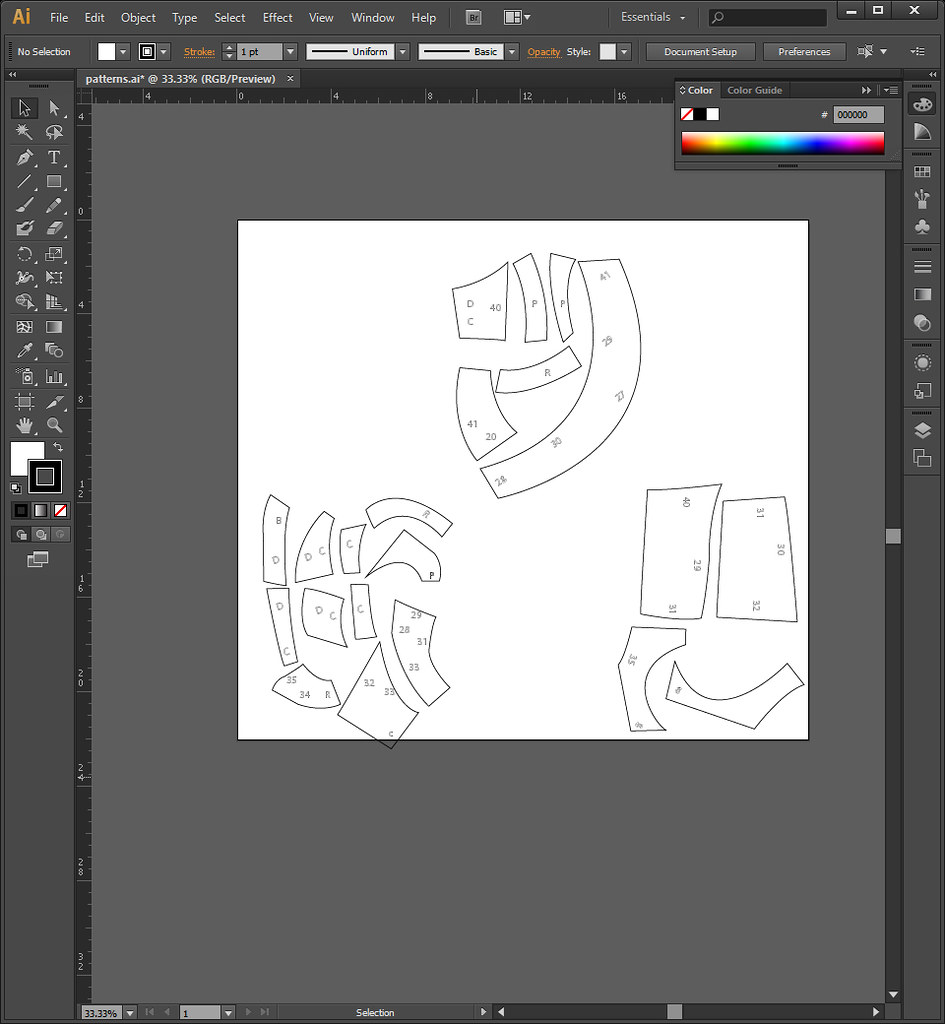
Once the pattern is cut out, its pinned down (or more simply spray adhesived down) and then scanned into the computer.
After redrawing the pattern, the tricky part is figuring out exactly how much to enlarge the parts to properly size the costume. For this fella, the lucky number was 2.68x.
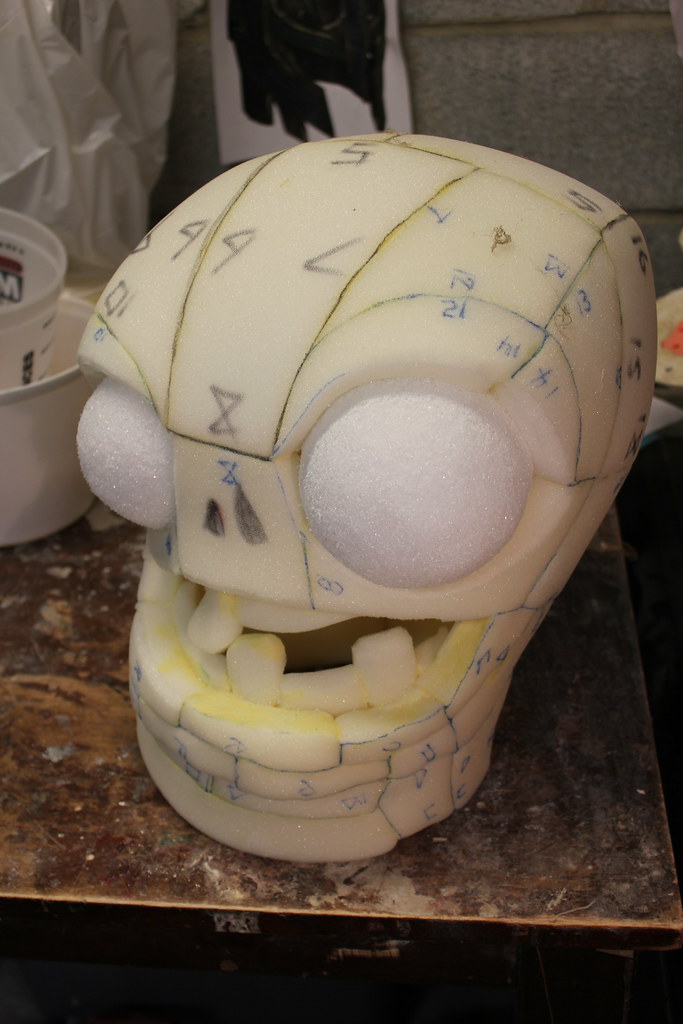
At this point the hard part is pretty much done, and it's not much more difficult than putting together a pepakura pattern. The teeth and gums were fairly simple shapes, so I didn't include them in the sculpt. For the eyes, I ended up using tiny foam basketballs I found at Walmart. The eyes in this shot are rigid foam balls from JoAnns - Highly overpriced. I don't recommend them.
My biggest hurdle for this quick build was how to seal and/or paint the foam. My first attempt was to apply acrylics directly to the foam. Being the sponge that it is, the piece sucked up about half a pint of paint and left it with an undesirable weight and surface finish. Fortunately the acrylics did a decent job of sealing the foam, and I was able to then brush up several layers of latex on the piece to give it a nice durable skin. For future foam projects, I aim to use stretch spandex as my "sealer", and then apply the latex skin for the paint surface. I'm very much open to suggestion for alternative methods for solving this problem.
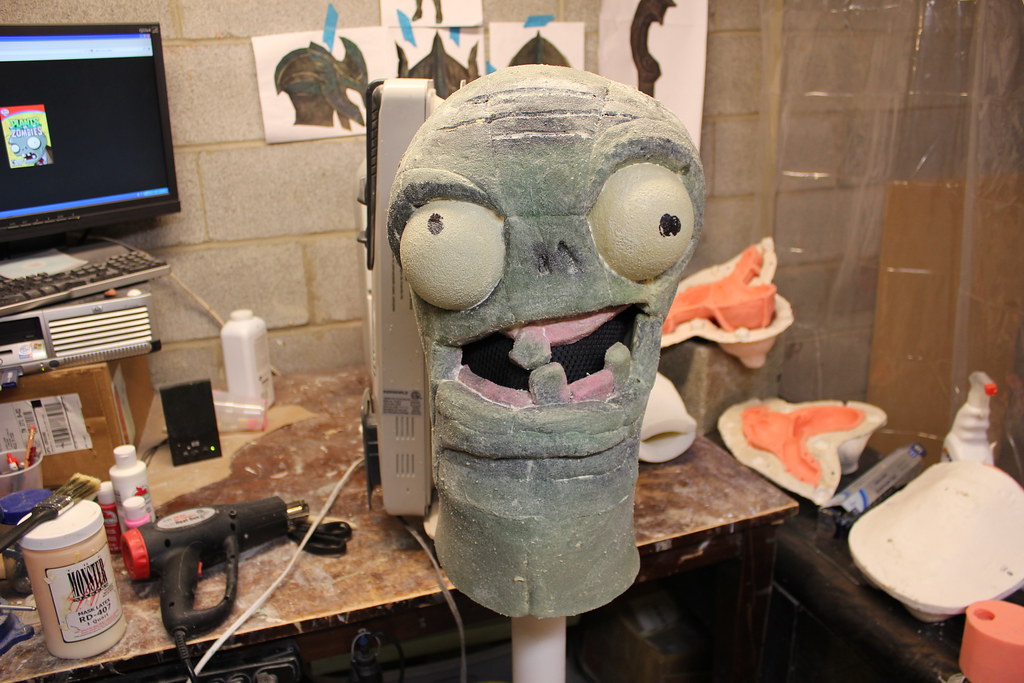
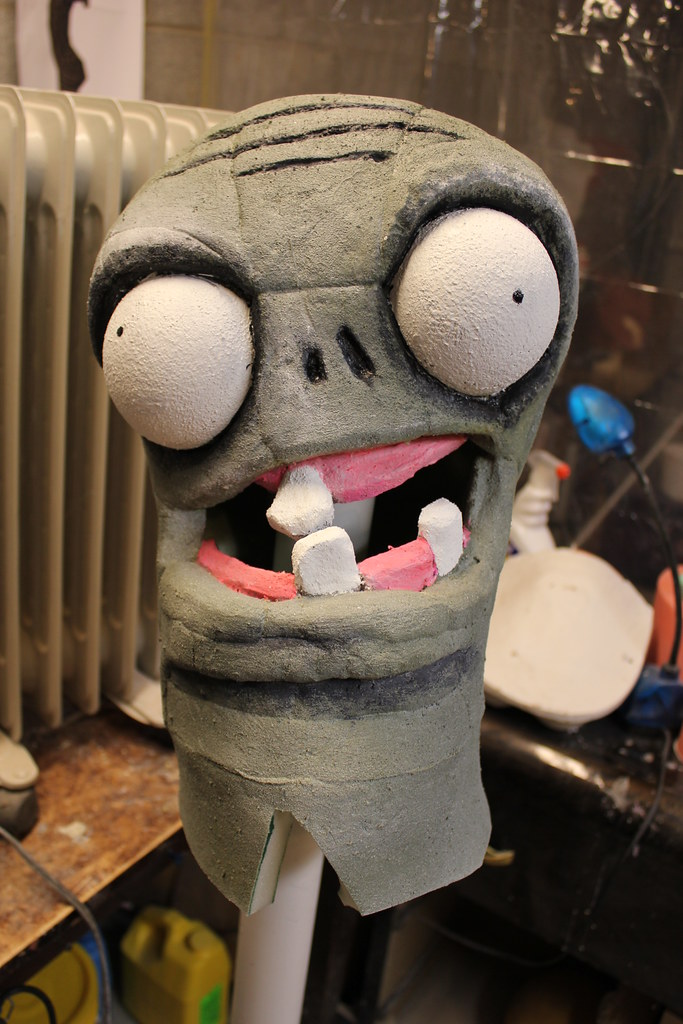
The latex coat can also help to hide and minimize seams, though with as crap a job I did assembling the thing, I'd need 20 layers of the stuff to hide the blemishes (ie - seam between the eyes, around lips, etc). After the latex is cured, a final paint layer is applied. The hair is simply window insulation stripping.
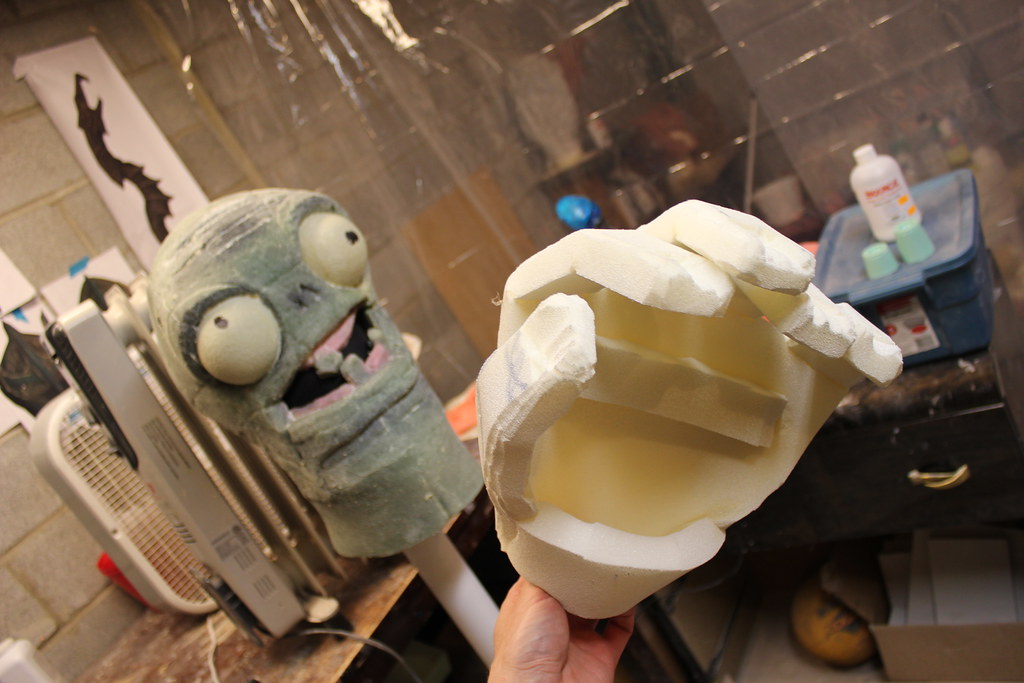
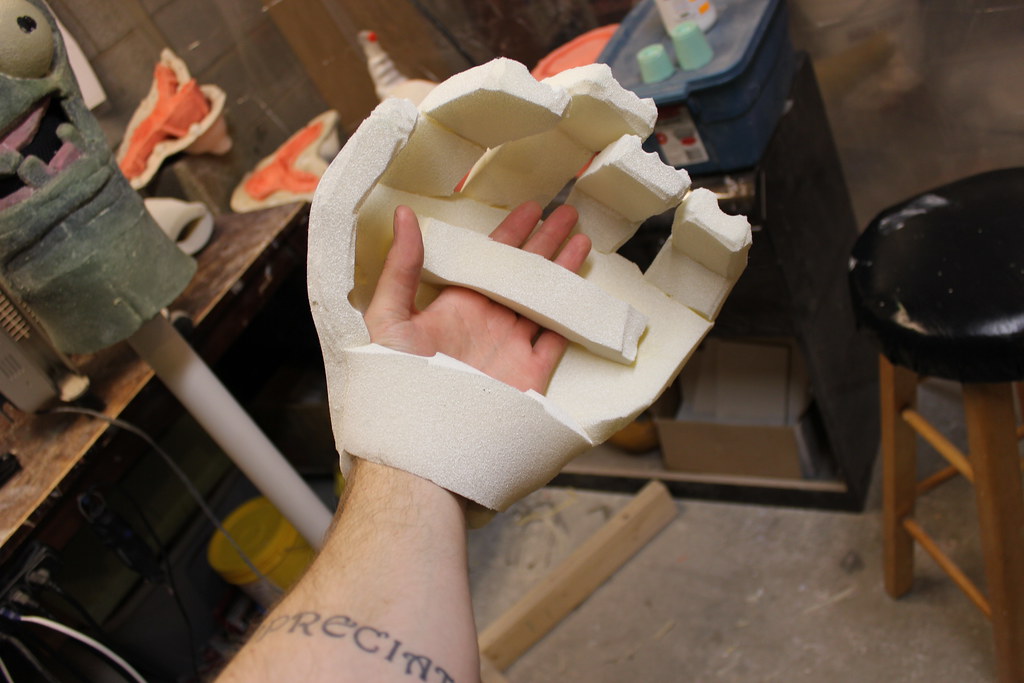
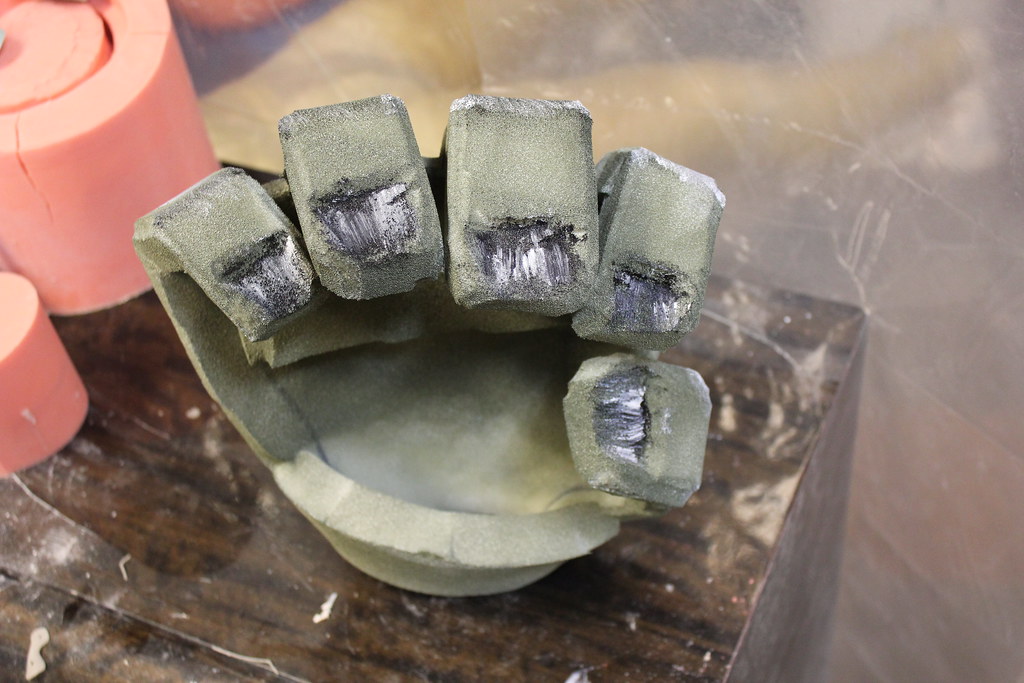
For the hands, they too were quick and dirty - 1-ply foam scored and glued into a zombies' grasping, filthy clawrrrrr.
The strap is designed to give animation to the hands, but also to allow me the ability to easily hold onto my beer with out taking them off.
Quick and dirty paint.
A trip to Goodwill for clothes and we're done. All together now!
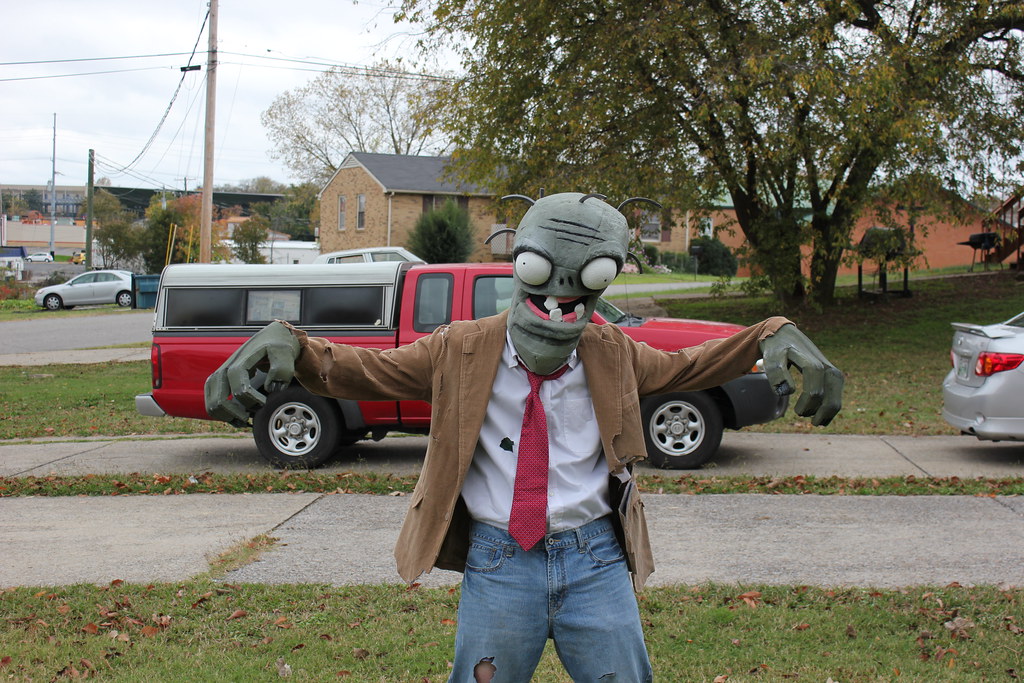
Ladies....

It was kind of a last minute idea, so it was a quick and dirty build.
First, I sculpted out a rough maquette in clay to pattern over.
Then I brushed up 5-8 layers of RD-407 latex in order to draw out my pattern. This was my first foam patterning project so in retrospect I definitely see things I would have done differently.
Once the pattern is cut out, its pinned down (or more simply spray adhesived down) and then scanned into the computer.
After redrawing the pattern, the tricky part is figuring out exactly how much to enlarge the parts to properly size the costume. For this fella, the lucky number was 2.68x.
At this point the hard part is pretty much done, and it's not much more difficult than putting together a pepakura pattern. The teeth and gums were fairly simple shapes, so I didn't include them in the sculpt. For the eyes, I ended up using tiny foam basketballs I found at Walmart. The eyes in this shot are rigid foam balls from JoAnns - Highly overpriced. I don't recommend them.
My biggest hurdle for this quick build was how to seal and/or paint the foam. My first attempt was to apply acrylics directly to the foam. Being the sponge that it is, the piece sucked up about half a pint of paint and left it with an undesirable weight and surface finish. Fortunately the acrylics did a decent job of sealing the foam, and I was able to then brush up several layers of latex on the piece to give it a nice durable skin. For future foam projects, I aim to use stretch spandex as my "sealer", and then apply the latex skin for the paint surface. I'm very much open to suggestion for alternative methods for solving this problem.
The latex coat can also help to hide and minimize seams, though with as crap a job I did assembling the thing, I'd need 20 layers of the stuff to hide the blemishes (ie - seam between the eyes, around lips, etc). After the latex is cured, a final paint layer is applied. The hair is simply window insulation stripping.
For the hands, they too were quick and dirty - 1-ply foam scored and glued into a zombies' grasping, filthy clawrrrrr.
The strap is designed to give animation to the hands, but also to allow me the ability to easily hold onto my beer with out taking them off.
Quick and dirty paint.
A trip to Goodwill for clothes and we're done. All together now!
Ladies....
