Back to the Future Part 3 - Cowboy Marty "Clint Eastwood" - WIP

Pants

Sorry this will be pic heavy. I finally finished the pants, and it was a lot more work than I thought it would be. I'm going to gloss over some details, but hopefully you get the idea.

(Before I started this costume, I actually found some very similar pants in the right color at a vintage store, but they were way too big. If anyone is interested, the brand was 'H Bar C' and it was part of a 'California Ranchwear' line. You can find them on ebay. The pants looked almost identical, except there was no piping. Since I couldn't get it in my size, I had to make the whole thing from other pants.)

I started with a pair of pajama pants I got from a thrift store. Not the best base to start with, but they were the only ones I could find in the right color, and for super cheap.
pants_001.jpg


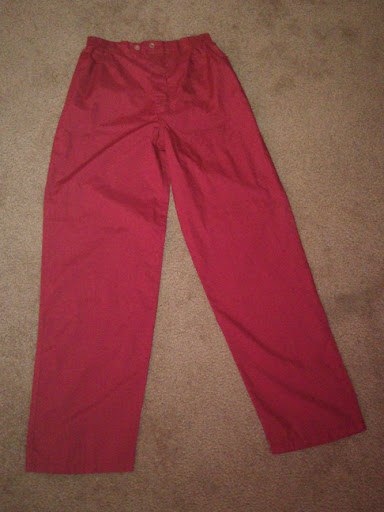
I knew I was going to need extra material to make the pockets and the belt loops, so I found some pretty close to the same color. The picture actually makes it look like the same color, but the material I found was actually darker. You'll see it in later pics.
pants_002.jpg


The first real step was removing all the elastic from the pants since it made it sit funny when wearing it.
pants_003.jpg


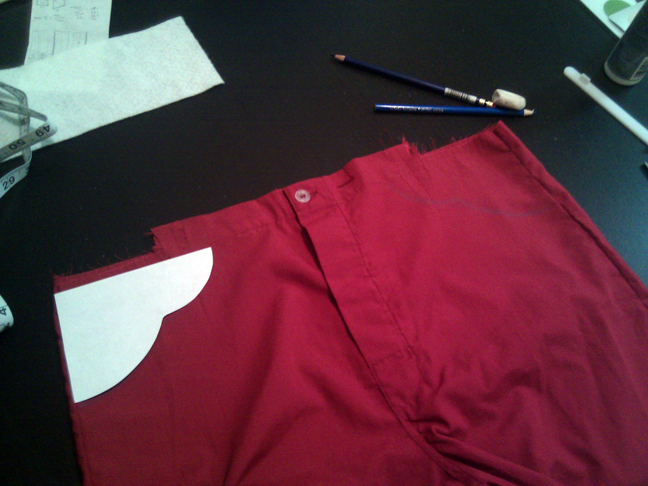
I planned out where I would cut out the unique front pockets.
pants_005.jpg


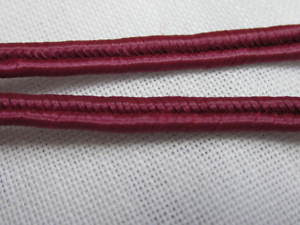
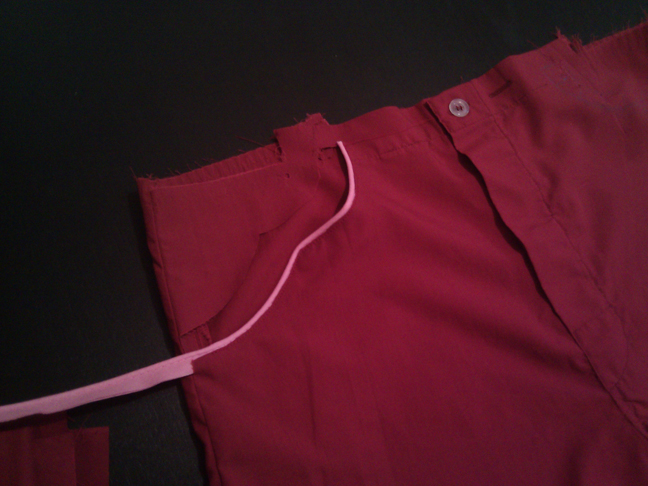
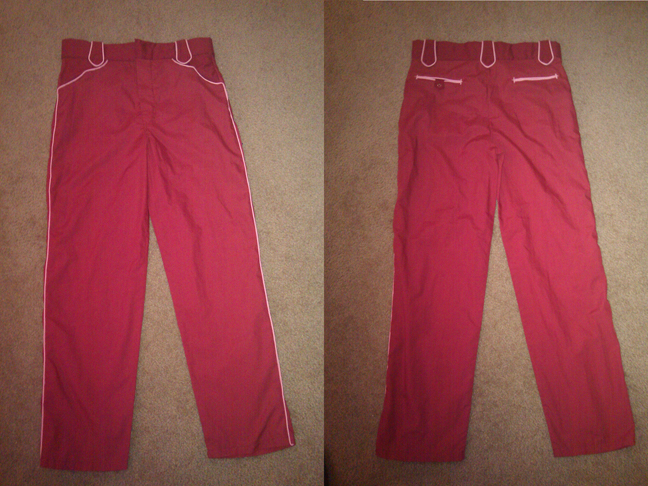
Here I attached the piping, and ran it all the way from the top of the pocket and down the leg.
pants_006.jpg


Here you can see the length of the piping down the leg. At this point I also created a new top piece for the pants, where the belt loops would attach. But before I that I had to make the pockets, since they were just holes for the moment.
pants_007.jpg


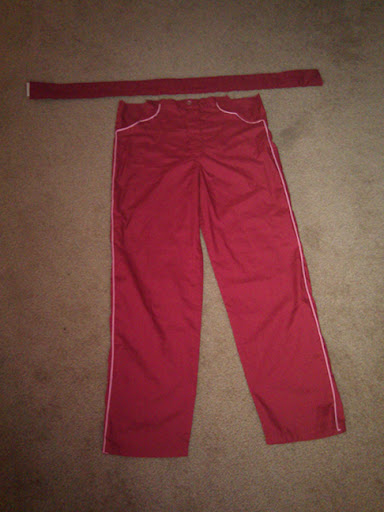
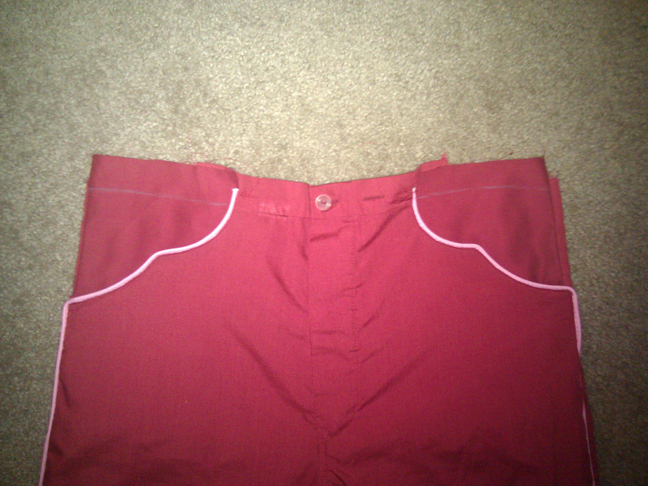
The pockets were not as easy as I thought they would be, but I eventually got them in place and sewed it up. After, I attached that top piece I made earlier. This made the whole top look nice and clean. You can see the color difference of the materials here.
pants_008.jpg


pants_009.jpg


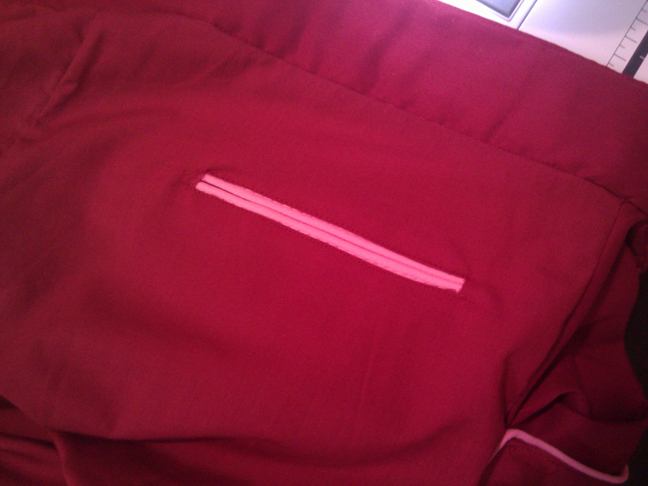
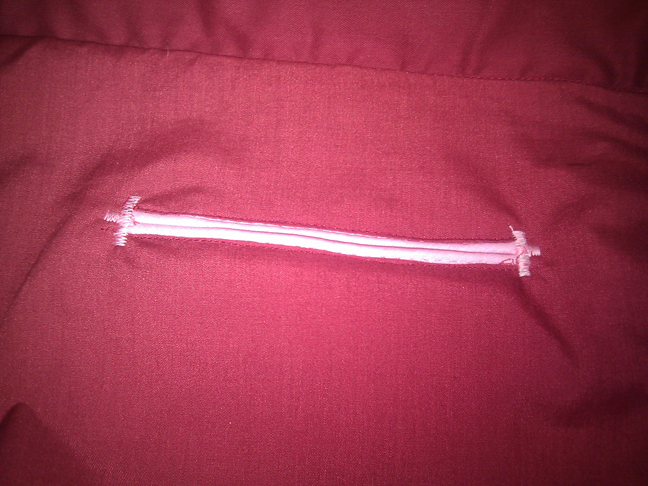
Next up, the back pockets. The pockets are just a folded rectangle of material, and then I sandwiched piping in between. The important step was to sew the piping on the bottom lip of the pocket first so as to avoid sewing the pocket shut. Then sew the piping on the top lip with the back of the pocket in place.
pants_010.jpg


pants_011.jpg


Inside view:
pants_012.jpg


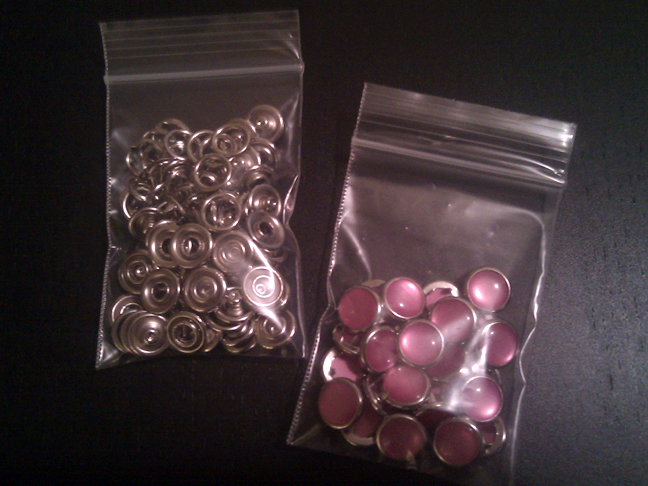
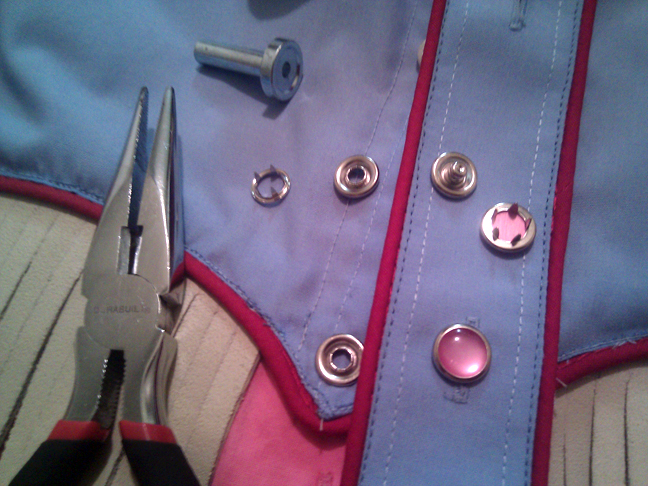
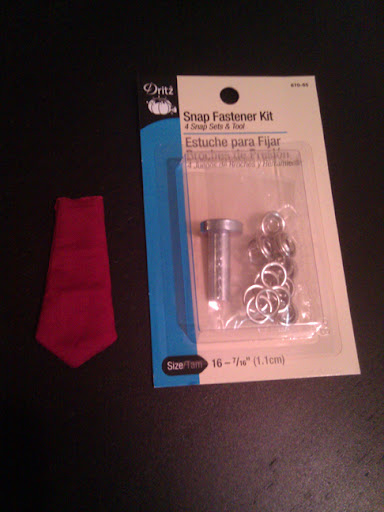
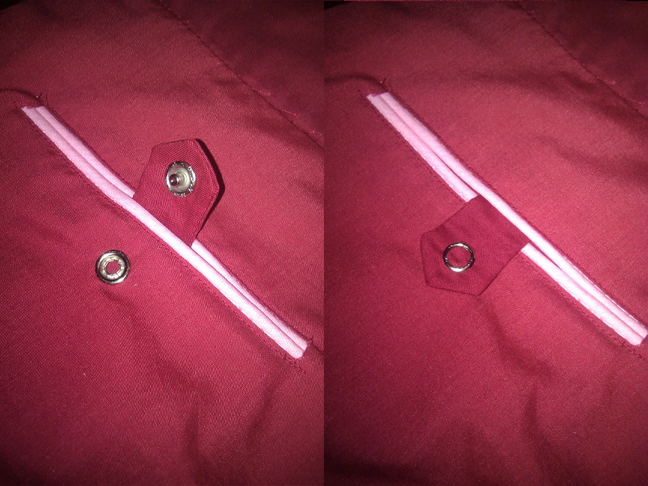
One of the back pockets has a little tab with a snap button on it. I bought a kit which let me add a snap button without sewing.
pants_013.jpg


pants_015.jpg


Then I reinforced each back pocket corner just like the pants in the movie.
pants_016.jpg


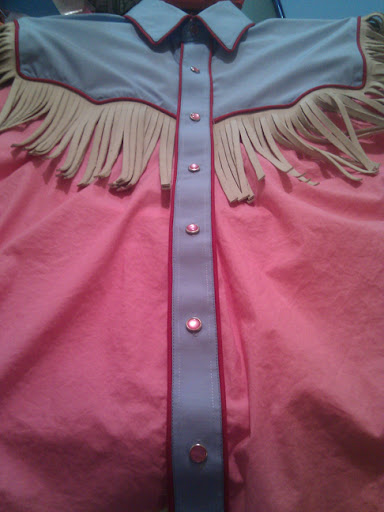
The belt loops are probably the most recognizable parts of the pants, so I was looking forward to getting to them when I started. Who knew they would be the last thing to do on the pants. Here are the stages of making one belt loop (pattern, stitch, trim, inside-out, piping).
pants_017.jpg


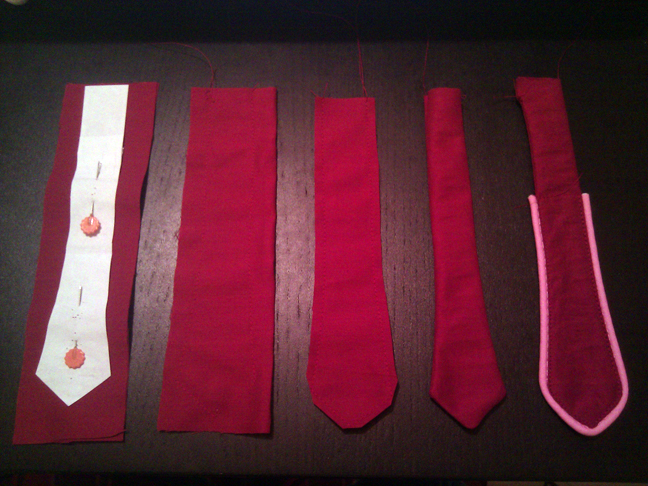
I attached the belt loops to finish off the pants.
pants_018.jpg
 
Until Monday...

Unfortunately I will be completely busy for the next four days (going to a bachelor party over the weekend), so I won't be able to get back to the costume until Monday. It's going to be a race to the finish to get it all done in two days next week.

I'm still waiting on the soutache cord for the atomic symbols (I really hope it gets here in time). I realize I keep mentioning this "soutache" without showing what it is. Here's a picture I snagged. It's really thin (1/8 inch), and should should work well.
shirt_soutache.jpeg


One thing I did get in the mail today is the pink snap buttons for the front and sleeve cuffs of the shirt. I got them on etsy from a seller that just sells western style buttons. They look perfect. I can't wait to attach these.
shirt_023.jpg


Also, I mentioned this before, but if anyone has a ideas on how to temporarily make part of my shoes red, without ruining the shoes, please let me know. I have the Nike Bruins, and my instinct is to use some kind of tape (red electrical tape) to cover the suede swooshes, but I'd love to hear a better idea.
shoes_001_half.jpg


Good luck to everyone on finishing over the weekend. Until Monday...
 
Electrical tape wont have the sticking power to stay on properly. Better to use red duct tape or red fabric based tape which tend to use much stronger adhesive.
 
That's really impressive. All of it.

Maybe you could get some cheap thin red pleather and use spirit gum or double sided tape to attach it?

I recently painted my Bruins. The masking tape I used to protect the rest of the shoe left a strong residue that required a good amount of scrubbing with acetone to remove. If you're trying to protect the shoe, free of potential chemicals/damage, strong tape might not be the way to go either.

I felt regret painting my deadstock Bruins, too. But I only bought them and wanted them because of McFly, so I decided to just do it. I've been getting compliments on them, and nobody has called me out on the paint job yet. I used Angelus leather paint and a sponge (I kept having problems with a brush, it was leaving too much texture). I went with scarlet red, but it looks like that might have been too dark.

With the attention to detail and effort you're putting into the costume, I can't imagine the shoes looking bad, regardless of what you do. Good luck getting it done on time.
 
This is my new favorite thread. I can't wait to see it finished, and based on what you've already done, I have no doubt that you'll be able to finish it in time. I am amazed that you were able to find that belt buckle.
 
about your shoes. maybe you could paint on latex over the swoosh. The latex can be coloured before you paint it with acrylic paints.
 
here's my 2 cents on the swooshes - hit some masking tape with a few layers of red paint then cut them to fit, wipe the swooshes with some warm soapy water to clean off any oils so it sticks well.
 
This just gets better and better! Loving this build. It's going to look great when it's all together. The attention to detail for such a silly costume is just perfect! :D
 
Re: Until Monday...

Also, I mentioned this before, but if anyone has a ideas on how to temporarily make part of my shoes red, without ruining the shoes, please let me know. I have the Nike Bruins, and my instinct is to use some kind of tape (red electrical tape) to cover the suede swooshes, but I'd love to hear a better idea.
shoes_001_half.jpg


Good luck to everyone on finishing over the weekend. Until Monday...

Before I got the chance to get a real ones I "transformed" some old shoes using "artifitial red sheepskin". I sewed the edges in order to make it look as if they were really sewed to the shoe and it turned out very acceptable. In my case I glued mine but in yours I guess a double side tape stripe might solve the problem (it's just an idea...)
 
Wow, I'm amazed by all the details and by the fact that you're making everything from scratch.
Already love it and can't wait for updates... :love
 
Thanks for the encouraging words and advice on the shoes everyone. I'm back from my weekend trip and looking forward to finishing this up in the next two days!
 
This is fantastic. I look forward to the seeing the final finished piece. I goal one day is to have all of Marty's outfits. I sewing skills are coming along so hopefully not to long from now I may start my own.
 
Shirt Buttons

So of course I'll be pulling an all-nighter trying to get this one done. In the meantime I thought I would post a few updates and then get back to work for the home stretch.

So remember these?
shirt_023.jpg


The way these work is that you pinch both sides of the snap button to each side of material. That means you need a front and a back for each part of the button. That's four parts total for just one button snap. But it beats sewing each button by a long shot! You can either pinch the parts together with a special tool (which I don't have), or carefully with pliers (which I do have), or use a hammer and a special hammer bit (which you can see in the picture). The hammer bit came with the set I used for the back pocket, and it works here too.
shirt_024.jpg


shirt_025.jpg


shirt_026.jpg


Here's the latest with all the buttons.
shirt_027.jpg


Before I get to the atomic symbols, I'll update some of the other parts.
 
Bandana

So I looked everywhere for a similar bandana as the one he wears, but I couldn't find it. It's an odd dark red-brown with unique tan symbols.
bandana_001.jpg


I ended up ordering this one, which looked pretty good once I turned it inside out. It might not be quite the right color, but burgundy is pretty close. It gave it that flat sort of look that the original had.
bandana_002.jpg
 
Last edited:
Shoes

So like I mentioned before, I have the right shoes, but in the wrong color, and I don't really want to paint them since they're really old and somewhat rare.
shoes_001.jpg


I tried a few different tapes, but few of them would hold to the 'swoosh' since it was rough suede. I found that electrical tape holds really well...and it comes in red.
shoes_002.jpg


Cutting the edges clean was really tough, so as you can see they're pretty rough and jagged, but I'm hoping it's not too noticeable once I'm in the full get up.
shoes_003.jpg
 
Shirt Atomic Symbols Part 1

Since I'll be working all night, I wanted to show how I'm approaching the atomic symbols on the shirt. I finally got the soutache cord yesterday (phew). As you can see, it's pretty thin.
shirt_028.jpg


Here's the rough layout for the symbols. I had to make sure they would all fit before drawing them lightly using a makeshift light box using a lamp.
shirt_029.jpg


shirt_030.jpg


I'm tacking them down with that same craft glue before sewing to make sure they don't move around too much. Still, it's hard to keep them exactly in place.
shirt_031.jpg


shirt_032.jpg


As you can see, it's really testing my abilities with the sewing machine, but I think as the night goes on, I'll get better.
shirt_033.jpg


Now all I have to do is finish...
 
Shirt Atomic Symbols Part 2

So i was pretty unhappy with the way that first atomic symbol came out (luckily I started on the back). For the front symbols, I wanted to try a different approach. Instead of just tacking it down in a few spots and sewing each ring individually, I fully glued every ring down first. Then I let it dry completely and then just reinforced it through sewing, rather than trying to shape it while sewing. Takes longer, but a MUCH cleaner result.

shirt_034.jpg


shirt_035.jpg
 
This thread is more than 7 years old.

Your message may be considered spam for the following reasons:

  1. This thread hasn't been active in some time. A new post in this thread might not contribute constructively to this discussion after so long.
If you wish to reply despite these issues, check the box below before replying.
Be aware that malicious compliance may result in more severe penalties.
Back
Top