1:1 Millennium Falcon Cockpit Replica - Group Build

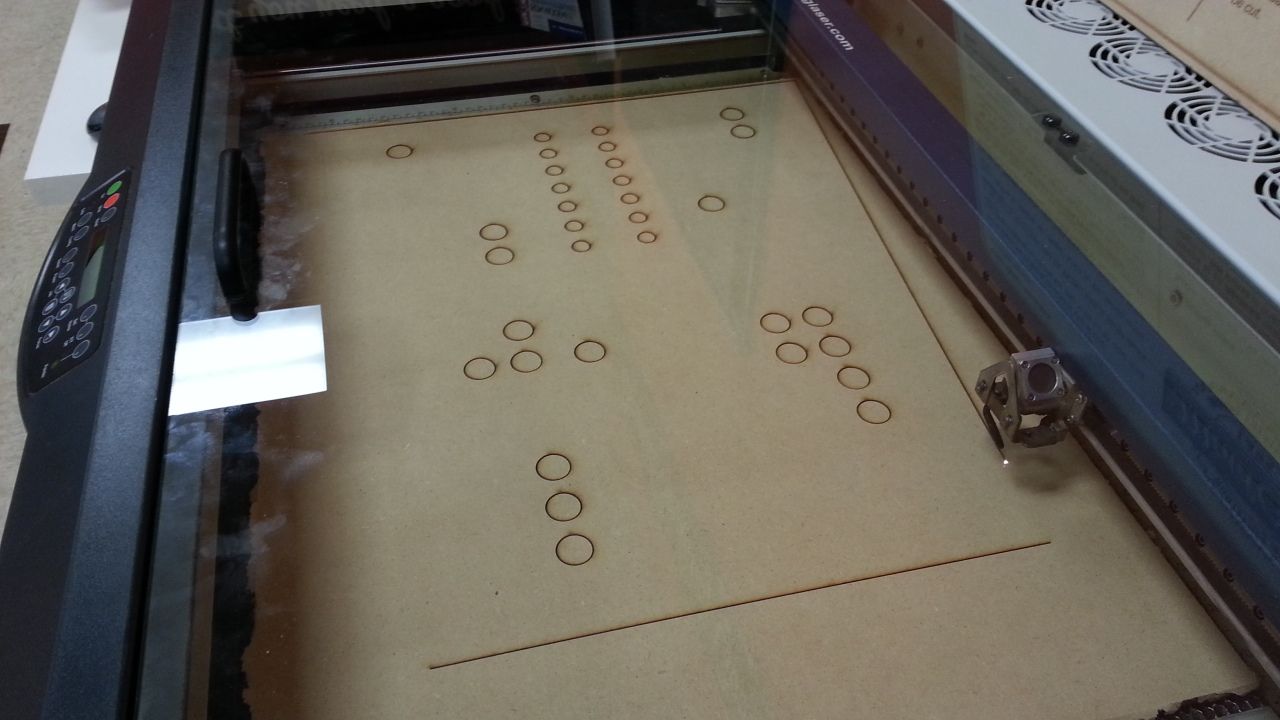
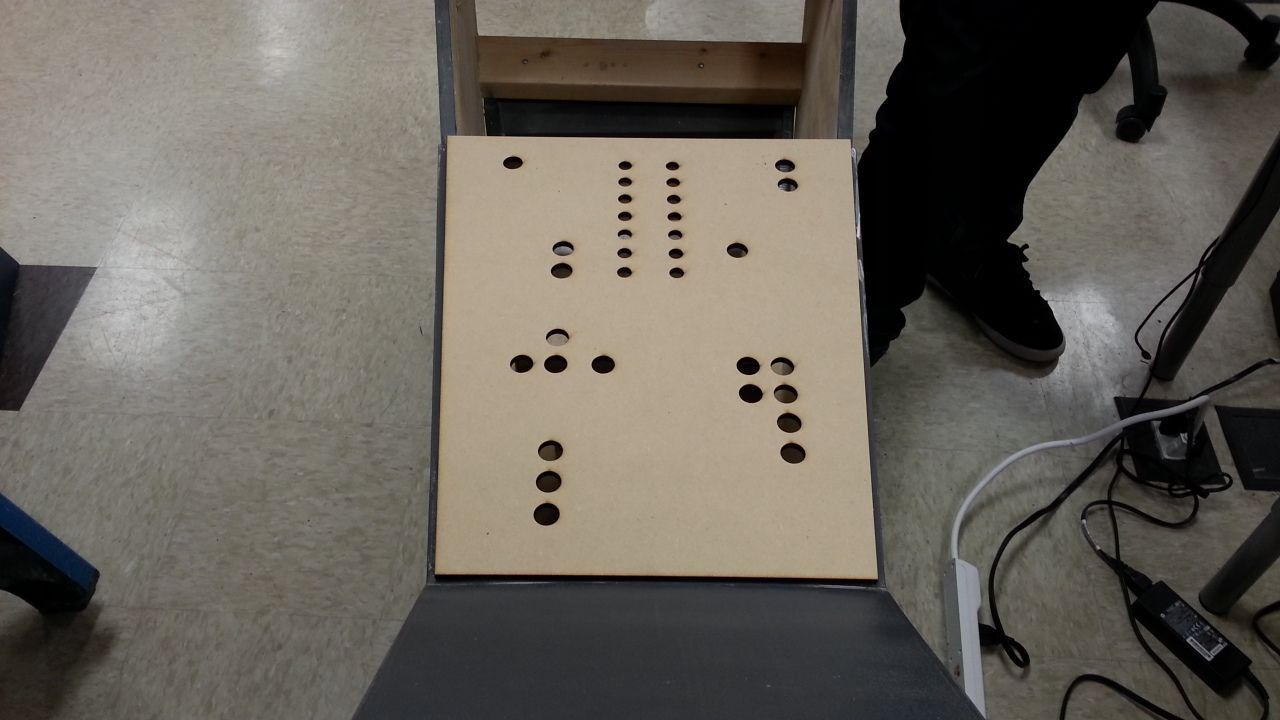
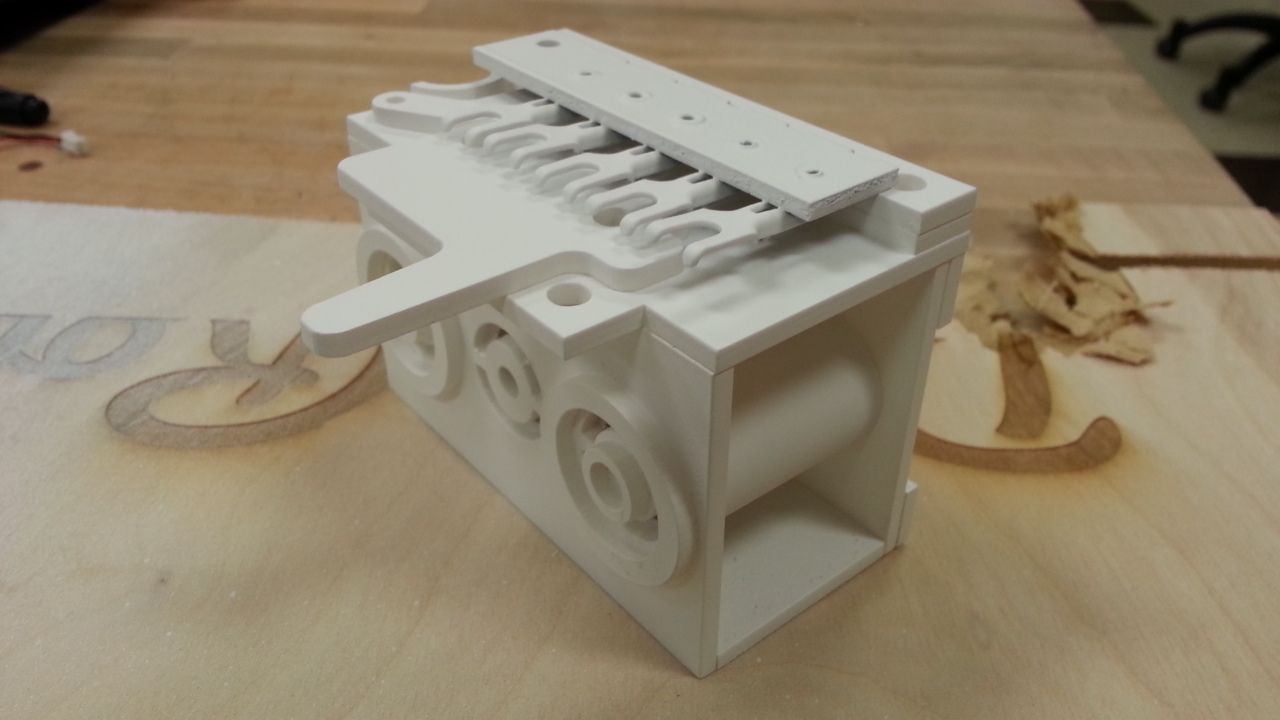
Exciting stuff for sure, thank you for sharing all these build shots, SK!

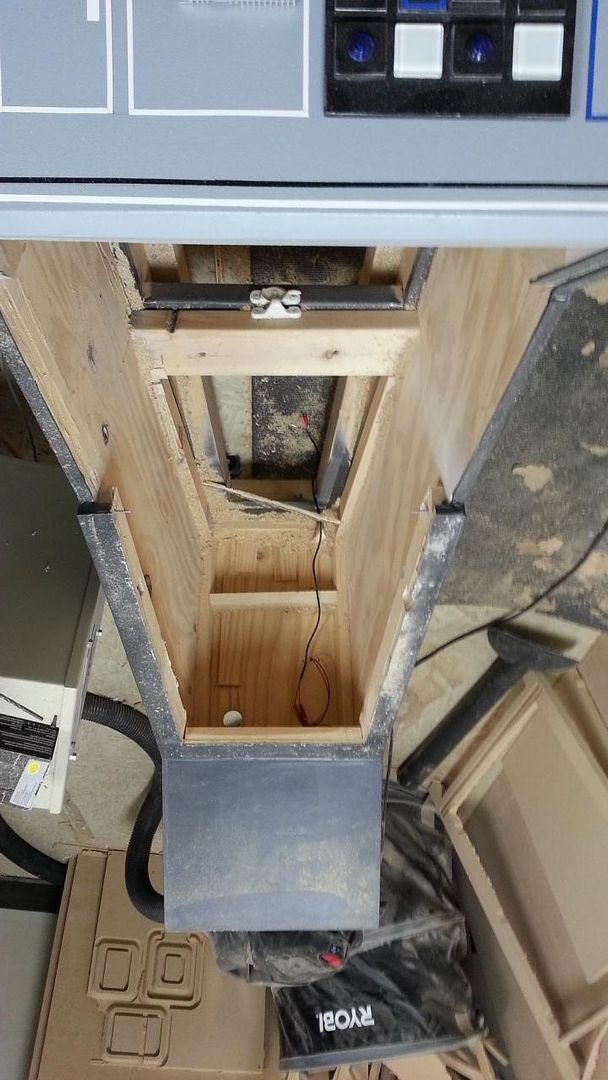
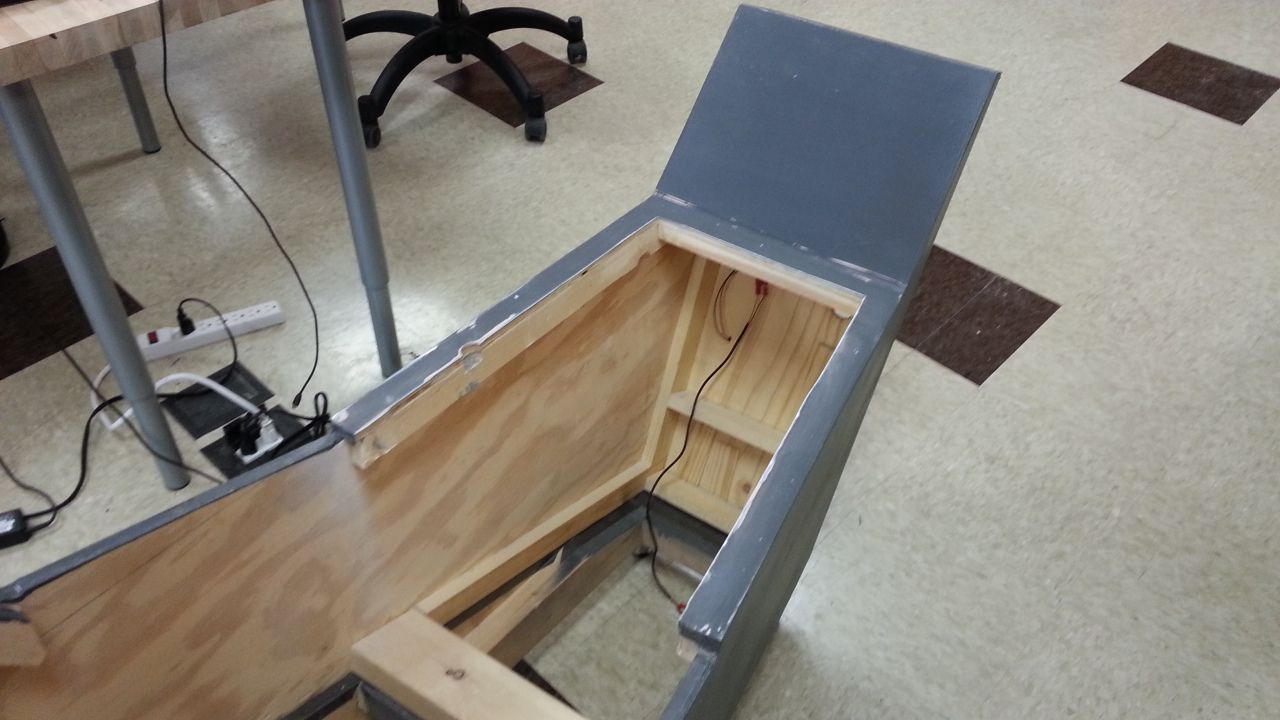
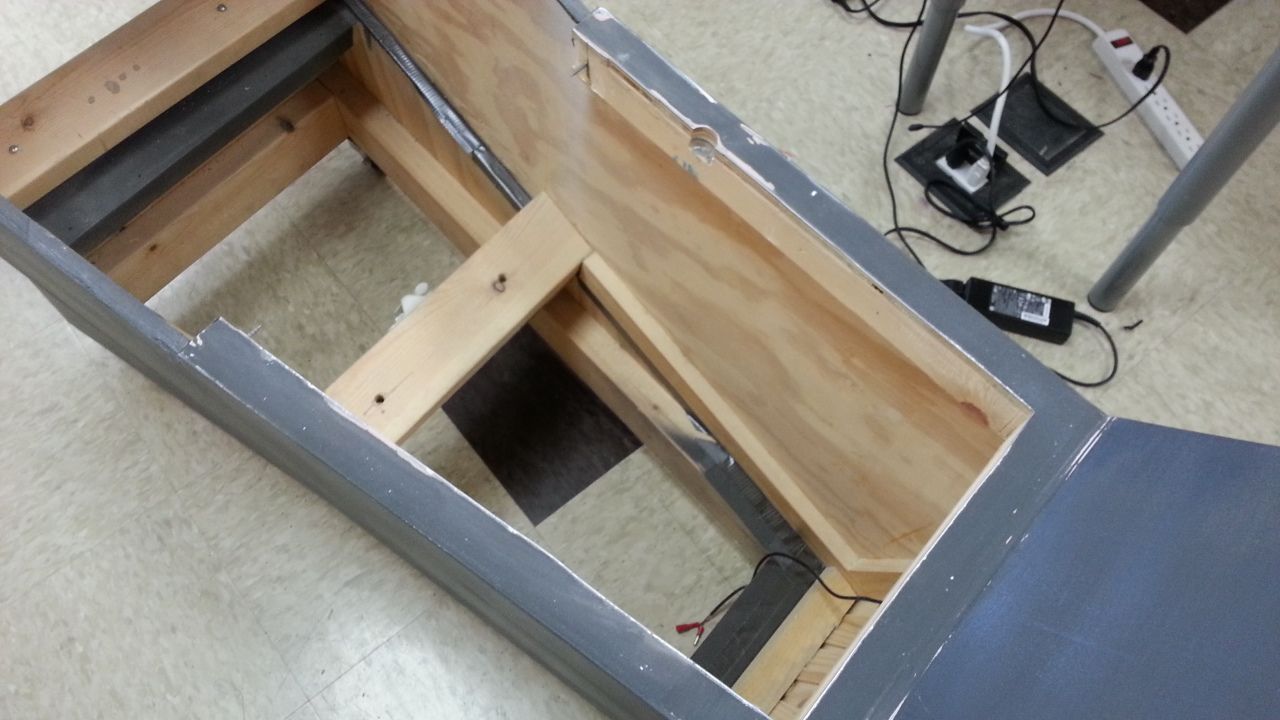
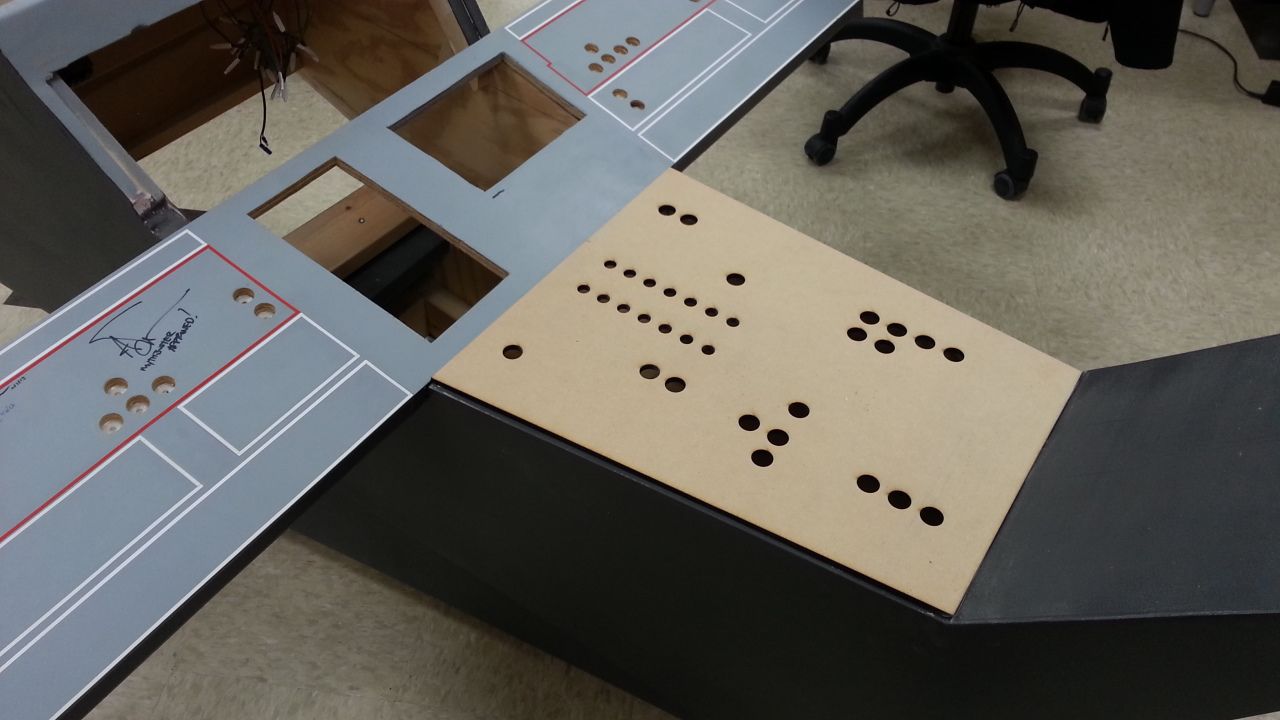
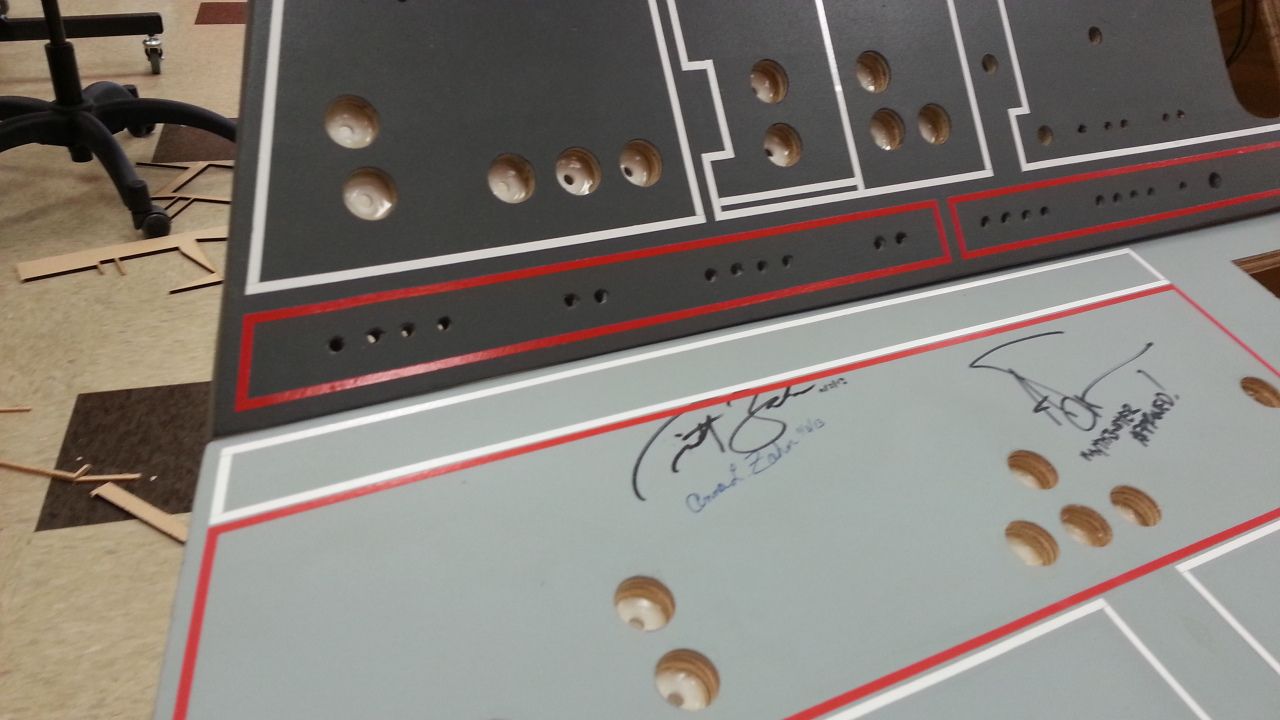
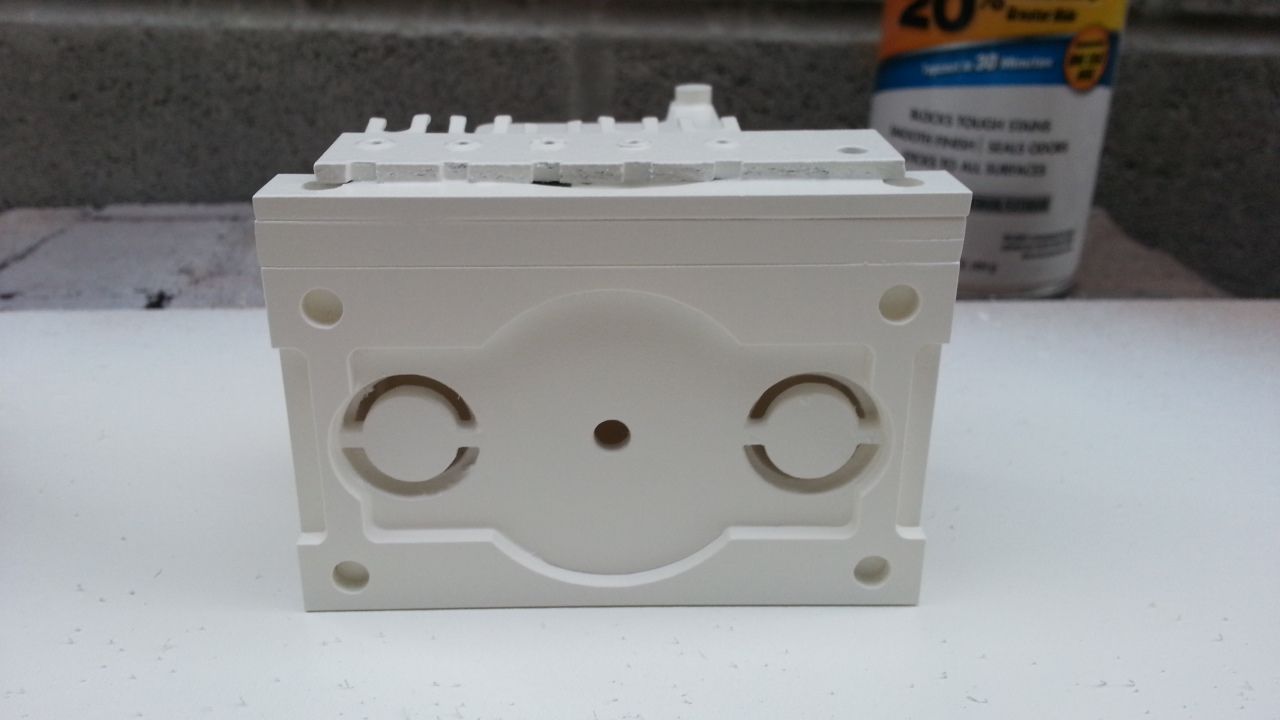
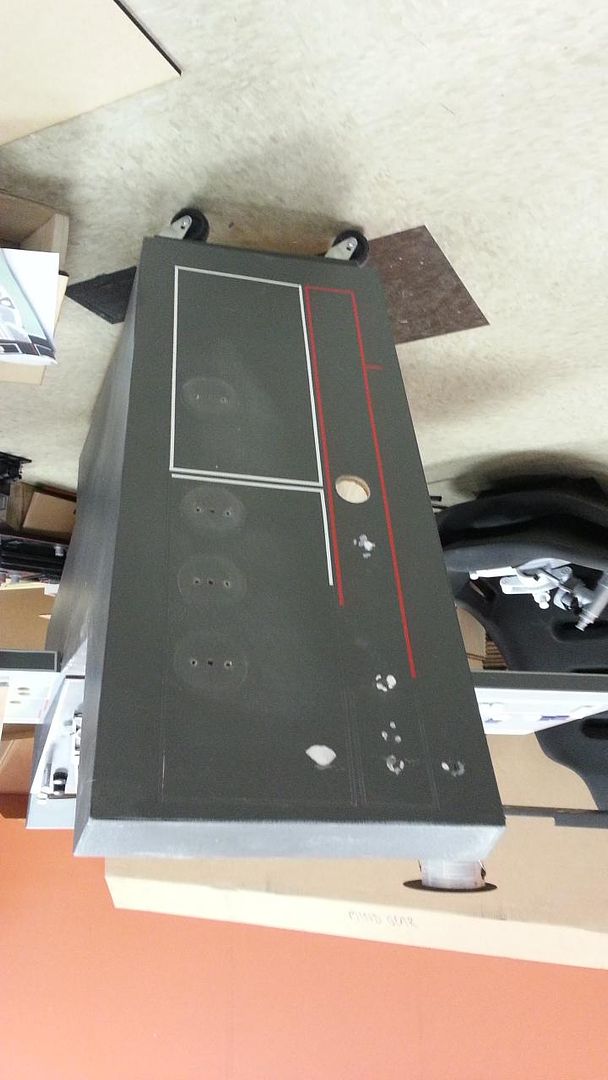
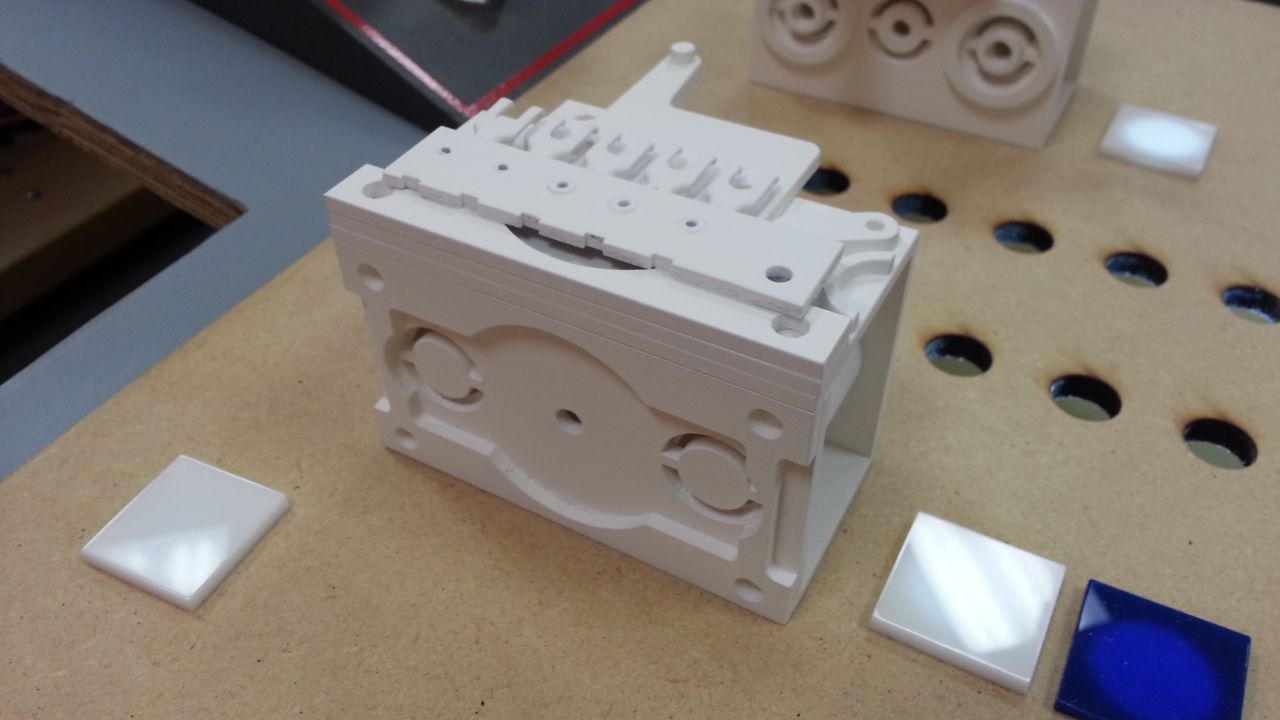
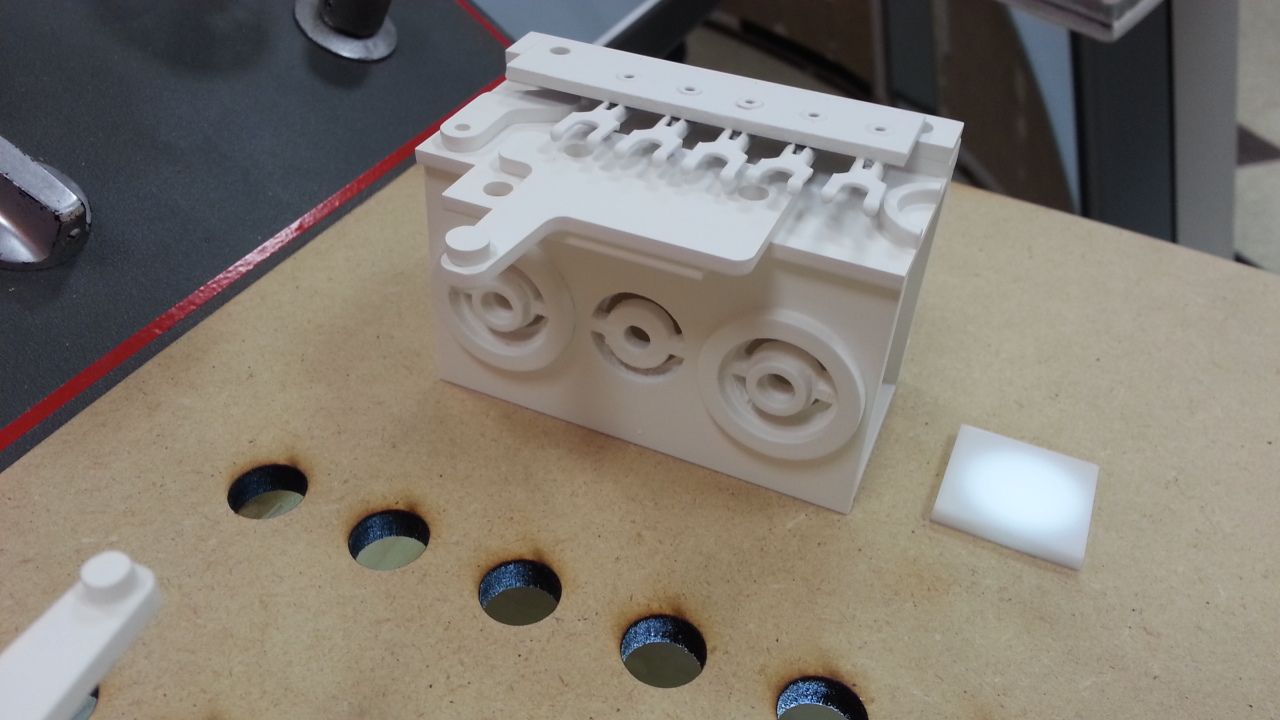
To me the dings and repairs and the layering of paint add that extra layer of Star Wars realism - the console truly feels like part of a "used universe".
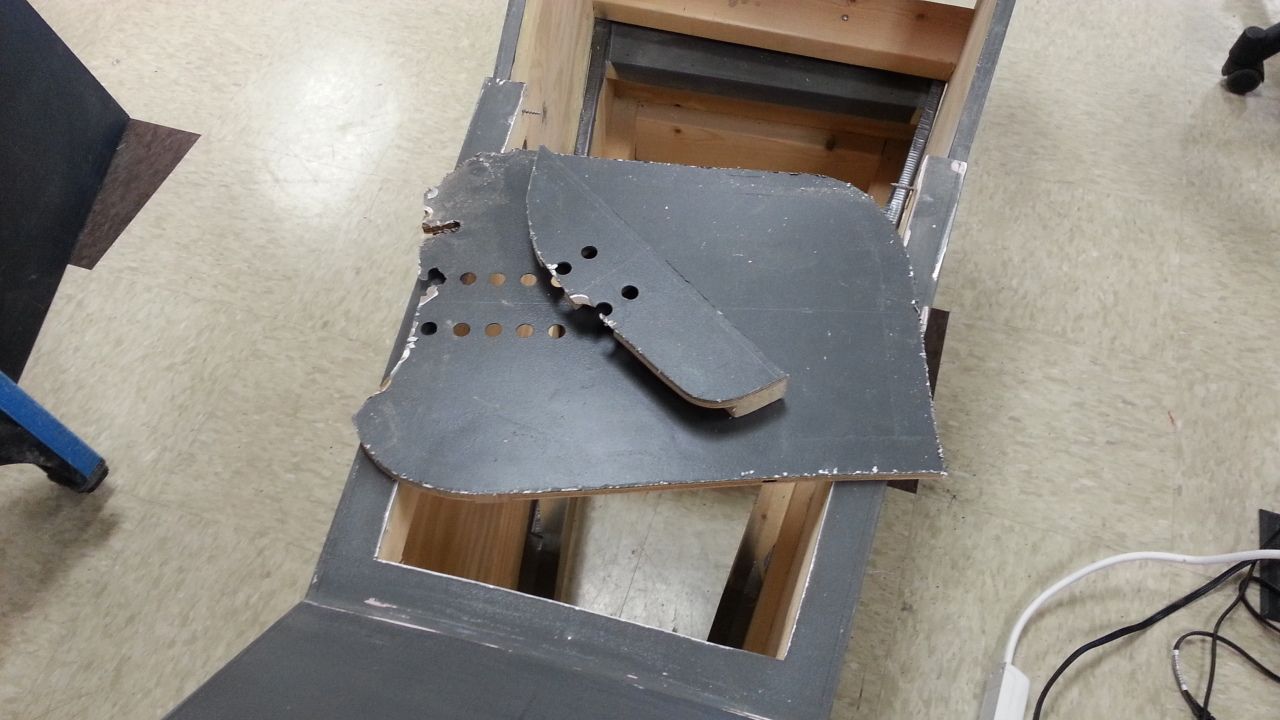
Will you be weathering the final piece as well?

Hi J,

Thank you for taking the time to check out the post - and you're very welcome. :)

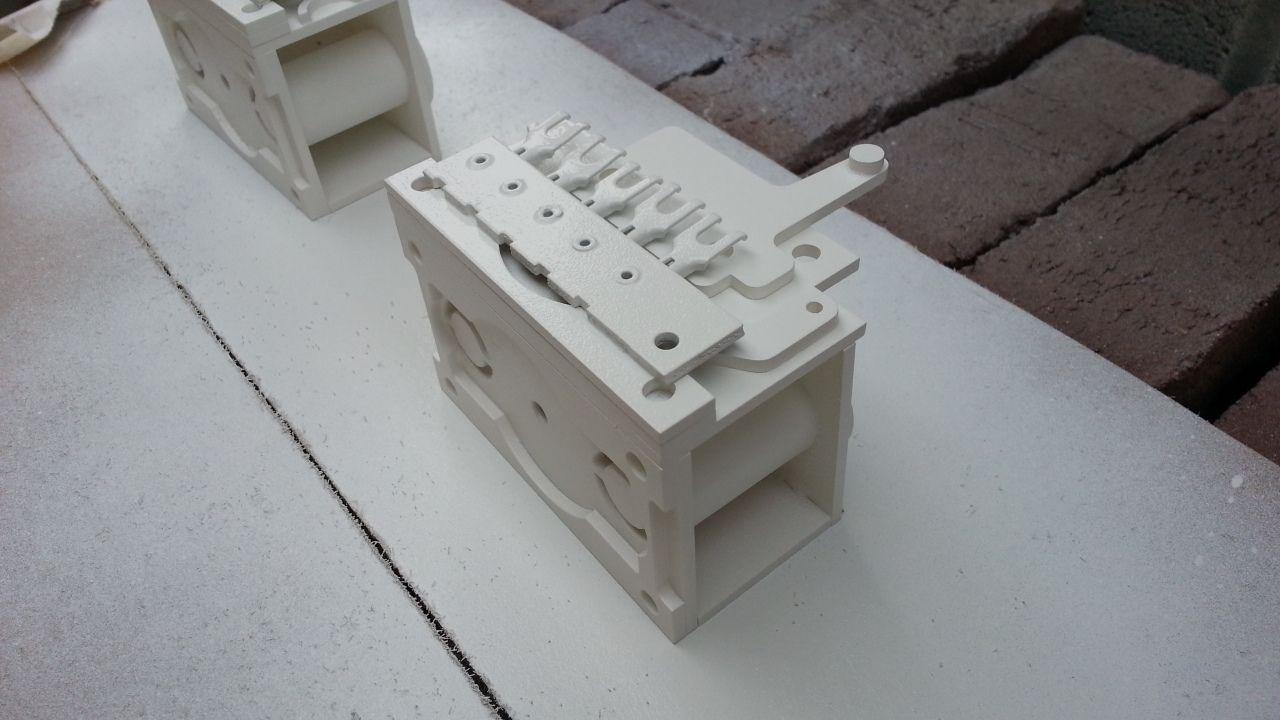
I never really looked at all the dings and imperfections in the console as being part of the "used" universe. That actually makes me feel a little better about all the imperfections. I don't have to worry about it so much. I'm not sure we'll be weathering the console too much. I'd like to think regular wear and tear will do the job.

We have sveral more things cooking. So stand by!
 
FAB job once again SofaKing:cool Love the console (to think about the work you've put into it is mind-boggling!)...keep at it, one day she'll fly!
 
FAB job once again SofaKing:cool Love the console (to think about the work you've put into it is mind-boggling!)...keep at it, one day she'll fly!

Hey J,

Thanks so much, my friend. I have to admit it was somewhat upseting to take a perfectly finished console and tear it down... but knowing the direction we're taking and what's about to happen does make it a little easier... I did just get a few sound bytes from Chris of the MF engines. So... we're getting closer to actually flying ;)
 
Hi SK,

thank you for your reply!

Re-reading my last post it dawned on me that it might have come across as though I was pointing out imperfections, when quite the opposite was the case! What I meant to say was this: What a joy it is to see the console grow layer by layer, detail upon detail. It's like watching Han and Chewie looking after their beloved ship, repairing, adding, perfecting. There is so much work and care beneath that pristine surface, I am reminded, too, of a vintage car that has been lovingly restored and cared for over the ages. Perhaps you could call it emotional, as opposed to visible, texture. The console has a rich history, just what the Falcon is all about.

Certainly standing by for more workshop goodness!

Hi JR,

I was not offended or put off by your comment at all. The funny thing is, the console armrest in particular has been giving me such greif these last few weeks that I sometimes lose sight of the fact that this ship is supposed to be a piece of junk. The minor imperfections "I" see and constantly dwell on should be seen as character and the "wear and tear" we've all come to know and love about the SW universe.

More workshop goodness is coming. I've taken the last few days off to regroup. Plus the paint on the console needs a few days to dry.

I very much appreciate the kind words. Stand by! :)
 
Has been a while since I saw your build, and the progress is still good I see. A few...hundred tiles, looks exhausting, but necessary. Nice work! :)
 
Has been a while since I saw your build, and the progress is still good I see. A few...hundred tiles, looks exhausting, but necessary. Nice work! :)

Hey Kev,

Great to hear from ya! Unfortunately we're still taking baby steps and there is still no resolution to the workspace... UGH... But we all have our marching orders and work does continue. I'll be hitting the console this weekend and "hope" to have my share of the work complete.

Cutting the tiles was easy... it will be carefully removing all those glass tiles and drilling the holes that will be a killer... But we're ready for anything... ;)

How's R2 coming?
 
I guess some work isn't supposed to be fun, but in the end it's the result that matters. I'm sure you can do it ;)
Well, I guess there are ups and downs in all builds, no way around.


The R2 is coming along nicely, thanks. :)
I will get started on it later on today, I just have to pick up some new supplies like more glue, paint and primer. Let's give him some details and more parts!
 
Hi Everyone,

Not much in the way of pictures on the quad v2, but some decent progress- The second piston frame now joins its brother in pseudo completion. The next step is building a frame for counterweight for the back end.

A fellow stagehand dropped by to discuss motor and solenoid control issues, and we think we have a plan. Right now we are aiming (sorry, couldn't resist) for a pitch move of a little over 90 degrees in about a second and a half. He thinks he has a motor in operation on another project that he thinks has enough torque for the job, as long as we are able to balance the load properly. Once we know we have a motor that will a) make the quad move right, and b) fit inside the body of the quad itself, we can figure out the mount and join the two piston frames together.

We also decided on an axle dimension that will support the gun, so that leads us to bearings and sprockets and chain (oh, my) (again, apologies, theatre rat here)

SK and I have been discussing some "maintenance hatches" on the barrels to help with installation and overhaul, if necessary.

I will get more pictures soon, but anything I take right now looks more like a step backwards with all of the skin removed.

Scot
 
that acrylic greeblie of yours.... i cant not see some form of ak-47 or variant such as the SKS's receiver. i have an sks, maybe i will break it down for a better look. still loving this build, keeps blowing me away
 
Hi Gang,

Well... we ran into a slight problem with the darker paint. After a week of sitting the paint still had not cured / dried. VERY frustrating. So, we sat down and decided to do a little cosmetic surgery on the console. With the help of the laser cutter and some behind the scene photos from ESB, we decided on this...

Away with you!
20140301_124941_zps5e54a872.jpg


20140301_130636_zps2d9e2e4c.jpg


20140301_130646_zpsd85fcf98.jpg


20140301_151814_zps848916e3.jpg


After taking dozens of measurements, we then laser cut a new panel with the LED and switch holes precut :)
20140301_151824_zps0ab136d2.jpg


20140301_152319_zps79b8a1d8.jpg


The panel will sit atop the console just as the ESB version did
20140301_152339_zps16396501.jpg


Lever greeblies in their place - still needs some paint
20140301_152700_zps7b51aca0.jpg


20140301_153505_zpsfd655e24.jpg


Side View
20140301_153515_zpse0b52463.jpg


Over time the two instrument panels have begun to sag - we're going to address this issue as well
20140301_161755_zps5078c52d.jpg


Temp clamps in place as we design "something"
20140301_161743_zpse564fee6.jpg


That's better
20140301_161733_zps1b531ef7.jpg


Then added a new center brace
20140301_181805_zpsbe461696.jpg


More to Follow :)
 
Last edited:
Hi SK,

very sorry to read about the paint not curing. Great to see that you didn't get discouraged though.

The new laser-cut panel looks absolutely fantastic :thumbsup

Have been doing a some research and found this interesting little fellow:

Consolidated PBY Catalina throttle quadrant 2.jpg Consolidated PBY Catalina throttle quadrant 1.jpg

This segment in particular:
Consolidated PBY Catalina throttle quadrant 2, marked.JPG


This is the throttle quadrant of a Consolidated PBY Catalina. It is not an exact match to the levers on the console, but quite similar.

The images hailed from here: Collect Air | Good Stuff P-40 Etc (scroll down to about the middle of the page).

Have a great Sunday!
 
Last edited:
Hi Gang,

Spent a few hours at the lab...

Laser cut a few shapes...
20140302_123253_zpsc7431853.jpg


20140302_153745_zps09e52650.jpg


Started putting them together
20140302_123308_zpsbd17b9c8.jpg


This is base for the new armrest lever
20140302_144731_zpse2f5d58b.jpg


20140302_144741_zps0af3f1ff.jpg


20140302_144751_zps905539fa.jpg


Still needs to be painted silver
20140302_144802_zps30fa5933.jpg


Started on the second one
20140302_153729_zpsff38cad8.jpg


20140302_153736_zps6466684d.jpg


Added primer
20140302_164117_zpsfe176978.jpg


20140302_164125_zps23b8a0ee.jpg


20140302_164132_zps8948ebee.jpg


20140302_164138_zps0057a355.jpg


20140302_164149_zps99ce7159.jpg


Mike then got to work on the back panel - this was his baby! :)
20140302_162000_zps5a09b0cb.jpg


Several measurements later and the help of the laser cutter - a new back panel was made
20140302_162038_zps8496e092.jpg


Acrylic was then cut for the new ESB details
20140302_164828_zps16dac057.jpg


Testing the red 1" tiles and panel light
20140302_171157_zpsdc8c60c5.jpg


More backlight tests
20140302_171248_zps7d98ede3.jpg


20140302_172453_zpsa513604f.jpg


20140302_171912_zps9b0e649e.jpg


Some of the acrylic still had the paper backing
20140302_171918_zps3e3014b4.jpg


20140302_172510_zps0fea8a76.jpg


Needs a little paint and some pin stripes
20140302_172518_zps99e124a3.jpg


Armrest lever greeblie
20140302_172522_zpsc4c488a3.jpg


Those empty holes are for the toggle switches
20140302_172527_zpsf2158a35.jpg


Tomorrow night the wiring / lighting / sound officially begins! :)
 
Looking good as always...yes, more bracing will be needed (steel) overtime...maybe the next one will be aluminium;)

Thanks! I have to admit I was very hesitant about cutting out the panel but I'm glad we did. A fresh panel is good. :) We actually discussed using metal... so who knows?
 
Hi SK,

very sorry to read about the paint not curing. Great to see that you didn't get discouraged though.

The new laser-cut panel looks absolutely fantastic :thumbsup

Have been doing a some research and found this interesting little fellow:

View attachment 292759 View attachment 292760

This segment in particular:
View attachment 292776


This is the throttle quadrant of a Consolidated PBY Catalina. It is not an exact match to the levers on the console, but quite similar.

The images hailed from here: Collect Air | Good Stuff P-40 Etc (scroll down to about the middle of the page).

Have a great Sunday!

Hi JR,

Thanks for the kind words and GREAT FIND! I really wish we could use more real parts for the project but the cost for some of these parts are very high. But I think we're doing pretty well so far?

- - - Updated - - -

Enamel? Hate that...

Me too! I wasn't too thrilled coming into the lab and finding the paint hadn't cured. But... it is what it is and that panel no longer gets to play with the rest of the console. Bad panel!

- - - Updated - - -

The paint never dried? What the hey???!!! :(

NOPE! Horribly frustrating! But I think we're headed in the right direction now.
 
Sad about the paint, but it's nice to see that it's fixed, or right about fixed. Great work!

Lights already added? Nice! Gives it a lot more sci-fi look, keep it going. :)
 
Remembering that you are going to make three of these, I'd say you can't beat yourself up about not using more original parts. Plus, there is something cool about the way you're going about it where the end result is true to the fictional source (i.e. it looks right) vs. the actual production source. If folks looked closely at a greeblie and saw "made in China" it would sort of ruin the whole "galaxy far, far away" aspect.

Hmm, so now I'm thinking you should add "made on Alderaan" in Aurebesh on some of the greeblies!
 

Your message may be considered spam for the following reasons:

If you wish to reply despite these issues, check the box below before replying.
Be aware that malicious compliance may result in more severe penalties.
Back
Top