EvanW
Well-Known Member
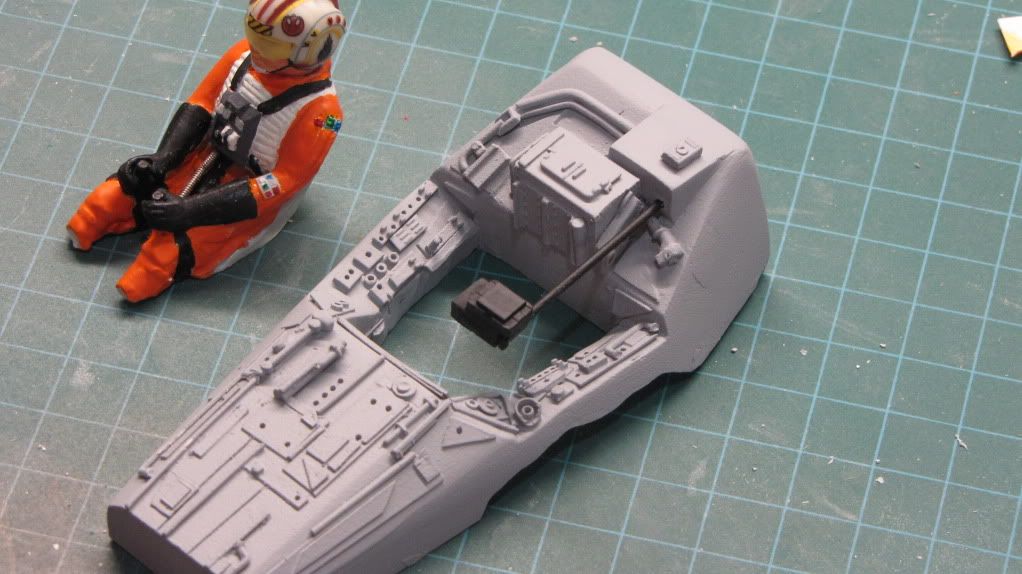
I picked up a Salzo V3 from a member here last Christmas. (2010). This was to be my 10th resin kit purchase, but my FIRST resin build. I got to work on this in January with the intention of building a Red 5. I took a look around and saw A LOT of Red 5's. Not that there is anything wrong with that, I just saw myself being too critical of details to building something screen accurate. So I decided to build a studio scale sized version of what I though Red 9 would look like. I researched probably all of the builds on this site and borrowed a little artistic value from each. First off I started with the pilot. At this time it was going to be Red 5 but I didn't like the head that came with the kit. This was my first resin build remember. I loped of the head of a POTF Luke action figure and married it up with the kit body. The head was about 1.5 mm larger than the kit one. I felt the size diff was negligible. I pictured myself going bonkers with all the small decal details on a helmet this size! Here he is beside his drilled out cockpit and targeting computer.
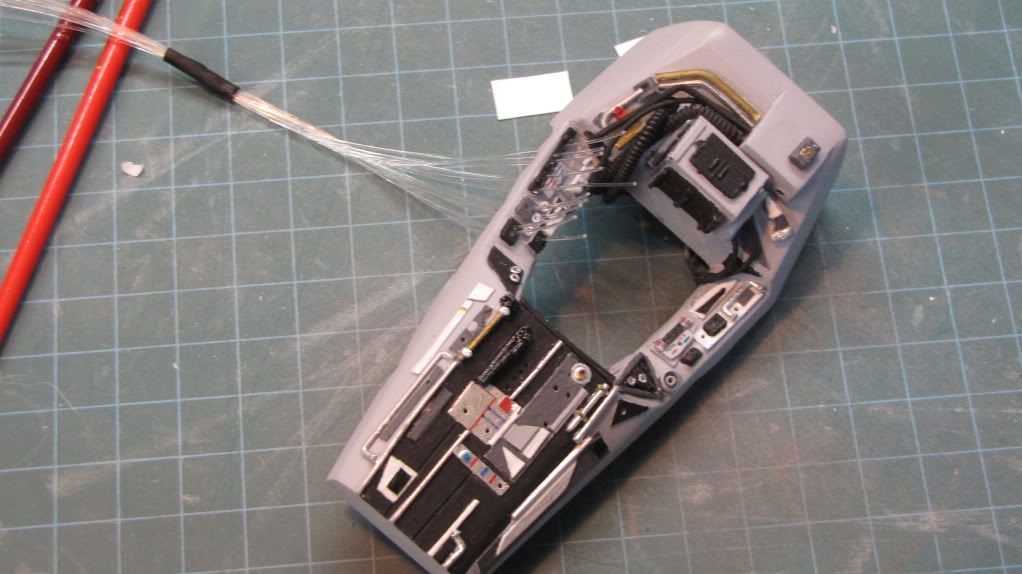
Here is a shot of the painted cockpit as I added the fiber optics. Various sizes of guitar string made up the hoses and such.
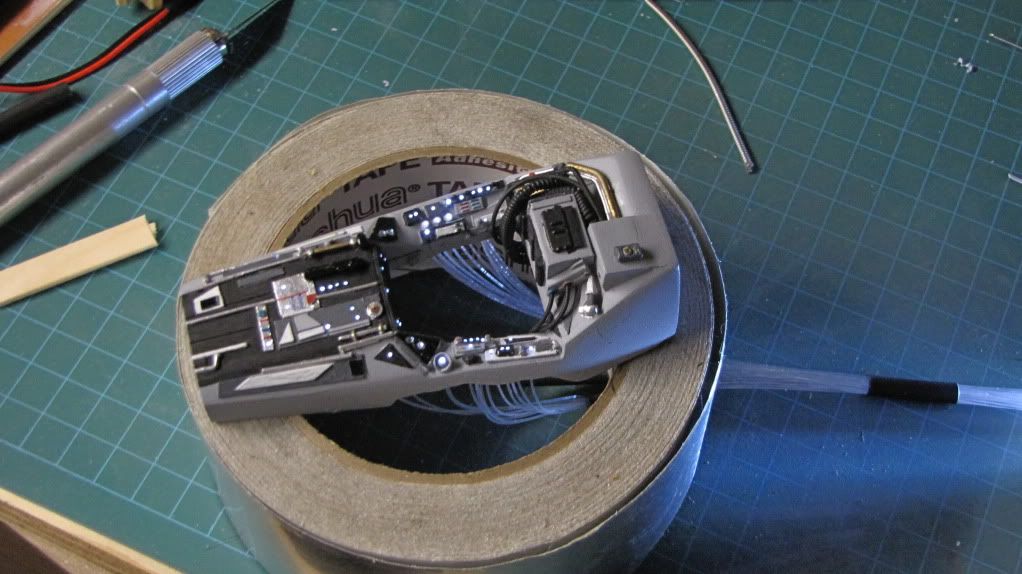
I figured 47 lights for the cockpit was enough...
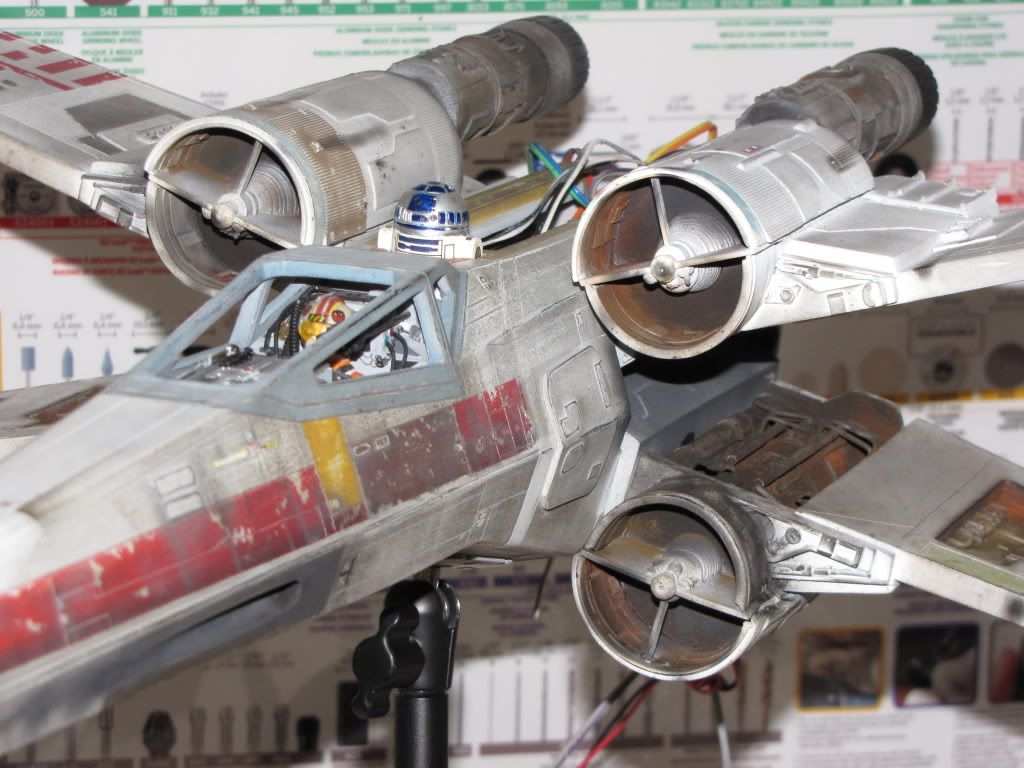
Next I moved onto the engines and was really inspired by a builder her who had added brass tube to his for a more real looking effect. I tried a variation and included some Tamiya tank parts too.

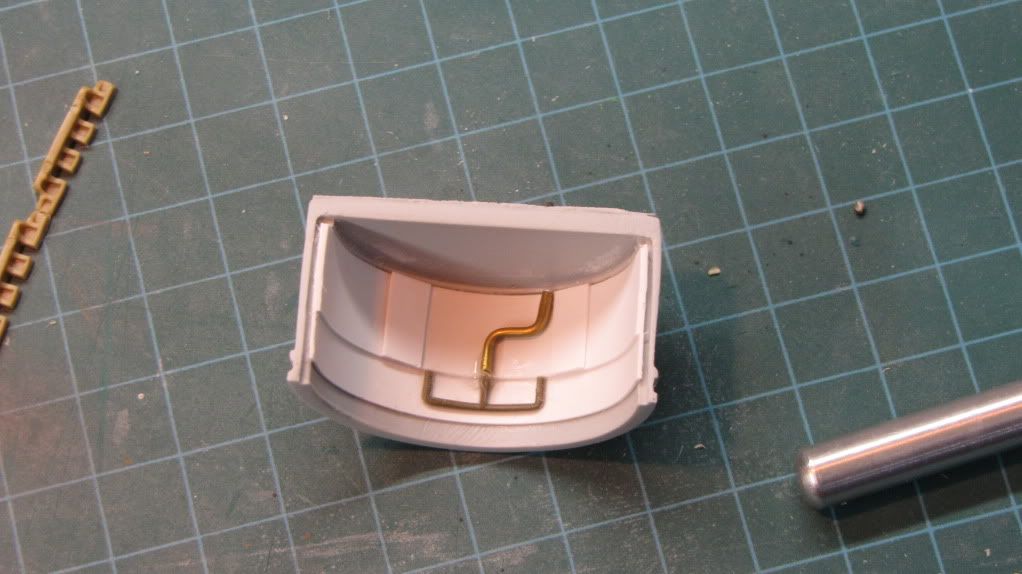
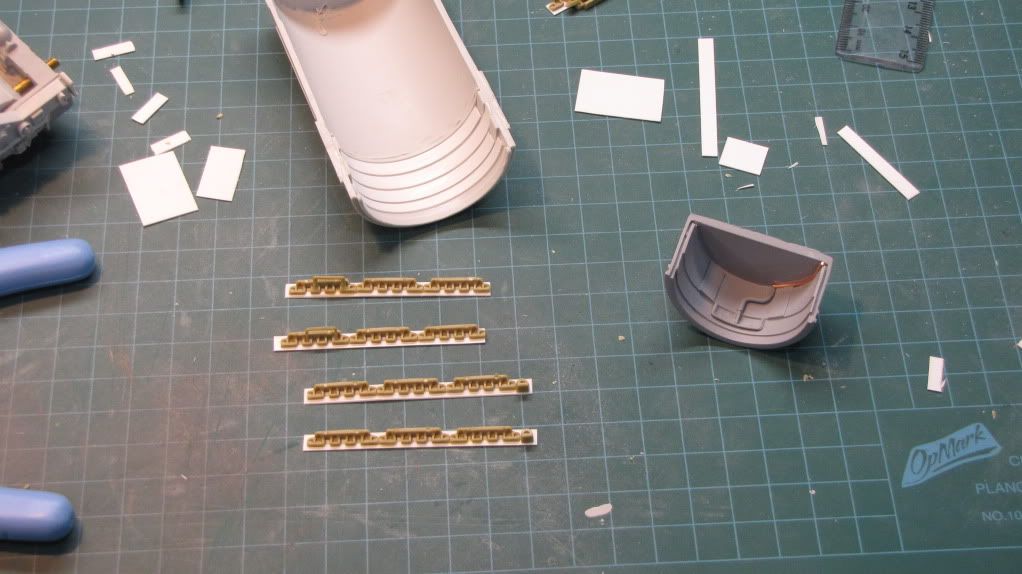
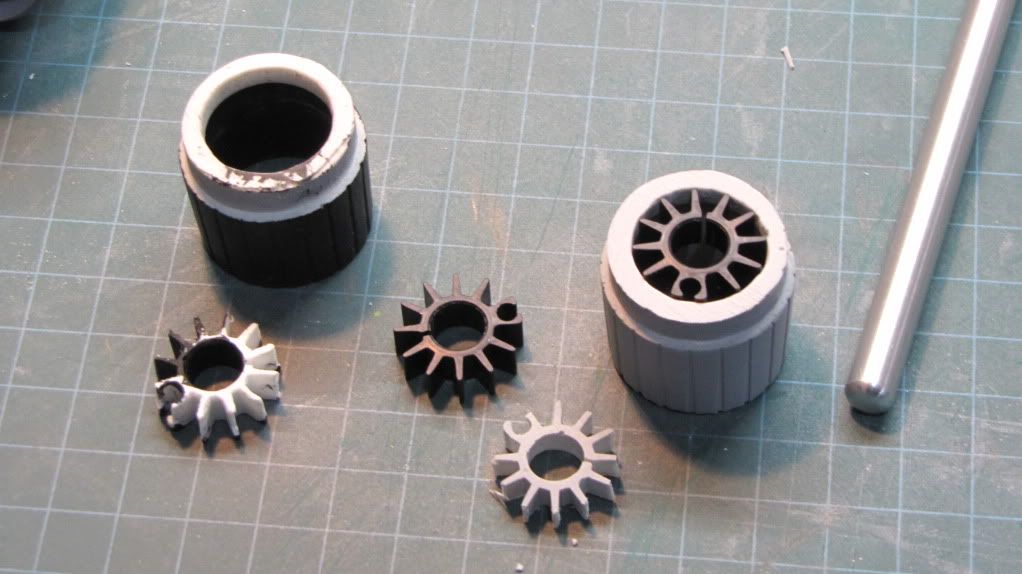
I also removed the kit engine inserts and replaced them with cleaner screen accurate ones.
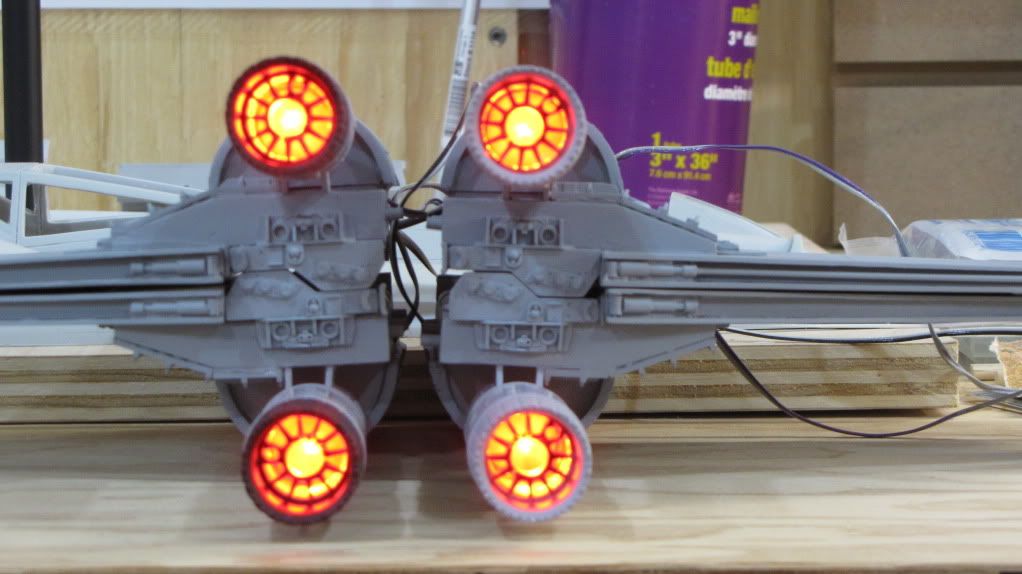
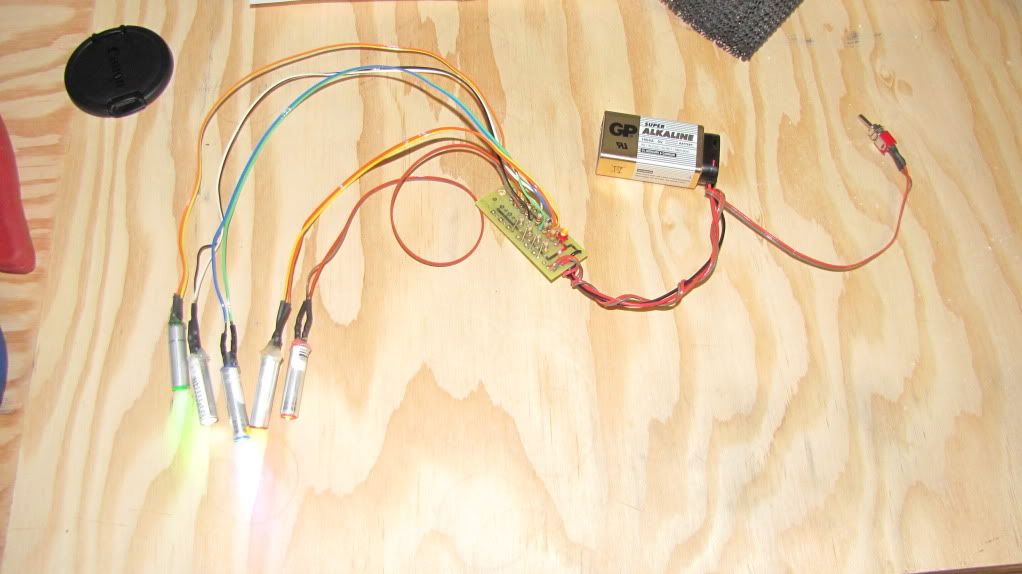
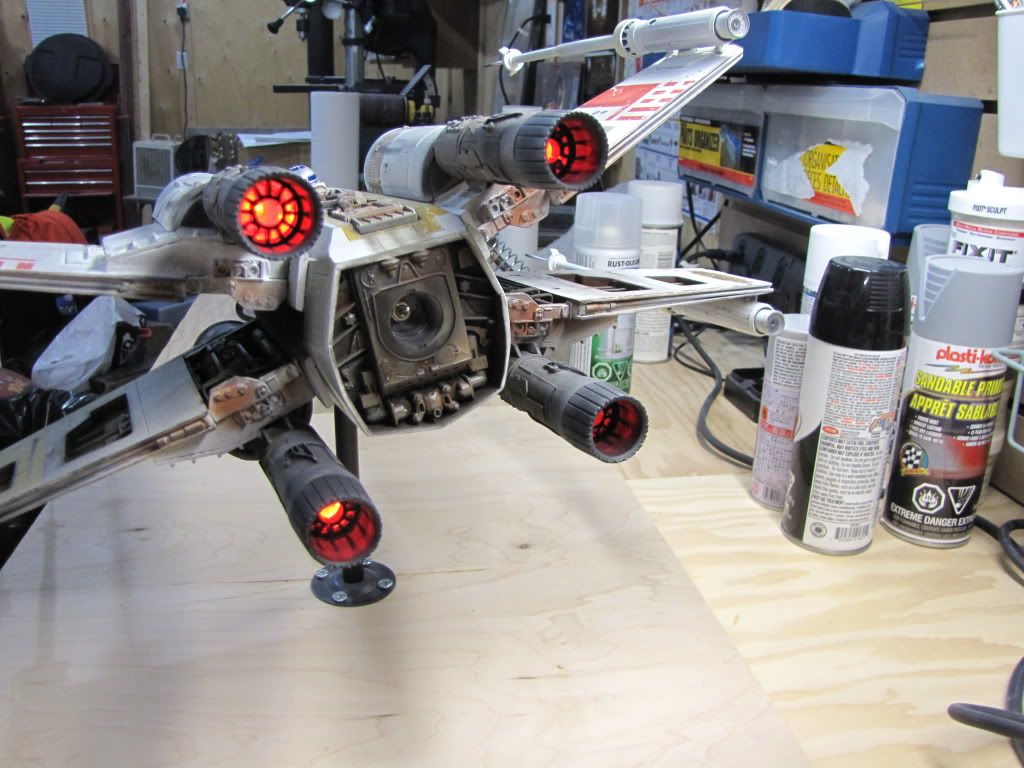
A light test on all engines looked good to my eye anyway. The inside of the engine cans were lined with alum foil tape to maximize the light output. Lights were supplied by Voodoo FX and I was grateful for the soldering help. He applied the resistors and a couple of lights to get me started. This was also my first wired kit.
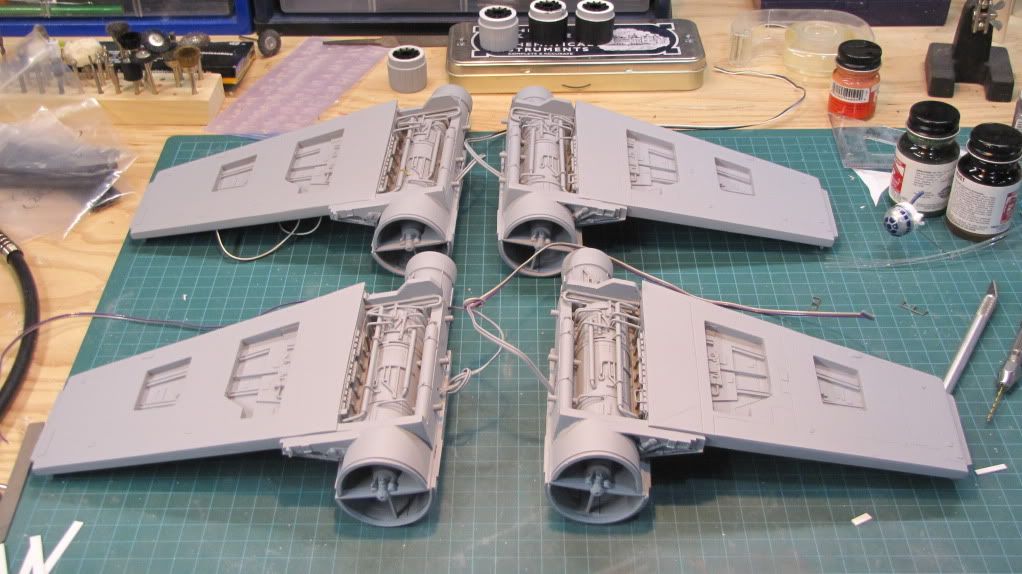
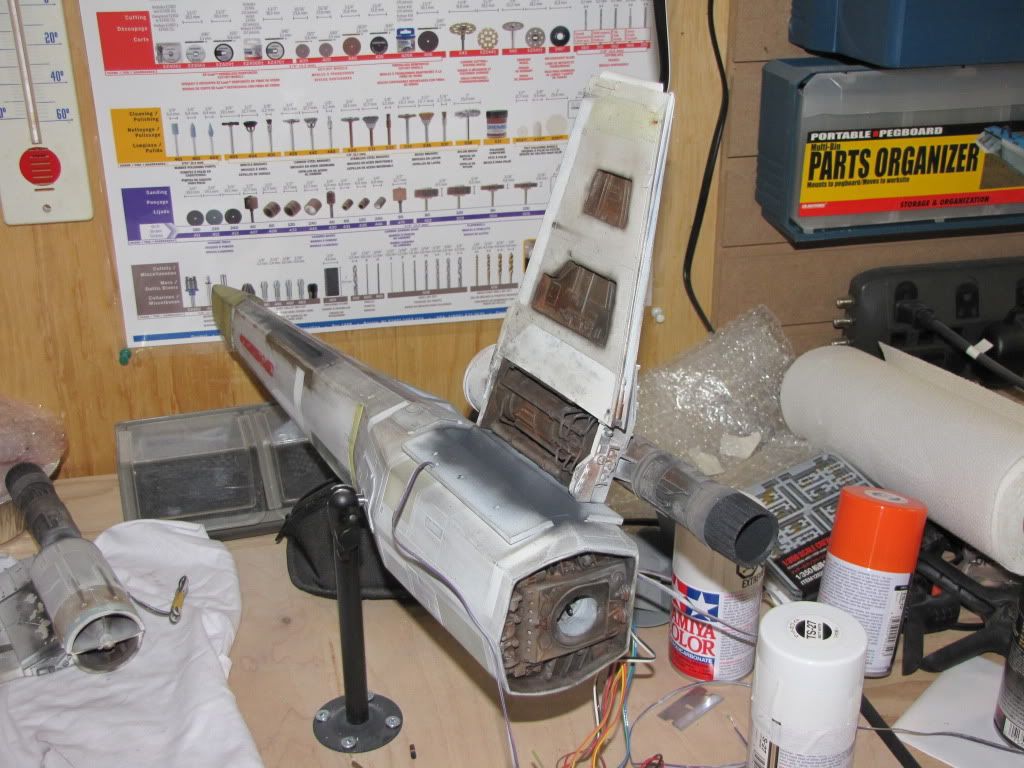
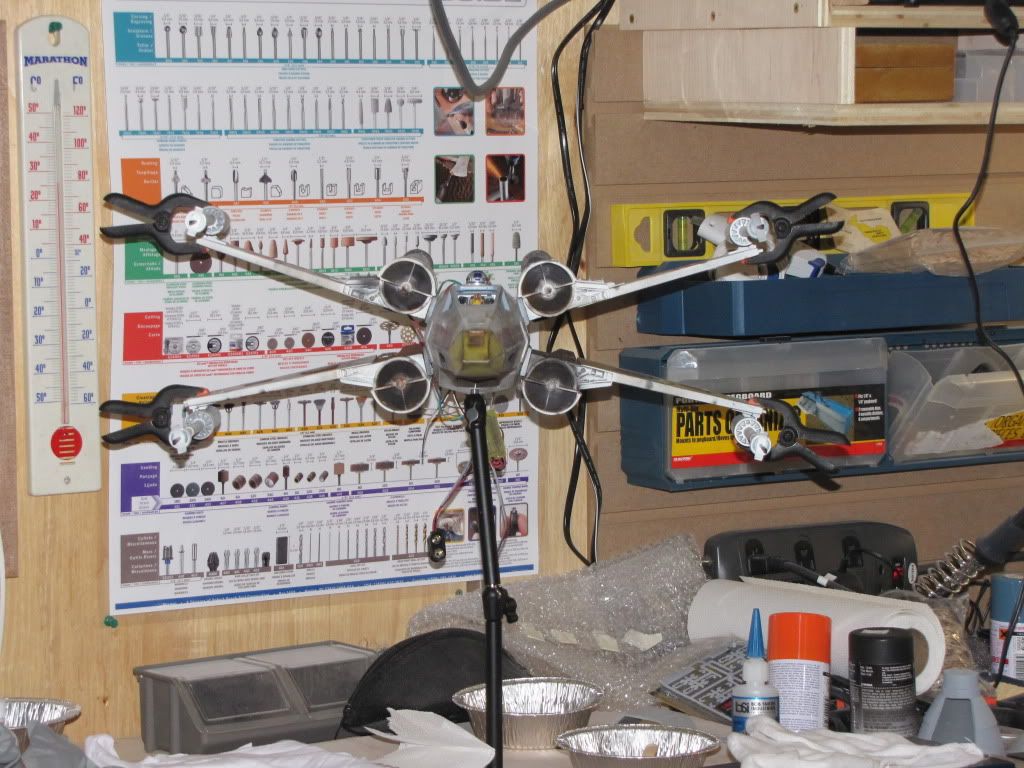
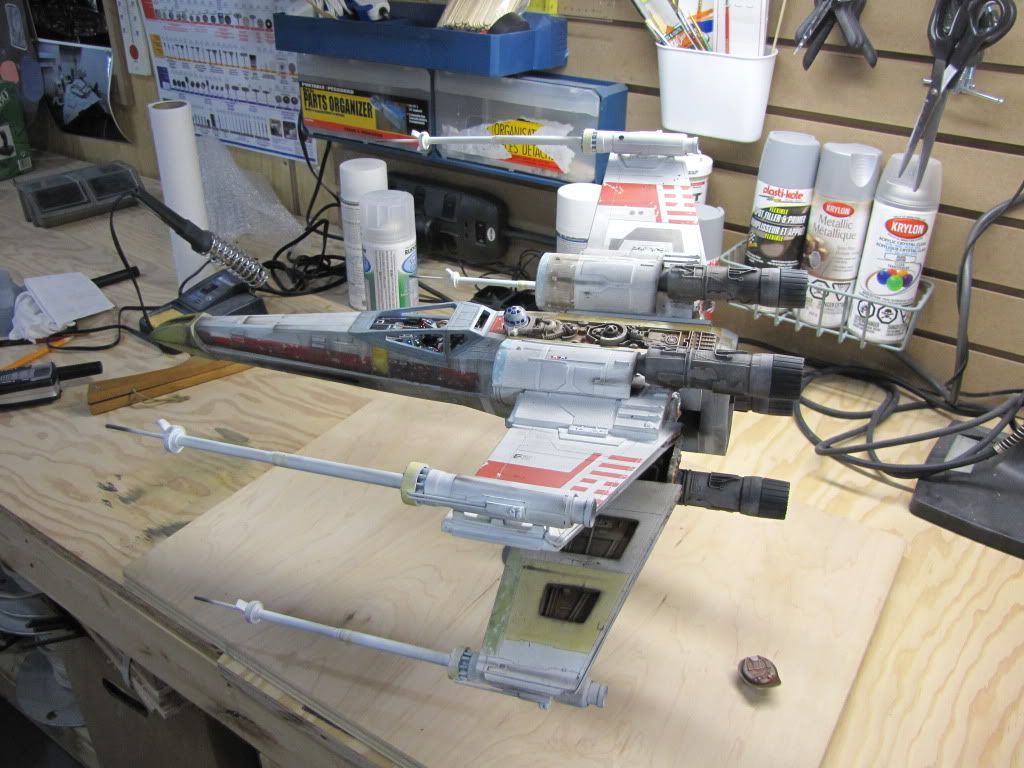
From here this build gets sketchy as I would go at it for marathon sessions and forget to take pictures. Doh! Here she is with the holes drilled in the side after assembling the top and bottom.

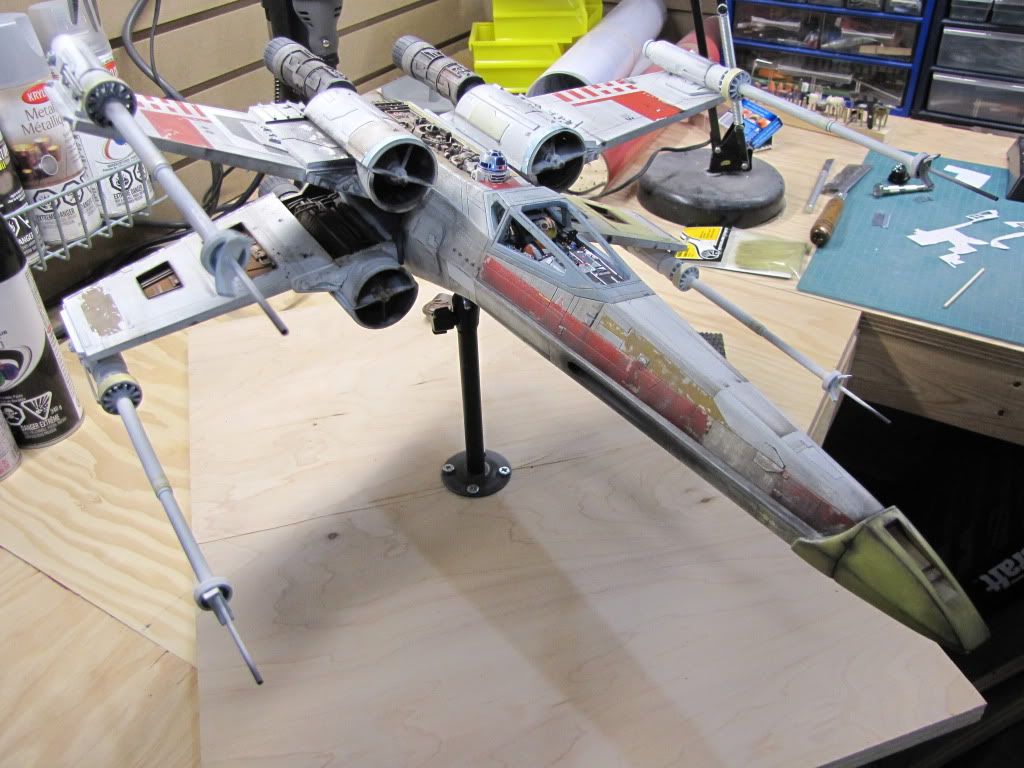
Now came the fun part. I suck at painting. Unless it is a rattle can primer coat. I have that down pat somewhat! I was not going to wreck this with a bad paint job, so I called Apophis to once again again bail my sorry ass out of another mess. I gave him some ideas and left the rest to his "artistic license and discretion". This is what was returned to be 8 weeks later just before Christmas:
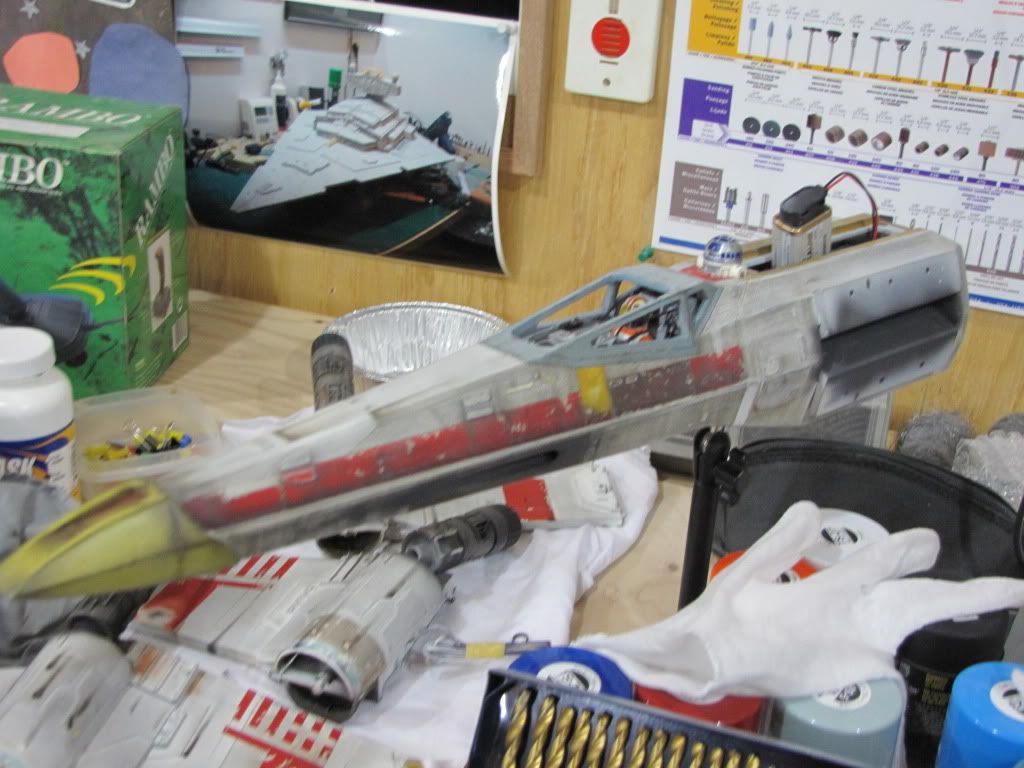
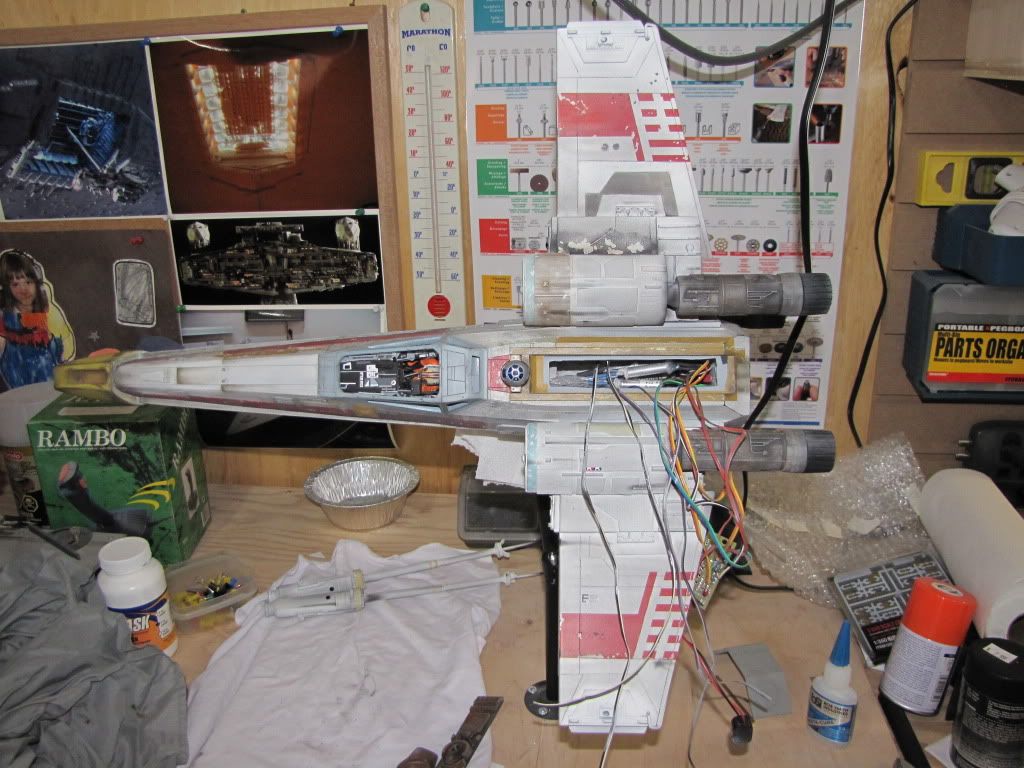
I was extremely pleased with the paint work. Once again Jerry had out did himself! I had placed the circuit board and wiring in the rear hollow and rigged up a switch to be covered by the rear plate. The droid strip would be affixed by magnets so I could swap out the battery when needed. Now the wings and cannons had to be mounted so I could finish it up.
Finally all finished! A year later ( I have 4 kids, a wife, and numerous pets that seem to want ALL my attention ALL the time! LOL!). I am actually going to miss working on it. I learned a lot from the other members here. You all inspired me to try different things. A big shout out to the guys who helped break my cherry on this: Randy from Voodoo FX for the numerous emails and finally a phone call to help me through the soldering process! Mike for producing my dream kit to start with, Jerry for the awesome paint job. Jason E for the decals, and everyone else here who has documented their build so I could dive into mine.
Now I just need to find an awesome display base for it. Already have a plaque from gatorbait.
Thanks for looking,
Evan
Here is a shot of the painted cockpit as I added the fiber optics. Various sizes of guitar string made up the hoses and such.
I figured 47 lights for the cockpit was enough...
Next I moved onto the engines and was really inspired by a builder her who had added brass tube to his for a more real looking effect. I tried a variation and included some Tamiya tank parts too.
I also removed the kit engine inserts and replaced them with cleaner screen accurate ones.
A light test on all engines looked good to my eye anyway. The inside of the engine cans were lined with alum foil tape to maximize the light output. Lights were supplied by Voodoo FX and I was grateful for the soldering help. He applied the resistors and a couple of lights to get me started. This was also my first wired kit.
From here this build gets sketchy as I would go at it for marathon sessions and forget to take pictures. Doh! Here she is with the holes drilled in the side after assembling the top and bottom.
Now came the fun part. I suck at painting. Unless it is a rattle can primer coat. I have that down pat somewhat! I was not going to wreck this with a bad paint job, so I called Apophis to once again again bail my sorry ass out of another mess. I gave him some ideas and left the rest to his "artistic license and discretion". This is what was returned to be 8 weeks later just before Christmas:
I was extremely pleased with the paint work. Once again Jerry had out did himself! I had placed the circuit board and wiring in the rear hollow and rigged up a switch to be covered by the rear plate. The droid strip would be affixed by magnets so I could swap out the battery when needed. Now the wings and cannons had to be mounted so I could finish it up.
Finally all finished! A year later ( I have 4 kids, a wife, and numerous pets that seem to want ALL my attention ALL the time! LOL!). I am actually going to miss working on it. I learned a lot from the other members here. You all inspired me to try different things. A big shout out to the guys who helped break my cherry on this: Randy from Voodoo FX for the numerous emails and finally a phone call to help me through the soldering process! Mike for producing my dream kit to start with, Jerry for the awesome paint job. Jason E for the decals, and everyone else here who has documented their build so I could dive into mine.
Now I just need to find an awesome display base for it. Already have a plaque from gatorbait.
Thanks for looking,
Evan
")