ParadoxJane
New Member
Benn along time since I have been on the RPF. I am currently working on several big costumes and projects for Dragoncon. My most labor intensive is the Royal Dress from the Video Game Alice Madness Returns.
There are many dresses in the game, including 5 in just the DLC alone. this one was my favorite.
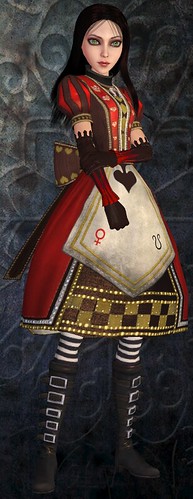
I Made my own patterns for the dress with a modified Simplicity Skirt pattern. Of course Alice is impossibly thin and out of proportion in the game and as much as I would love to have a 18 inch waist, I have to adapt the pattern to my body type.
I Started with the base first. Red and Black Bridal weight Satin (More of a Matte finish rather than super shiney). Because of the way the dress looks in the game, I opted to not attach the underskirt.
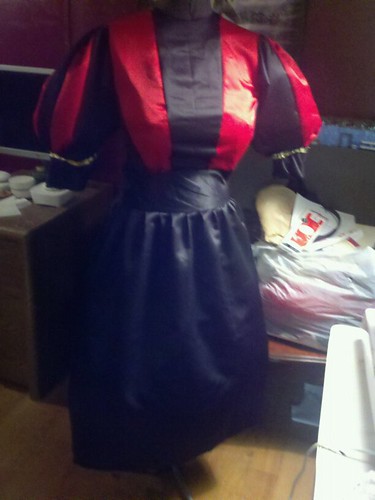
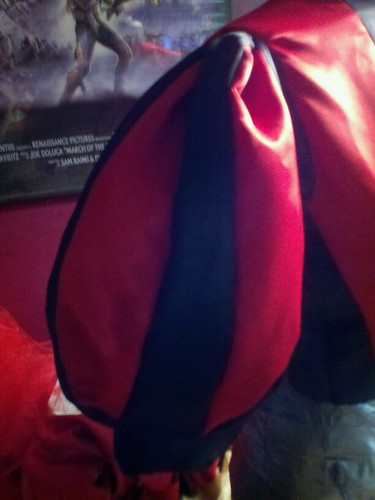
The Sleeves are done in a "Snow White" Style, Gathered at the top and Bottom to let the color show through. After I made these, I realized that they were too long and took off about 2 inches. Silly me forgot that I am going to wear full length gloves and some skin needed to show at the top.
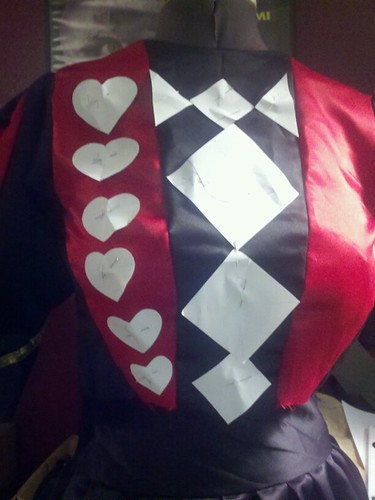
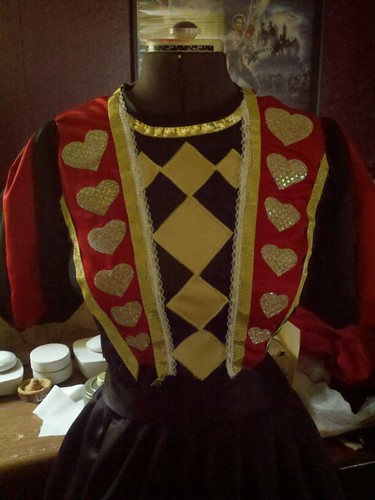
I then moved on to Planning out the Applique on the bodice. In the game the hearts have a rhinestone look to them. I have seen people use gold fabric, off white fabric and Just gems. You will see later what I chose. I wanted to do all the applique and the massive amounts of trim on the bodice before Sewing on the Skirt. This was probally the longest process as I chose to almost handsew all the trim. the applique is machine done.
I used a Product called Steam-a-seam lite to place all the applique before sewing. Steam a seam 2 is also available but you can't sew through it.
Steam a Seam Lite looks like this, Bought it at Joann's

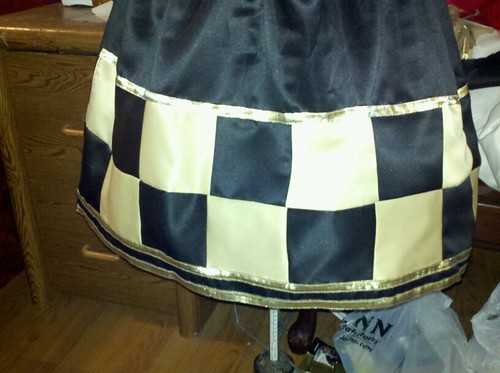
Here is the trim on the bottom of the Underskirt. I have since added the extra piece of trim at the top which you will see in later pics. I will add rhinestone gems later on.
Here is the finished applique, I also shortened the sleeves here. I will stuff them with tulle later on to make them more poofy.
Work thus far at this point has been tedious. I wanted the right placement for everything and I am a bit OCD about the trim being right, hand sewing to me just looked better but was time consuming.
Now I am ready to work on the Giant bow in the back, which also has a skull. finding good pics on the internet of the back of the dress is difficult at best. I find that I have to constantly go into the game and take notes.
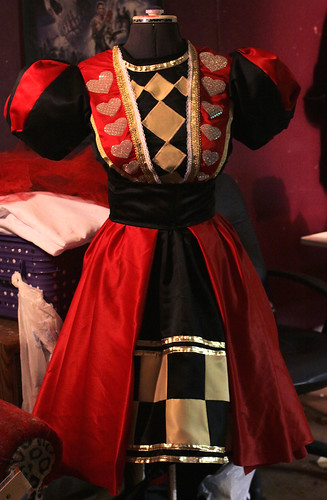
Here I started on the bow base which I am making using buckram under satin to give it stiffness and to basically hold everything together! I also did the hem which is now ready for more trim. Did I mention all the trim on this gown? Somewhere around 22 yards! I keep having to buy more.
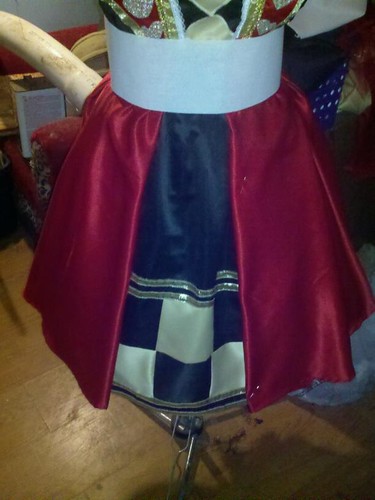
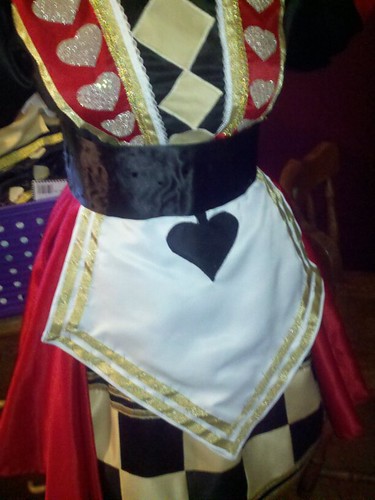
Apron Started. I've done a little more work and will post updates later. Sorry for the poor quality cell phone pics. My Camera cord is lost right now!
I am also making a prop for the dress. The catnip cannon! that's a while another thread. Hopefully I will get some work done tonight.
There are many dresses in the game, including 5 in just the DLC alone. this one was my favorite.

I Made my own patterns for the dress with a modified Simplicity Skirt pattern. Of course Alice is impossibly thin and out of proportion in the game and as much as I would love to have a 18 inch waist, I have to adapt the pattern to my body type.
I Started with the base first. Red and Black Bridal weight Satin (More of a Matte finish rather than super shiney). Because of the way the dress looks in the game, I opted to not attach the underskirt.
The Sleeves are done in a "Snow White" Style, Gathered at the top and Bottom to let the color show through. After I made these, I realized that they were too long and took off about 2 inches. Silly me forgot that I am going to wear full length gloves and some skin needed to show at the top.
I then moved on to Planning out the Applique on the bodice. In the game the hearts have a rhinestone look to them. I have seen people use gold fabric, off white fabric and Just gems. You will see later what I chose. I wanted to do all the applique and the massive amounts of trim on the bodice before Sewing on the Skirt. This was probally the longest process as I chose to almost handsew all the trim. the applique is machine done.
I used a Product called Steam-a-seam lite to place all the applique before sewing. Steam a seam 2 is also available but you can't sew through it.
Steam a Seam Lite looks like this, Bought it at Joann's
Here is the trim on the bottom of the Underskirt. I have since added the extra piece of trim at the top which you will see in later pics. I will add rhinestone gems later on.
Here is the finished applique, I also shortened the sleeves here. I will stuff them with tulle later on to make them more poofy.
Work thus far at this point has been tedious. I wanted the right placement for everything and I am a bit OCD about the trim being right, hand sewing to me just looked better but was time consuming.
Now I am ready to work on the Giant bow in the back, which also has a skull. finding good pics on the internet of the back of the dress is difficult at best. I find that I have to constantly go into the game and take notes.
Here I started on the bow base which I am making using buckram under satin to give it stiffness and to basically hold everything together! I also did the hem which is now ready for more trim. Did I mention all the trim on this gown? Somewhere around 22 yards! I keep having to buy more.
Apron Started. I've done a little more work and will post updates later. Sorry for the poor quality cell phone pics. My Camera cord is lost right now!
I am also making a prop for the dress. The catnip cannon! that's a while another thread. Hopefully I will get some work done tonight.