purefusion
New Member
Every year for the past several years I've done some sort of costume for Halloween, even if it's only to wear while passing out candy to the kids in the neighborhood. Each year, my costume-making trend seems to be moving towards amping up the complexity. My costumes started out pretty simple, but they've always been pretty interesting and atypical as far as costumes are characters go. I pick characters that aren't your run-of-the-mill costumes that you'd find other people wearing. I tend to aim for uniqueness, things no one else would have thought of. The likelihood of finding such costumes in a store is pretty slim to none as well.
Nowadays, my neighbors have come to expect impressive costume designs from me. My first year, I was Ace Ventura, and I did my hair and wore an "Ace Ventura pet detective" name tag. Simple stuff. The next year was the year of those Wendy's wigs, where the guys in the commercials wore the red wigs with gravity defying pigtails and did dumb things like kicking trees. So I made one of those wigs. That was fun. The next year I amped things up quite a bit and made a light up Tron outfit. That was quite impressive. Last year, I decided to go all out and build a crazy huge Wreck-It Ralph costume, which is how I first stumbled upon The RPF forums. I was just looking for ways to build with foam, and I came across 2012's costume contest winner, The Incredible Hulk. That costume was pretty sweet. I enjoyed working with the foam, but this year it was time to try something new.
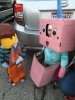
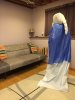
The Lego Movie came out earlier this year, and it was a surprising hit. In a vote for relevance, I decided to create Lego Movie costumes for me and the family. Wanting to deviate from what might be popular, character wise, at first I was thinking I wanted to do Lord Business in his super tall outfit. But I had to come to terms with the fact that that would've been a bit much, especially considering that I would need to be able to reach my kids when they needed assistance while trick-or-treating, so anything with stilts were out. So I decided to do Vitruvius instead, which excited me quite a bit since it would also allow me to use some of the leftover light strips from my Tron outfit from a couple years back. For the kids, my daughter Elise decided she wanted to be Unikitty, and Andrew was too young to make any specific decisions so we decided to stick with Emmet, the hero of the movie, for him. I expected to see other Emmet costumes out there, But Andrew was the only one surprisingly enough.
Pictures below…
Nowadays, my neighbors have come to expect impressive costume designs from me. My first year, I was Ace Ventura, and I did my hair and wore an "Ace Ventura pet detective" name tag. Simple stuff. The next year was the year of those Wendy's wigs, where the guys in the commercials wore the red wigs with gravity defying pigtails and did dumb things like kicking trees. So I made one of those wigs. That was fun. The next year I amped things up quite a bit and made a light up Tron outfit. That was quite impressive. Last year, I decided to go all out and build a crazy huge Wreck-It Ralph costume, which is how I first stumbled upon The RPF forums. I was just looking for ways to build with foam, and I came across 2012's costume contest winner, The Incredible Hulk. That costume was pretty sweet. I enjoyed working with the foam, but this year it was time to try something new.
The Lego Movie came out earlier this year, and it was a surprising hit. In a vote for relevance, I decided to create Lego Movie costumes for me and the family. Wanting to deviate from what might be popular, character wise, at first I was thinking I wanted to do Lord Business in his super tall outfit. But I had to come to terms with the fact that that would've been a bit much, especially considering that I would need to be able to reach my kids when they needed assistance while trick-or-treating, so anything with stilts were out. So I decided to do Vitruvius instead, which excited me quite a bit since it would also allow me to use some of the leftover light strips from my Tron outfit from a couple years back. For the kids, my daughter Elise decided she wanted to be Unikitty, and Andrew was too young to make any specific decisions so we decided to stick with Emmet, the hero of the movie, for him. I expected to see other Emmet costumes out there, But Andrew was the only one surprisingly enough.
Pictures below…
Last edited by a moderator: