coryalex
Active Member
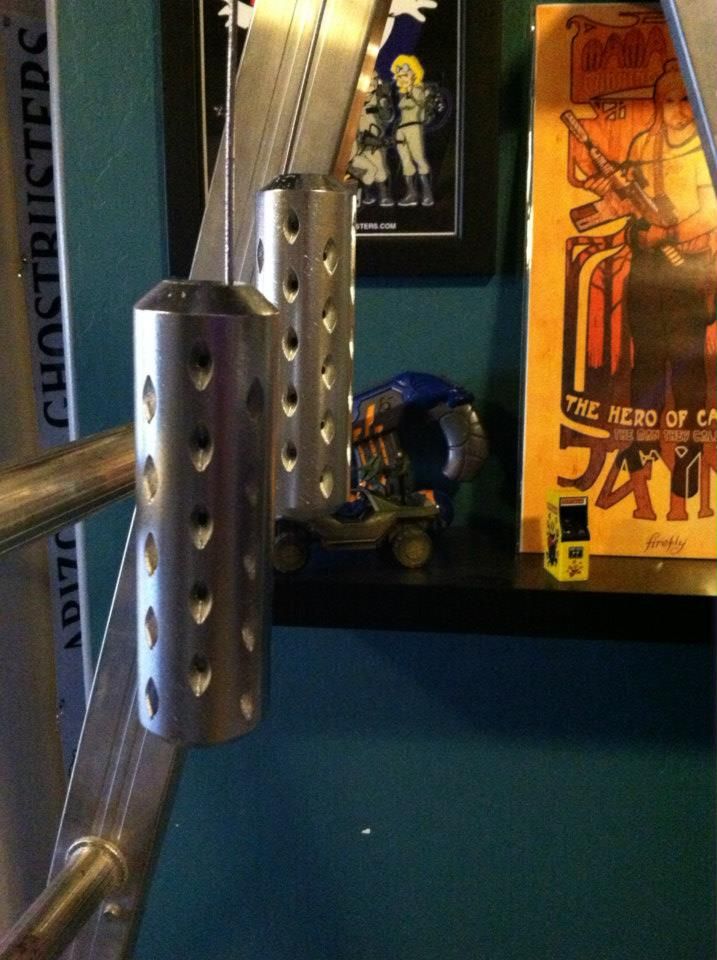
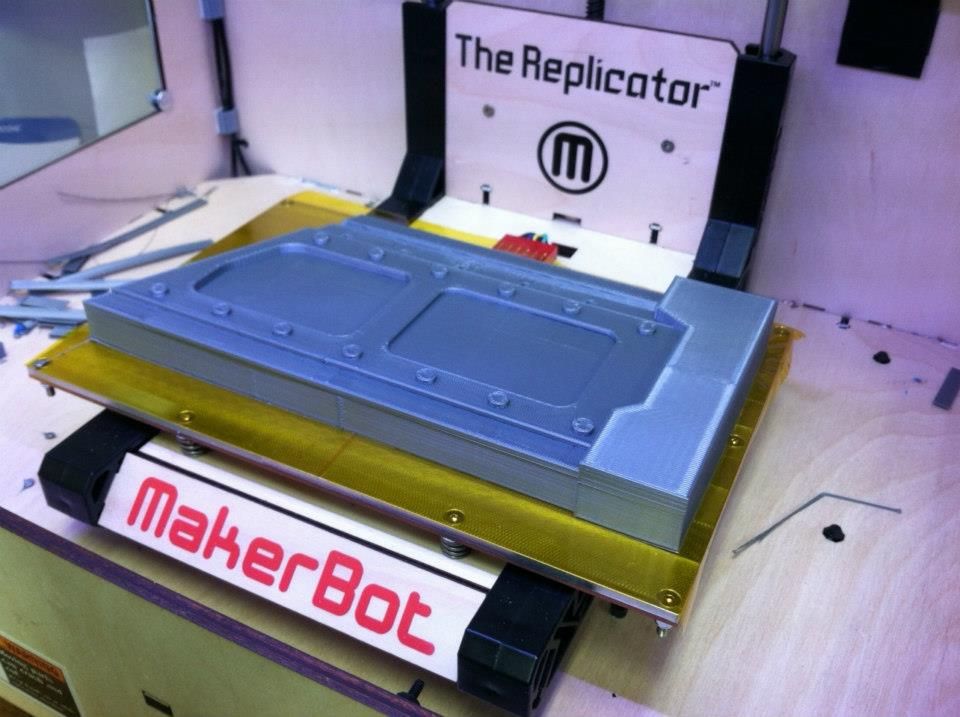
I'm a big fan of "Firefly", and I've costumed as Jayne a couple of times at Phoenix Comic Con (I live in southern Arizona). Jayne's pretty awesome, and he does have one of my favorite sci-fi/fantasy weapons... his precious "Vera." I decided a while back that I'd build my own Vera, but using a method I hadn't tried yet... 3D printing (using ABS plastic). I have a MakerBot Replicator, and it's been handy making odds and ends I need for work and my other hobbies, but I've never undertaken quite a task before. I've been toiling away on and off for a few months on this project, and I'm almost done. I had better be done in less than a week, because Phoenix Con 2013 starts a week from tomorrow!
I've decided to proceed with sharing photos from my build process. Feel free to ask any questions you like, as I love talking about my hobbies and projects. This has been a fun build, and I can't wait to dress her up and take her out somewhere fun.
Without further yapping on my part, here are the photos...
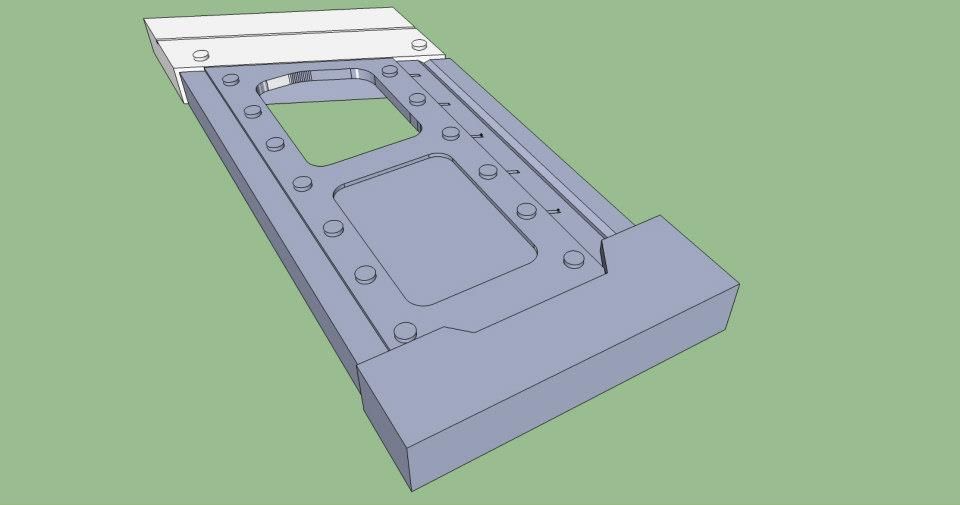
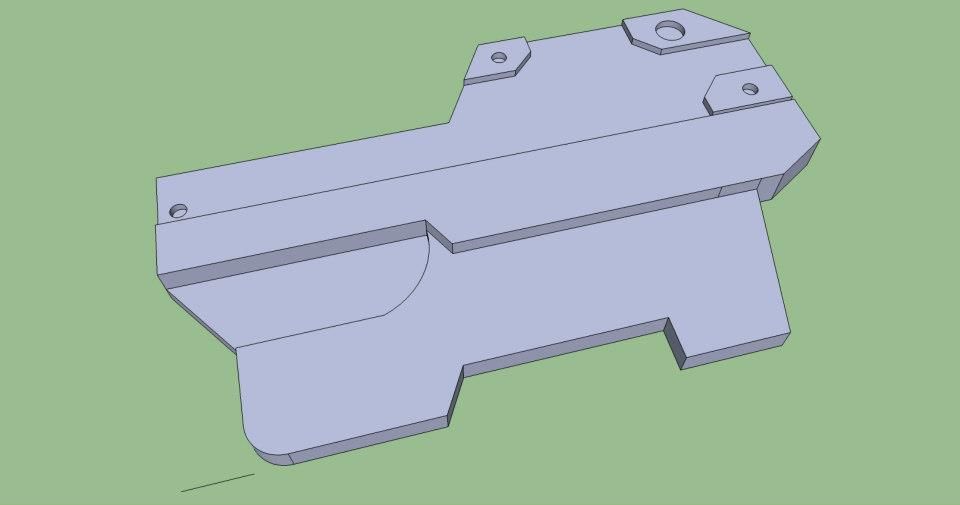
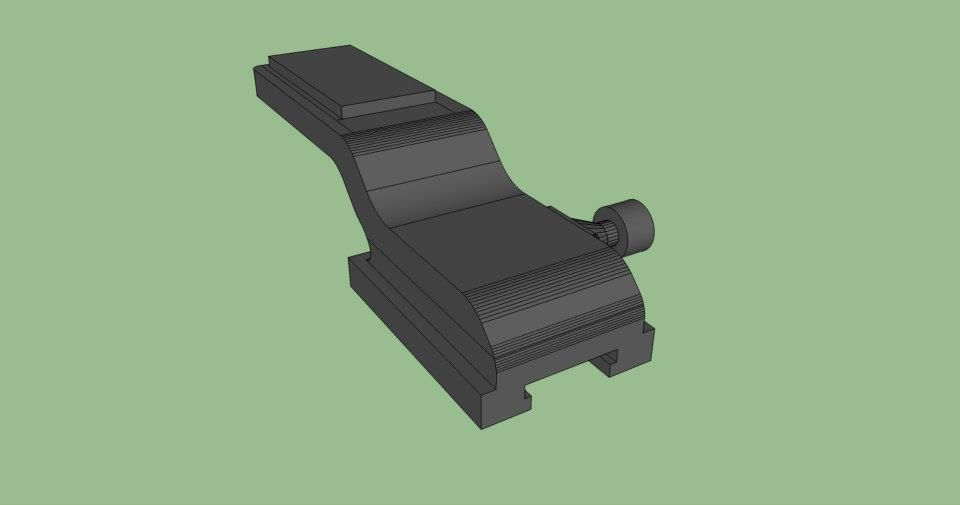
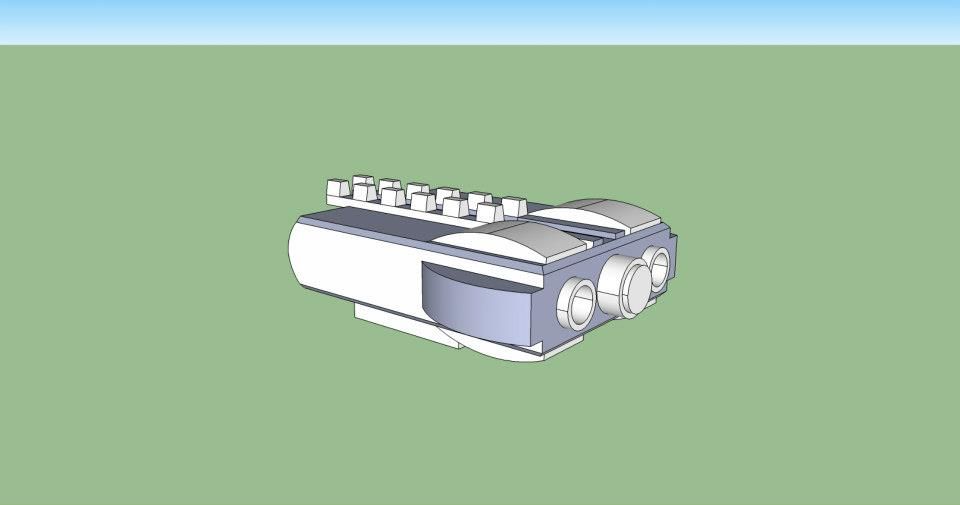
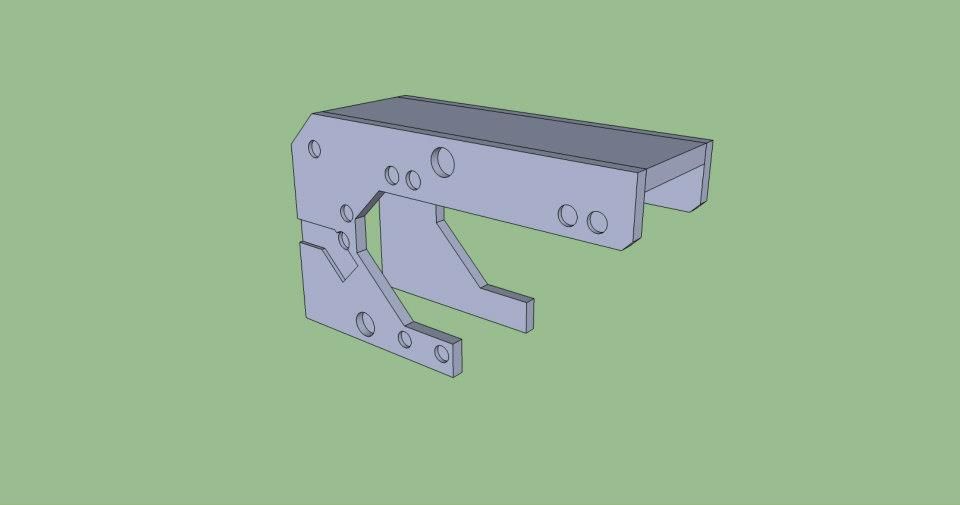
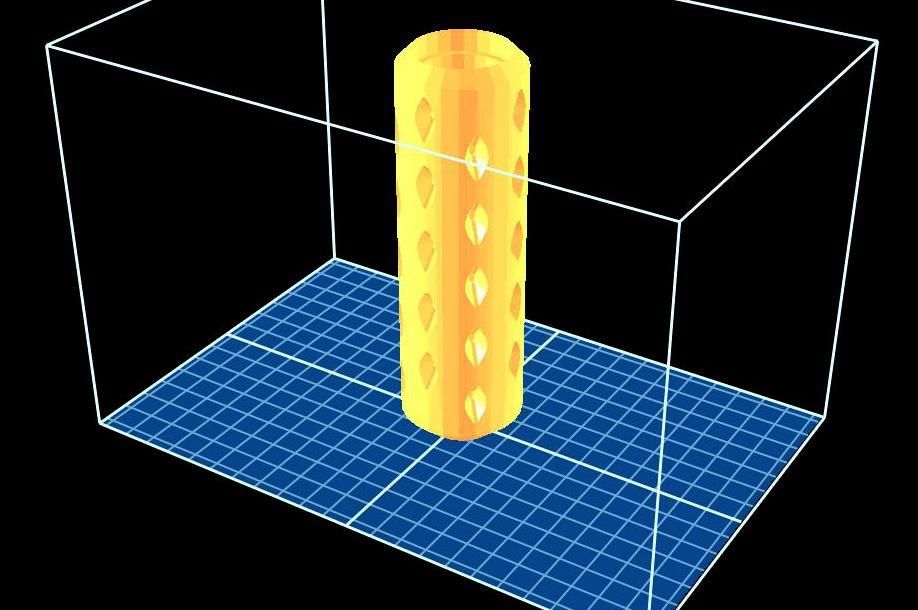
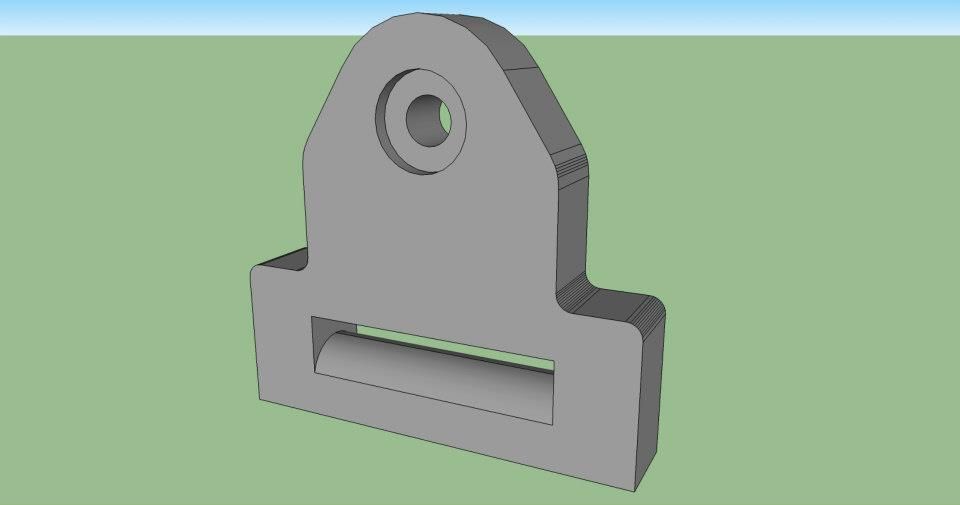
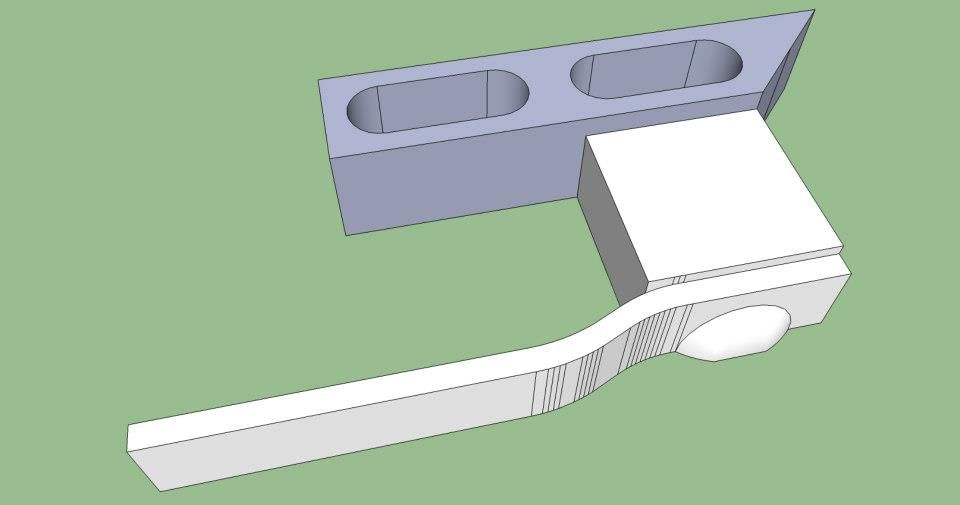
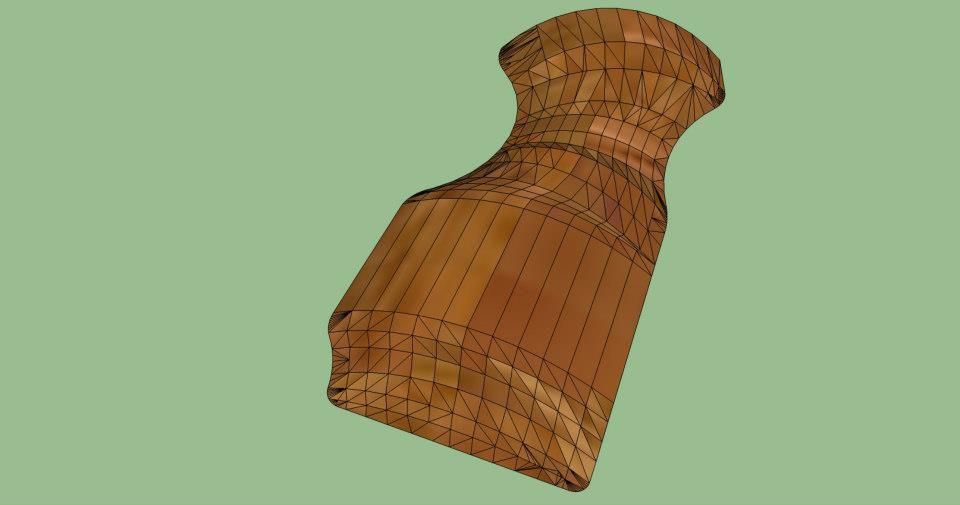
I'll start with my 3D drawings.
I made these all in Google SketchUp (with the exception of the Suppressor part, which my friend made in AutoCAD).
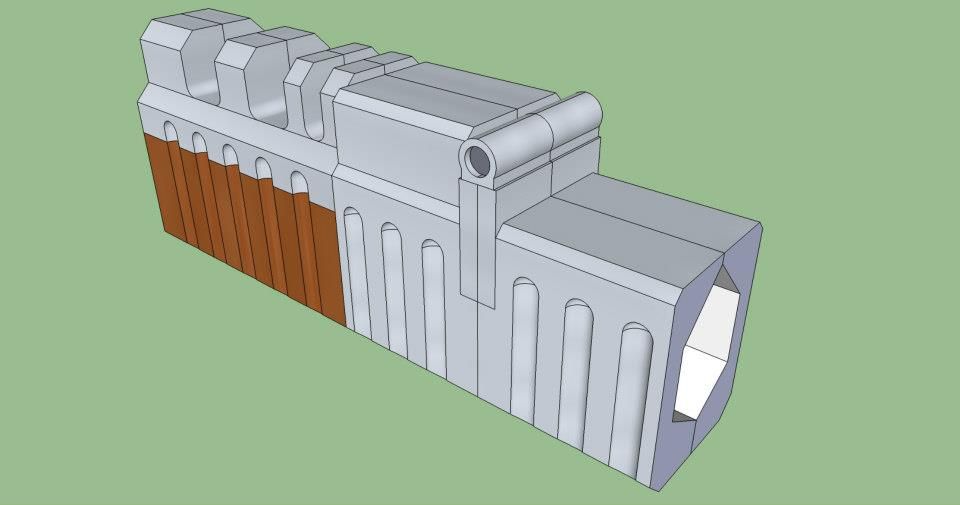
Barrel Guard (complete)
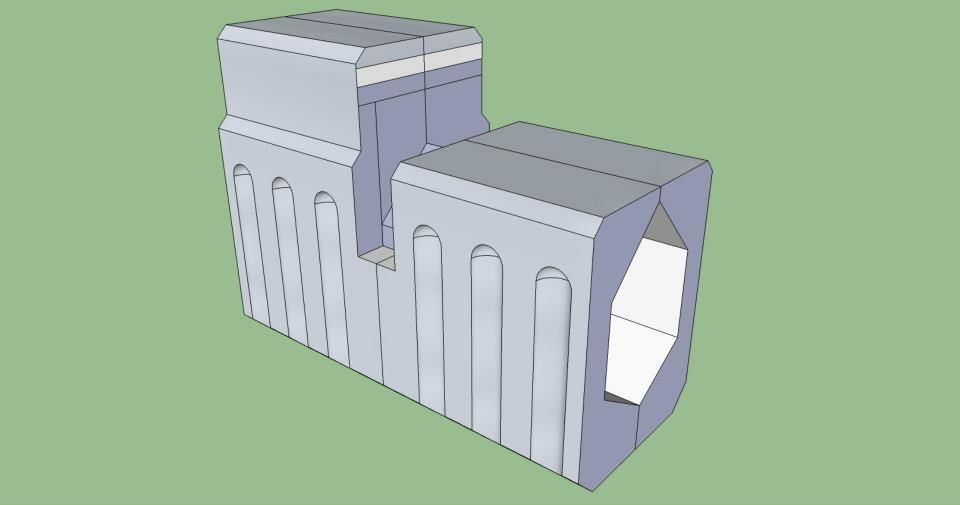
Barrel Guard - hinged piece
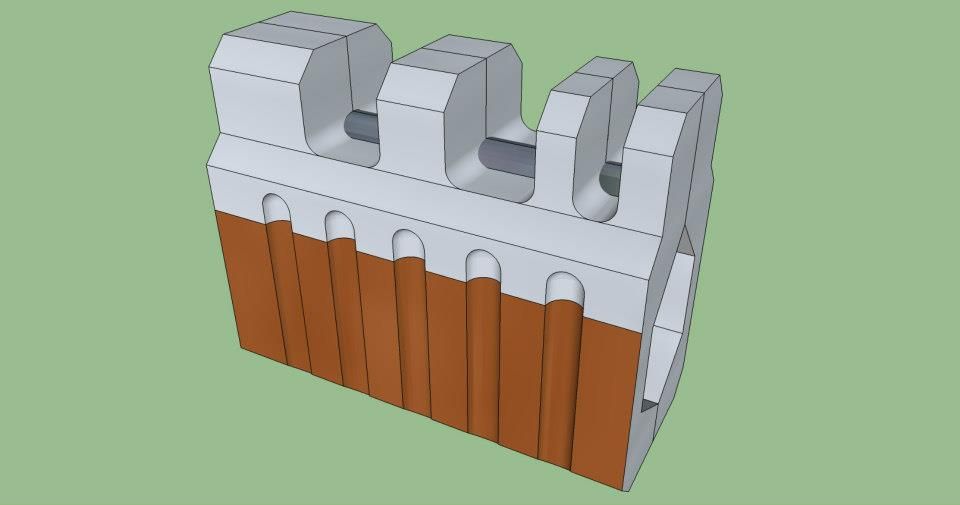
Barrel Guard - wood grain piece
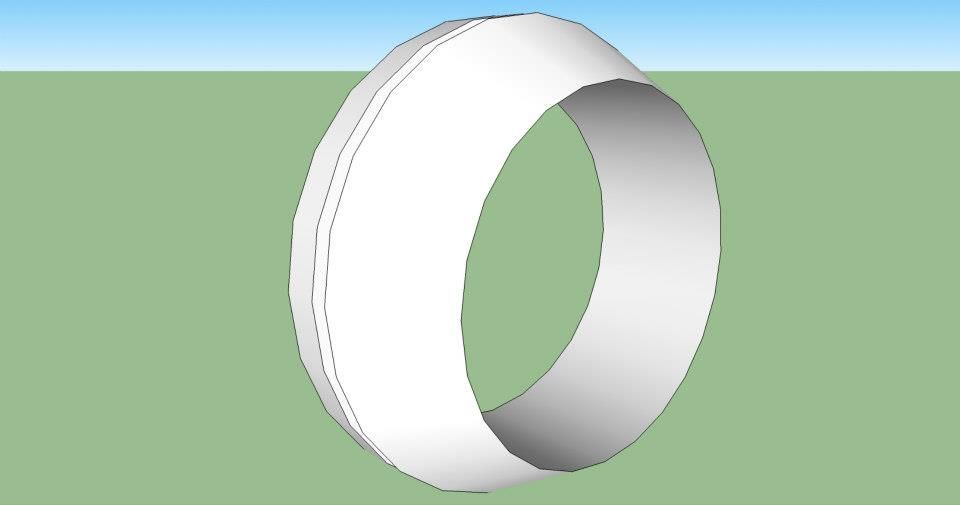
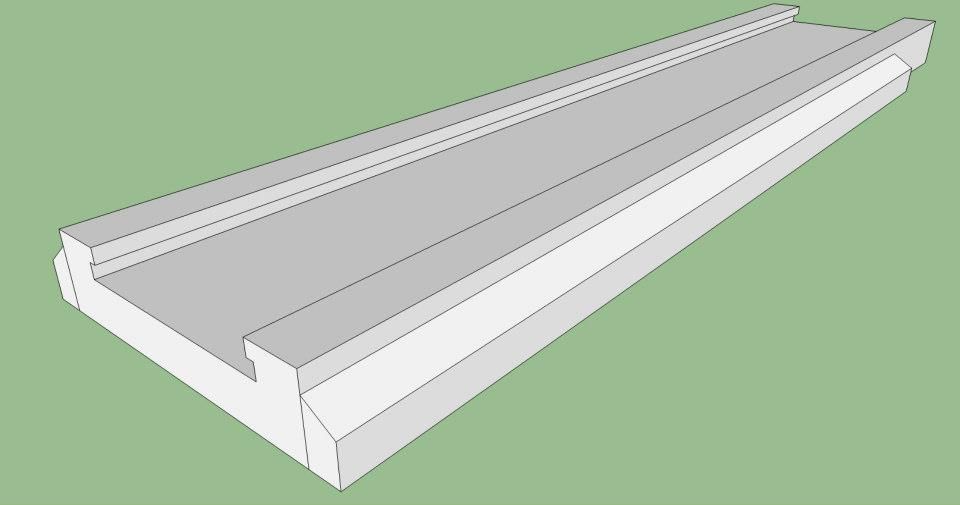
Barrel Ring
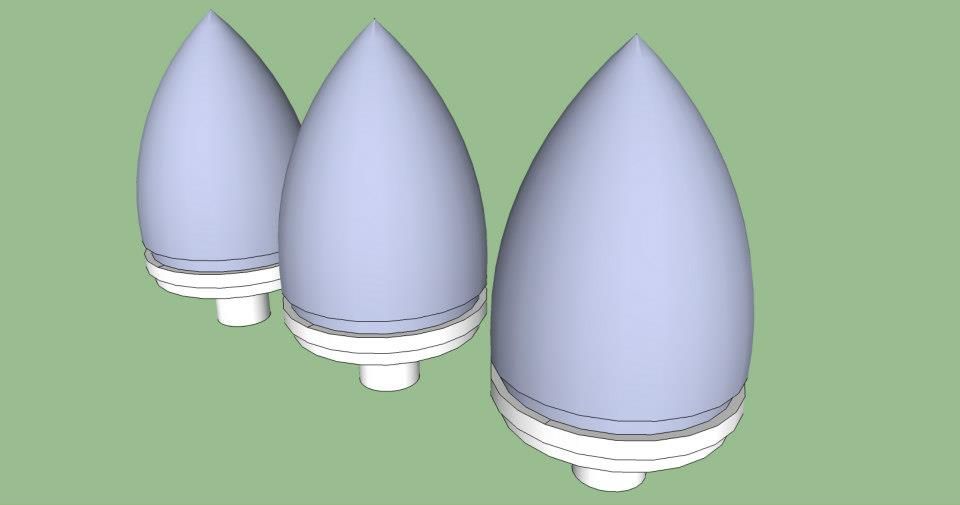
Bullets
Bullet Tray
Bullet Tray (underside)
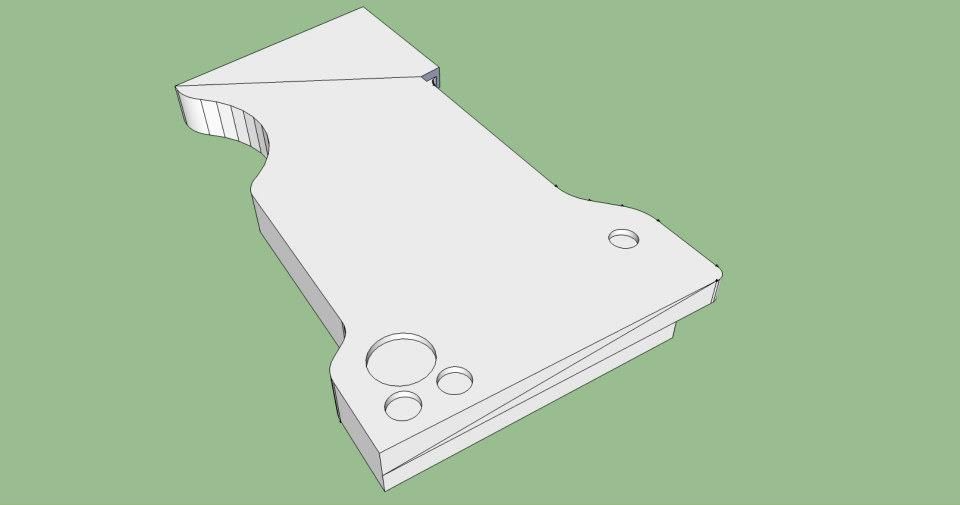
Grip
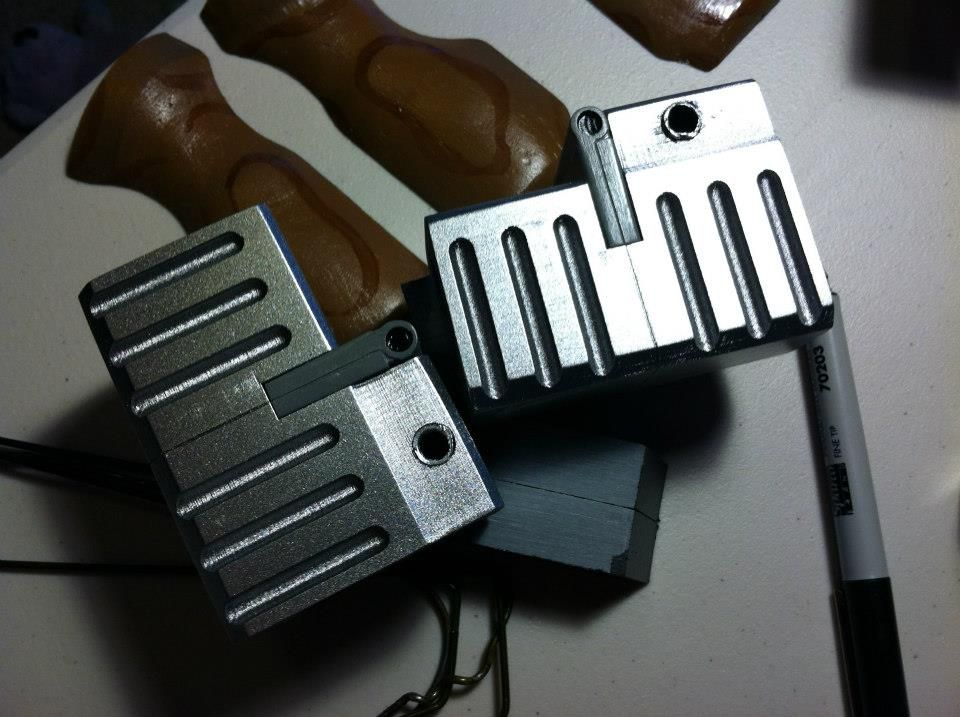
Hinge

Magazine
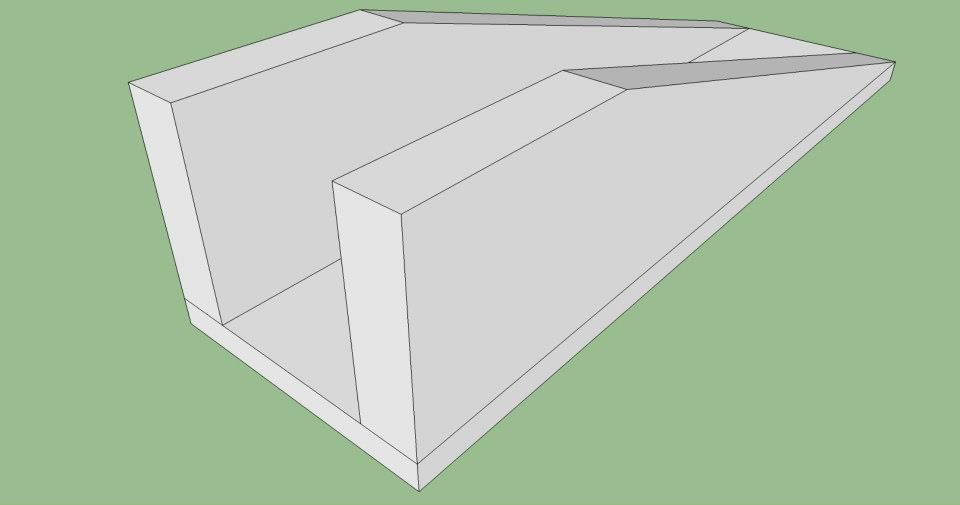
Mag Well Guard
Optic Riser
Rear Optic on Riser
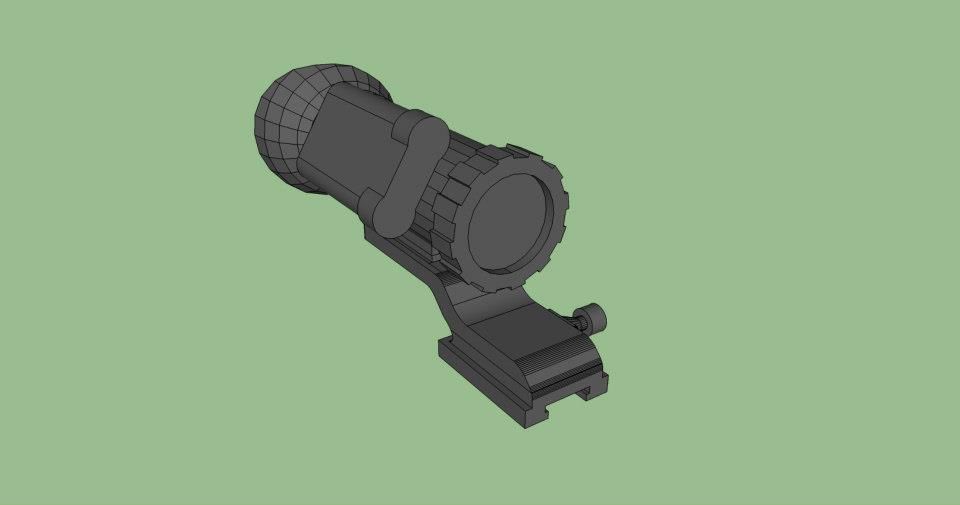
Front Optic/Laser
Rear Guard
Rear Picatinny (on stock)

Rear Stock Guard

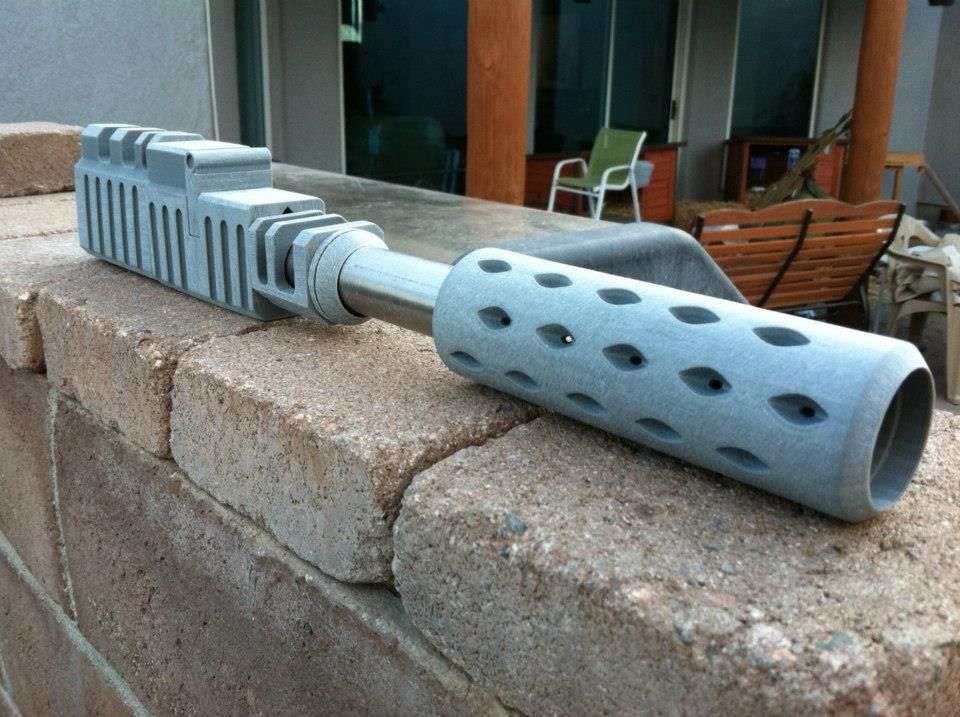
Suppressor
Swivel (for sling)
Trigger Guard
Wood Grip
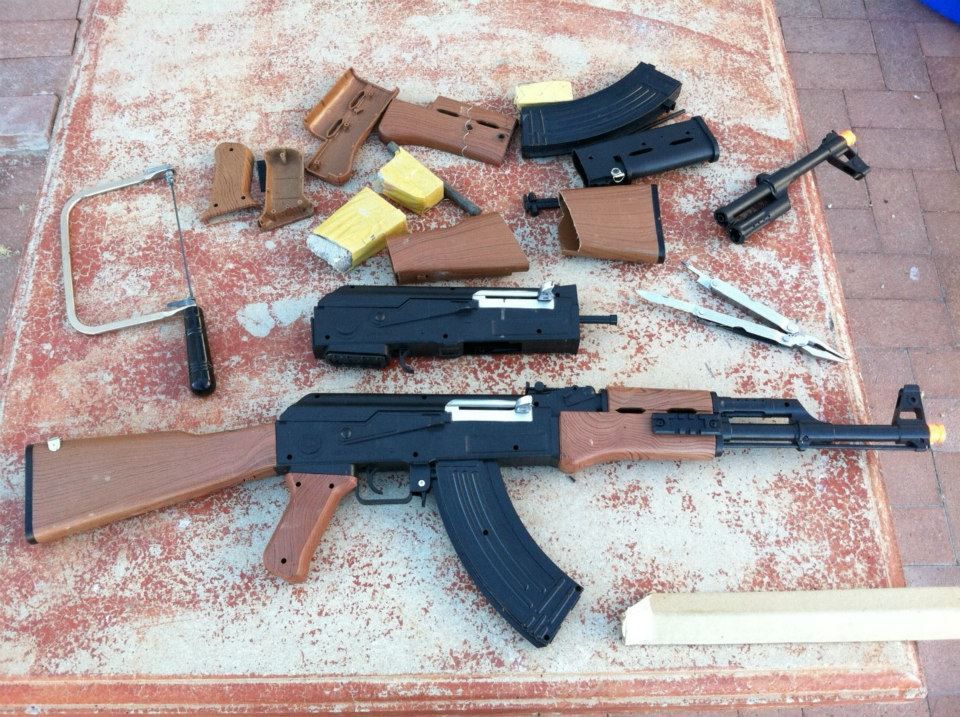
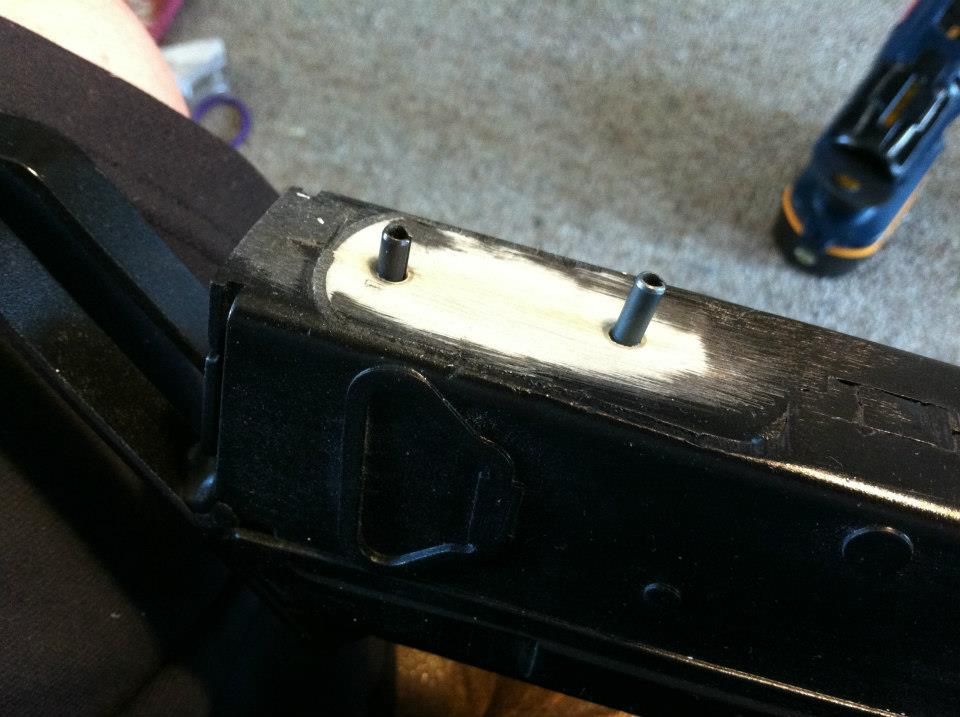
I had to start with a base, as I wanted a stable platform on which to anchor all my parts... just like the original was built around an existing gun, mine is built around a $15 Airsoft-style AK-47.
I chopped off all the unnecessary crap using a hacksaw and was left with this:
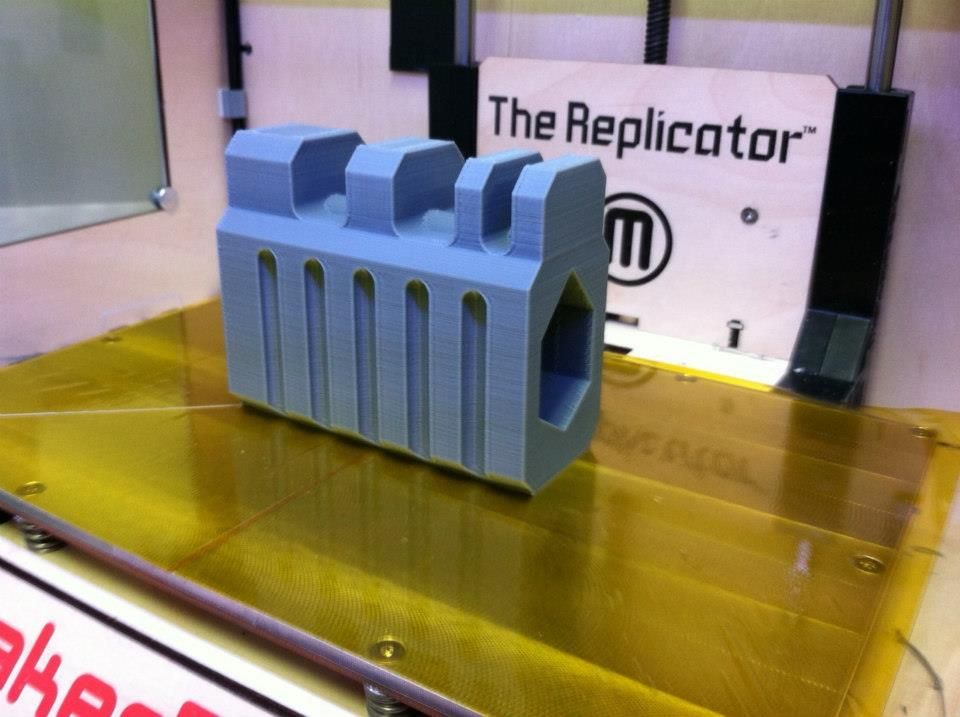
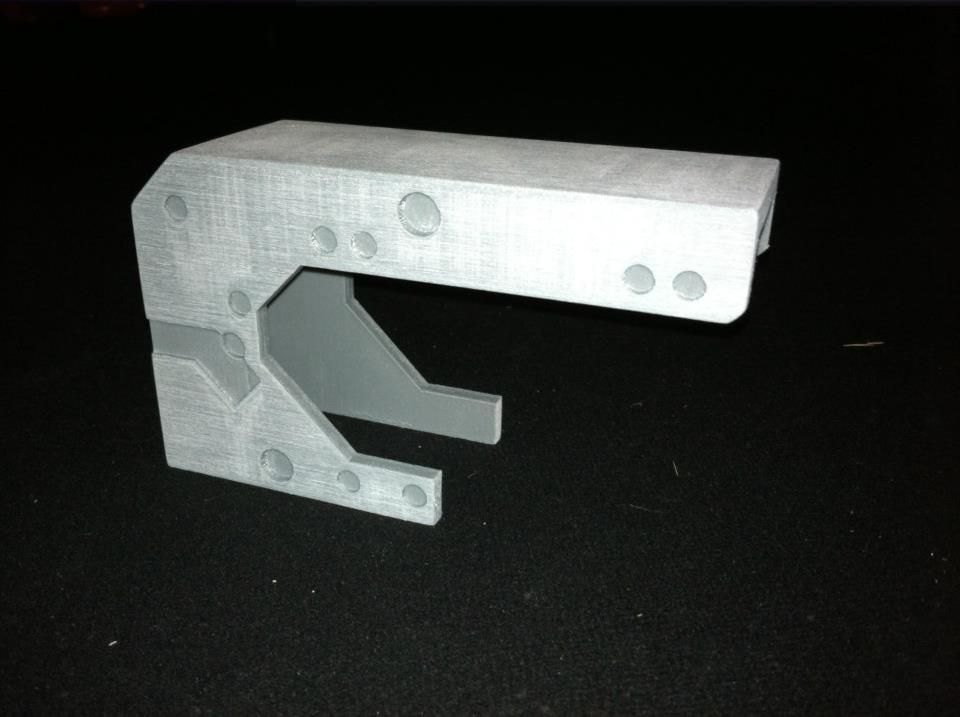
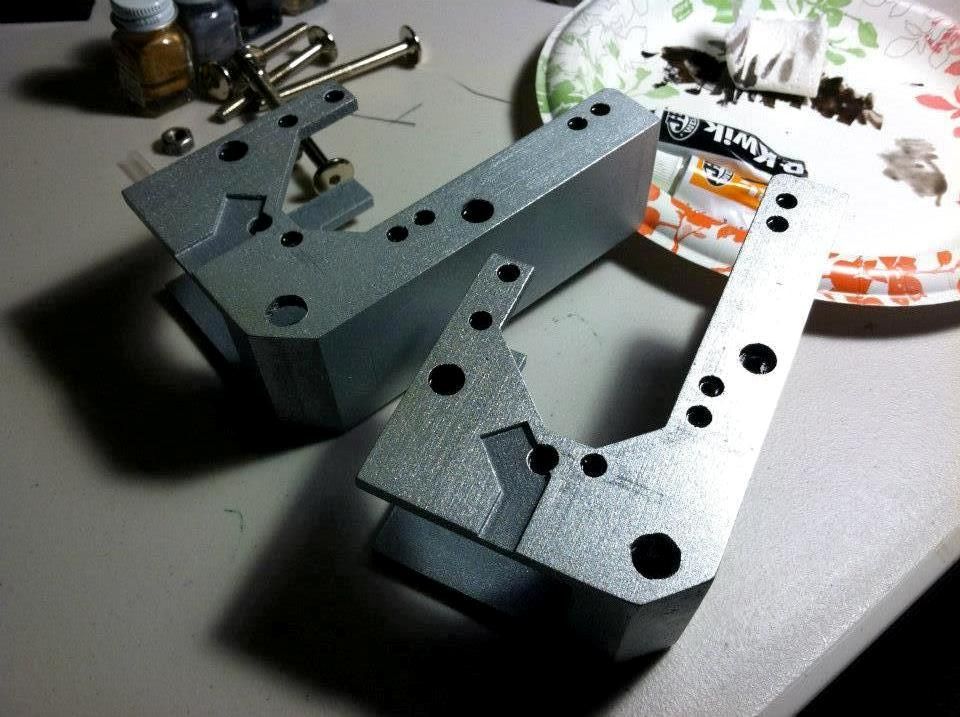
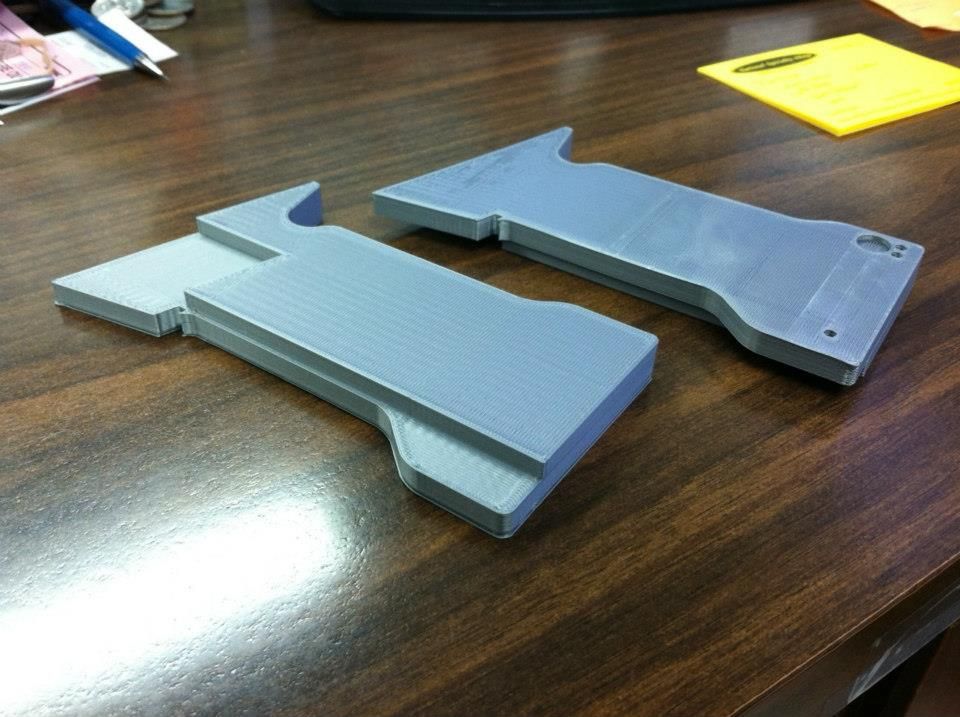
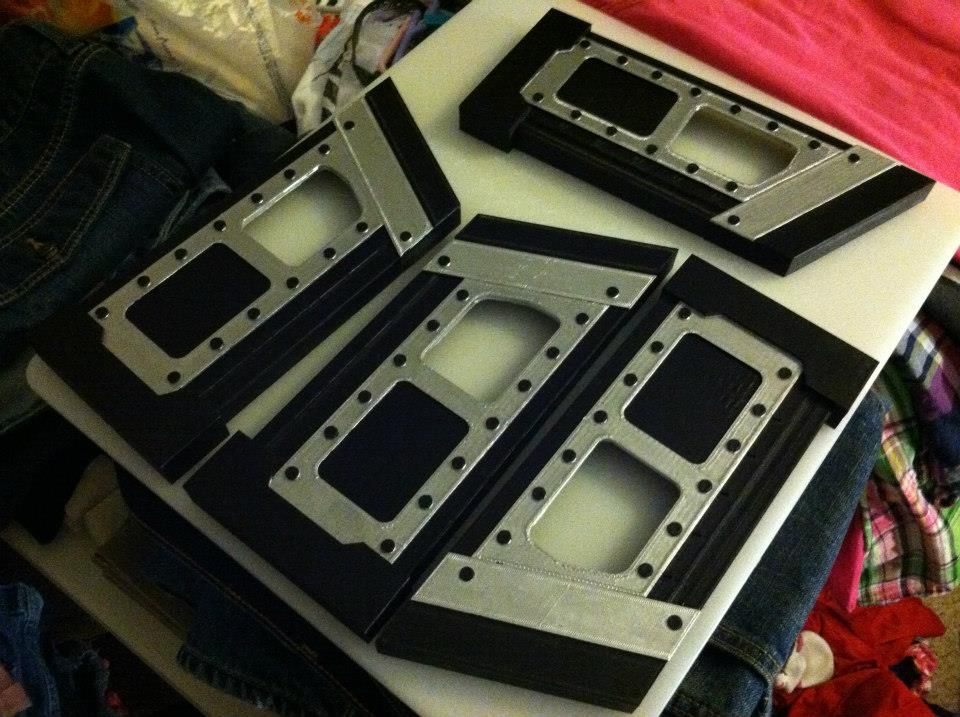
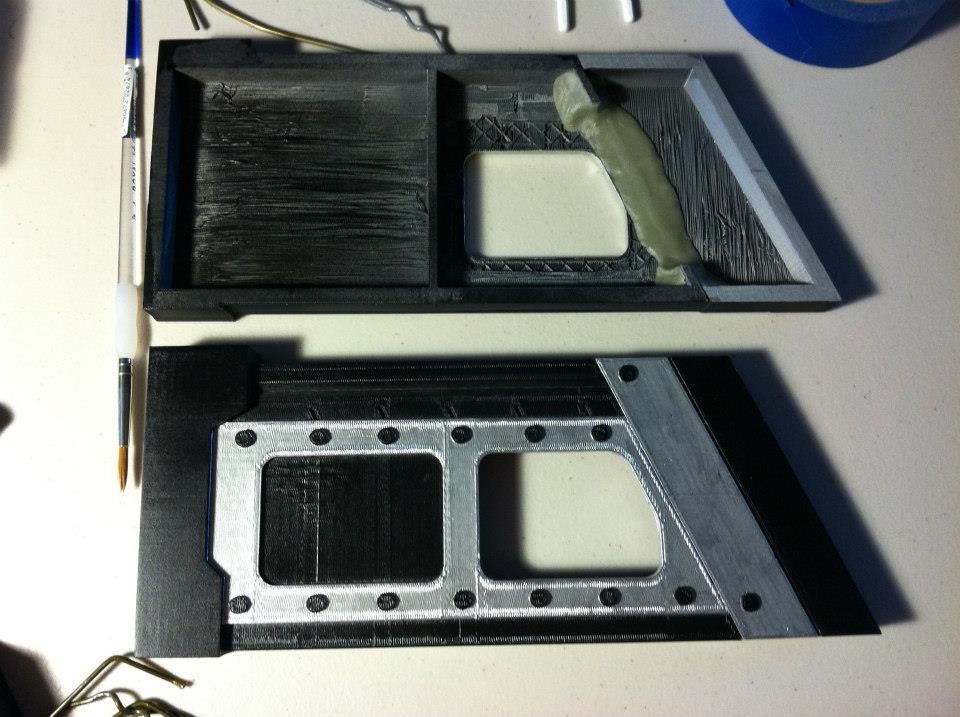
Then, I started printing my components...
Printed Barrel Guard component
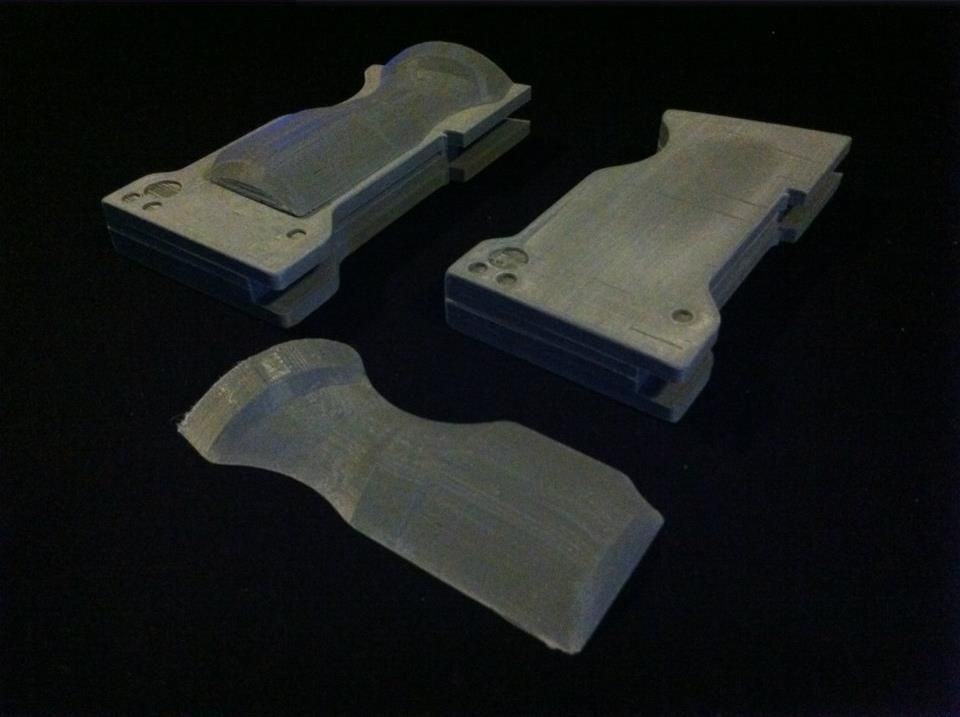
Test Fit of Printed parts
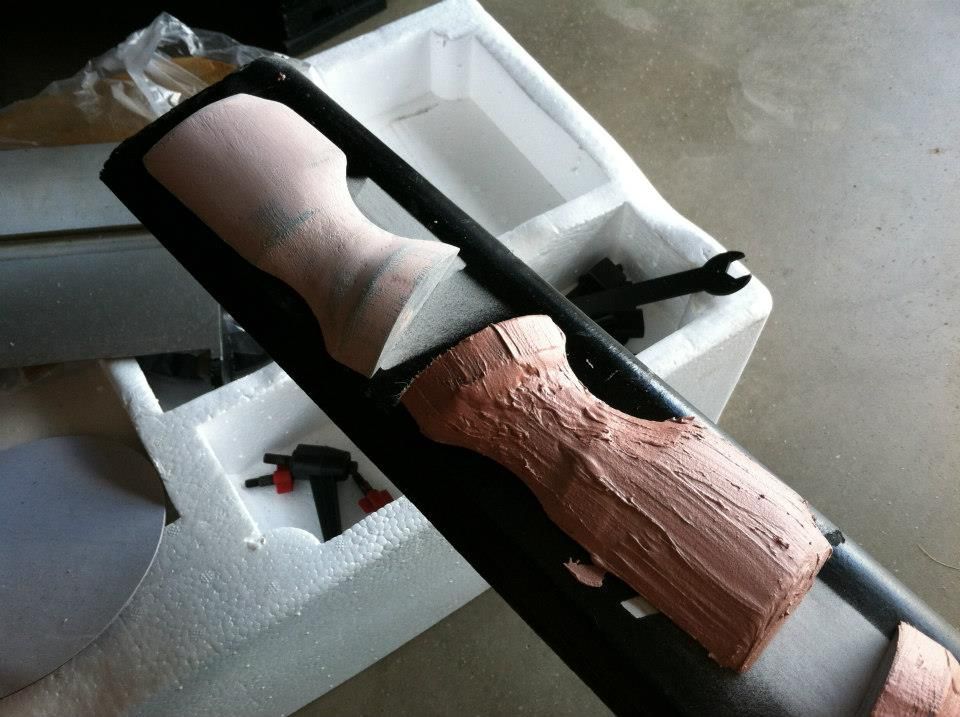
Faux Wood Grain
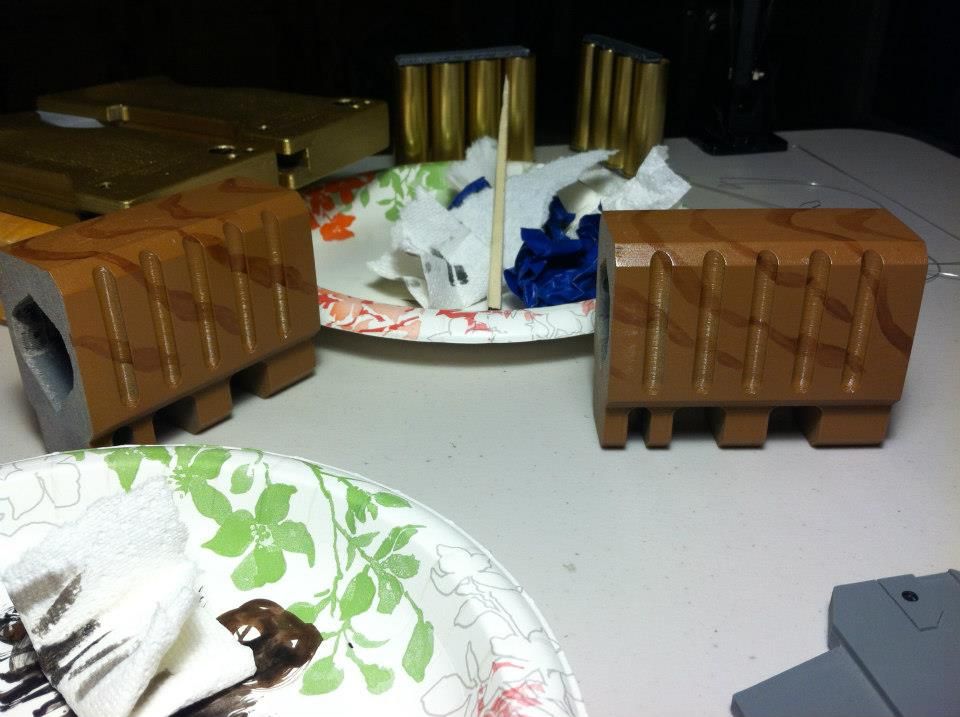
"Hinged" Barrel Guard component
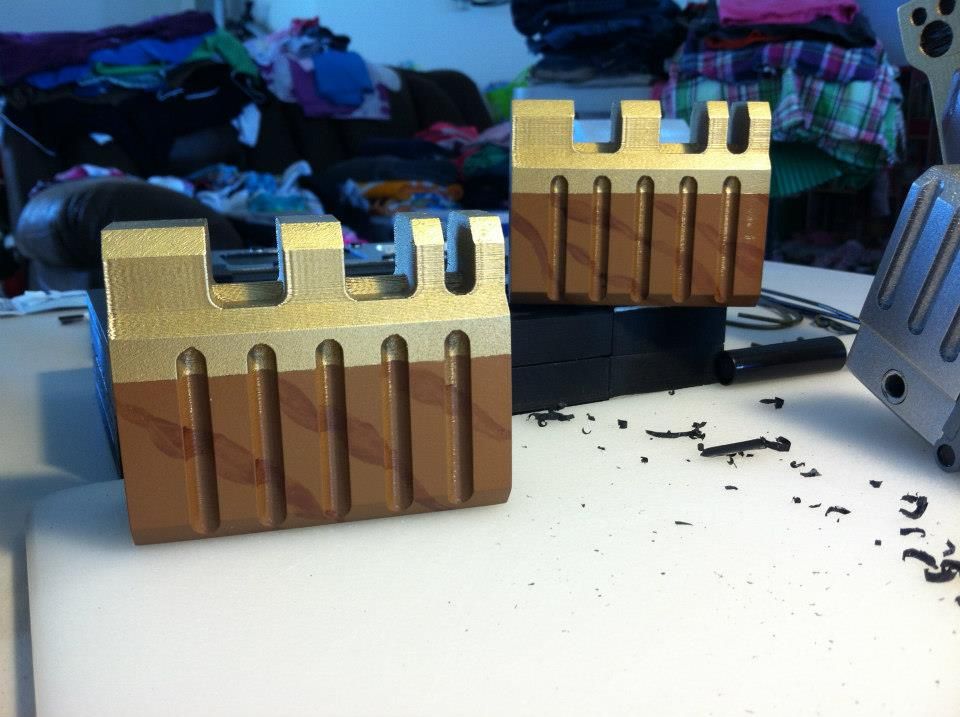
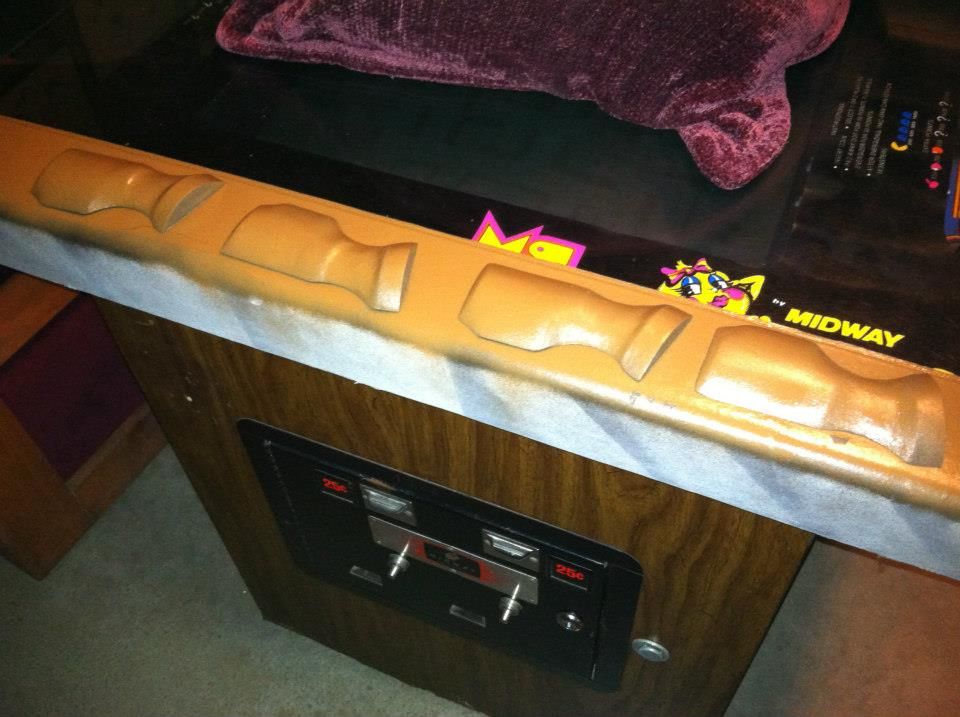
Finished Gold&Wood component
Painted Suppressor
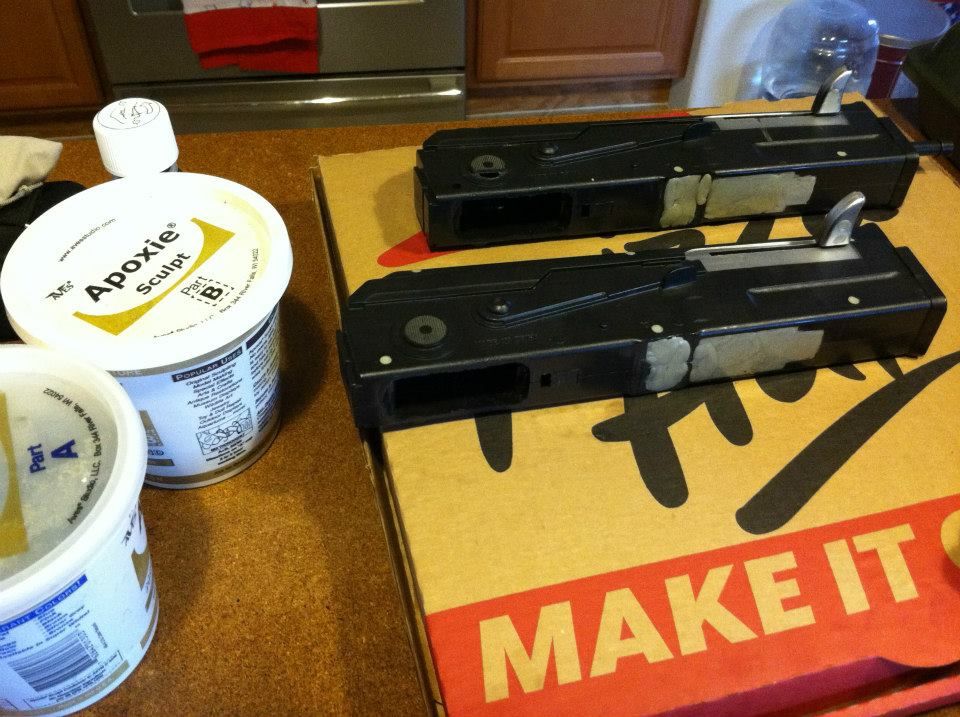
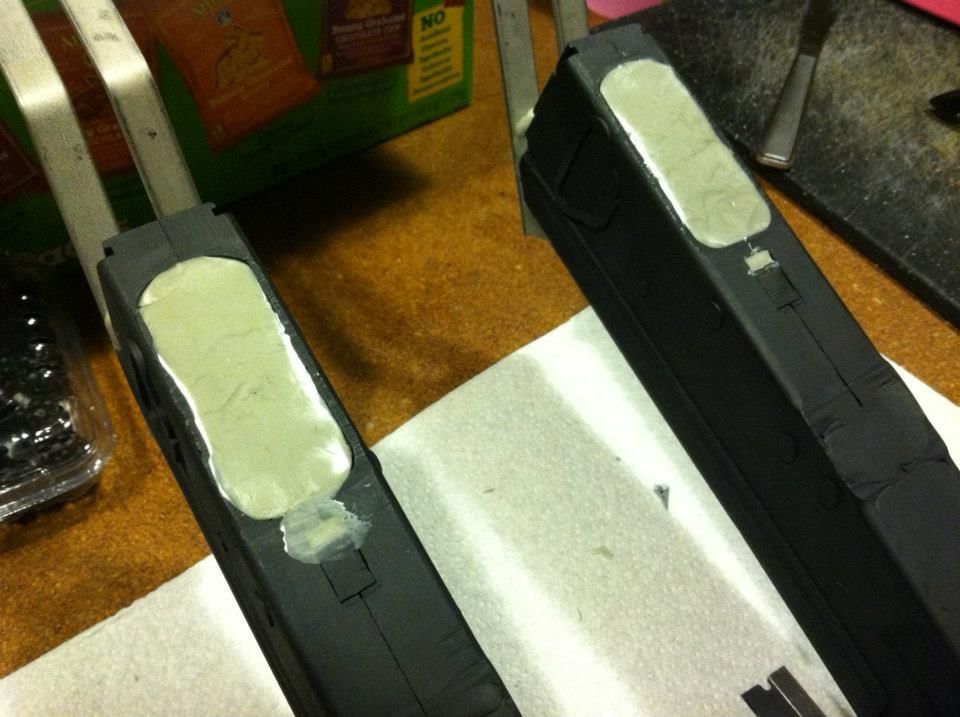
Then, I had to prepare the body of the rifle...
I sanded down all the cuts and filled the holes left by the grip and magazine with Apoxie, so I'd have a firm surface to which I could add my own grip and magazine.
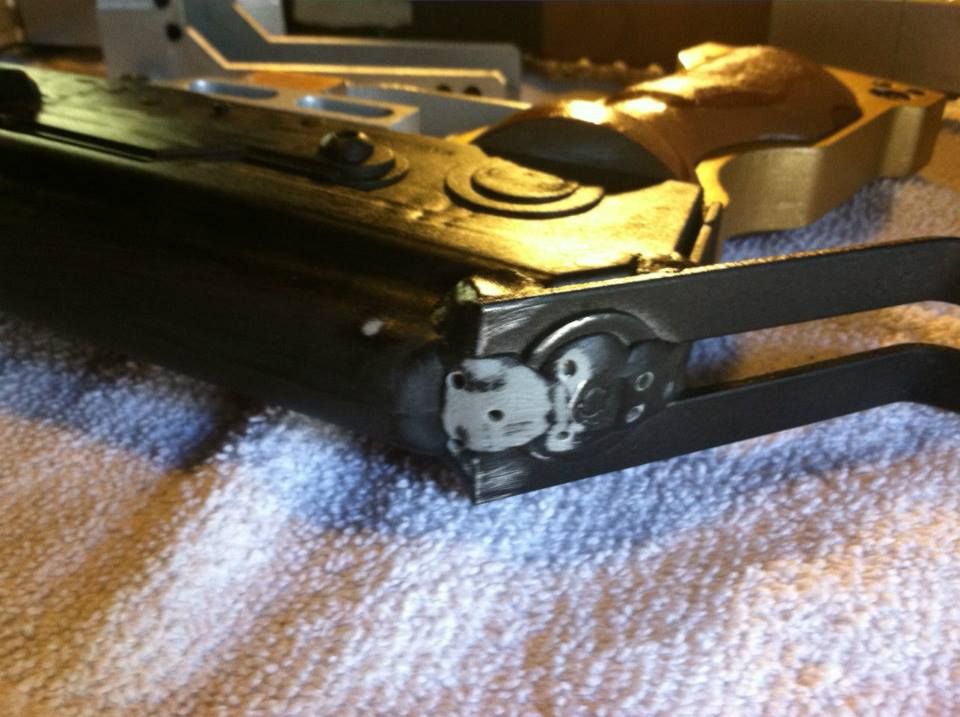
Here are photos of the Rear Guard (goes on rear of rifle body, covers stock joint and provides hard point for sling)...
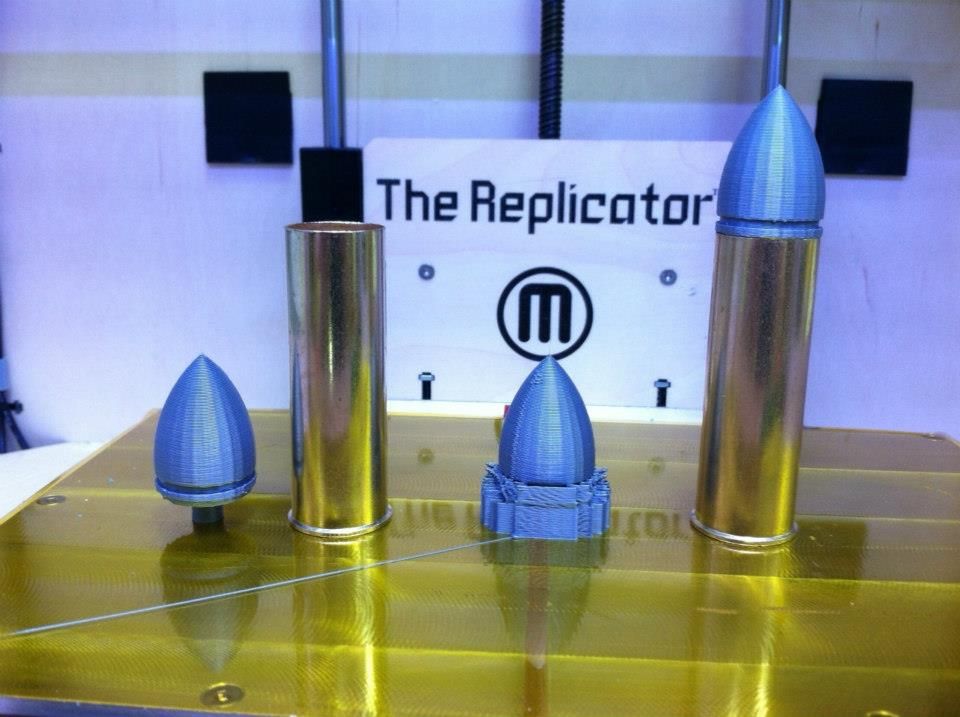
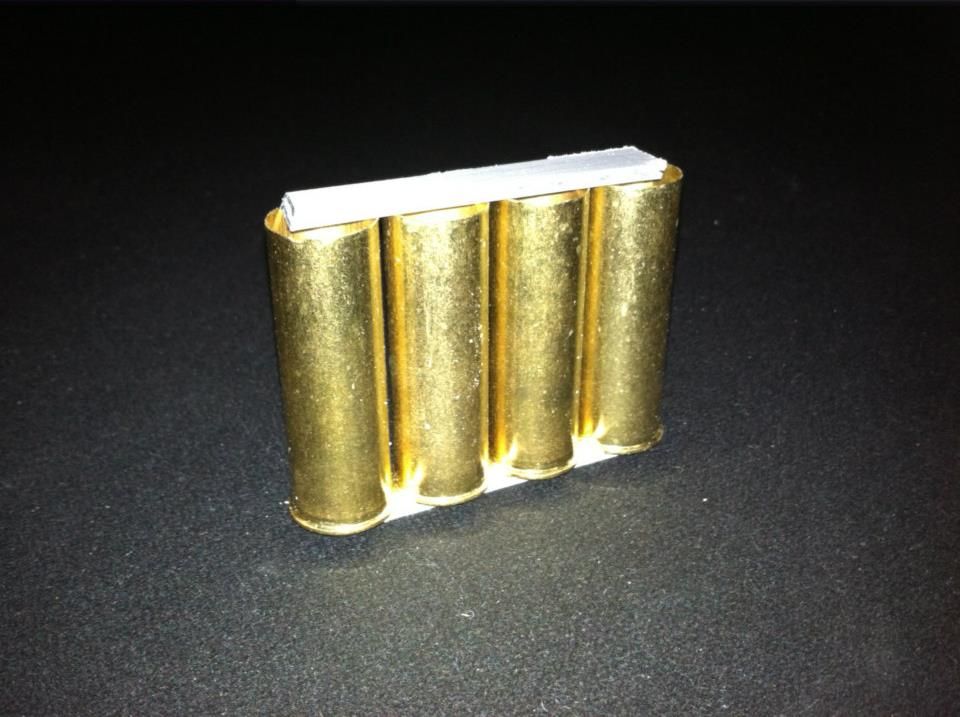
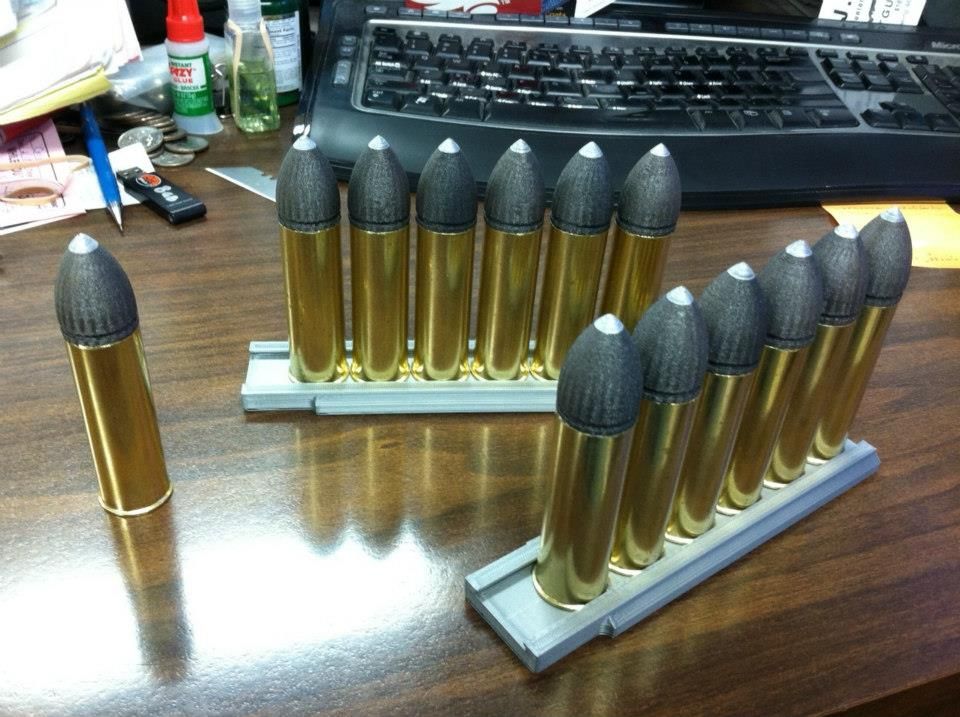
The Bullets were a combination of 12ga brass (purchased from sports store) and printed projectiles.
Printed Bullets
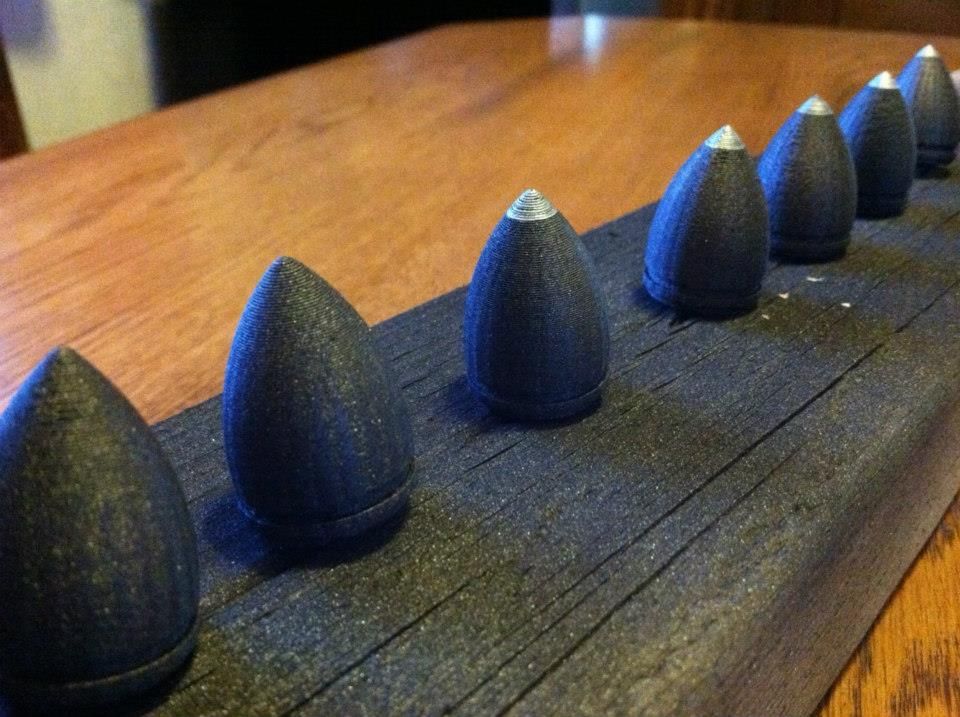
Painted Bullets
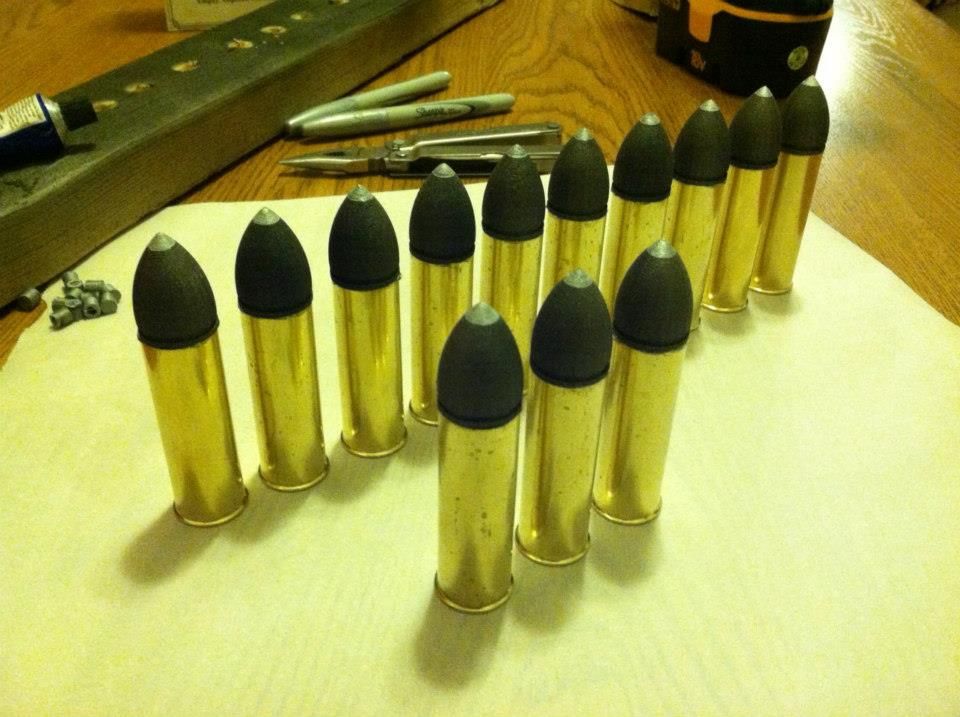
Assembled Bullets
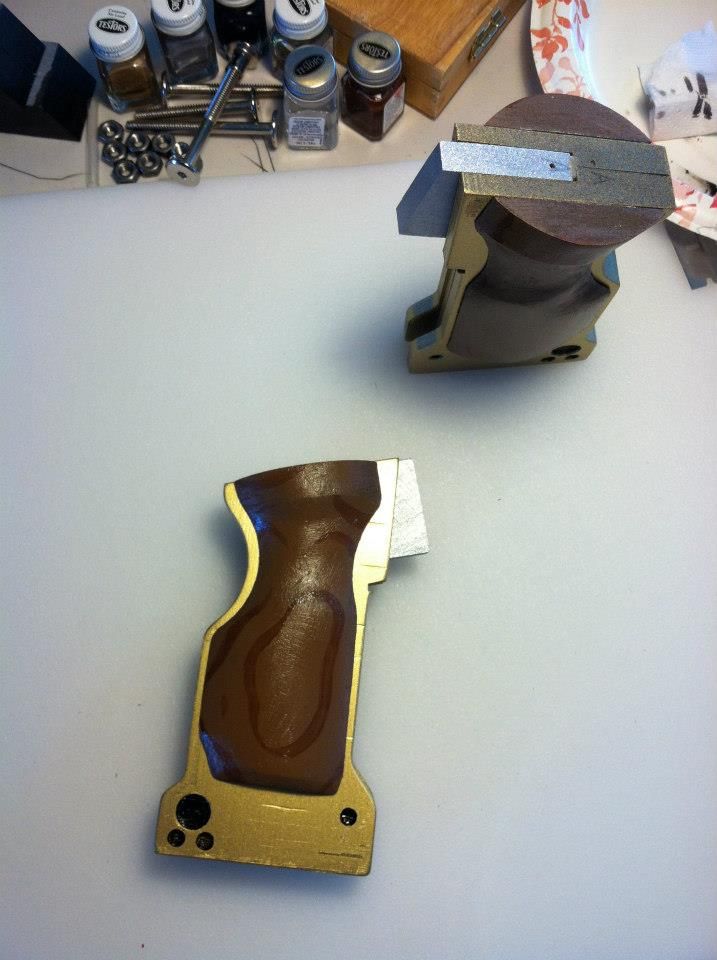
The grips were printed in halves (like many of the other components)
Grip body
Test Fit
I used Bondo to even out the texture left from printing
Brown coat of paint (browncoat, lol)
Finished Grips
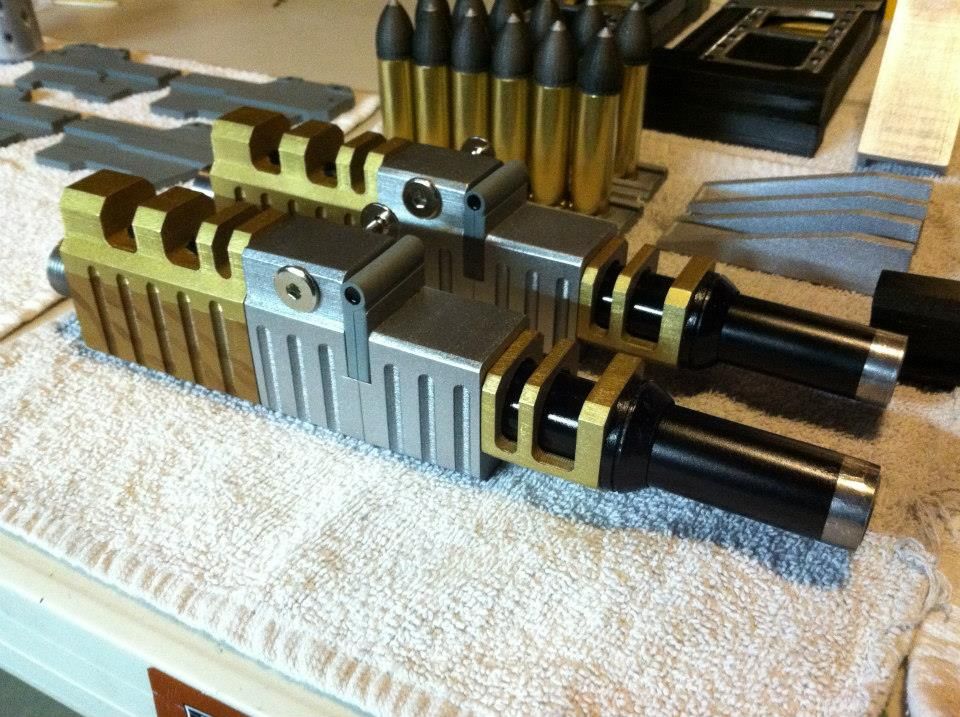
The Magazine is a huge and iconic part of Vera... I think the Suppressor and Magazine are the most identifiable components of this prop.
From the size of the bullets, you can bet the magazine is HUGE... it's over a foot long, so I had to print it on pieces and assemble it. The process worked pretty well.
Main magazine part (all mag parts were printed in halves)
Primed parts

Painted parts
Assembled using Apoxie
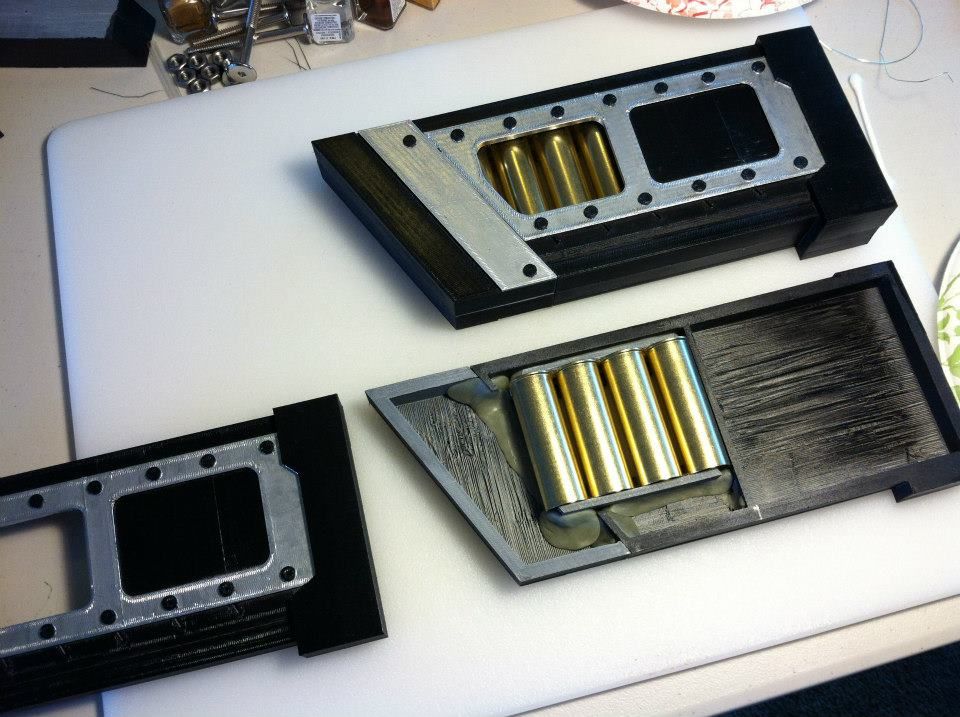
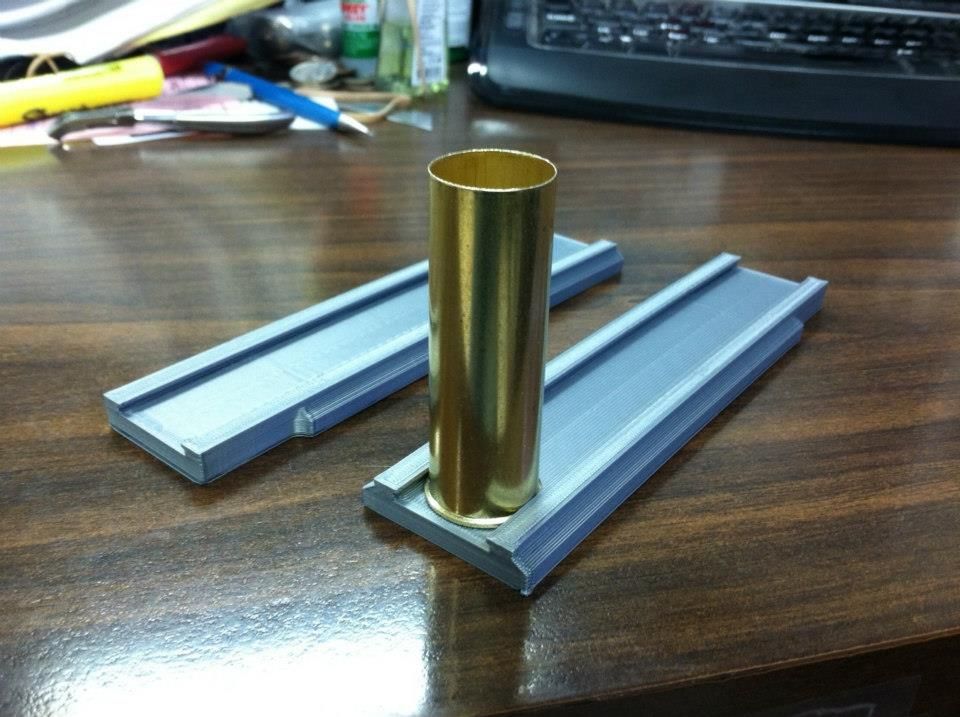
Shells are visible through the mag window, so I arranged them on a rig prior to magazine assembly
More assembly with Apoxie
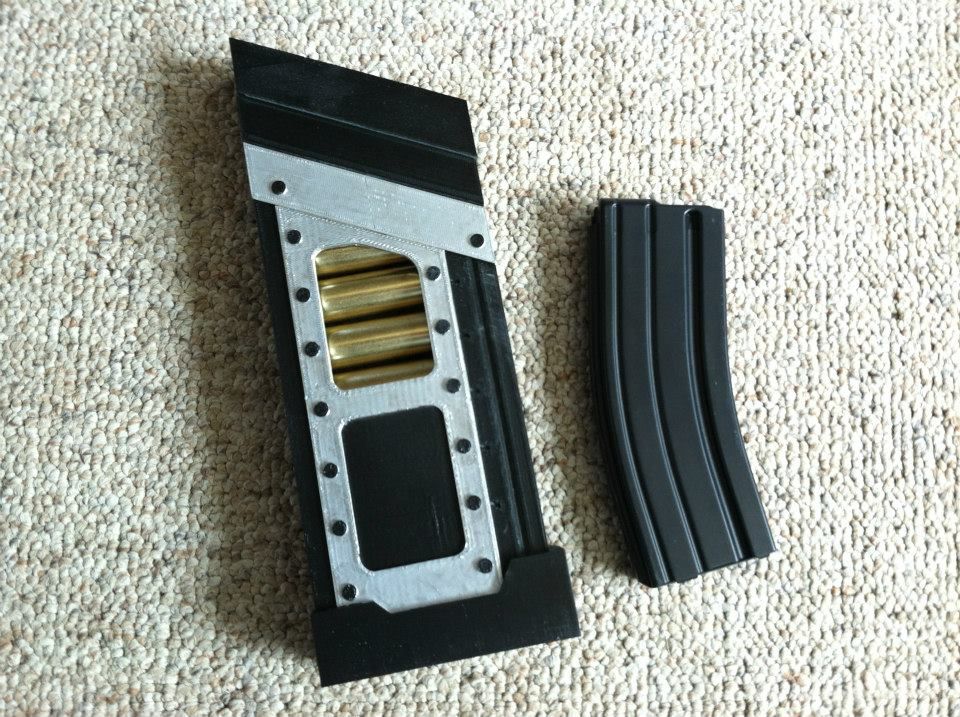
For size comparison, here's a Vera mag next to a 30-round AR magazine... it's HUGE!
Here are the plates that cover the union of the magazine and the rifle.
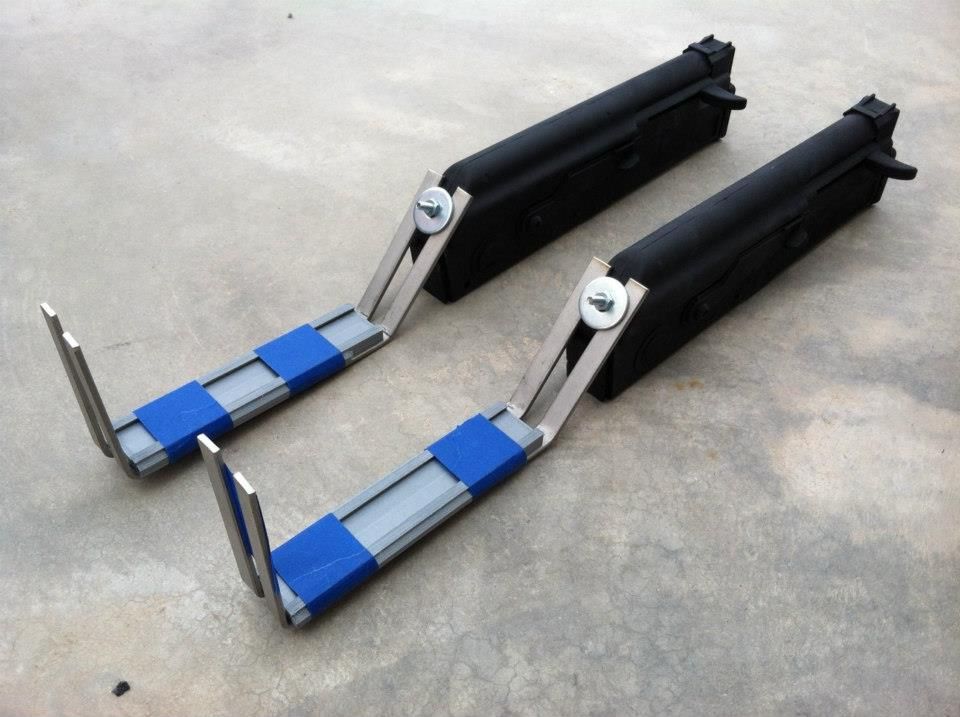
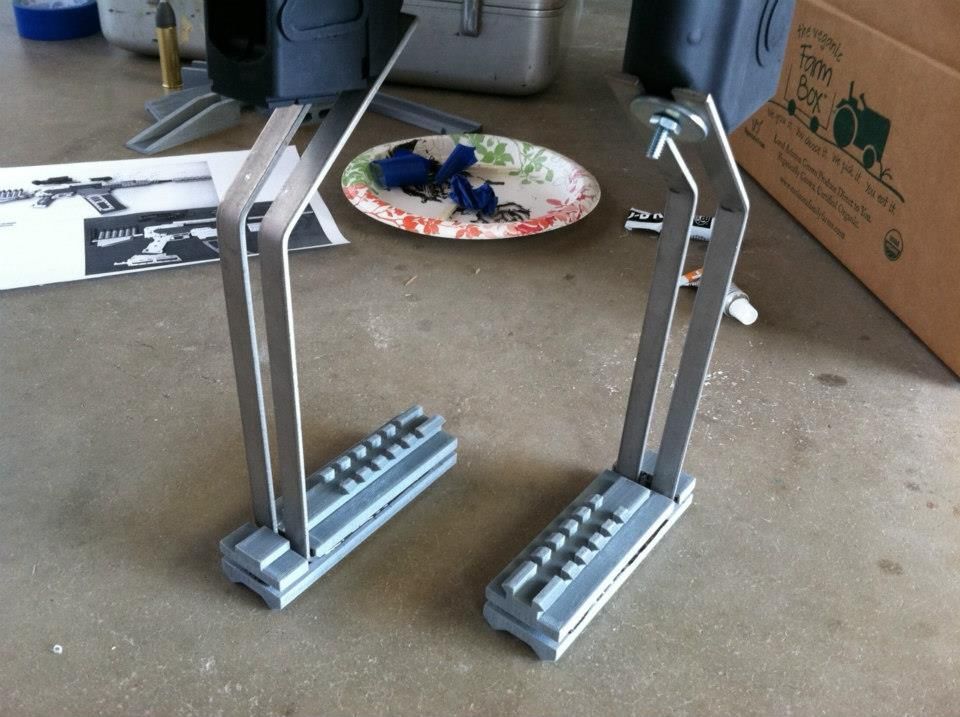
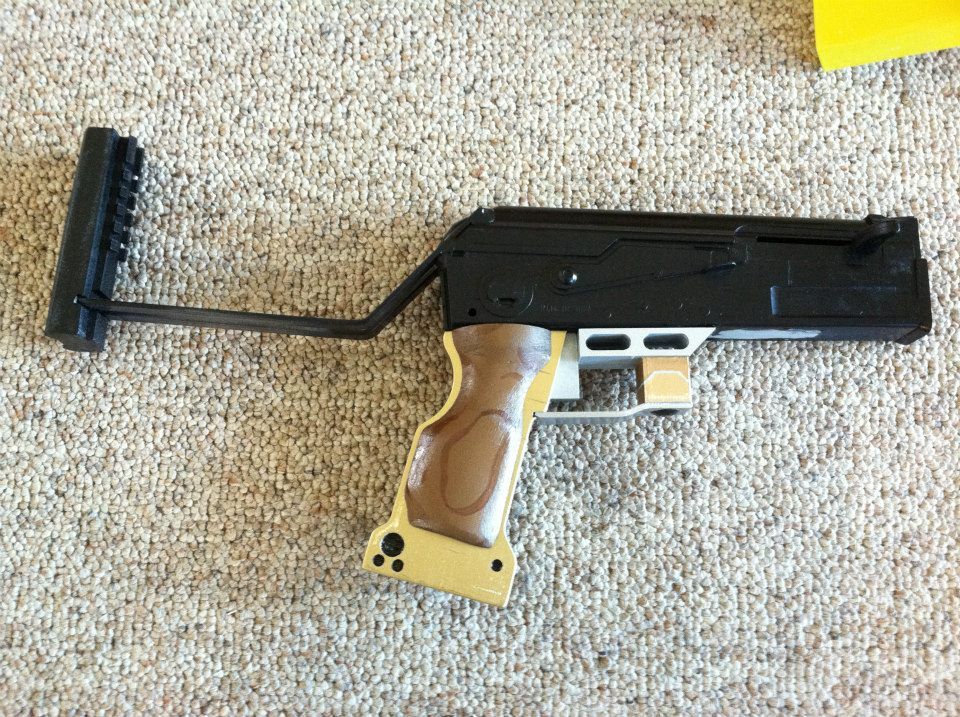
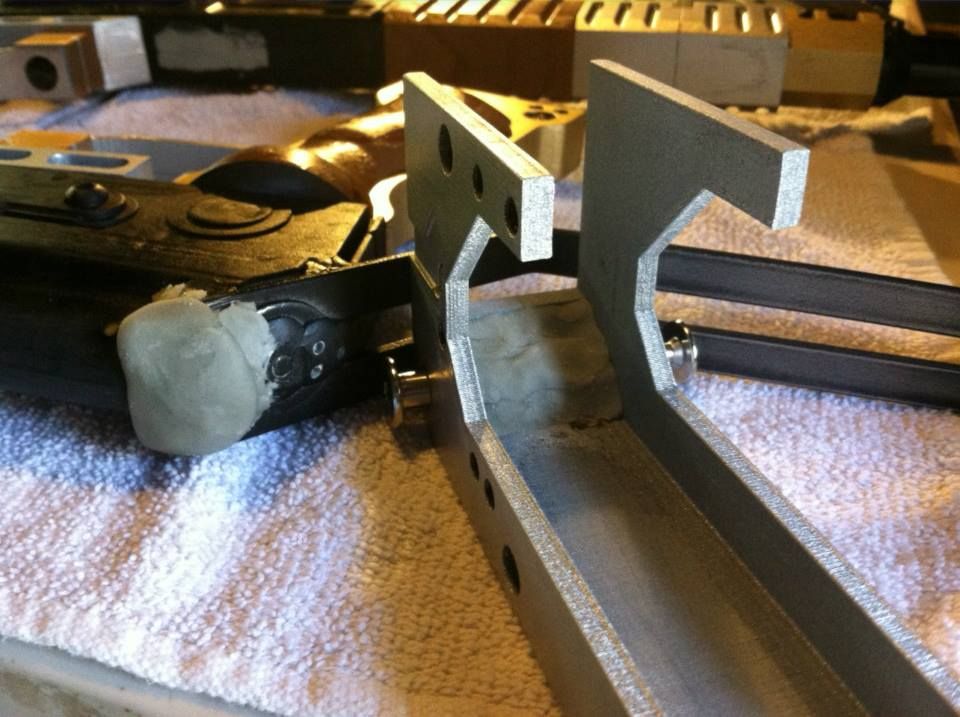
The Stock has many components. I decided to build mine around 2 bent straps of Stainless Steel for strength. The straps were anchored mechanically and with Apoxie to the rifle body... then the components were attached with either Apoxie or JB Weld (or both)
Bullet Tray/Rack
Rails installed
The rear of the Stock was put together in a "sandwich" style

The structure of the Stock will be hidden with cosmetic rails along the sides (my stock doesn't really articulate)

Okay, here's the section where it all comes together...
Grip assembly is attached with steel pins and JB Weld
Trigger Guard is attached with JB Weld in front of the Grip with JB Weld
Barrel assembly is put together with both JB Weld and Apoxie
You'll notice there is hardware running through the "gas block" portion of the barrel guard... this is for a sling
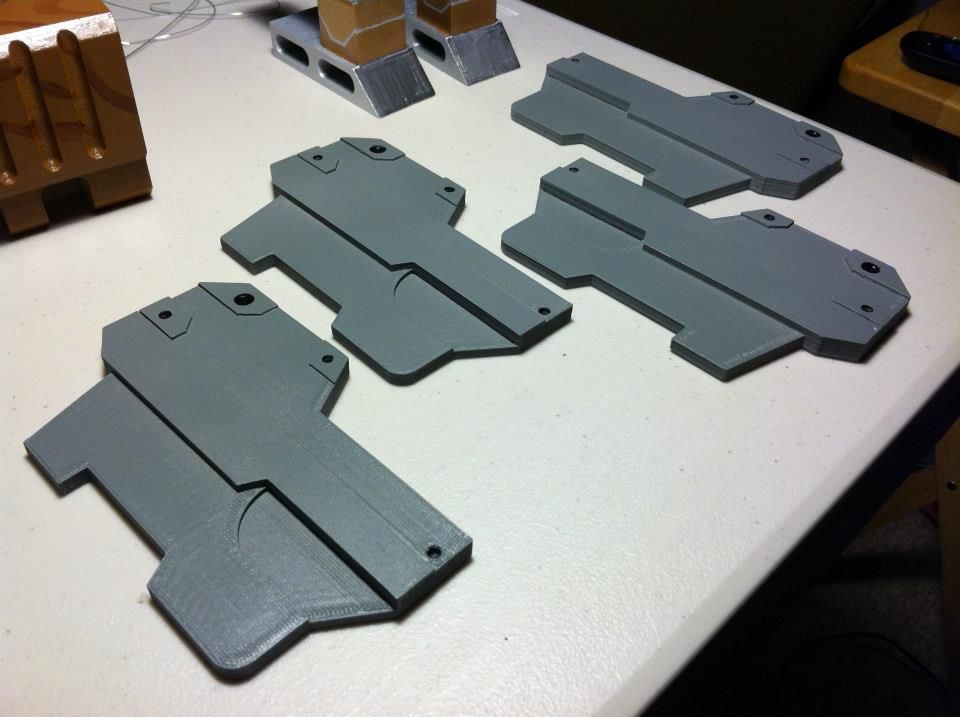
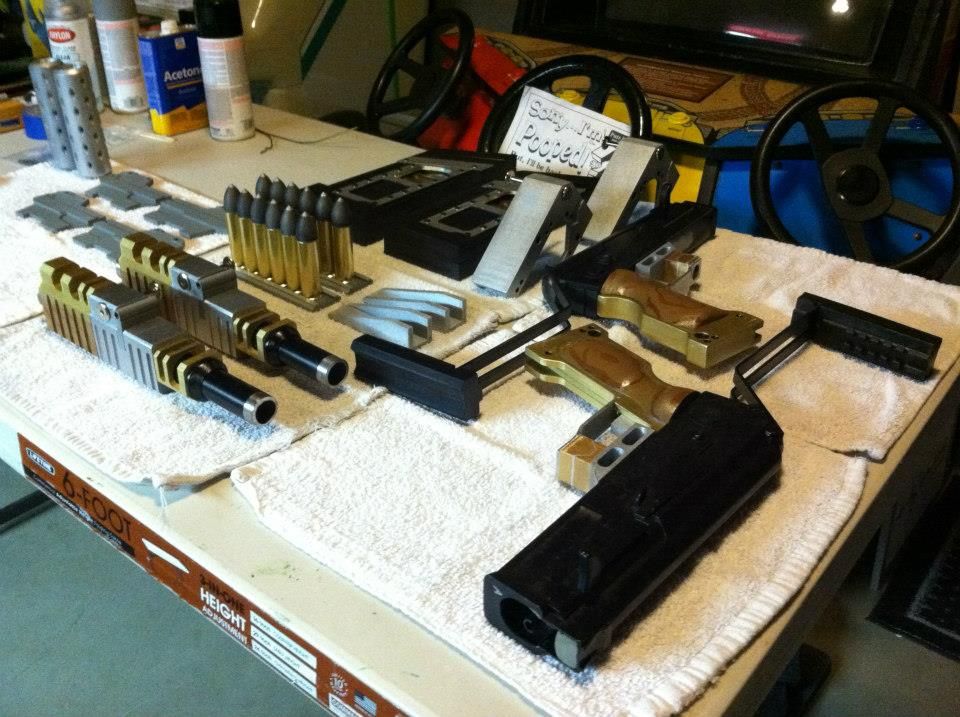
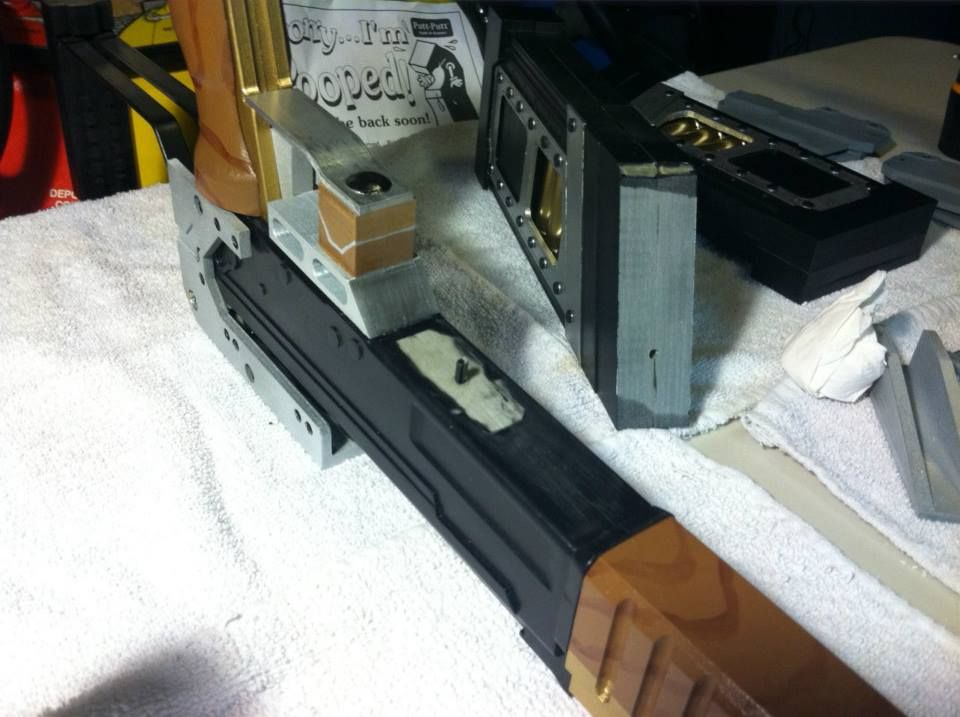
Collection of painted parts
The Rear Guard/Bracket also has hardware for a sling, so it must be mounted VERY securely
Barrel is mounted to the body with both Apoxie and JB Weld for a secure fit
Magazine is fitted with a steel pin and JB Weld
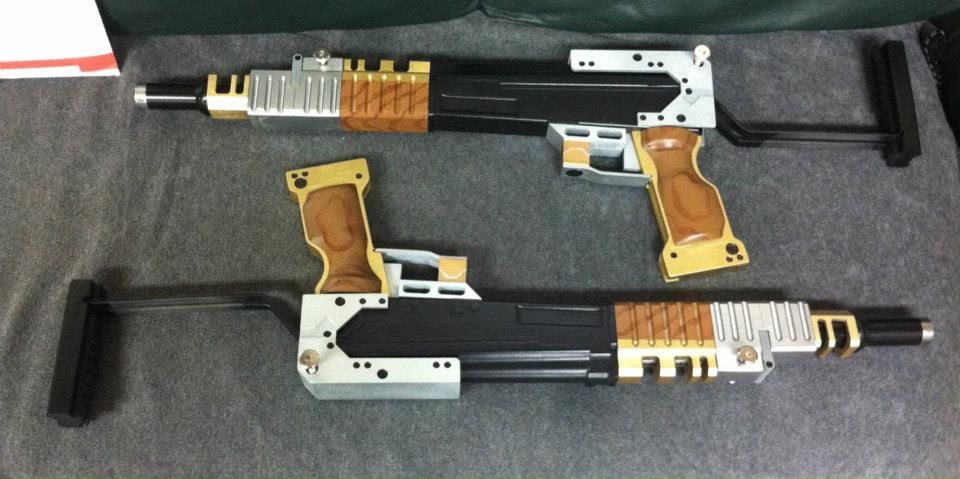
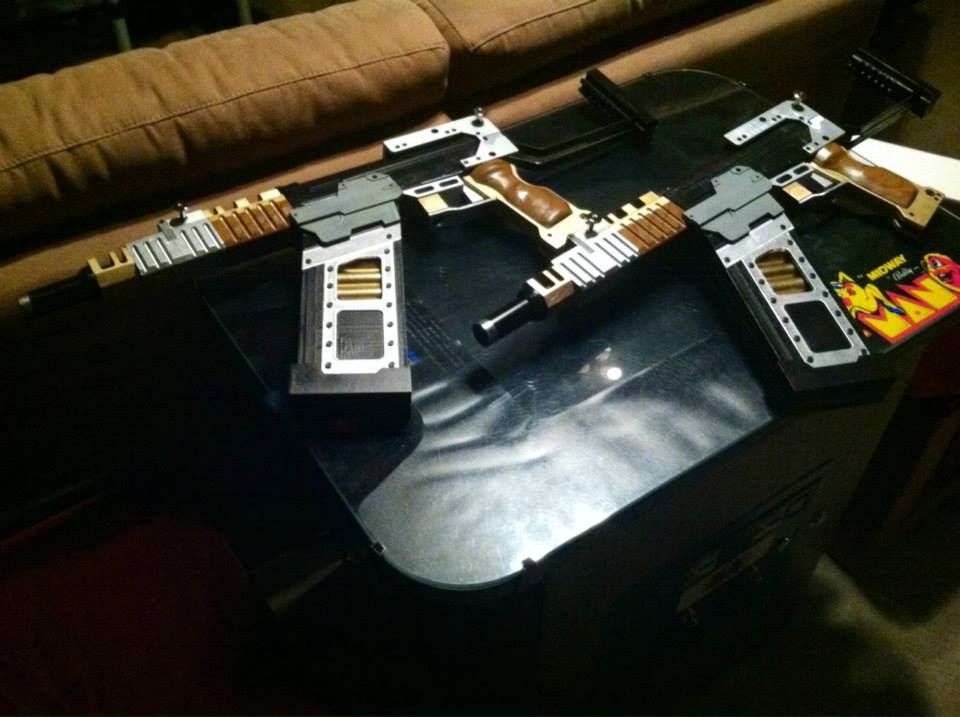
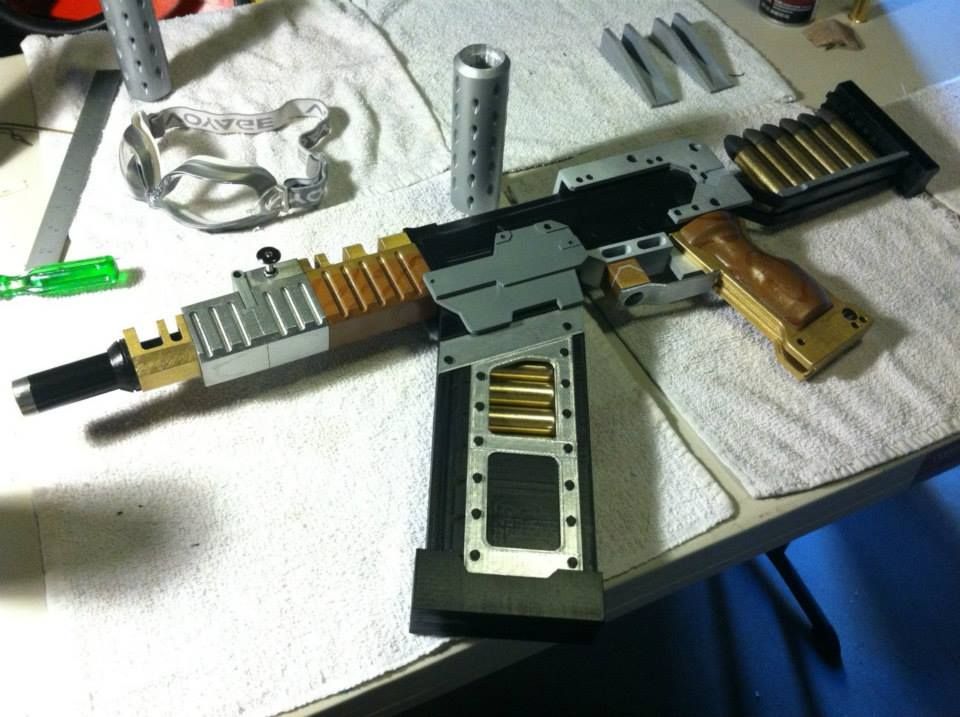
Final progress shots as of the last day or two (5/15/13)
Whew! That's quite a lot of posting (especially for my first thread).
All that's left now is to finish up assembly of the Stock and to complete painting and assembly of the Top Rail and Optics components. The Top Rail is printing right now, and the optics components are at home with paint curing.
Tonight, I'll aim to get the Stock done and possibly craft the sling.
I'll post updates as they come. Wish me luck!
I've decided to proceed with sharing photos from my build process. Feel free to ask any questions you like, as I love talking about my hobbies and projects. This has been a fun build, and I can't wait to dress her up and take her out somewhere fun.
Without further yapping on my part, here are the photos...
I'll start with my 3D drawings.
I made these all in Google SketchUp (with the exception of the Suppressor part, which my friend made in AutoCAD).
Barrel Guard (complete)

Barrel Guard - hinged piece

Barrel Guard - wood grain piece

Barrel Ring

Bullets

Bullet Tray

Bullet Tray (underside)

Grip

Hinge

Magazine

Mag Well Guard

Optic Riser

Rear Optic on Riser

Front Optic/Laser

Rear Guard

Rear Picatinny (on stock)

Rear Stock Guard

Suppressor

Swivel (for sling)

Trigger Guard

Wood Grip

I had to start with a base, as I wanted a stable platform on which to anchor all my parts... just like the original was built around an existing gun, mine is built around a $15 Airsoft-style AK-47.
I chopped off all the unnecessary crap using a hacksaw and was left with this:

Then, I started printing my components...
Printed Barrel Guard component

Test Fit of Printed parts

Faux Wood Grain

"Hinged" Barrel Guard component

Finished Gold&Wood component

Painted Suppressor

Then, I had to prepare the body of the rifle...
I sanded down all the cuts and filled the holes left by the grip and magazine with Apoxie, so I'd have a firm surface to which I could add my own grip and magazine.


Here are photos of the Rear Guard (goes on rear of rifle body, covers stock joint and provides hard point for sling)...


The Bullets were a combination of 12ga brass (purchased from sports store) and printed projectiles.
Printed Bullets

Painted Bullets

Assembled Bullets

The grips were printed in halves (like many of the other components)
Grip body

Test Fit

I used Bondo to even out the texture left from printing

Brown coat of paint (browncoat, lol)

Finished Grips

The Magazine is a huge and iconic part of Vera... I think the Suppressor and Magazine are the most identifiable components of this prop.
From the size of the bullets, you can bet the magazine is HUGE... it's over a foot long, so I had to print it on pieces and assemble it. The process worked pretty well.
Main magazine part (all mag parts were printed in halves)

Primed parts

Painted parts

Assembled using Apoxie

Shells are visible through the mag window, so I arranged them on a rig prior to magazine assembly

More assembly with Apoxie

For size comparison, here's a Vera mag next to a 30-round AR magazine... it's HUGE!

Here are the plates that cover the union of the magazine and the rifle.

The Stock has many components. I decided to build mine around 2 bent straps of Stainless Steel for strength. The straps were anchored mechanically and with Apoxie to the rifle body... then the components were attached with either Apoxie or JB Weld (or both)
Bullet Tray/Rack


Rails installed

The rear of the Stock was put together in a "sandwich" style


The structure of the Stock will be hidden with cosmetic rails along the sides (my stock doesn't really articulate)

Okay, here's the section where it all comes together...
Grip assembly is attached with steel pins and JB Weld

Trigger Guard is attached with JB Weld in front of the Grip with JB Weld

Barrel assembly is put together with both JB Weld and Apoxie
You'll notice there is hardware running through the "gas block" portion of the barrel guard... this is for a sling

Collection of painted parts

The Rear Guard/Bracket also has hardware for a sling, so it must be mounted VERY securely


Barrel is mounted to the body with both Apoxie and JB Weld for a secure fit

Magazine is fitted with a steel pin and JB Weld

Final progress shots as of the last day or two (5/15/13)


Whew! That's quite a lot of posting (especially for my first thread).
All that's left now is to finish up assembly of the Stock and to complete painting and assembly of the Top Rail and Optics components. The Top Rail is printing right now, and the optics components are at home with paint curing.
Tonight, I'll aim to get the Stock done and possibly craft the sling.
I'll post updates as they come. Wish me luck!
") )
)


