Y oh Y oh Y & its over!

Status
Not open for further replies.
Re: Y oh Y oh Y

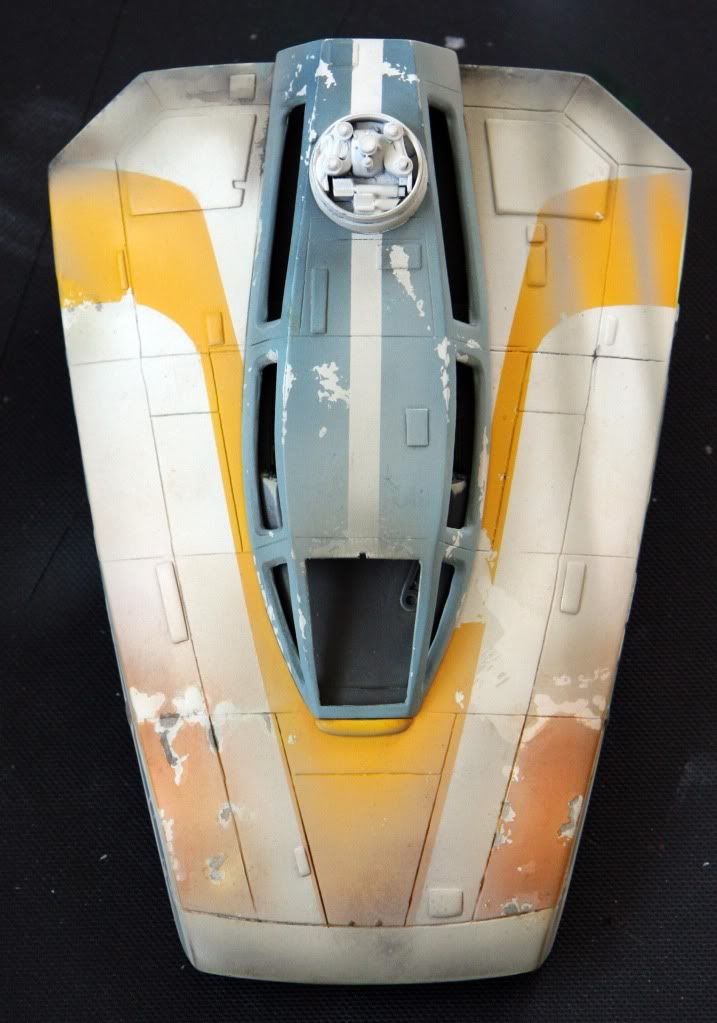
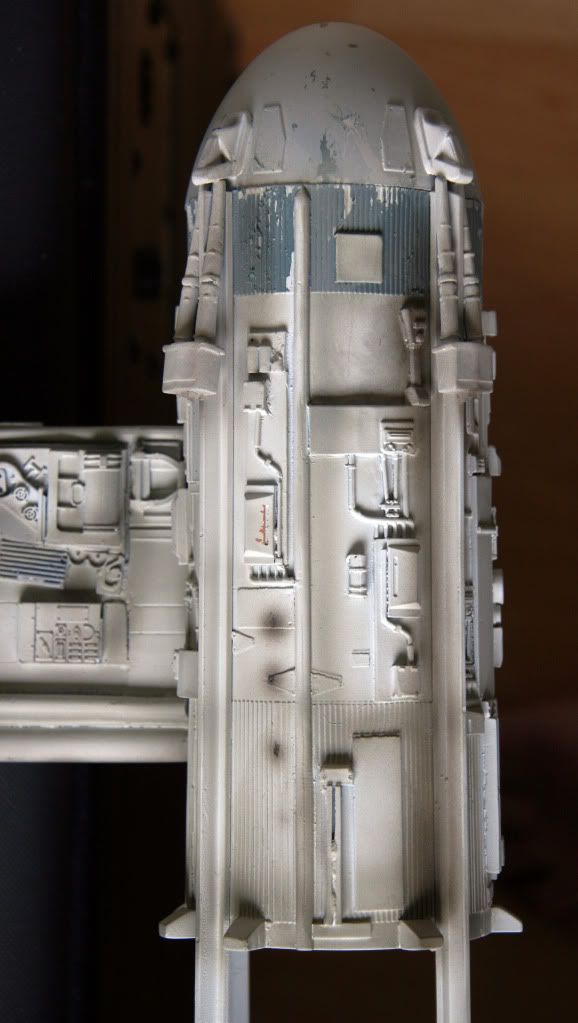
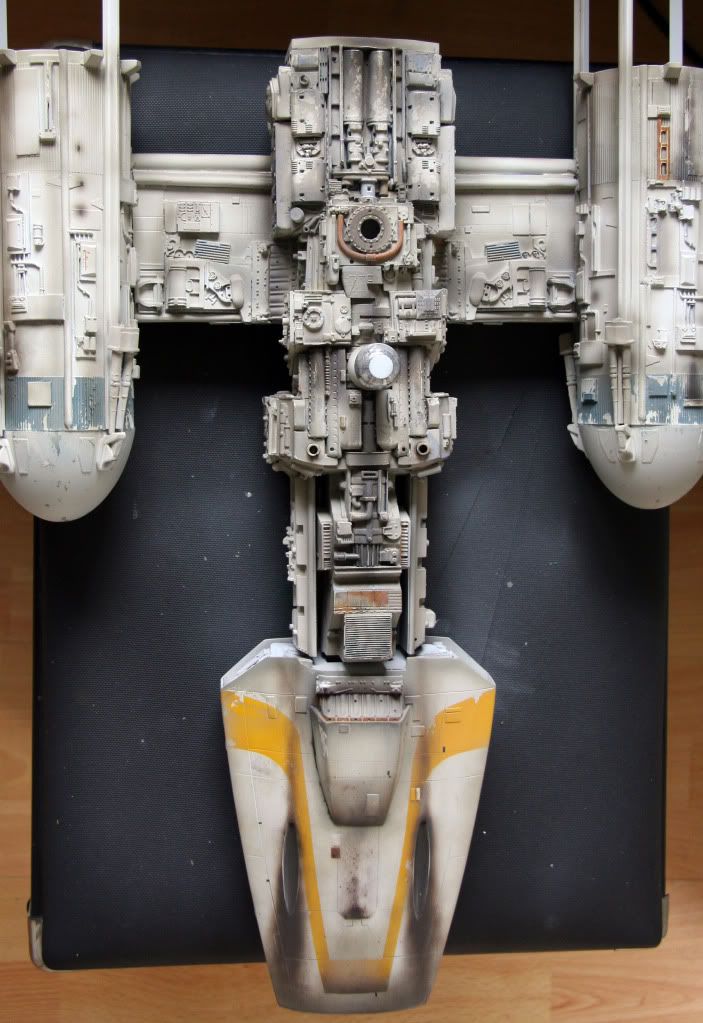
Totally started this one again, Re did the white base coat this afternoon then plodded on with what I think is a much better look, the other was OK but I ruined it after I took the pic, this is not an easy Y to paint as the contrast is so out on the ref pics that you kinda have to make it up a bit, so I'm going for a cross of the Ref & a guess.

NewYhead.jpg
 
Re: Y oh Y oh Y

I did the yellow stripes a bit more uneven than the first time round, although wrong to the eye its a bit more in keeping with the prop.
 
Re: Y oh Y oh Y

Looks much much better, very nice weathering job!

The only thing you need to correct is the little area if front of the canopy should be the same blue/grey color as the canopy not yellow, and the little notch you did on top front is actually a small black marking, there's a few others all over the hull if you look closely. You can see a big nice photo of this particular Y-wing your painting in The ART of STAR WARS book p.99

GFollano
 
Last edited:
Re: Y oh Y oh Y

Cheers mate, dont panic about the front bit of the cockpit that will be the right color in a couple of days, its easier to paint & mask the yellow & then do that last...well the way I paint anyway :lol

I guess I'm stuck with the notch though, bugger. All the black markings will be in place tomorrow when I get the decals ready, Still a long long way to go & I cant believe I've got that book somewhere & not looked at it :wacko
 
Re: Y oh Y oh Y

Quick update, all airbrush on the body so far & it needs to be very damped down with misting when all the weathering is done, I usually work high to low contrast, if that makes sense?

Fullcheck2.jpg
 
Re: Y oh Y oh Y

What a great painting!!It looks better than the photos of the Gold5 studio model.By the way,isn't the part in frot of the sturnV Jagdtiger wheel on the studio model?
 
Re: Y oh Y oh Y

Looks fantastic Guy, but you know im a BIG fan of your paint work, very pretty!

lee

Like wise mate, like wise. Its tough not having much ref & I dont want to start looking at other Y's or it will throw me off :lol. My PD ends in an hour so I'm on edge till the last bid comes in, sadly I only just this second got my car back ......£1255 bill for the cam belt breaking. Heartbreaking handing that kind of dosh over for a repair...... Bollox
 
Re: Y oh Y oh Y

Timing belts buddy, they are the scourge of motoring, the slap of valves isnt a joke at all, and wow, thats a hefty sum.
I think your doing fine on this build buddy, the whole kit is generic on the whole, so dont sweat it, your having a lot of fun, and it shows!

lee
 
Re: Y oh Y oh Y

Like wise mate, like wise. Its tough not having much ref & I dont want to start looking at other Y's or it will throw me off :lol. My PD ends in an hour so I'm on edge till the last bid comes in, sadly I only just this second got my car back ......£1255 bill for the cam belt breaking. Heartbreaking handing that kind of dosh over for a repair...... Bollox

Did it mash up the head when it broke? Or just the valves, thats why I used to love my old 8v MK1 GTi enough clearance if this happended, not so lucky for the 16v guys!!:cry
 
Re: Y oh Y oh Y

Been well busy underneath today, using oils paint extensively for the first time on this build & I'm liking it, not really washes but more for scaring & paint chips etc. Still a WIP & a long way to go but its coming along, with this it was the base coat then some shading with medium grey, then darker burn shading with a mix of in order (Black, German grey, brown, deck tan). Then did some oil paint work & some sanding then gave it a very wet mist of white with a small amount of grey.

Underside2.jpg

Underwing.jpg

bellyclose.jpg

Close2.jpg

Mainbelly.jpg
 
Re: Y oh Y oh Y

Wow, that weathering is just eyeball candy Guy, very proffessional and above all looks perfect!.
One thing, just how does one know when to stop the process before its too overdone, thats been my problem on a number of models?. It seems to be a very fine line between too much or not enough and just right!, you always manage to get it just right lol!.
Anyway, I always look at your builds/painting as tutorials to improve my paint skills, thanks dude!.

Stu

Thanks Stu, I know it sounds daft but I squint a lot when I look at ref material. Also I divide the model into small areas and work on them one at a time. I'm sure if we. Could see the real gold 5 then it would look nothing like mine :)
I only have one pic of the undersIde of the model and it's low res and not ver good, this actually helps as who knows how it should look? There are distinct areas of weathering that can be seen on the ref so I just emulate them as best I can. The trick is trying to make it look 30 years old, that's just being a bit scruffy in the way I work. I'm going to do a video soon of what I do just to show how easy it is if you don't try too hard, then hopefully Dean will do one... Nudge nudge, wink wink. I don't use dull coat between mediums either, I doubt ILM did and I don't have the patiance for it, I'm also using less pastel as time goes on. A good weathering job all depends on how into the subject you are and how good the ref is,the skills come last as it can be like paint with numbers. Anything I have learnt has usually come from mistakes that I need to rectify. I really wish people would put more builds up here, we can all learn from each other, I love looking at other peoples work truly inspiring
 
Status
Not open for further replies.
Back
Top