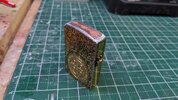
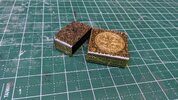
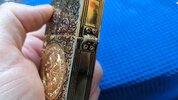
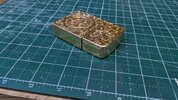
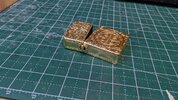
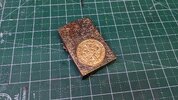
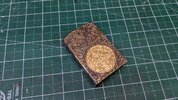
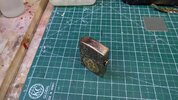
Upgrading a Cheap Constantine Lighter with Metal Leaf

Astyanax

Sr Member
RPF PREMIUM MEMBER
Hi all:

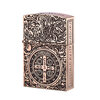
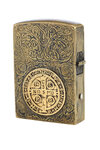
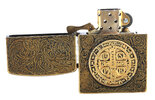
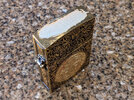
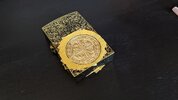
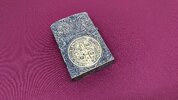
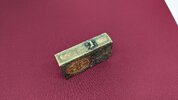
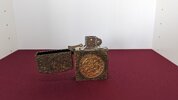
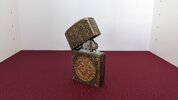
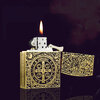
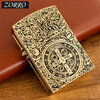
In an effort to build some new skills, I picked up this cheap Constantine lighter from AliExpress ($19 shipped):
1b.jpg 1a.jpg 1c.jpg

Although it is a really decent Zorro/Zippo knockoff as a real lighter, as a prop it is woefully inadequate:

- The edges are too sharp
- There's a "Constantine" logo on the top
- It's all gold, instead of copper on the main body, and gold on the "coin".
- It has fake weathering, perfectly painted black in all the recesses.
- The gold is far too shiny.
- The Latin on the side starts at the wrong end (minor, nothing I can do here).

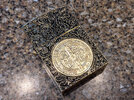
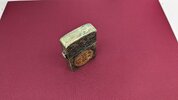
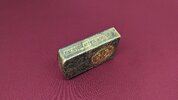
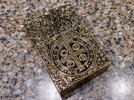
This is what I received. I would say the AliExpress pics were very accurate. It's metal, nice and heavy, with all the internal parts:
PXL_20230923_043112317.jpg

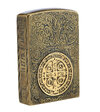
Here are a couple proper references from PropStore:
ad14f6307a69ae749dc9de1a01f4a575.jpg c7875211c75a3d357474aed09f3f4595.jpg aa80b60f2a48dcdc6f56cafba97f9815.jpg

I am going to do a number of things to try to make this look more authentic, and hopefully learn a couple new skills in the process! If I'm lucky, I don't expect the total cost to be over about $50.

I've already gotten a good start, so follow-up posts coming shortly!

Bill
 
Last edited:
The first thing I have to do it repaint the whole thing, try to get it back to a "new" state (without that fake shiny gold chrome), so that I can weather it properly. It also needs to be two colors: copper and gold.

I have decided to use gold and copper leaf, instead of paint. Cover it with real metal! But this is my first time using leaf of any kind. I watched a bunch a videos, did a bunch of reading, and dived in.

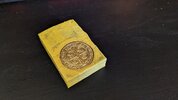
I used the chisel tip of a Mona List adhesive pen, put on the 7.0x reading glasses, and applied the adhesive with a steady hand. Then, I waited 10 minutes for it to become clear and tacky, and then laid a square of gold leaf over it. I burnished it (pressed it down) with a piece of wadded up cotton t-shirt, peeled off the backing, burnished it further, and brushed off the excess with a paintbrush. No masking necessary, no rubbing, no buffing!

PXL_20230923_144230678.jpg

Hey, not too bad! So I went forward with doing the other side.

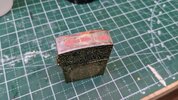
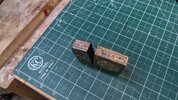
Next, I slathered some Bondo over the "Constantine" logo on the top. This is supposed to be an in-world prop. John doesn't strike me as the kind of guy to engrave his own personal logo in his stuff! ;) Will sand it shortly, as well as try to soften those sharp edges a little.

PXL_20230923_144254058.jpg

I'm encouraged! So I went ahead and ordered the copper leaf for the rest of the body of the lighter.

And now I have a question for any folks who have worked with metal leaf: what do you use as a high gloss spray sealer? It appears the Mona Lisa brand spray has been discontinued, so I don't know what to pick up that won't react with the metal and won't look too fake. I have Alclad II gloss lacquer; is that a good choice?

Thank you!

Bill
 
Last edited:
That's really cool! Always wondered about the quality of these. I have one of the original brass lighters from Lemarchand's run from like a decade ago and the matching knuckles as well.
 
Uhhh... the main body of the lighter is tarnished brass, not copper. So expect to be surprised/disappointed when your copper leaf shows up and it's totally the wrong color. :confused:
 
Uhhh... the main body of the lighter is tarnished brass, not copper. So expect to be surprised/disappointed when your copper leaf shows up and it's totally the wrong color. :confused:

Tarnished brass, eh? Thanks for the warning, it looked like copper to me! I'll send the copper leaf back.

I guess I could get the effect by going forward with all gold (since it's close) and then tarnishing it somehow, right? Maybe?

I don't think there's much out there by way of genuine brass leaf, so I may have to resort to paint. Any suggestions?

Thanks for the catch!

Bill
 
It appears that the very same gold leaf I used for the coin is actually true brass, composed of copper and zinc. Time to experiment with tarnishing techniques!
 
it looked like copper to me!
Old copper pots with a brass handle and a brass ring:

copper & brass.jpg


One of my go-to methods for tarnishing copper and copper alloys (brass, bronze) is ammonia fuming. You pour ammonia into a shallow dish and place it a bucket that you can seal with a lid. Put a piece of wire mesh on top of the dish and place the metal item that you want to age on the mesh. Seal the bucket and let the ammonia vapors do their thing.

It can take as little as 15 - 30 minutes or up to several hours, so you need to keep an eye on it, depending upon how dark you want it to end up. The most important thing is that the metal needs to be CLEAN - if you haven't been wearing gloves while handling the item, it needs to be wiped down with a solvent (acetone, isopropyl alcohol).

I have no idea if this method would even work on metal leafing, as I have never tried it.
 
That film was such a gem. Loads of cool props. I am curious to see how your tarnishing will turn out and which method works the best
 
Yep, just a tiny bit of progress so far, but I plan to keep going.

After much testing of different tarnishing techniques on the gold leaf paper itself (brush painting and fuming with ammonia were too uneven), I have decided I'm going to gold leaf the entire lighter and then dip it "Brass Ager". Knowing this, I probably should have done the gold leaf on the coin LAST, not first. I recommend you don't follow in my footsteps until I'm done...might screw up royally! ;)

I did two more things, so far:
  1. Masked off the coin on both sides, and airbrushed it in Alclad II Aqua Gloss. The sheen still looks pretty good. :)

    PXL_20230924_180711638.jpg PXL_20230924_182240227.jpg

  2. Filled and sanded the "Constantine" logo on the top. I started with Bondo, then followed with a couple applications of Bondo spot putty.

    PXL_20231007_170313092.jpg
Next step is to round the corners. I have a benchtop sander, and will try 80 grit for that, then hand-sanding with 220, 400, and 600 afterward. Wish me luck!
 
Last edited:
Corners rounded! I used 80 grit on my belt sander, then followed up with 220 grit by hand, using a sanding block.

It's not perfect, nor do I think it should be. Also, accidentally took a little off the outside of the hinge, but it still functions just fine.

PXL_20231008_183612375.jpg PXL_20231008_183629760.jpg PXL_20231008_185003683.jpg
 
The rest of the gold leaf has been applied! There are a few spots in the nooks and crannies where the gold leaf cracked, but I'm pleased overall, and the final black wash will hide those kinds of things.

PXL_20231008_194311817.jpg PXL_20231008_194320517.jpg
 
Tarnishing done! Well now!

I poured a portion of "Brass Ager" into a small tray, dipped the opened lighter for 20 seconds, flipped it, and gave it another 20 or so. Then I dipped the whole thing in water so that the chemical reaction would stop.

Turns out the tarnishing did not happen very evenly at all. Perhaps oils from my fingers? I didn't want to pre-clean it with alcohol, because the gold comes off. Lots of colors came through!

PXL_20231008_195651912.jpg

But, knowing that the tarnish effect is largely a surface effect, I began rubbing it with t-shirt cloth. This evened things out pretty well!

PXL_20231008_195657606.jpg PXL_20231008_195850518.jpg PXL_20231008_195900490.jpg

In the middle picture above, those are not cracks, but scratches and various imperfections. Hard to capture on film, because it's so reflective.

As you can see the tarnish is still not perfectly even, but it sure does look real! Maybe a little more aged than was in the movie, but still real tarnished brass! Maybe a little more idealized and more reality-accurate than movie-accurate? ;) What do you think?

And the Aqua Gloss did protect the coin, which only darkened very slightly.

Final steps will be a clearcoat and black wash, and then done!
 
Last edited:
All done! I weathered the whole thing with slightly-thinned black acrylic, and wiped it all off. That made the detail pop, and slightly darkjened the whole lighter.

I then painted some flat black acrylic on the outside hinge. When it was dry, I scratched off some, so that the underlying gold would show through on some of the edges.

Finally, I VERY LIGHTLY drybrushed A LITTLE gold paint on the gold coins. This helped the gold pop a little more.

Below are the final shots. Total cost (not counting Bondo, sandpaper, masking tape, and paint): About $58.

$ 20 - AliExpress: Lighter (shipped cost)
$ 10 - Amazon Prime: Mona Lisa Gold Leaf (used 3-4 sheets)
$ 10 - JO-ANN: Mona Lisa Glue Pen
$ 18 - Amazon Prime: Brass Ager (8oz - used half a bottle)

PXL_20231009_181812075.jpg PXL_20231009_181917184.jpg PXL_20231009_181934210.jpg PXL_20231009_181941068.jpg

PXL_20231009_182002274.jpg PXL_20231009_182024319.jpg PXL_20231009_182032748.jpg
 
Last edited:

Your message may be considered spam for the following reasons:

If you wish to reply despite these issues, check the box below before replying.
Be aware that malicious compliance may result in more severe penalties.
Back
Top