Steampunk Ironman Helmet WIP - 5/31 update

Re: Steampunk Ironman Helmet WIP - Faceplate Cutting Video & Pics!

Thanks, Chimmera! It's been a fun build so far - and my favorite bits haven't even started yet! :):thumbsup

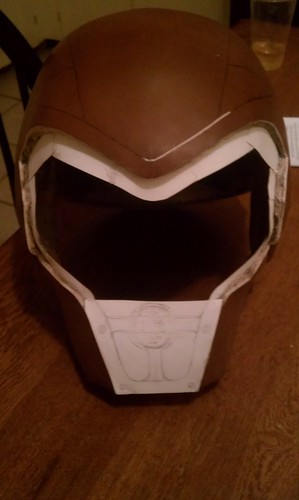
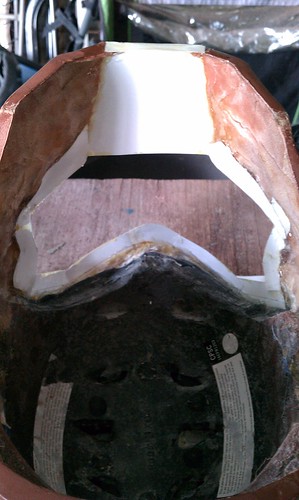
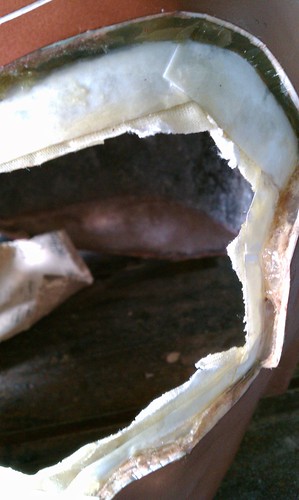
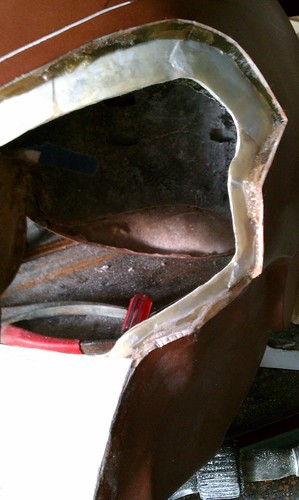
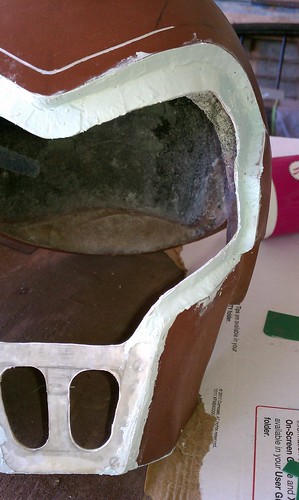
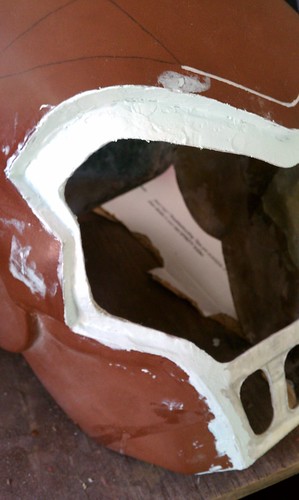
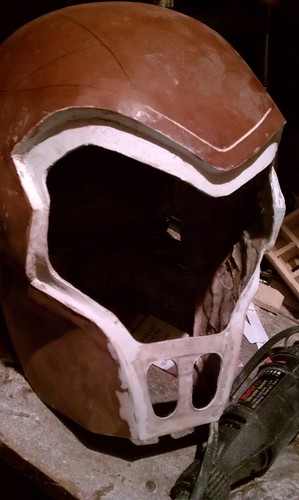
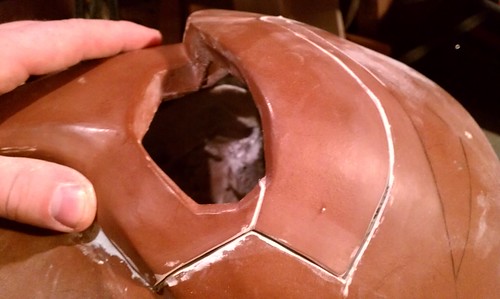
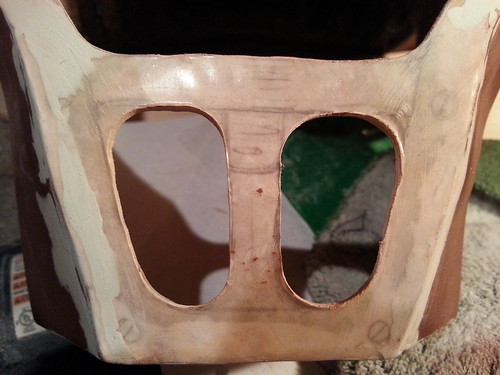
Speaking of that, I've been toying with what the do with the lower part of the open space that will be behind the faceplate when it's down and only visible when the faceplate is open.

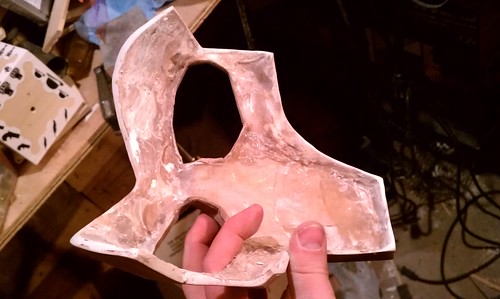
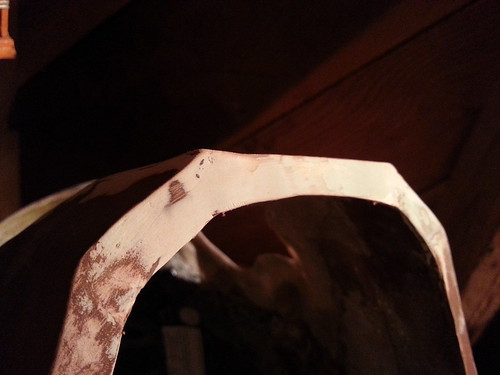
Here's a very rough sketch of my top idea so far. This is the microphone/speaker mount idea I mentioned.
7436075980_683603f90a_n.jpg


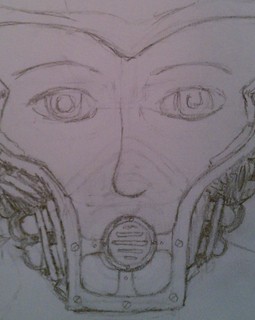
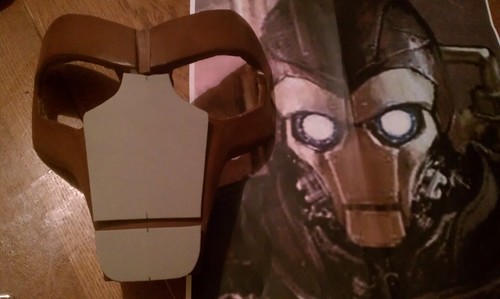
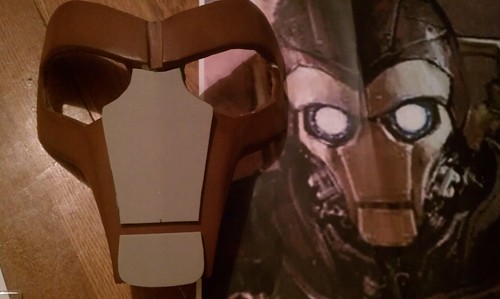
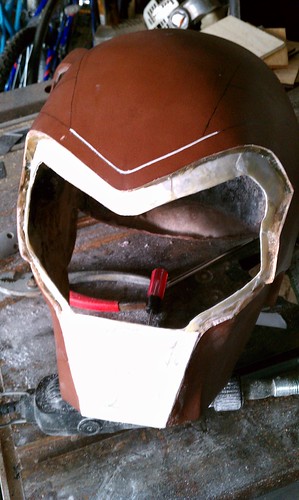
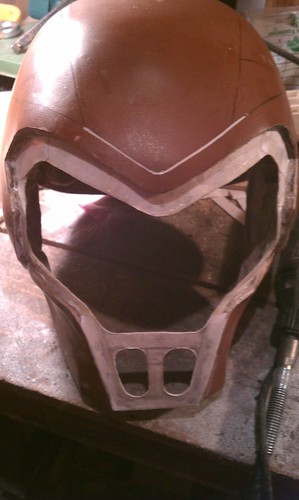
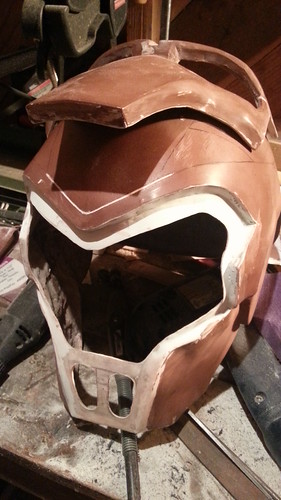
And here is sorta what it might look like with the helmet...
7436077952_6903ceddc9.jpg


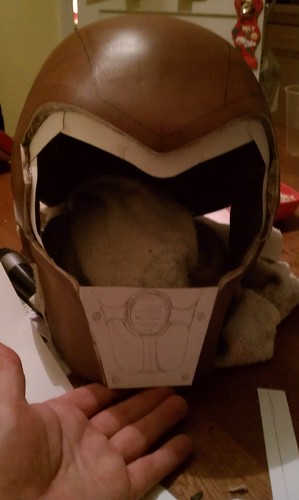
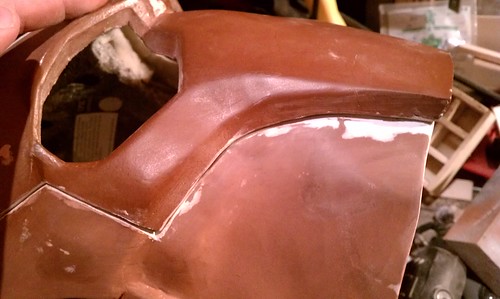
The final version of the 'frame' you see would be brass-colored and the speaker/microphone would look 'vintage'...

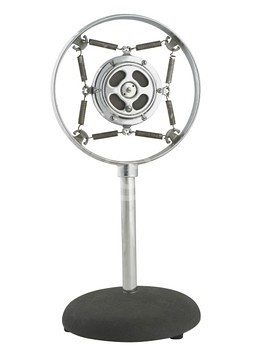
Maybe something like:
7436256946_0561e69cbe_o.jpg


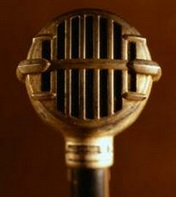
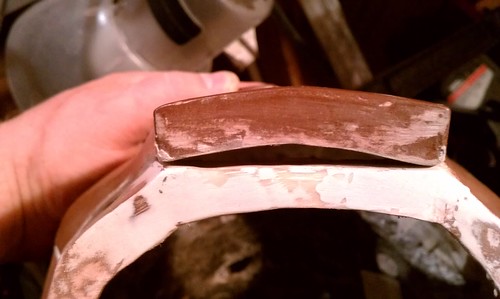
I guess I could really old-school and make something like this, although I think I'd prefer something that keeps it's true 'operation' enclosed so there's some mystery (or imagination required) regarding how it works.
7436257010_568be56487.jpg


Thoughts?
 
Re: Steampunk Ironman Helmet WIP - Faceplate Cutting Video & Pics!

not magneto, mega man

but the question is... will it blend?
oh wait, wrong page

amazing work, and very creative
 
Re: Steampunk Ironman Helmet WIP - Faceplate Cutting Video & Pics!

Indie, you have some Interestin' an inventive ideas brah. I like th' speaker mouth piece that displays when th' faceplate is opened. I can't wait ta see what ya come up /w/. Keep up th' good work brah.:cool:love:cool
 
Re: Steampunk Ironman Helmet WIP - Faceplate Cutting Video & Pics!

I love the mic suspended on the springs! It looks wicked and would allow it to push back when the helmet closes... This is looking even more fantastic every day!!!
 
Re: Steampunk Ironman Helmet WIP - Faceplate Cutting Video & Pics!

Ok, so I finished up the paper lip around the main helmet (where the faceplate will rest). I also added a solid piece of cardstock paper over the area where I will create the 'communication' mount.

Here's what it looks like prior to me hitting it with resin on the outside...
7445214854_a15425d50a.jpg


I'll be applying more fiberglass to the inside tonight (with cloth to strengthen it). After that I'll be spending some time with the putty and sanding tools to make that overlap edge nice and clean (or at least workable).

Since I had nothing to do after fiberglassing these parts, I started playing around with the armor-plating for the nose area again.

I quickly realized that without blowup images, I had TOTALLY gotten the shape of these armor plates wrong.

Here is what I had initially (next to a color blowup reference pic):
7445218090_bb779b15e7.jpg


I had it WAY too wide and also missed the minor hour-glass shape of the pieces.

Here is what I ended up with after some work last night:
7445217008_774d657114.jpg


I think this is MUCH closer to the picture and looks that much cooler... Thoughts?

Also, I know I had botched the whole foam nose-plate armor the first time around, so it might seem insane to be going back to it. But, I'm very confident that I can use XRobot's plastic-coating technique to make these pieces just as hardened as the rest of the helmet! :):thumbsup
 
Re: Steampunk Ironman Helmet WIP - Faceplate Cutting Video & Pics!

OMG this is SO BADASS. And thank you so much for a cutting video! You mentioned that that is a special cutting tool for the dremel. Do you know what it is called? I'm going to have to get one for myself.

Also, where did you purchase you hand saw?
 
Re: Steampunk Ironman Helmet WIP - Faceplate Cutting Video & Pics!

You are correct! The blow up made a huge difference in the shape! I will have to remember that on my builds as well! When in doubt, blow it up! Sounds cool anyhow. I am also supremely glad you are showing how you are making your seam edges and lip to rest the face plate on as I am going to have to do alot of that!! It is looking more awesome every time I see your work!
M
 
Re: Steampunk Ironman Helmet WIP - Faceplate Cutting Video & Pics!

Thanks, Electraflier! ...and I'm totally stealing "When in doubt, blow it up!" :lol


You mentioned that that is a special cutting tool for the dremel. Do you know what it is called? I'm going to have to get one for myself. Also, where did you purchase you hand saw?

I got both pieces at my local ACE Hardware store.

The dremel cutting wheel was $13.49 and is 3/4"dia circular blade with 60 very fine teeth. It's listed as 0.015" thick. You will need to have (get) a little 'post' that you can can attach this to (just a shaft with a screw top that fits your dremel).

7448624616_d844b28296.jpg


The hand-saw is actually called a 'Keyhole' saw. It runs $7.99 at my ACE store. I used the 'metal' blade because it has finer teeth and is a bit thinner than the blade for wood. (Side Note: I've tried to figure out 3 'other' ways to use this '4-way' saw, but I can't imagine what they might be...any ideas? :confused)

7448620034_89b7d257cd.jpg


Hope that helps! :):thumbsup
 
Re: Steampunk Ironman Helmet WIP - Faceplate Cutting Video & Pics!

Thanks, Electraflier! ...and I'm totally stealing "When in doubt, blow it up!" :lol


I got both pieces at my local ACE Hardware store.

The dremel cutting wheel was $13.49 and is 3/4"dia circular blade with 60 very fine teeth. It's listed as 0.015" thick. You will need to have (get) a little 'post' that you can can attach this to (just a shaft with a screw top that fits your dremel).

7448624616_d844b28296.jpg


The hand-saw is actually called a 'Keyhole' saw. It runs $7.99 at my ACE store. I used the 'metal' blade because it has finer teeth and is a bit thinner than the blade for wood. (Side Note: I've tried to figure out 3 'other' ways to use this '4-way' saw, but I can't imagine what they might be...any ideas? :confused)

7448620034_89b7d257cd.jpg


Hope that helps! :):thumbsup

Awesome!!! Thanks!!!!
 
Re: Steampunk Ironman Helmet WIP - Faceplate Cutting Video & Pics!

Sorry for the delay, I did some light animation work last night and didn't get to fiberglassing the inside of the overlap on the helmet.

I was able to get that done this evening, so here are a couple pictures of what that looks like.

Prior to applying the fiberglass...
7457907154_0f794448a5.jpg


That's just the card-stock paper hotglued into place. From here, I applied a layer of fiberglass resin, some old t-shirt material I had laying around and then another layer of resin. I applied two layers of the thin t-shirt material and resin to the 'communication' fame area to give it a bit more strength.

Here is what this looks like from the inside after the application of the fiberglass...

7457909886_1267c49ecd.jpg


7457915984_c55348efc7.jpg


You'll notice I tend to leave extra pieces or edges of material hanging past the edge of the card-stock. I find it easier to get the resin fully soaked into the material all the way to the edges when you fiberglass PAST the edge than trying to stop right at the edge. Tomorrow I'll be able to cut with scissors and then quickly dremel-sand back these edges to where the paper stock lines were. Hopefully, this will leave very clean and crisp edges that are fully strengthened by the resin.

Also, I don't normally care much about what the inside of the helmet looks like. Remember the outside was just 'painted' with resin, so it should look basically just like it did before I applied the resin - and that will be were the putty and sanding will start up next!
 
Re: Steampunk Ironman Helmet WIP - Making the Faceplate overlap edges

Started tonight by cleaning up the overlap with my dremel. Took less than 10 minutes to get it ready for putty work.

Here is the BEFORE shots:
7464053788_e2a85ce2b0.jpg


7464054440_d6d67b2e7a.jpg


And here are the AFTER shots:
7464055286_42f4d407fd.jpg


7464056296_de97c1180e.jpg


7464057896_894fefa3ea.jpg


So, I think I'm also going to cut out the pieces of the communicator plate prior to applying the putty. I'm not sure if that's the right move... but that's what I'm going to try. :):thumbsup
 
Re: Steampunk Ironman Helmet WIP - Making the Faceplate overlap edges

So, the communication mounting frame is now cut out. Next step is bondo (or in my case flowable putty).

7464194660_9f7a91e1ec.jpg


Of course this whole process is taking longer than it should because it's 100 degrees here in Tennessee this evening... So I've been taking long breaks in between work on the helmet (which I have to do outside). :confused
 
Re: Steampunk Ironman Helmet WIP - Making the Faceplate overlap edges

So, I finally got around to putting putty on the overlaps...

I was slightly delayed yesterday by a last minute b-day party game build for my (now) 4yr old. He wanted an Angry Birds party and those darn birds are like $5 each. So, I just spent $15 at Hobby Lobby on some wooden balls and some paint and made a set of 12 pigs and birds.

7475331028_bc9445178d.jpg


They came out ok for just having one evening to finish the entire project. Knocking the pigs off their perches with the birds was a great game that everyone enjoyed - so it was fairly successful project! :):thumbsup


It delayed my putty work on the edges of the helmet, however, until today. Here is what the helmet looks like after getting the putty around the entire main helmet opening.

7472886784_694cec2dd1.jpg


7472888042_23c64f2eef.jpg


I normally don't bondo/putty the sides of the faceplate, as it's fairly hidden, painted black and normally not an issue. However, since we're planning to cast these two pieces, I'd like even these edges to be cleaned up a bit.

Here is the faceplate with some putty applied around the cut edges.

7472889004_6971a7f5fe.jpg


Sanding to follow...
 
Re: Steampunk Ironman Helmet WIP - Making the Faceplate overlap edges

Thanks for the update! This think is getting better and better. Can't wait to see it completed.
 
Re: Steampunk Ironman Helmet WIP - Making the Faceplate overlap edges

Got the roughest of the putty off of both the main helmet overlap and the faceplate edges.

Here is what the faceplate looks like tonight:
7476628572_5197ec9aa6.jpg


And here is what the main helmet section looks like this evening:
7476624034_9e68e513eb.jpg


I also thought I'd take this opportunity to walk you around the connection seam of the faceplate and helmet pieces... here goes!

Left side (close-up on the lower faceplate):
7476627538_87eccec279.jpg

**Still looks like there is a gap I'd like to get closer along that lower faceplate edge. I'm not sure if it will really matter (or be seen), but I might try to get get that closed up a bit more.

Chin attachment point:
7476625892_4904b398dd.jpg

**Yes, the faceplate is curved and the main helmet chin is not. This was planned, but I don't know if I like this look or not. It's completely unseen (unless by very short people standing chest-to-chest with you looking straight up), but as a design element I don't know yet if it's 'right'... I'll have to think more about it.

Right Temple Area:
7476625018_db59e720c9.jpg

**I'm pleased with both sides of the temple. The Left side of the faceplate is just SLIGHTLY inset of the main helmet body, but other than that very minor issue I'm generally pleased with this fit.

Brow:
7476624506_1aaab21d09.jpg

**Again, I'm generally pleased with this fit. I had initially wanted to do something fancy where the 'brows' were higher than the 'furrowed' area between them, but I think this simple line is not only easier to create, but works well for the look of the helmet.

That's it for tonight... It's been running over 100 degrees today in Tennessee so I'm exhausted. :confused

Catch you all tomorrow! :):thumbsup
 
Re: Steampunk Ironman Helmet WIP - Making the Faceplate overlap edges

Over 100 degrees, but you forgot to add that you do all of this work outside.

It's looking amazing! We need to get together again soon so I can see it in person. I've got new LEDs for the eyes now. I should know tomorrow how they are going to work.
 
Re: Steampunk Ironman Helmet WIP - Making the Faceplate overlap edges

Thanks - I've been pretty pleased with the way it's coming along.

I just got a shinny new Galaxy S3 phone yesterday so I wanted to test out the 12 megapixel camera by getting some very close-up shots of the sanding work I've been doing on the overlap edges I created.

Here's the full helmet and then some close-ups...
7491813048_cf81b5b1dd.jpg


This one is the underside of the chin. It's where the new communication mount was added to connect the two cheek sides.
7491852608_2b5ed5aa73.jpg


And here is a very close-up shoot of the front of the communication mount.
7491854190_8e9cfd5e61.jpg


Here is a look at the edge near the top Left-hand side of the faceplate opening.
7491855466_ddcdc299b1.jpg


And here is a look at the other side...
7491858274_035900aca2.jpg


Lastly, here is look at the Right-hand side. This is at the top of the check piece, so it transitions here from overlap edge (which is at a right angle to the helmet surface to a complete flush with the outside of the helmet near the communicator mount.
7491856760_d65e731dd1.jpg


As you can see from these close-up shoots, this is not made by a machine! :confused

Most of the 'ugliness' will be fixed with a coat of primer, but since I've marked out where the plate lines are on the top of the helmet (and I don't want to do that again), I will need to carve those BEFORE I can hit the whole thing with primer again. :unsure

Regardless, it's coming along... slowly but surely. :):thumbsup
 
Re: Steampunk Ironman Helmet WIP - Some Close-up Pics

AWWWWWWWWWWWWWEEEEEEESOOOOOOOOOOOOOOOMMMMMMMEEEE nice to see another type of ironman for a change :)
 
Re: Steampunk Ironman Helmet WIP - Some Close-up Pics

This build is really amazing and uttterly awesome. Fun to see something else than all the foam IV, VI and VII builds.
 
This thread is more than 9 years old.

Your message may be considered spam for the following reasons:

  1. This thread hasn't been active in some time. A new post in this thread might not contribute constructively to this discussion after so long.
If you wish to reply despite these issues, check the box below before replying.
Be aware that malicious compliance may result in more severe penalties.
Back
Top