wayouteast
Sr Member
I'm starting to work on a couple of TOS movie era communicators.
I've never liked the little-seen 'lunchbox' communicator from 'The Wrath of Khan' to be honest. I might make it at some point for completeness' sake but it's not my favourite ST prop!
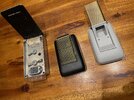
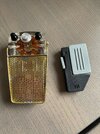
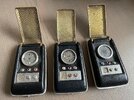
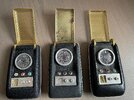
The communicators used in 'The Search for Spock' and then updated for 'The Final Frontier' and 'The Undiscovered Country' are pretty nice though. I found some STL files for them on Cults3D and CG Trader. The Search For Spock version is already nicely designed to incorporate electronics, but the Final Frontier one will need some work with a Dremel and a bit of a redesign to allow access to the interior for a battery and switch. Luckily, from what I can see, the changes that were made for that film actually simplified the prop's effects to a single bright white light panel instead of the various indicators on the SfS version, so it shouldn't be too difficult to replicate.
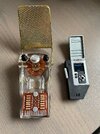
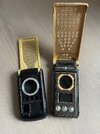
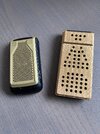
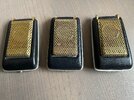
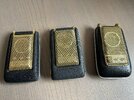
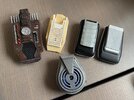
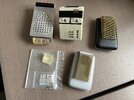
All the parts for both versions are printed using Elegoo ABS-like resin (and Anycubic Clear resin for a few of the parts) on my old Elegoo Mars printer. It took several attempts to get the grilles to print successfully as the 'slats' are very thin and need lots of supports to avoid delamination of the layers as the part prints. So removing and cleaning up the supports is a delicate and time-consuming job. Once cured they're pretty robust though.
All the clean up is done. I'm waiting for a slightly dryer day here in the UK so that I can give the parts their first primer coat as the next stage before painting them.


I've never liked the little-seen 'lunchbox' communicator from 'The Wrath of Khan' to be honest. I might make it at some point for completeness' sake but it's not my favourite ST prop!
The communicators used in 'The Search for Spock' and then updated for 'The Final Frontier' and 'The Undiscovered Country' are pretty nice though. I found some STL files for them on Cults3D and CG Trader. The Search For Spock version is already nicely designed to incorporate electronics, but the Final Frontier one will need some work with a Dremel and a bit of a redesign to allow access to the interior for a battery and switch. Luckily, from what I can see, the changes that were made for that film actually simplified the prop's effects to a single bright white light panel instead of the various indicators on the SfS version, so it shouldn't be too difficult to replicate.
All the parts for both versions are printed using Elegoo ABS-like resin (and Anycubic Clear resin for a few of the parts) on my old Elegoo Mars printer. It took several attempts to get the grilles to print successfully as the 'slats' are very thin and need lots of supports to avoid delamination of the layers as the part prints. So removing and cleaning up the supports is a delicate and time-consuming job. Once cured they're pretty robust though.
All the clean up is done. I'm waiting for a slightly dryer day here in the UK so that I can give the parts their first primer coat as the next stage before painting them.