TerranCmdr
Active Member
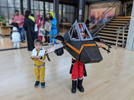
And naturally I accepted the challenge!

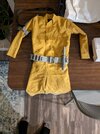
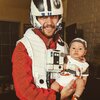
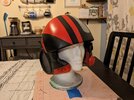
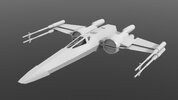
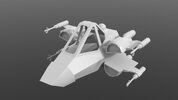
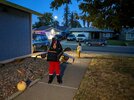
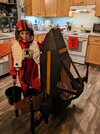
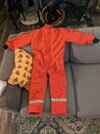
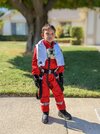
Well, he specifically wanted to be Poe flying his X-wing. So I did the suit first. This was my 3rd Resistance pilot costume so I pretty much had the process down. However this was my first time lining a suit. Really not much more challenging than doing it unlined once I worked out the process.
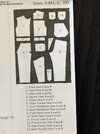
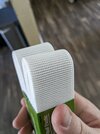
I traced the patterns from the Kwik Sew 3389 and scaled them to my son's proportions in Illustrator. I already had 10+ yards of Solar Cherry in my stock for when I redo my suit so I used that. I used patterns for the pockets generously provided by Jynger in their build thread on Rebel Legion, scaled to about 65% which seemed to work well enough. The Solar Cherry is extremely difficult to work with because it doesn't really iron and it frays very easily. During this process I really wished I had a serger but I did a normal stitch and then went back and did an overstitch on every single raw edge. Even after that the suit has some blown stitches which is disappointing but I'll have to live with it. For the ribbing on the arms and collar I opted for a 2" ribbed elastic dyed with red and orange to match the suit. Not perfectly accurate but looks good enough to me. I lined the suit with cheap black lining fabric - I'd never done this before but basically I made a second suit out of the lining and started by attaching it at the zipper, then hemming it in at the legs and finally attaching it with the arm cuffs.
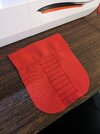
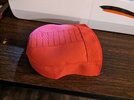
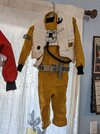
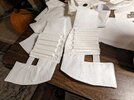
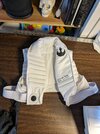
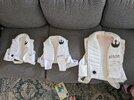
I then moved on to the vest - this was made from my own patterns based on Philonius' excellent tutorial. My 4th one of these so I flew through it pretty quickly without any major issues. I now have the "Goldilocks" setup with vests with a full size, a 75% size and a 50% size (so cute!).
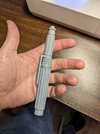
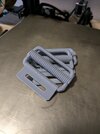
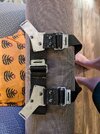
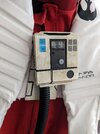
Next I made the belt. I saved a velcro strap from when we bought a mattress from Ikea and it ended up being about the perfect size. I 3d printed the paddles and roll pin buckles and assembled with high-strength thread and chicago screws. The 3d prints were painted black and finished with Rub-n-buff. The "Ikea" portion of the belt is 2" and I bought some extra strapping for the lower part which is 1.5". For the chest box, I used this free file, printed at 75% scale. I modified it slightly to accommodate for lights and printed the buttons in clear and translucent resin. I didn't have time to add the lights but maybe at a later date. The hose I found on an air pump at the thrift store for $4 and it ended up being the perfect size. He put on some gloves he had from last year and his snow boots to complete the look.
And that was the suit done! Continued in the next post...
Well, he specifically wanted to be Poe flying his X-wing. So I did the suit first. This was my 3rd Resistance pilot costume so I pretty much had the process down. However this was my first time lining a suit. Really not much more challenging than doing it unlined once I worked out the process.
I traced the patterns from the Kwik Sew 3389 and scaled them to my son's proportions in Illustrator. I already had 10+ yards of Solar Cherry in my stock for when I redo my suit so I used that. I used patterns for the pockets generously provided by Jynger in their build thread on Rebel Legion, scaled to about 65% which seemed to work well enough. The Solar Cherry is extremely difficult to work with because it doesn't really iron and it frays very easily. During this process I really wished I had a serger but I did a normal stitch and then went back and did an overstitch on every single raw edge. Even after that the suit has some blown stitches which is disappointing but I'll have to live with it. For the ribbing on the arms and collar I opted for a 2" ribbed elastic dyed with red and orange to match the suit. Not perfectly accurate but looks good enough to me. I lined the suit with cheap black lining fabric - I'd never done this before but basically I made a second suit out of the lining and started by attaching it at the zipper, then hemming it in at the legs and finally attaching it with the arm cuffs.


I then moved on to the vest - this was made from my own patterns based on Philonius' excellent tutorial. My 4th one of these so I flew through it pretty quickly without any major issues. I now have the "Goldilocks" setup with vests with a full size, a 75% size and a 50% size (so cute!).


Next I made the belt. I saved a velcro strap from when we bought a mattress from Ikea and it ended up being about the perfect size. I 3d printed the paddles and roll pin buckles and assembled with high-strength thread and chicago screws. The 3d prints were painted black and finished with Rub-n-buff. The "Ikea" portion of the belt is 2" and I bought some extra strapping for the lower part which is 1.5". For the chest box, I used this free file, printed at 75% scale. I modified it slightly to accommodate for lights and printed the buttons in clear and translucent resin. I didn't have time to add the lights but maybe at a later date. The hose I found on an air pump at the thrift store for $4 and it ended up being the perfect size. He put on some gloves he had from last year and his snow boots to complete the look.


And that was the suit done! Continued in the next post...
Last edited:

