Scratch built Terminator T-800 Endoskeleton

Thanks for the input Alaneye! I was actually thinking of making a glove mold with the seamline running from the back of the neck up towards the top of the skull. Would that be crazy? Would you mind drawing on one of my pics to demonstrate where you would divide it? I really need all the help I can get on this one! :p
 
I was thinking it's a full skull, or is the underneath of it open? If it's open then you could probably make a one piece mould without slitting it. If it's partially open then you could probably do it the way you are thinking. It's less of a clean up, but the mould might not last as long... I'm not sure really as I've never used the glove mould method.

Al
 
All my molds are glove molds and are so easy to do and use. Have yet to try any other methods, so I can't say another method would be better.
Glad to see this thread up and running! and congrats!
 
Thanks for the input guys, and thanks for the congrats, Dericrw! :)
There is a rather big hole underneath the skull, where the neck attaches, so I think I would be able to pull off a glove mold.
Is there any way of reinforcing the silicone mold? (not talking about the support shell) Like add cloth, or fibres of some sort to the outer layers of silicone to prevent tears and make it more durable?
 
Apparently cheese cloth is what's used! I've been looking stuff up lately :)

Looking good man, keep up the good work :) :thumbsup
 
Hi Guys!

Here's a small update!

Did some work on the neck, adding the protruding details on the sides.
182.jpg
 
Very nice! It's nice to see some progress :)
As for moulding, I've enjoyed making the moulds for Bob lately. I definitely cant say its been easy but it has been rewarding.
I guess what I'm getting at is that building the moulds can be as much fun & just as satisfying as creating the piece your moulding :)
 
Wow, that neck looks fantastic. If I ever cut the neck out of my T3 bust I may just come bugging you for a casting ;)

Leigh, you are exactly right, moulding can be an art form in itself depending on the complexity of the piece being moulded. Nothing like pulling out that first casting and inspecting it.

Al
 
This thread is so much fun!

congrats and thanks for a great entertainment.

I use a netting that is used in wall plastering to make glove molds stronger. Brush on silicone in a "print pour" adding several layers.
cut the netting into shapes that fit and lay on. add more silicone in another series of layers to bind the mesh into the wall of the mold.
make your cut in the mold for the seam right at the start of the first few layers, this way you can add a closure flap.
You also will want to make a support shell over the top of the glove,
this is a separate hard shell that supports the glove during the pour process. so in essence you have the glove, then the support as separate parts.
the support shell should be fibreglassed on the outside and be bolted together.

you can make molds hollow by using a balloon filled with air and covered with plaster strips covered in paper.

also make sure that your vents and pour locations are logical. all you need after that is good mold release and conditioner.
 
Last edited:
Thanks Bondservnt, and thank for the tip regarding the molding process!
Could you make the support shell from plaster strips?

Here's a new update!

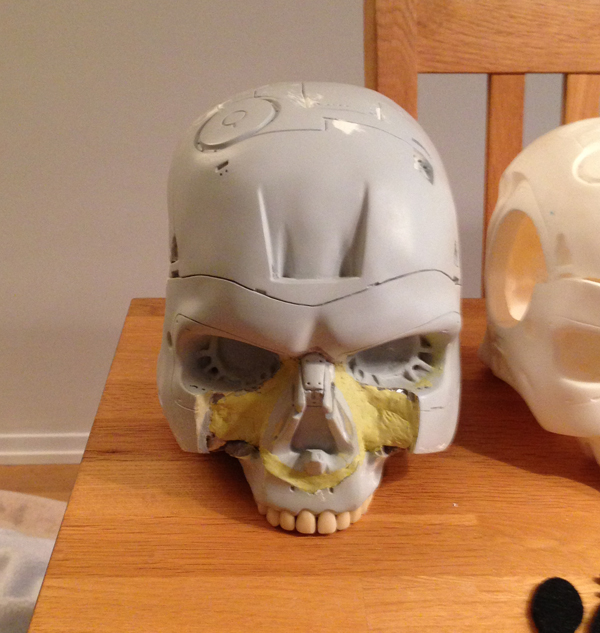
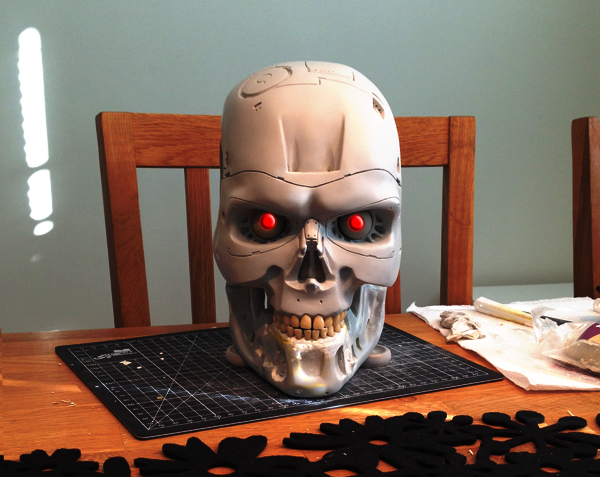
I decided I wasn't happy with my endoskull's face, I wanted it more "flat" like the real endoskull is.
I have been thinking about doing it for quite some time but because of the wire mesh inside of the skull this would be kind of hard.
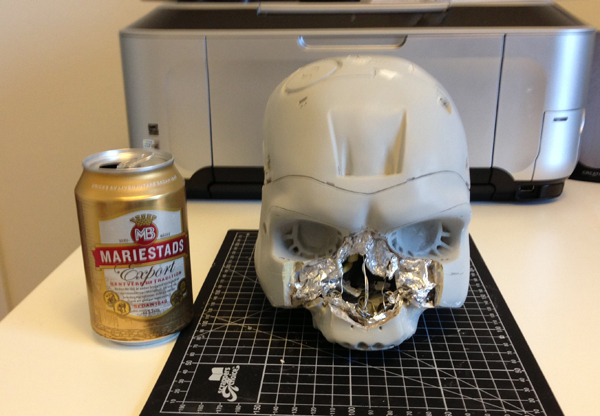
Well today I went berzerk:

Step one, guide lines:
183.jpg


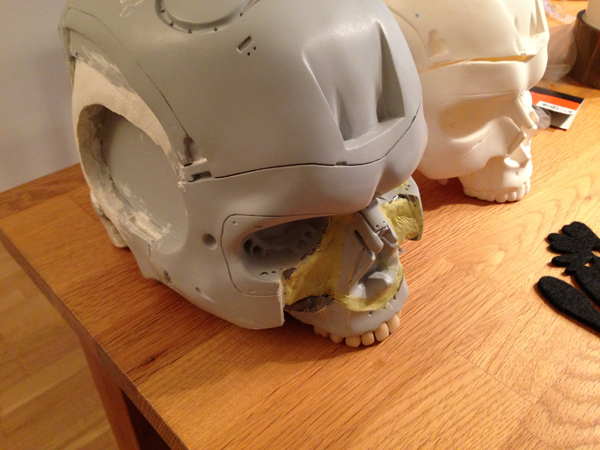
Step two, face off! I needed a beer for this step, I didn't want to crack anything else than the face:
184.jpg

185.jpg


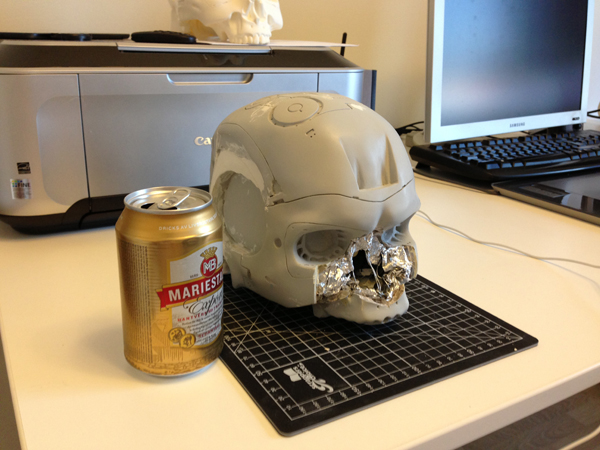
Step three, reposition the nose and "gums":
186.jpg


Step four, add new clay to keep things in place:
187.jpg


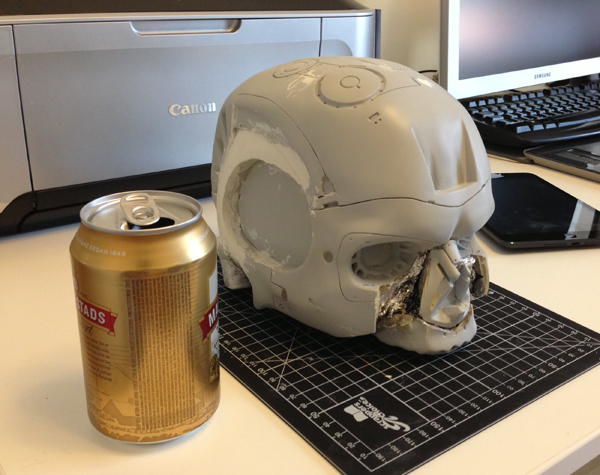
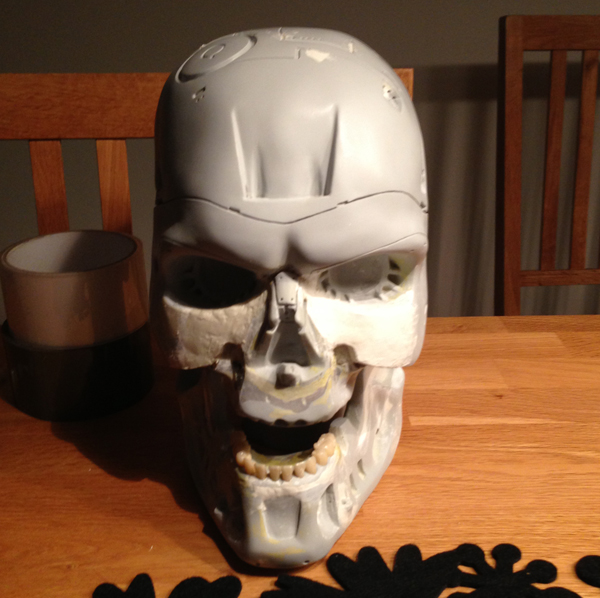
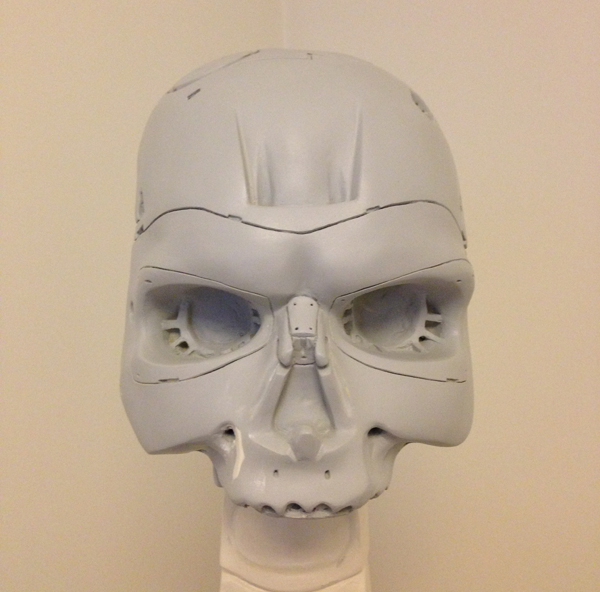
Here you can actually see how far back I moved the face. This is much more accurate.
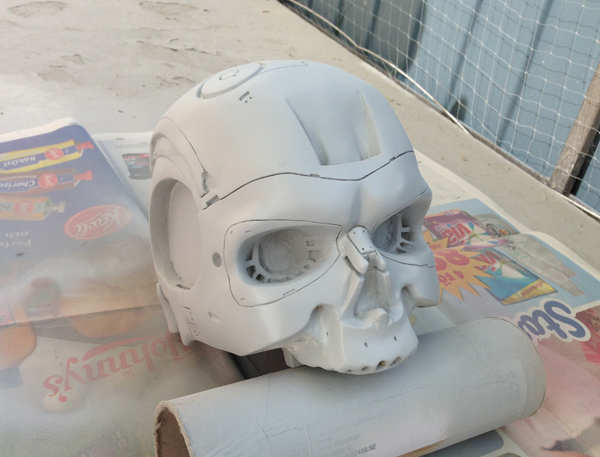
The remaining cheeks will be sanded down, and resurfaced.
188.jpg
 
Very brave! I can sympathise with what your doing here ;)
Yeh, if its been bugging you, get it sorted & put your mind at rest :) :thumbsup
 
fibreglass is best for a support shell. you need it to be tougher than the silicone. you also should put wood or metal for the
bolts and frame needed. think of it like a mold box that's not a box. which supports the glove in place.
 
Thanks for the comments guys!

Here's a new update:
I resculpted the face and did some priming and sanding. Here are some progress pics:

189.jpg

190.jpg

191.jpg

192.jpg

And one with photoshopped eyes:
193.jpg

For comparison, here's the old face:
179.jpg


What do you think? Better?
 
This thread is more than 3 years old.

Your message may be considered spam for the following reasons:

  1. This thread hasn't been active in some time. A new post in this thread might not contribute constructively to this discussion after so long.
If you wish to reply despite these issues, check the box below before replying.
Be aware that malicious compliance may result in more severe penalties.
Back
Top