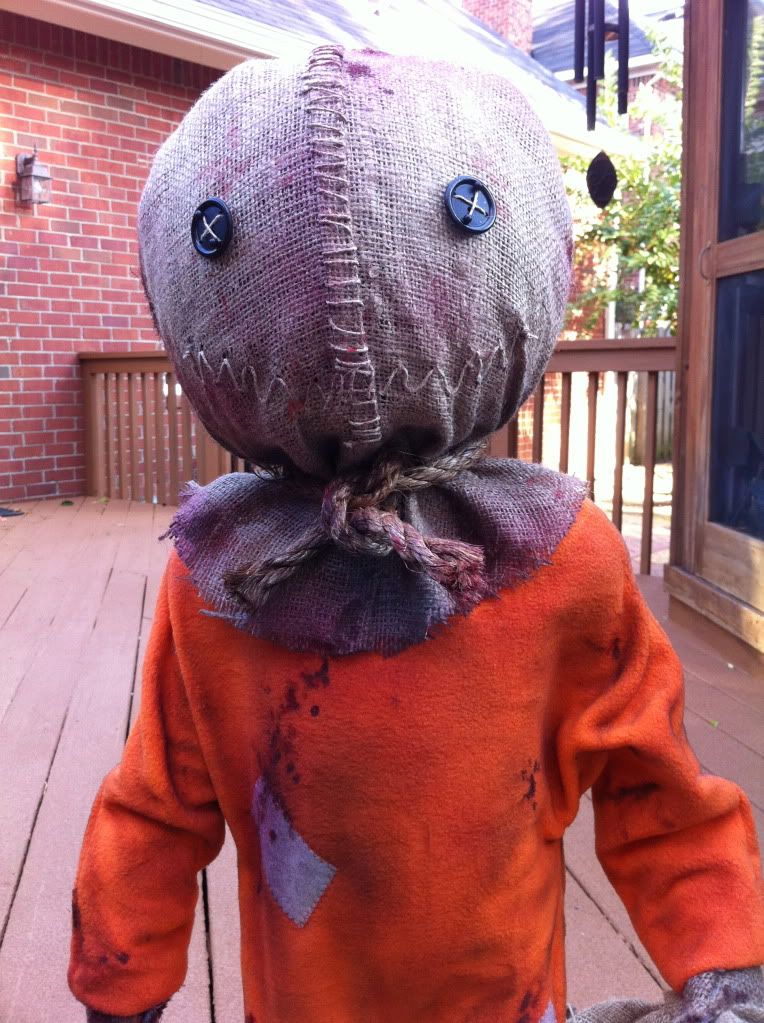
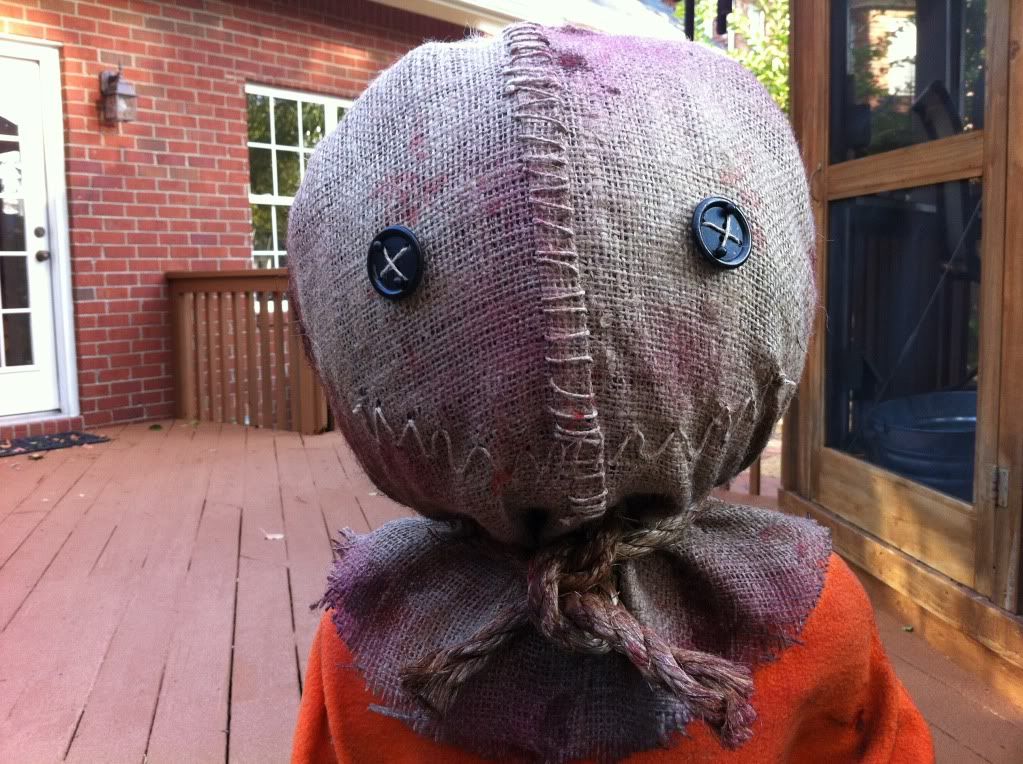
Someone asked earlier how I got the burlap to look smooth on the head.....it's a matter of fitting and sewing it on the sides. Pulls out all wrinkles except the collar portion at the neck.
basically I folded the fabric in half and sewed a stitch parallel and close to the fold. Then you open up the fabric, lay the folded/stitched part down onto one half and stitch that down using a zigzag stitch. This creates the ridge that goes down the center of his face. Hand stitch the twine sutures across this ridge as seen in the pic. Then you place this on his head and pin it in place all along the ridge front to back making sure to leave enough to create the collar area below his neck.
Then you cut the fabric from the sides of the neck (in line with his shoulders) up to that ridge. Now you just pull the wrinkles out of the fabric and pinch the fabric on both sides of his head top to bottom except once you get down to the widest portion of the side of the head....you just pin it from that point straight down and not go under the bottom curvature of the sides of the head. This is so the hood will pull over the pumpkin. If it were pinned below that it would never pull over the head/pumpkin.
Pin it in this position. Now remove the hood and sew it beside the pins. Cut the excess fabric about 1/4" beside the row of stitching It will now look like a typical hood.
Now you simply turn it inside out and pull it down onto the head.
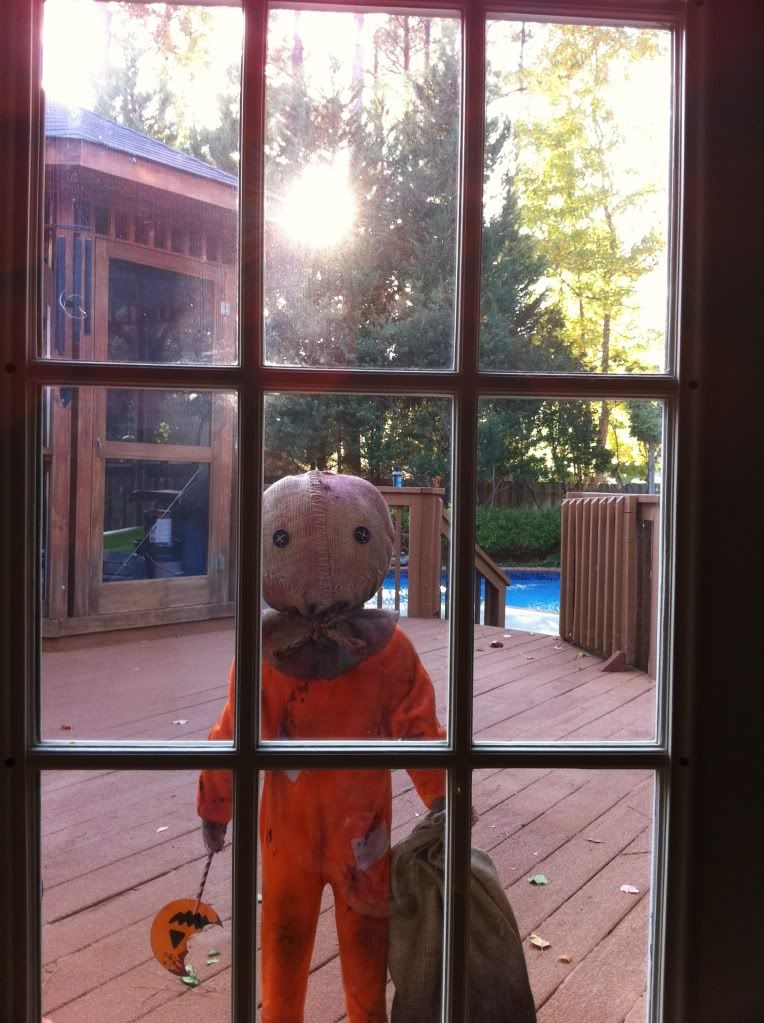
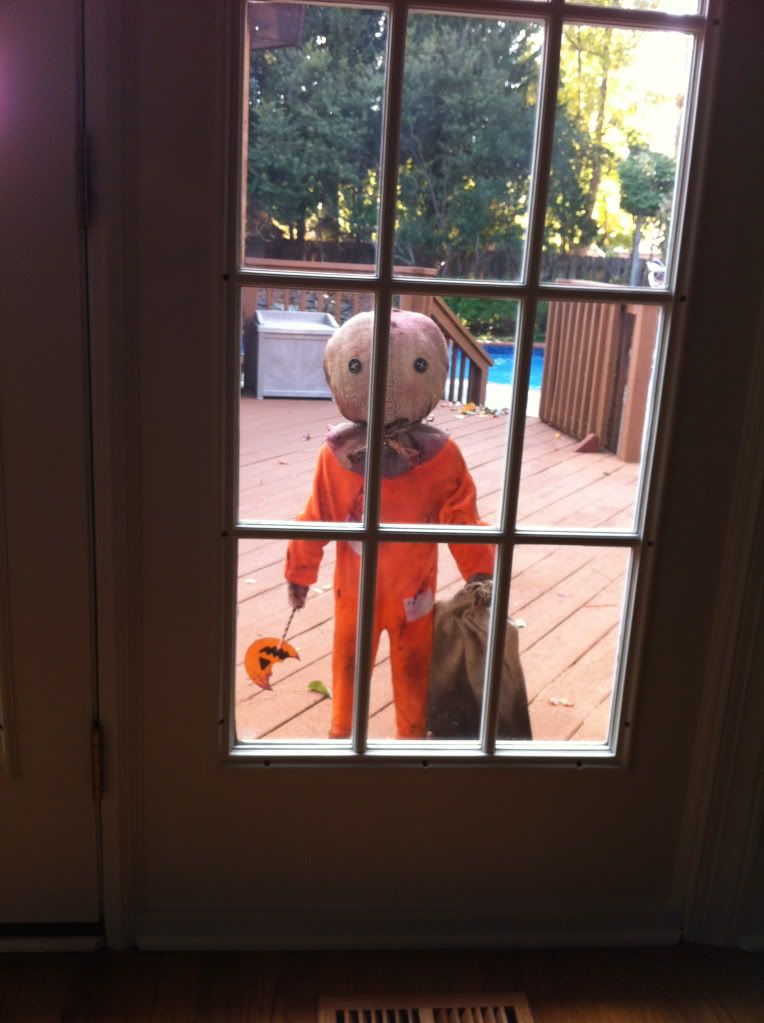
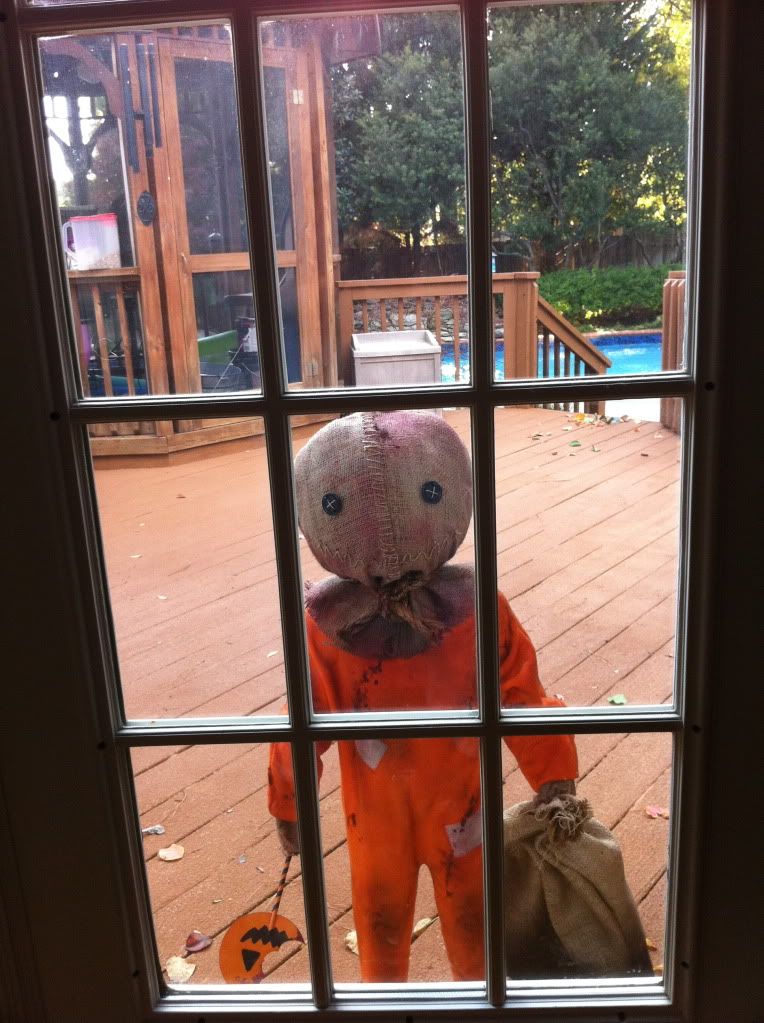
Tie a rope around the neck and arrange the bottom like you see it in the film and trim any excess until it looks like the film.
Then attach the eyes and then stitch the mouth in place. It's really that simple. Then weather it up. dark browns and blacks and some red to look like mud and dried blood.
")