Rey - Star Wars: The Force Awakens Build (open for everyone!)

g1.jpg

GF got 2 of those giant bands used to hold big office files together from work. They have an elastic core with some kind of fabric / thread outer part and are brown. They are really strong....not sure where you can buy them though, maybe an office supply store or something. I didn't find anything usable at the craft store.
 
Yeh the girl at hobby lobby was like :/ we don't have that. I know what you mean though. For the brown kinda file folders? I'll check out Office Depot found these threaded inserts to connect the pieces of staff together. Should have a full staff tomorrow not 3 pieces. Then to figure out how to wrap the center piece.

16e4eb8780274dea6885dd8891edc578.jpg


Sent from my iPhone using Tapatalk
 
Hello there!
Last weekend I was at the Pyrkon fantastic festival in Poznan (Poland) and I've noticed that cosplays of Rey and Kylo Ren are the most popular ones (not only among other SW cosplays but in general) :) Is it also the same case at the conventions you visit?
Here are some pics of me with other SW characters:
IMG_6620.JPGIMG_6651.jpgIMG_6745.JPGIMG_6640.JPG
 
So, finally I can say hello to all of you amazing people.

It is so lovely and inspiring to see all your amazing Rey costumes coming to life.

I stumbled upon this thread a few months ago when I started my research for my Rey costume. And all the information you found and gathered and all the tips helped me so much.
I have to say a big thank you to all of you. Making Rey was so much fun and I've never felt so comfortable in one of my costumes in my entire life.

By now I have finished the basic scavenger outfit but I'm still planning on doing the full scavenger and resistance outfit.

But enough talk, have some pictures. :D

Staff.jpg Rey_small.jpg IMG_2871.jpg IMG_2866.jpg
 
So, finally I can say hello to all of you amazing people.

It is so lovely and inspiring to see all your amazing Rey costumes coming to life.

I stumbled upon this thread a few months ago when I started my research for my Rey costume. And all the information you found and gathered and all the tips helped me so much.
I have to say a big thank you to all of you. Making Rey was so much fun and I've never felt so comfortable in one of my costumes in my entire life.

By now I have finished the basic scavenger outfit but I'm still planning on doing the full scavenger and resistance outfit.

But enough talk, have some pictures. :D

View attachment 614177 View attachment 614178 View attachment 614179 View attachment 614180

Nice job! I particularly like the fabric you used for the wrap dress... it has the right semi-sheer look to it. also you've used the Po-Zu boots... so great job there. Belt and pouch look really good as well.

All around very well done! :thumbsup
 
Thanks, Kristen!

Yeah, the wrap dress fabric was a lucky find. I just stumbled upon it in a discount fabric store I like to visit. Only Problem it was a pure white. I was so afraid dyeing it but I like the color that came out. :)

I still have to make the belt darker on the edges, that's the only thing I'm not completely happy with.
 
progress2.jpgprogress1.jpg

Woo, progress! (Ignore the hat and dopey expression--it's 1 a.m.) Obviously I haven't made the belt and bracer yet, and I'm still finishing the boots, but the basic costume looks pretty solid to me. I just need to sew the sleeves on the shirt and tack the wrap to it, and then I'm good to go.

As for the pants, since I promised:

progress3.jpg

I used this silk, dyed it light gray, then overdyed it with double-strength coffee. I used a youtube tutorial for palazzo pants to make the pattern, then modified it as needed. I wish I could get a better picture, but my husband is a lousy photographer...
 
Hi all! I found/started following this about a week ago when I was given an opportunity for a Kylo/Rey fight shoot to be released on May the 4th (irony, right?!) and once again, I, too, found you lovely, encyclopedia of knowledge, amazingly fantastic people by initially finding TheLadynerd's drawings on her blog. (They were amazing by the way!! And extremely helpful.

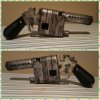
I have also delved into the world of Rey and figured I could share my progress and join the banter! So far my blaster is complete, it's all 3d printed and tediously sanded/painted.

PhotoGrid_1460382063348.jpg
PhotoGrid_1460333212950.jpg

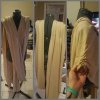
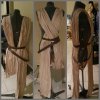
My wrap piece is all Rayon, since I'm impatient and didn't want to order Viscose and chance undermeasuring (I've done that a few times, it's never fun). I then dyed it with black tea in a 5 gal. Bucket. I started with 4 bags in a medium pot about half full, pulled to a rolling boil, then dumped that into the bucket. Before putting in my fabric I filled the bucked to about 3/4 with hot water. Submerged my rayon and stirred away. After about 15 minutes, I wasn't feeling the color, so I got 4 more tea bags and about 3 cups of water, boiled, added the additional tea water and stirred more. After about 30 minutes or so soaking, i was pretty pleased with the 'wet' color, so I rang it out, dried it and I was super excited (and it smells amazing!) . Cut my fabric in half length wise (I had 4 yards, then magic made 8!) Sergey the ends on one side together, draped, hand stitched my shoulder gathers with a sideways whip stitch and pulled to gather it. Set to the width I needed, pinch pleated the whole thing and steamed it a few times (including my pinky) and yea. That's where I'm at.
PhotoGrid_1460438417077.jpg
PhotoGrid_1460438541553.jpg

Currently printing my staff, boots I'm cheating on for now since I have to complete this by the 29th and my satchel is on its way for modification!

...this got to be a lot longer of an introduction than I thought so I'll stop and leave on this note

**HI! I'm Waka, and I have a craft addiction**
 
(4) 3/4" rectangle rings for the belt.

Bracer. So I tried doing the 2 leather pieces back to back and with the leather I had it was way too thick. I was able to pull the 2 pieces apart and then tried a thinner leather that I had for 1 side of it. Since I had the other piece from the first attempt, I just made a second one......and the modified smaller Mithril template was a perfect layout and fit. I used the ECO antique gel leather dye in dark brown. Also used that for my belt and holster, I really like the color and rustic look of it.

rey-costume-bracers.jpg bracer-movie.jpg
 
Last edited:
I used little brass buckles left over from the shoes I'm molding. They're small so they won't be noticeable. The twine I've seen others use the big spools you can get in craft stores, usually around jewelry or party supplies!
 
So finally after following this thread for months I'm starting to make some progress. Today I finished making the pouch. I used the signals 37 bag and cut it down. I have never worked with canvas before and I have broken all my seam rippers and several needles :')

Nevertheless here it is

tumblr_o5ks3foBIl1qd7wg5o2_1280.jpgtumblr_o5ks3foBIl1qd7wg5o1_1280.jpg

It's not 100% perfect but it's close enough for me :)

Now it's time to start working on the bracer and the belt.
 
As for the pants, since I promised:

View attachment 614437

I used this silk, dyed it light gray, then overdyed it with double-strength coffee. I used a youtube tutorial for palazzo pants to make the pattern, then modified it as needed. I wish I could get a better picture, but my husband is a lousy photographer...

These look great! I have been putting off buying fabric for the pants, but this material looks like it could be the winner. I'm guessing all the sheen disappears after washing and dyeing?
 
These look great! I have been putting off buying fabric for the pants, but this material looks like it could be the winner. I'm guessing all the sheen disappears after washing and dyeing?

Yep. It's a stonewashed crepe, so there wasn't much sheen to begin with, and dyeing pretty much eliminated what was left. (I used soda ash when I dyed them gray, which you aren't normally supposed to do with silk since it dulls the shine, but in this instance that was exactly what I wanted.)

Question for those who have modified the signal satchel: how are you all removing the "SIGNAL SATCHEL" print on top? That's the one piece I can't quite figure out, and I'd hate to screw it up.
 
I used a slightly different way to make my bracer to make it thinner. I have two different leathers with a seam where I flipped one of the leathers over. When I tighten the bracer, the seam is hidden under the pair of slits where the bracer doubles back on itself. I have attached two photos to try to explain better. To make it fit, I cut the one type of leather to the pattern and then had my daughter try it on with the arm wraps in place. This is important to get the seam in the right place although there is about 1/2" of wiggle room under the slits for adjustment.

I then marked the place where the seam should be and cut the leather. I used the off cut piece to measure the other piece of leather, flipped that piece over and stitched the seam with a cross stitch to make it flat. When the bracer is tightened on her arm, the seam disappears.

I hope this makes sense to everyone.

26408648015_73a636b35c_n.jpg


25803803914_96f8f56e9b_n.jpg
 
Last edited:

Your message may be considered spam for the following reasons:

If you wish to reply despite these issues, check the box below before replying.
Be aware that malicious compliance may result in more severe penalties.
Back
Top